Spring.Net IOC基本应用和在MVC4中的应用
1.Spring.Net的IOC简单应用
新建一个解决方案添加一个控制台应用程序和一个业务层一个业务层的接口层,通过配置,让控制台应用程序调业务层的方法
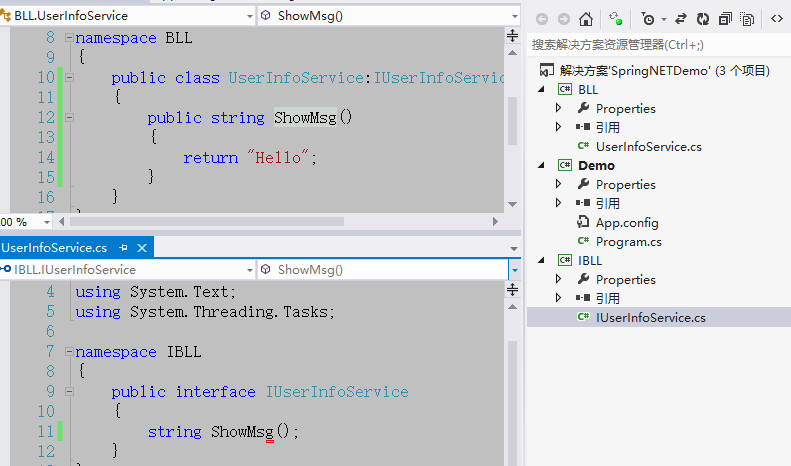
1)新建如下图所示,BLL为业务层,通过Spring.Net在Demo控制台应用程序中获取BLL中UserInfoService的方法
2)在Demo项目文件夹中新建一个Lib文件夹用来放第三方类库,把Spring.Net的核心类库Spring.Core.dll和Common.Logging.dll放进去然后Demo项目引用一下
3)给Demo项目的App.config中配置Spring.Net所需要的配置信息,如下
其中objects节点的子节点object是配置获取类的实例的,type中写的是类的全名称(BLL.UserInfoService)和其所在程序集(BLL),创建类UserInfoService的实例
 <?xml version="1.0" encoding="utf-8" ?>

 <configuration>

   <configSections>

     <sectionGroup name="spring">

       <section name="context" type="Spring.Context.Support.ContextHandler, Spring.Core"/>

       <section name="objects" type="Spring.Context.Support.DefaultSectionHandler, Spring.Core" />

     </sectionGroup>

   </configSections>

   <spring>

     <context>

       <resource uri="config://spring/objects"/>

     </context>

     <objects xmlns="http://www.springframework.net">

       <description>An  example that demonstrates simple IoC features.</description>

       <object name="MyUserInfoService" type="BLL.UserInfoService, BLL"></object>

     </objects>

   </spring>

 </configuration>
4)Demo项目中的Program中的代码
 static void Main(string[] args)

         {

             IApplicationContext ctx = ContextRegistry.GetContext();//读取配置文件

             IUserInfoService userInfoService = (IUserInfoService)ctx.GetObject("MyUserInfoService");//由ctx容器拿到UserInfoService的实例,MyUserInfoService就是配置文件中object的name属性值

             Console.WriteLine(userInfoService.ShowMsg());//调取方法

             Console.ReadKey();

         }
5)运行结果,这样就实现了Demo项目和BLL的解耦,不用再Demo中通过IUserInfoService userService =new UserInfoService();来调取他里面的方法。
以后我们想要换另一个命名空间中的UserInfoService只要引用新的业务层,修改配置文件中object中的属性值对应新的业务层的命名空间,变成另一个项目了就。
如果有多个需要获取的类,则在objects节点下写多个object节点即可。

2.Spring.Net DI属性注入(简单类型和实体的注入)
1)首先在UserInfoService中添加一个属性值
 namespace BLL

 {

     public class UserInfoService : IUserInfoService

     {

         public string UserName { get; set; }

         public string UserAge { get; set; }

         public string ShowMsg()

         {

             return "Hello " + UserName + " " + UserAge;

         }

     }

 }
2)在配置文件App.config中对这个属性赋值,如下
 <objects xmlns="http://www.springframework.net">

       <description>An  example that demonstrates simple IoC features.</description>

       <object name="MyUserInfoService" type="BLL.UserInfoService, BLL">

         <property name="UserName" value="XiaoMing"></property>

         <property name="UserAge" value=""></property>

       </object>

     </objects>
3)运行结果,这就是简单类型注入

4)比如新建Model层,新建实体Department,如下图

在UserInfoService中实现Department的注入,UserInfoService的代码如下
 namespace BLL

 {

     public class UserInfoService : IUserInfoService

     {

         public string UserName { get; set; }

         public string UserAge { get; set; }

         public Department Department { get; set; }

         public string ShowMsg()

         {

             return "Hello " + UserName + " " + UserAge

                 +" 部门名称:" +Department.Name;

         }

     }

 }
配置文件App.config中的写法,如下注释解释
 <objects xmlns="http://www.springframework.net">

       <description>An  example that demonstrates simple IoC features.</description>

       <object name="MyUserInfoService" type="BLL.UserInfoService, BLL">

         <property name="UserName" value="XiaoMing"></property>

         <property name="UserAge" value=""></property>

         <property name="Department" ref="MyDepartment"></property>//ref所指的名称是另一个object,代表该属性和另一个object节点绑定,这样就实现实体的注入

       </object>

       <object name="MyDepartment" type="Model.Department,Model">//type中第一个是类的全名和程序集名称

         <property name="Name" value="研发部门"></property>//给实体中的属性赋值

       </object>

     </objects>
5)运行结果如下,这是实体的注入

6)在App.config中放很多object会很乱,在Demo项目新建一个services.xml,记得设置属性(复制到输出目录为始终复制),然后把App.config中objects代码挪过去,如下
 <?xml version="1.0" encoding="utf-8" ?>

 <objects xmlns="http://www.springframework.net">

   <description>An  example that demonstrates simple IoC features.</description>

   <object name="MyUserInfoService" type="BLL.UserInfoService, BLL">

     <property name="UserName" value="XiaoMing"></property>

     <property name="UserAge" value=""></property>

     <property name="Department" ref="MyDepartment"></property>

   </object>

   <object name="MyDepartment" type="Model.Department,Model">

     <property name="Name" value="研发部门"></property>

   </object>

 </objects>
App.config中添加services.xml的关联
 <?xml version="1.0" encoding="utf-8" ?>

 <configuration>

   <configSections>

     <sectionGroup name="spring">

       <section name="context" type="Spring.Context.Support.ContextHandler, Spring.Core"/>

       <section name="objects" type="Spring.Context.Support.DefaultSectionHandler, Spring.Core" />

     </sectionGroup>

   </configSections>

   <spring>

     <context>

       <resource uri="config://spring/objects"/>

       <resource uri="file://services.xml"/>//和services.xml做关联

     </context>

     <objects xmlns="http://www.springframework.net">

       <!--<description>An  example that demonstrates simple IoC features.</description>

       <object name="MyUserInfoService" type="BLL.UserInfoService, BLL">

         <property name="UserName" value="XiaoMing"></property>

         <property name="UserAge" value=""></property>

         <property name="Department" ref="MyDepartment"></property>

       </object>

       <object name="MyDepartment" type="Model.Department,Model">

         <property name="Name" value="研发部门"></property>

       </object>-->

     </objects>

   </spring>

 </configuration>
7)运行后结果和上个结果一致。
3.Spring.Net在MVC4中的应用
1)导入dll文件
新建MVC4的项目WebMVC然后,导入Spring.Net中的dll文件:Spring.Core.dll,Spring.Web.dll,Spring.Web.Extensions.dll,Spring.Web.Extensions.xml,Spring.Web.Mvc4.dll,Spring.Web.Mvc4.xml
2)修改配置信息
将Spring.Net带的examples中的Spring.Mvc4QuickStart中的Config文件夹拷到项目WebMVC(这里其实就是在新建的MVC4项目根目录添加一个Config文件夹里面添加一个controllers.xml代码如下),代码中objects的子节点对应的是Controller,它的property对应的是Controller中需要DI注入的属性,这里singleton指是否是单例模式
 <?xml version="1.0" encoding="utf-8" ?>

 <objects xmlns="http://www.springframework.net">

   <object type="Spring.Mvc4QuickStart.Controllers.HomeController, Spring.Mvc4QuickStart" singleton="false" >

     <property name="Message" value="Welcome to ASP.NET MVC4 powered by Spring.NET!" />

   </object>

   <object type="Spring.Mvc4QuickStart.Controllers.SuffixController, Spring.Mvc4QuickStart" singleton="false" >

     <property name="Suffix" value="_Spring.NET_was_Here!" />

   </object>

   <object type="Spring.Mvc4QuickStart.Controllers.OdataController, Spring.Mvc4QuickStart" singleton="false" />

   <!--intentionally do NOT register the AccountController or the ValuesController with the container; demonstrates that the underlying

   default controller factory will properly (attempt to!) resolve all controllers not registered with Spring.NET

   using its default controller resolution behavoir-->

   <!--<object type="Spring.Mvc4QuickStart.Controllers.AccountController, Spring.Mvc4QuickStart" singleton="false" />-->

   <!--<object type="Spring.Mvc4QuickStart.Controllers.ValuesController, Spring.Mvc4QuickStart" singleton="false" />-->

 </objects>
3)在WebMVC项目中的Controller中新增一个,如下
 namespace WebMVC.Controllers

 {

     public class UserInfoController : Controller

     {

         //

         // GET: /UserInfo/

         IUserInfoService UserInfoService { get; set; }

         public ActionResult Index()

         {

             string msg = UserInfoService.ShowMvcMsg();

             ViewData["msg"] = msg;

             return View();

         }

     }

 }
同时分别在IUserInfoService中添加一个ShowMvcMsg()和UserInfoService中添加代码如下
         public string ShowMvcMsg()

         {

             return "Hello Spring.Net MVC4";

         }
4)修改controller.xml中的配置信息如下
 <?xml version="1.0" encoding="utf-8" ?>

 <objects xmlns="http://www.springframework.net">

   <object type="WebMVC.Controllers.UserInfoController, WebMVC" singleton="false" >

     <property name="UserInfoService" ref="MyUserInfoService" />

   </object>

   <object name="MyUserInfoService" type="BLL.UserInfoService, BLL" singleton="false" >

   </object>

 </objects>
5)修改WebMVC项目中Web.config配置文件,添加Spring.Net的配置,这里只是显示和Spring.Net相关的配置设置
 <configSections>

     <sectionGroup name="spring">

       <section name="context" type="Spring.Context.Support.MvcContextHandler, Spring.Web.Mvc4"/>

     </sectionGroup>

   </configSections>

   <spring>

     <context>

       <resource uri="file://~/Config/controllers.xml"/>

     </context>

   </spring>
6)同样的道理将controller.xml中将控制器的配置与业务类的配置分离到services.xml
controller.xml代码如下
 <?xml version="1.0" encoding="utf-8" ?>

 <objects xmlns="http://www.springframework.net">

   <object type="WebMVC.Controllers.UserInfoController, WebMVC" singleton="false" >

     <property name="UserInfoService" ref="MyUserInfoService" />

   </object>

 </objects>
services.xml代码如下
 <?xml version="1.0" encoding="utf-8" ?>

 <objects>

   <object name="MyUserInfoService" type="BLL.UserInfoService, BLL" singleton="false" >

   </object>

 </objects>
MVC项目中的Web.config中context节点下添加子节点
<resource uri="file://~/Config/services.xml"/>
7)修改Global.asax文件原来该类继承System.Web.HttpApplication,修改为继承SpringMvcApplication
8)WebMVC项目展示

运行结果如下,实现了Controller和业务层(BLL层)的解耦。

4.Spring.Net在MVC4中请求Webservice
为什么要解耦UI层和业务逻辑层呢?业务层不可能说今天换一个明天可能换另一个。数据访问层和数据库解耦是因为现在
用SqlServer实际环境会变成Oracle这样大大降低了修改成本。其实解耦Ui层和业务逻辑层是因为,让程序更加灵活,有了面
向服务的资本,可以把业务层做成服务发布出去,UI层可以通过Spring.Net去请求服务来实例化UI层中的接口,就是
(3.Spring.Net在MVC4中的应用)中是用本地的(BLL)中来注册实例化IUserInfoService UserInfoService { get; set; },
下面其实就是在配置文件中把本地的写法,换成服务地址的写法,如下:
1)新建一个Webservice服务
 using IBLL;

 using System;

 using System.Collections.Generic;

 using System.Linq;

 using System.Web;

 using System.Web.Services;

 namespace WebService

 {

     /// <summary>

     /// WebService1 的摘要说明

     /// </summary>

     [WebService(Namespace = "http://tempuri.org/")]

     [WebServiceBinding(ConformsTo = WsiProfiles.BasicProfile1_1)]

     [System.ComponentModel.ToolboxItem(false)]

     // 若要允许使用 ASP.NET AJAX 从脚本中调用此 Web 服务,请取消注释以下行。

     // [System.Web.Script.Services.ScriptService]

     public class WebService1 : System.Web.Services.WebService,IUserInfoService

     {

         [WebMethod]

         public string ShowMsg()

         {

             return "Hello ";

         }

         [WebMethod]

         public string ShowMvcMsg()

         {

             return "Hello Spring.Net MVC4 Webservice服务";

         }

     }

 }
2)项目引用该服务,在项目的引用上右击添加服务引用,下图

然后就和上面一样了,配置如下:controllers.xml
 <?xml version="1.0" encoding="utf-8" ?>

 <objects xmlns="http://www.springframework.net">

   <object type="WebMVC.Controllers.UserInfoController, WebMVC" singleton="false" >

     <property name="UserInfoService" ref="MyUserInfoService" />

   </object>

 </objects>
主要是services.xml,看见了吗?就是把value的地址改成服务的地址就是这样。
 <?xml version="1.0" encoding="utf-8" ?>

 <objects>

   <object name="MyUserInfoService" type="Spring.Web.Services.WebServiceProxyFactory, Spring.Services" >

     <property name="ServiceUri" value="http://localhost:3042/WebService1.asmx"/>

     <property name="ServiceInterface" value="IBLL.IUserInfoService, IBLL"/>

   </object>

 </objects>
3)结果如下

Spring.Net IOC基本应用和在MVC4中的应用的更多相关文章
- Spring.Net —IOC详解
一. Spring.net中IOC介绍 1. 什么是IOC,控制反转(Inversion of Control,缩写为IoC),是面向对象编程中的一种设计原则,可以用来减低计算机代码之间的耦合度.其中 ...
- Spring的IOC和AOP之深剖
今天,既然讲到了Spring 的IOC和AOP,我们就必须要知道 Spring主要是两件事: 1.开发Bean:2.配置Bean.对于Spring框架来说,它要做的,就是根据配置文件来创建bean实例 ...
- Spring框架IOC容器和AOP解析
主要分析点: 一.Spring开源框架的简介 二.Spring下IOC容器和DI(依赖注入Dependency injection) 三.Spring下面向切面编程(AOP)和事务管理配置 一.S ...
- Spring总结—— IOC 和 Bean 的总结
一.Spring 官方文档中给出的 Spring 的整体结构. 二.我自己所理解的 Spring 整体结构图. 三.本次总结 Spring 核心部分 1.从上面图中可以看出,Beans 和 Conte ...
- spring的IOC和AOP
spring的IOC和AOP 1.解释spring的ioc? 几种注入依赖的方式?spring的优点? IOC你就认为他是一个生产和管理bean的容器就行了,原来需要在调用类中new的东西,现在都是 ...
- spring容器IOC创建对象<二>
问题?spring是如何创建对象的?什么时候创建对象?有几种创建方式?测试对象是单例的还是多例的 ?对象的初始化和销毁? 下面的四大模块IOC的内容了!需要深刻理解 SpringIOC定义:把对象的创 ...
- Spring的IoC应用
IoC(Inversion of Control,控制反转) Spring的IoC应用是其框架的最大的特点,通过依赖注入可以大大降低代码之间的耦合度,从而实现代码和功能之间的分离.在代码中可以不直接和 ...
- Spring 实践 -IoC
Spring 实践 标签: Java与设计模式 Spring简介 Spring是分层的JavaSE/EE Full-Stack轻量级开源框架.以IoC(Inverse of Control 控制反转) ...
- 挖坟之Spring.NET IOC容器初始化
因查找ht项目中一个久未解决spring内部异常,翻了一段时间源码.以此文总结springIOC,容器初始化过程. 语言背景是C#.网上有一些基于java的spring源码分析文档,大而乱,乱而不全, ...
随机推荐
- RDLC报表的相关技巧三(数量/金额的逐页累加)
数量/金额的逐页累加,不是当页小计. 核心步骤: 1.在Group1大组中加入小组Group2,2.Group2的组尾加入一个计算框 : =RunningValue(Fields!BaseAmount ...
- css ie6双倍margin现象
IE6双倍margin bug 当出现连续浮动的元素,携带和浮动方向相同的margin时,队首的元素,会双倍marign. 解决方案: 1)使浮动的方向和margin的方向,相反. 所以,你就会发现, ...
- 清除bean中所有非基本数据类型的属性值
利用beanutils清除javabean中所有非基本数据类型的属性值: import com.google.gson.Gson; import lombok.Data; import org.apa ...
- 进阶篇:2)DFMA方法的运用
本章目的:DFMA方法运用,引导后面的章节.(运用比只理解重要!) 1.DFMA概述 1.1 DFMA的由来 工艺粗略可分为装配工艺和制造工艺.在这里,我们所讲的“制造”是指产品或部件的某个零件的制造 ...
- 2017-2018 ACM-ICPC, Asia Daejeon Regional Contest
题目传送门 只打了三个小时. A. Broadcast Stations B. Connect3 补题:zz 题解:因为格子是4*4的,而且每次落子的位置最多是只有四个,再加上剪枝,情况不会很多,直接 ...
- Linux安装python3.6.3
一: (1)wget https://www.python.org/ftp/python/3.6.3/Python-3.6.3.tgz 下载安装包 (可以到网站下载,然后上传到Linux) (2)ta ...
- Linux 构建ftp服务器
1.安装vsftpd服务器 $sudo apt-get install vsftpd 2.cd 到etc文件,配置vsftpd.conf文件 $sudo vi /etc/vsftpd.conf 修改至 ...
- Spring boot 项目部署服务器
Spring Boot 有两种部署到服务器的方式,这里介绍官方推荐的(jar包) 一.首先进行application.properties配置 # EMBEDDED SERVER CONFIGURAT ...
- Revit二次开发_快速显示隐藏剖面框
最近遇到一种状况需要经常切换剖面框的可见性,于是想将剖面框的显示与隐藏做成一个按钮,方便切换. 其他类似元素想做成快速切换可见性应该可以使用类似做法. 这次的隐藏对象是剖面框,所以我直接就隐藏元素了. ...
- debian sudo
apt-get install sudo vi /etc/sudoers add CentOS 7 root ALL=(ALL) ALL Debian root ALL=(ALL:ALL) ALL 按 ...