Spring Boot整合EhCache
本文讲解Spring Boot与EhCache的整合。
1 EhCache简介
EhCache 是一个纯Java的进程内缓存框架,具有快速、精干等特点,是Hibernate中默认CacheProvider。Ehcache是一种广泛使用的开源Java分布式缓存。主要面向通用缓存,Java EE和轻量级容器。它具有内存和磁盘存储,缓存加载器,缓存扩展,缓存异常处理程序,一个gzip缓存servlet过滤器,支持REST和SOAP api等特点。
2 Spring Boot整合EhCache步骤
2.1 创建项目,导入依赖
<?xml version="1.0" encoding="UTF-8"?>

<project xmlns="http://maven.apache.org/POM/4.0.0"

         xmlns:xsi="http://www.w3.org/2001/XMLSchema-instance"

         xsi:schemaLocation="http://maven.apache.org/POM/4.0.0 http://maven.apache.org/xsd/maven-4.0.0.xsd">

    <modelVersion>4.0.0</modelVersion>

    <groupId>com.yiidian</groupId>

    <artifactId>ch03_10_springboot_ehcache</artifactId>

    <version>1.0-SNAPSHOT</version>

    <!-- 导入springboot父工程. 注意:任何的SpringBoot工程都必须有的!!! -->

    <!-- 父工程的作用:锁定起步的依赖的版本号,并没有真正到依赖 -->

    <parent>

        <groupId>org.springframework.boot</groupId>

        <artifactId>spring-boot-starter-parent</artifactId>

        <version>2.1.11.RELEASE</version>

    </parent>

    <dependencies>

        <!--web起步依赖-->

        <dependency>

            <groupId>org.springframework.boot</groupId>

            <artifactId>spring-boot-starter-web</artifactId>

        </dependency>

        <!--springboot 集成 junit 起步依赖-->

        <dependency>

            <groupId>org.springframework.boot</groupId>

            <artifactId>spring-boot-starter-test</artifactId>

            <version>2.1.6.RELEASE</version>

            <scope>test</scope>

        </dependency>

        <!-- 缓存坐标 -->

        <!-- https://mvnrepository.com/artifact/org.springframework.boot/spring-boot-starter-cache -->

        <dependency>

            <groupId>org.springframework.boot</groupId>

            <artifactId>spring-boot-starter-cache</artifactId>

            <version>2.1.11.RELEASE</version>

        </dependency>

        <!-- Ehcache支持 -->

        <dependency>

            <groupId>net.sf.ehcache</groupId>

            <artifactId>ehcache</artifactId>

            <version>2.10.6</version>

        </dependency>

    </dependencies>

</project>
2.2 配置ehcache.xml
在resources目录下建立ehcache.xml,内容如下:
<ehcache xmlns:xsi="http://www.w3.org/2001/XMLSchema-instance" xsi:noNamespaceSchemaLocation="../config/ehcache.xsd">

    <diskStore path="java.io.tmpdir"/>

    <!-- defaultCache: 默认配置 -->

    <defaultCache

            maxElementsInMemory="10000"

            eternal="false"

            timeToIdleSeconds="120"

            timeToLiveSeconds="120"

            maxElementsOnDisk="10000000"

            diskExpiryThreadIntervalSeconds="120"

            memoryStoreEvictionPolicy="LRU">

        <persistence strategy="localTempSwap"/>

    </defaultCache>

    <!-- 缓存名称为customer的配置 -->

    <cache name="customer"

           maxElementsInMemory="10000"

           eternal="false"

           timeToIdleSeconds="120"

           timeToLiveSeconds="120"

           maxElementsOnDisk="10000000"

           diskExpiryThreadIntervalSeconds="120"

           memoryStoreEvictionPolicy="LRU">

        <persistence strategy="localTempSwap"/>

    </cache>

</ehcache>
参数说明:
- name 缓存名称
- maxElementsInMemory 缓存最大个数
- eternal 对象是否永久有效,一但设置了,timeout将不起作用
- timeToIdleSeconds 设置对象在失效前的允许闲置时间(单位:秒)。仅当eternal=false对象不是永久有效时使用,可选属性,默认值是0,也就是可闲置时间无穷大
- timeToLiveSeconds 设置对象在失效前允许存活时间(单位:秒)。最大时间介于创建时间和失效时间之间。仅当eternal=false对象不是永久有效时使用,默认是0.,也就是对象存活时间无穷大
- overflowToDisk 当内存中对象数量达到maxElementsInMemory时,Ehcache将会对象写到磁盘中
- diskSpoolBufferSizeMB 这个参数设置DiskStore(磁盘缓存)的缓存区大小。默认是30MB。每个Cache都应该有自己的一个缓冲区
- maxElementsOnDisk 硬盘最大缓存个数
- diskPersistent 是否缓存虚拟机重启期数据
- diskExpiryThreadIntervalSeconds 磁盘失效线程运行时间间隔,默认是120秒。
- memoryStoreEvictionPolicy 当达到maxElementsInMemory限制时,Ehcache将会根据指定的策略去清理内存。默认策略是LRU(最近最少使用)。你可以设置为FIFO(先进先出)或是LFU(较少使用)
- clearOnFlush 内存数量最大时是否清除
2.3 编写application.yml
#配置EhCache的配置

spring:

  cache:

    ehcache:

      config: ehcache.xml # 读取ehcache.xml配置
2.4 编写引导类
package com.yiidian;

import org.springframework.boot.SpringApplication;

import org.springframework.boot.autoconfigure.SpringBootApplication;

import org.springframework.boot.web.servlet.FilterRegistrationBean;

import org.springframework.boot.web.servlet.ServletListenerRegistrationBean;

import org.springframework.boot.web.servlet.ServletRegistrationBean;

import org.springframework.cache.annotation.EnableCaching;

import org.springframework.context.annotation.Bean;

/**

 * Spring Boot引导类

 * 一点教程网 - www.yiidian.com

 */

@SpringBootApplication

@EnableCaching // 开启缓存

public class MyBootApplication {

    public static void main(String[] args) {

        SpringApplication.run(MyBootApplication.class,args);

    }

}
引导类中需要添加@EnableCaching注解,开启缓存功能
2.5 编写Service类
package com.yiidian.service;

import com.yiidian.domain.Customer;

import org.springframework.cache.annotation.Cacheable;

import org.springframework.stereotype.Service;

/**

 * 业务层

 *一点教程网 - www.yiidian.com

 */

@Service

public class CustomerService {

    @Cacheable(value = "customer",key = "#id")

    public Customer findById(Integer id){

        System.out.println("执行了UserService获取User");

        Customer customer = new Customer();

        customer.setId(1);

        customer.setName("小明");

        customer.setGender("男");

        customer.setTelephone("13244445555");

        return customer;

    }

}
@Cacheable的属性:
- value:对应ehcache.xml的缓存配置名称(name属性值)
- key:给缓存值起个key,便于Spring内部检索不同的缓存数据。#id这个语法代表把方法形参作为key。
2.6 编写测试类
package com.yiidian.test;

import com.yiidian.MyBootApplication;

import com.yiidian.service.CustomerService;

import org.junit.Test;

import org.junit.runner.RunWith;

import org.springframework.beans.factory.annotation.Autowired;

import org.springframework.boot.test.context.SpringBootTest;

import org.springframework.test.context.junit4.SpringJUnit4ClassRunner;

/**

 *  SpringBoot整合EhCache

 * 一点教程网 - www.yiidian.com

 */

@RunWith(SpringJUnit4ClassRunner.class)

@SpringBootTest(classes = MyBootApplication.class)

public class EhCacheDemo {

    @Autowired

    private CustomerService customerService;

    @Test

    public void test1(){

        //查询第一次

        System.out.println(customerService.findById(1));

        //查询第二次

        System.out.println(customerService.findById(1));

    }

}
2.7 运行测试
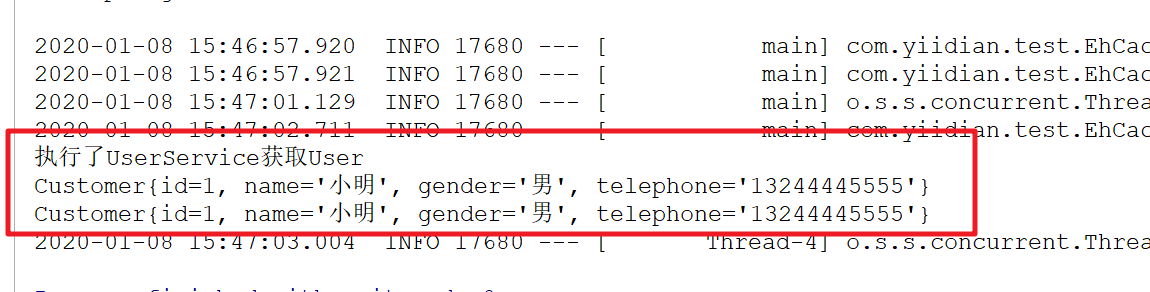
从结果可以看出,第一次调用Service的时候,到Service内部获取数据。但是第二次调用Service时已经不需要从Service获取数据,证明第一次查询的时候已经把Customer对象缓存到EhCache中。
3 EhCache常用注解
- @Cacheable: 主要针对方法配置,能够根据方法的请求参数对其进行缓存
- @CacheConfig: 统一配置本类的缓存注解的属性
- @CachePut:保证方法被调用,又希望结果被缓存。与@Cacheable区别在于是否每次都调用方法,常用于更新
- @CacheEvict :清空缓存
@Cacheable/@CachePut/@CacheEvict 主要的参数:
- value:缓存的名称,在 spring 配置文件中定义,必须指定至少一个
例如:
@Cacheable(value=”mycache”) 或者
@Cacheable(value={”cache1”,”cache2”} - key:缓存的 key,可以为空,如果指定要按照 SpEL 表达式编写,
如果不指定,则缺省按照方法的所有参数进行组合
例如:
@Cacheable(value=”testcache”,key=”#id”) - condition:缓存的条件,可以为空,使用 SpEL 编写,返回 true 或者 false,
只有为 true 才进行缓存/清除缓存
例如:@Cacheable(value=”testcache”,condition=”#userName.length()>2”) - unless 否定缓存。当条件结果为TRUE时,就不会缓存。
@Cacheable(value=”testcache”,unless=”#userName.length()>2”) - allEntries
(@CacheEvict ): 是否清空所有缓存内容,缺省为 false,如果指定为 true,
则方法调用后将立即清空所有缓存
例如:
@CachEvict(value=”testcache”,allEntries=true) - beforeInvocation
(@CacheEvict): 是否在方法执行前就清空,缺省为 false,如果指定为 true,
则在方法还没有执行的时候就清空缓存,缺省情况下,如果方法
执行抛出异常,则不会清空缓存
例如:
@CachEvict(value=”testcache”,beforeInvocation=true)
3.1 @Cacheable
@Cacheable注解会先查询是否已经有缓存,有会使用缓存,没有则会执行方法并缓存。
@Cacheable(value = "customer" ,key = "targetClass + methodName +#p0")

public List<Customer> queryAll(Customer cust) {

   return customerDao.findAllByUid(cust);

}
3.2 @CacheConfig
当我们需要缓存的地方越来越多,你可以使用@CacheConfig(cacheNames = {"myCache"})注解来统一指定value的值,这时可省略value,如果你在你的方法依旧写上了value,那么依然以方法的value值为准。
使用方法如下:
@CacheConfig(cacheNames = {"myCache"})

public class UserServiceImpl implements UserService {

    @Override

    @Cacheable(key = "targetClass + methodName +#p0")//此处没写value

    public List<BotRelation> findUsers(int num) {

        return userDao.findUsers(num);

    }

    .....

}
3.3 @CachePut
@CachePut注解的作用 主要针对方法配置,能够根据方法的请求参数对其结果进行缓存,和 @Cacheable 不同的是,它每次都会触发真实方法的调用 。简单来说就是用户更新缓存数据。但需要注意的是该注解的value 和 key 必须与要更新的缓存相同,也就是与@Cacheable 相同。示例:
@CachePut(value = "customer", key = "targetClass + #p0")

public Customer updata(Customer cust) {

    Customer customer = customerDao.findAllById(cust.getId());

    customer.updata(cust);

    return customer ;

}

@Cacheable(value = "customer", key = "targetClass +#p0")//清空缓存

public Customer save(Customer cust) {

    customerDao.save(cust);

    return cust;

}
3.4 @CacheEvict
@CachEvict 的作用 主要针对方法配置,能够根据一定的条件对缓存进行清空 。
@Cacheable(value = "customer",key = "#p0.id")

public Customer save(Customer cust) {

    customerDao.save(cust);

    return job;

}

//清除一条缓存,key为要清空的数据

@CacheEvict(value="customer",key="#id")

public void delect(int id) {

    customerDao.deleteAllById(id);

}

//方法调用后清空所有缓存

@CacheEvict(value="customerCache",allEntries=true)

public void delectAll() {

    customerDao.deleteAll();

}

//方法调用前清空所有缓存

@CacheEvict(value="customerCache",beforeInvocation=true)

public void delectAll() {

    customerDao.deleteAll();

}

欢迎关注我的公众号::一点教程。获得独家整理的学习资源和日常干货推送。
如果您对我的系列教程感兴趣,也可以关注我的网站:yiidian.com
Spring Boot整合EhCache的更多相关文章
- Spring Boot2 系列教程(三十)Spring Boot 整合 Ehcache
用惯了 Redis ,很多人已经忘记了还有另一个缓存方案 Ehcache ,是的,在 Redis 一统江湖的时代,Ehcache 渐渐有点没落了,不过,我们还是有必要了解下 Ehcache ,在有的场 ...
- 另一种缓存,Spring Boot 整合 Ehcache
用惯了 Redis ,很多人已经忘记了还有另一个缓存方案 Ehcache ,是的,在 Redis 一统江湖的时代,Ehcache 渐渐有点没落了,不过,我们还是有必要了解下 Ehcache ,在有的场 ...
- spring boot 整合 ehcache
1. 该说的话 每个人都应当学会独立地去思考.去寻找答案,而不是一味地伸手向他人索取所谓的标准答案. 首先,别成为"拿来主义"者,其次远离"拿来主义"的人. 2 ...
- Spring Boot缓存Ehcache
Spring Boot 整合 Ehcache 修改 pom 文件 <!-- Spring Boot 缓存支持启动器 --> <dependency> <groupId ...
- Spring Boot 整合 Hibernate5
Run java -jar -Dspring.profiles.active=dev sport.web.services.jar Maven <parent> <groupId&g ...
- Spring Boot 整合 Elasticsearch,实现 function score query 权重分查询
摘要: 原创出处 www.bysocket.com 「泥瓦匠BYSocket 」欢迎转载,保留摘要,谢谢! 『 预见未来最好的方式就是亲手创造未来 – <史蒂夫·乔布斯传> 』 运行环境: ...
- spring boot整合jsp的那些坑(spring boot 学习笔记之三)
Spring Boot 整合 Jsp 步骤: 1.新建一个spring boot项目 2.修改pom文件 <dependency> <groupId>or ...
- spring boot 系列之四:spring boot 整合JPA
上一篇我们讲了spring boot 整合JdbcTemplate来进行数据的持久化, 这篇我们来说下怎么通过spring boot 整合JPA来实现数据的持久化. 一.代码实现 修改pom,引入依赖 ...
- Spring Kafka和Spring Boot整合实现消息发送与消费简单案例
本文主要分享下Spring Boot和Spring Kafka如何配置整合,实现发送和接收来自Spring Kafka的消息. 先前我已经分享了Kafka的基本介绍与集群环境搭建方法.关于Kafka的 ...
随机推荐
- vue组件插槽与编译作用域
<!DOCTYPE html> <html> <head> <title></title> </head> <script ...
- laravel多条件模糊查询
1.运用cmd在项目根目录下创建路由组 php artisan make:controller queryController --resource 1.1数据库信息(student) CREATE ...
- DES加密算法 转
1.什么是对称密码算法 网络安全通信中要用到两类密码算法,一类是对称密码算法,另一类是非对称密码算法.对称密码算法有时又叫传统密码算法.秘密密钥算法或单密钥算法,非对称密码算法也叫公开密钥密码算法或双 ...
- importing-cleaning-data-in-r-case-studies
目录 importing-cleaning-data-in-r-case-studies 导入数据 查看数据结构 下面的一些都是查数据结构的 separate 拆分单元格 读取指定位置的数据 stri ...
- Codeforces Round #600 (Div. 2) C - Sweets Eating
#include<iostream> #include<algorithm> #include<cstring> using namespace std ; typ ...
- pl/sql developer试用期结束
(产品代码)Product Code:ljkfuhjpccxt8xq2re37n97595ldmv9kch (序列号)Serial Number:302967 (口令)Password:xs374ca ...
- 数据库接口基础类 oracle,sql server
1.为数据库读取基类 public class DBBase : IDisposable { public virtual void Dispose() { throw new NotImplemen ...
- print format
python基础_格式化输出(%用法和format用法) name = 'jack' age = 18 sex = 'man' job = "IT" salary = 9999.9 ...
- Linux system 初步
快捷键: open a new terminal: ctrl+alt+T; close current terminal: ctrl+shift+W; switch windows: alt+tab ...
- C++——简单程序设计
1.一个简单的程序 #include <iostream> //iostream是头文件,用来说明要使用的对象的相关信息. using namespace std; //使用命名空间,解决 ...