Wix 安装部署教程(九) --用WPF做安装界面
经常安装PC端的应用,特别是重装系统之后,大致分为两类。一类像QQ,搜狗输入法这样的。分三步走的:第一个页面可以自定义安装路径和软件许可。第二个页面显示安装进度条,第三个页面推荐其他应用。先不管人家怎么实现的,我们先回顾一下。
QQ:
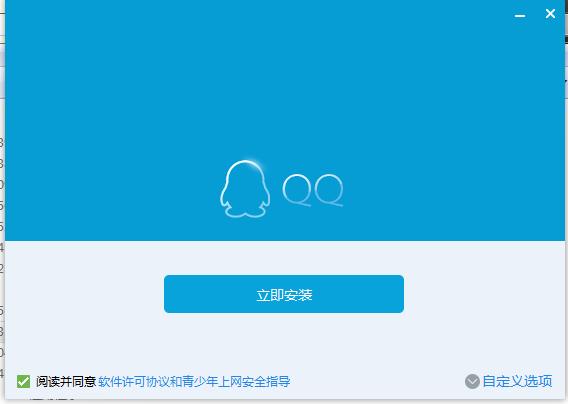


再一个就是分六步或七步走的,如QQ影音:欢迎界面,用户许可,安装组件,安装目录,安装进度,安装完成,有七步的,一般会多一些软件推荐。当然还有其他的,比如是基于ClickOnce打包的,就一个界面,一个进度条。没有安装目录选择,这一般不是商业软件。先说第二种,上一步下一步的有很多第三方的打包工具,比较有名的有InstallShield,setupfactory等,看似有了图形化的操作界面,做简单的还可以,但是要是有一些自定义的部分就比较麻烦,因为你没地方改,比如你要在一个安装包中去静默的触发另一个安装包悄悄的安装,而且这些还是商业化的。开源的WIX,基于XML文件配置的方法来打包应用。Wix的基本打包(6,7个步骤),可以出门左拐可以看我之前的教程。接下来要说的,是基于WIX的Bootstrapper工程用WPF接入安装界面。
WIX是基于BootstrapperCore.dll提供UI扩展的,你可以使用WPF,也可以使用Winform作为安装界面。而这里先不得不先说其中的两个对象。一个是Engine,它提供了最根本的安装方法,如Detect,Plan,Apply和Quit等,另外一个就是引导对象BootstrapperApplication,他提供了安装相关事件,设置窗体对象等。这为我们自定义界面的时候控制安装包提供了基础。
一、工程准备
1)新建一个Bootstrapper工程。

新建完成之后会有一个Bundle.wxs文件,里面包含你要安装的msi文件和依赖组件比如.net4.0.
<?xml version="1.0" encoding="UTF-8"?>

<Wix xmlns="http://schemas.microsoft.com/wix/2006/wi" xmlns:bal="http://schemas.microsoft.com/wix/BalExtension"  xmlns:netfx="http://schemas.microsoft.com/wix/NetFxExtension"  xmlns:util="http://schemas.microsoft.com/wix/UtilExtension">

  <Bundle Name="WIXTest" Version="1.1.1.0" Manufacturer="Delta" UpgradeCode="{51C1EB78-C0D2-4C30-803C-8D7993CB38A5}"    Compressed="yes"    >

    <BootstrapperApplicationRef Id="WixStandardBootstrapperApplication.RtfLicense"   />

    <WixVariable Id="WixMbaPrereqLicenseUrl" Value=""/>

    <WixVariable Id="WixMbaPrereqPackageId" Value=""/>

    <Chain DisableRollback='yes'>

      <PackageGroupRef Id="Netfx4Full"  />

          <MsiPackage Id="DIAView" SourceFile="D:\TestWix\bin\Debug\zh-cn\TestWix.msi" Compressed="yes"  DisplayInternalUI="yes" >

             </MsiPackage>

    </Chain>

  </Bundle>

  <Fragment>

    <util:RegistrySearchRef Id="NETFRAMEWORK40"/>

    <PackageGroup Id="Netfx4Full">

      <ExePackage

          Id="Netfx4FullExe"

          Cache="no"

          Compressed="yes"

          PerMachine="yes"

          Permanent="yes"

          Vital="yes"

          SourceFile="$(var.Dia)dotNetFx40_Full_x86_x64.exe"

          InstallCommand="/q /norestart "

          DetectCondition="NETFRAMEWORK40"

          DownloadUrl="http://go.microsoft.com/fwlink/?LinkId=164193"/>

    </PackageGroup>

  </Fragment>

</Wix>
最终的EXE还是通过这个工程来生成的。MsiPackage的ID 后面可以用来检测当前电脑是否安装了这个软件。
二、创建WPF界面程序。
1).创建一个C# Library工程CustomBA,引用BootstrapperCore.dll 及 WPF相关dll
BootstrapperCore在你安装的wix安装目录中就能找到。比如我使用的wix3.8,路径就是C:\Program Files (x86)\WiX Toolset v3.8\SDK\BootstrapperCore.dll

另外一个就是Prism 组件,这个可以通过Nuget安装。

但这个有点嫌多,其实工程只使用到了属性更改通知和命令。可以使用wix源码中的两个对象。如此就不必引用上面的Prism
RelayCommand
 public class RelayCommand : ICommand

    {

        private readonly Action<object> execute;

        private readonly Predicate<object> canExecute;

        public RelayCommand(Action<object> execute)

            : this(execute, null)

        {

        }

        public RelayCommand(Action<object> execute, Predicate<object> canExecute)

        {

            this.execute = execute;

            this.canExecute = canExecute;

        }

        public event EventHandler CanExecuteChanged

        {

            add { CommandManager.RequerySuggested += value; }

            remove { CommandManager.RequerySuggested -= value; }

        }

        [DebuggerStepThrough]

        public bool CanExecute(object parameter)

        {

            return this.canExecute == null ? true : this.canExecute(parameter);

        }

        public void Execute(object parameter)

        {

            this.execute(parameter);

        }

    }
PropertyNotifyBase
  public abstract class PropertyNotifyBase : INotifyPropertyChanged

    {

        /// <summary>

        /// Initializes a new instance of the <see cref="PropertyNotifyBase"/> class.

        /// </summary>

        protected PropertyNotifyBase()

        {

        }

        /// <summary>

        /// Raised when a property on this object has a new value.

        /// </summary>

        public event PropertyChangedEventHandler PropertyChanged;

        /// <summary>

        /// Warns the developer if this object does not have a public property with the

        /// specified name. This method does not exist in a Release build.

        /// </summary>

        /// <param name="propertyName">Property name to verify.</param>

        [Conditional("DEBUG")]

        [DebuggerStepThrough]

        public void VerifyPropertyName(string propertyName)

        {

            // Verify that the property name matches a real, public, instance property

            // on this object.

            if (null == TypeDescriptor.GetProperties(this)[propertyName])

            {

                Debug.Fail(String.Concat("Invalid property name: ", propertyName));

            }

        }

        /// <summary>

        /// Raises this object's PropertyChanged event.

        /// </summary>

        /// <param name="propertyName">The property that has a new value.</param>

        protected virtual void OnPropertyChanged(string propertyName)

        {

            this.VerifyPropertyName(propertyName);

            PropertyChangedEventHandler handler = this.PropertyChanged;

            if (null != handler)

            {

                PropertyChangedEventArgs e = new PropertyChangedEventArgs(propertyName);

                handler(this, e);

            }

        }

    }
使用方法差别不大。
2)可以建立如下的文件目录,配合WPF的MVVM。

3)增加配置文件,以让Burn使用新的程序集。必须命名为BootstrapperCore.config ,也可以从C:\Program Files (x86)\WiX Toolset v3.8\SDK 目录下拷贝一个版本。
<?xml version="1.0" encoding="utf-8" ?>

<!--

  <copyright file="BootstrapperCore.config" company="Outercurve Foundation">

    Copyright (c) 2004, Outercurve Foundation.

    This software is released under Microsoft Reciprocal License (MS-RL).

    The license and further copyright text can be found in the file

    LICENSE.TXT at the root directory of the distribution.

  </copyright>

-->

<configuration>

    <configSections>

        <sectionGroup name="wix.bootstrapper" type="Microsoft.Tools.WindowsInstallerXml.Bootstrapper.BootstrapperSectionGroup, BootstrapperCore">

            <section name="host" type="Microsoft.Tools.WindowsInstallerXml.Bootstrapper.HostSection, BootstrapperCore" />

        </sectionGroup>

    </configSections>

    <startup useLegacyV2RuntimeActivationPolicy="true">

        <supportedRuntime version="v4.0" />

        <supportedRuntime version="v2.0.50727" />

    </startup>

    <wix.bootstrapper>

        <!-- Example only. Use only if the startup/supportedRuntime above cannot discern supported frameworks. -->

        <!--

        <supportedFramework version="v4\Client" />

        <supportedFramework version="v3.5" />

        <supportedFramework version="v3.0" />

        -->

        <!-- Example only. Replace the host/@assemblyName attribute with assembly that implements BootstrapperApplication. -->

        <host assemblyName="AssemblyWithClassThatInheritsFromBootstrapperApplication" />

    </wix.bootstrapper>

</configuration>
修改为:
<?xml version="1.0" encoding="utf-8" ?>

 <configuration>

    <configSections>

        <sectionGroup name="wix.bootstrapper" type="Microsoft.Tools.WindowsInstallerXml.Bootstrapper.BootstrapperSectionGroup, BootstrapperCore">

            <section name="host" type="Microsoft.Tools.WindowsInstallerXml.Bootstrapper.HostSection, BootstrapperCore" />

        </sectionGroup>

    </configSections>

    <startup useLegacyV2RuntimeActivationPolicy="true">

        <supportedRuntime version="v4.0" />

    </startup>

    <wix.bootstrapper>

      <host assemblyName="CustomBA">

        <supportedFramework version="v4\Full" />

        <supportedFramework version="v4\Client" />

      </host>

    </wix.bootstrapper>

</configuration>
CustomBA.dll,BootstrapperCore.config 和 Microsoft.Practices. Prism.dll(如果使用了) 都会拷贝到bootstrapper项目中去。
4)修改Assemblyinfo
增加:
[assembly: BootstrapperApplication(typeof(CustomBootstrapperApplication))]

[assembly: AssemblyTitle("CustomBA")]
CustomBootstrapperApplication 是我们接下来要创建的一个对象,Bundle会调用它的Run方法,这是整个安装包的起点。
5)创建WPF对象。
根据MVVM模式,我们分别创建Model,ViewModel和View 以及一些辅助的对象。
1.Model-->BootstrapperApplicationModel
  public class BootstrapperApplicationModel

    {

        private IntPtr hwnd;

        public BootstrapperApplicationModel( BootstrapperApplication bootstrapperApplication)

        {

            BootstrapperApplication = bootstrapperApplication;

            hwnd = IntPtr.Zero;

        }

        public BootstrapperApplication BootstrapperApplication

        {

            get;

            private set;

        }

        public int FinalResult { get; set; }

        public void SetWindowHandle(Window view)

        {

            hwnd = new WindowInteropHelper(view).Handle;

        }

        public void PlanAction(LaunchAction action)

        {

            BootstrapperApplication.Engine.Plan(action);

        }

        public void ApplyAction()

        {

            BootstrapperApplication.Engine.Apply(hwnd);

        }

        public void LogMessage(string message)

        {

            BootstrapperApplication.Engine.Log(LogLevel.Standard, message);

        }

        public void SetBurnVariable(string variableName, string value)

        {

            BootstrapperApplication.Engine.StringVariables[variableName] = value;

        }

    }
从代码看是包装了Engine的方法,设置窗口,PlanAction,ApplyAction,LogMessage以及设置变量等。
2.ViewModel-->InstallViewModel
这是一个重要的交互对象。InstallState 安装状态,UpdateState 更新状态,Command用来处理用户在安装界面的操作,在构造函数里进行初始化。然后就是事件订阅。
using System;
using System.Collections.Generic;
using System.Diagnostics;
using System.Reflection;
using System.Windows;
using System.Windows.Input;
using Microsoft.Tools.WindowsInstallerXml.Bootstrapper; namespace CustomBA.ViewModels
{
public class InstallViewModel : PropertyNotifyBase
{
public enum InstallState
{
Initializing,
Present,
NotPresent,
Applying,
Cancelled,
Applied,
Failed,
} public enum UpdateState
{
Unknown,
Initializing,
Checking,
Current,
Available,
Failed,
} /// <summary>
/// 记录状态
/// </summary>
private InstallState state;
public UpdateState updatestate; /// <summary>
/// 需要显示在WPFWindow
/// </summary>
private string message;
private BootstrapperApplicationModel model;
private string _packageId = string.Empty;
private bool canceled;
private Dictionary<string, int> executingPackageOrderIndex;
private string username;
private int progress;
private int cacheProgress;
private int executeProgress;
private Version _version = new Version("2.0.0.0");
private bool _installEnabled;
private int progressPhases=;
private bool isUnstalling=false;
#region Command
/// <summary>
/// 执行安装命令
/// </summary>
public ICommand InstallCommand { get; private set; }
public ICommand UninstallCommand { get; private set; }
public ICommand CancelCommand { get; private set; }
public ICommand LaunchNewsCommand { get; private set; }
private ICommand repairCommand; public ICommand RepairCommand
{
get
{
return this.repairCommand ?? (this.repairCommand = new RelayCommand(param =>
model.PlanAction(LaunchAction.Repair)
, param => State == InstallState.Present));
}
} #endregion #region 属性
public string Message
{
get
{
return message;
}
set
{
if (message != value)
{
message = value;
OnPropertyChanged("Message");
}
}
} public InstallState State
{
get
{
return state;
}
set
{
if (state != value)
{
state = value;
Message = "Status: " + state;
OnPropertyChanged("State");
Refresh();
}
}
} public string PackageId
{
get { return _packageId; }
set
{
if (_packageId != value)
{
_packageId = "packid:" + value;
OnPropertyChanged("PackageId");
}
}
}
public bool Canceled
{
get
{
return this.canceled;
} set
{
if (this.canceled != value)
{
this.canceled = value;
OnPropertyChanged("Canceled");
}
}
}
public Version Version
{
get
{
return _version;
}
} public string Username
{
get
{
return this.username;
}
set
{
this.username = value;
this.model.SetBurnVariable("Username", this.username);
}
} public int Progress
{
get
{
if (isUnstalling)
{
return progress*;
}
return this.progress;
}
set
{
this.progress = value;
OnPropertyChanged("Progress");
OnPropertyChanged("Persent");
}
} private string _info; public string Info
{
get
{
if(string.IsNullOrEmpty(_info))
_info= InstallEnabled ? "安装中..." : "进行中...";
return _info;
}
set
{
_info = value;
OnPropertyChanged("Info");
}
} public string Persent
{
get { return Progress + "%"; }
} public bool InstallEnabled
{
get { return State == InstallState.NotPresent; }
} public bool UninstallEnabled
{
get { return UninstallCommand.CanExecute(this); }
} public bool CancelEnabled
{
get { return State == InstallState.Applying; }
} public bool ExitEnabled
{
get { return this.State != InstallState.Applying; }
} public bool ProgressEnabled
{
get { return this.State == InstallState.Applying; }
} /// <summary>
/// 先不管
/// </summary>
public bool IsUpToDate
{
get { return true; }
}
public bool RepairEnabled
{
get { return this.RepairCommand.CanExecute(this); }
} public bool CompleteEnabled
{
get { return State == InstallState.Applied; }
} public int Phases
{
get
{
return progressPhases;
}
} private string _installText = "Uninstall";
public string InstallText
{
get
{
return _installText;
}
set
{
_installText = value;
OnPropertyChanged("InstallText");
}
} public string RepairText
{
get { return _repairText; }
set { _repairText = value; }
} private bool _lableback=true;
private string _repairText = "Repair"; public bool LabelBack
{
get
{
return _lableback;
}
set
{
_lableback = value;
OnPropertyChanged("LabelBack");
}
} #endregion #region 构造函数
/// <summary>
/// 构造函数
/// </summary>
/// <param name="_model"></param>
public InstallViewModel(BootstrapperApplicationModel _model)
{
model = _model;
executingPackageOrderIndex = new Dictionary<string, int>(); State = InstallState.Initializing;
//处理由bootstrapper触发的事件
WireUpEventHandlers();
//初始化命令 第一个参数是命令要触发的方法,第二个匿名函数是命令执行的条件
InstallCommand = new RelayCommand(param => model.PlanAction(LaunchAction.Install), param => State == InstallState.NotPresent); UninstallCommand = new RelayCommand(param =>
{
model.PlanAction(LaunchAction.Uninstall);
isUnstalling = true;
}, param => State == InstallState.Present); CancelCommand = new RelayCommand(param =>
{
model.LogMessage("Cancelling...");
if (State == InstallState.Applying)
{
State = InstallState.Cancelled;
}
else
{
CustomBootstrapperApplication.Dispatcher.InvokeShutdown();
}
}, param => State != InstallState.Cancelled); model.BootstrapperApplication.DetectComplete += DetectComplete; //进度条相关事件绑定
//this.model.BootstrapperApplication.CacheAcquireProgress +=
//(sender, args) =>
//{
// this.cacheProgress = args.OverallPercentage;
// this.Progress = (this.cacheProgress + this.executeProgress) / 2;
//};
//this.model.BootstrapperApplication.ExecuteProgress +=
//(sender, args) =>
//{
// this.executeProgress = args.OverallPercentage;
// this.Progress = (this.cacheProgress + this.executeProgress) / 2;
//};
model.BootstrapperApplication.CacheAcquireProgress += CacheAcquireProgress;
model.BootstrapperApplication.ExecuteProgress += ApplyExecuteProgress;
model.BootstrapperApplication.ExecuteMsiMessage += ExecuteMsiMessage;
model.BootstrapperApplication.PlanBegin += PlanBegin;
model.BootstrapperApplication.PlanPackageComplete += PlanPackageComplete;
model.BootstrapperApplication.Progress += ApplyProgress;
model.BootstrapperApplication.CacheComplete += CacheComplete;
} #endregion private void DetectComplete(object sender, DetectCompleteEventArgs e)
{
if (LaunchAction.Uninstall == CustomBootstrapperApplication.Model.Command.Action)
{
CustomBootstrapperApplication.Model.Engine.Log(LogLevel.Verbose, "Invoking automatic plan for uninstall");
CustomBootstrapperApplication.Plan(LaunchAction.Uninstall);
}
else if (Hresult.Succeeded(e.Status))
{
if (CustomBootstrapperApplication.Model.Engine.EvaluateCondition("NETFRAMEWORK35_SP_LEVEL < 1"))
{
string message = "WiX Toolset requires the .NET Framework 3.5.1 Windows feature to be enabled.";
CustomBootstrapperApplication.Model.Engine.Log(LogLevel.Verbose, message); if (Display.Full == CustomBootstrapperApplication.Model.Command.Display)
{
CustomBootstrapperApplication.Dispatcher.Invoke((Action)delegate()
{
MessageBox.Show(message, "DIAView", MessageBoxButton.OK, MessageBoxImage.Error);
if (null != CustomBootstrapperApplication.View)
{
CustomBootstrapperApplication.View.Close();
}
}
);
} State = InstallState.Failed;
return;
}
}
else
{
State = InstallState.Failed;
}
} #region 方法
private void CacheAcquireProgress(object sender, CacheAcquireProgressEventArgs e)
{
lock (this)
{
this.cacheProgress = e.OverallPercentage;
this.Progress = (this.cacheProgress + this.executeProgress) / this.Phases;
e.Result = Canceled ? Result.Cancel : Result.Ok;
}
}
private void ApplyExecuteProgress(object sender, ExecuteProgressEventArgs e)
{
lock (this)
{ this.executeProgress = e.OverallPercentage;
this.Progress = (this.cacheProgress + this.executeProgress) / ; // always two phases if we hit execution. if (CustomBootstrapperApplication.Model.Command.Display == Display.Embedded)
{
CustomBootstrapperApplication.Model.Engine.SendEmbeddedProgress(e.ProgressPercentage, this.Progress);
} e.Result = Canceled ? Result.Cancel : Result.Ok;
}
} /// <summary>
/// 这个方法 会在Detect中被调用
/// </summary>
/// <param name="sender"></param>
/// <param name="e"></param>
protected void DetectPackageComplete(object sender, DetectPackageCompleteEventArgs e)
{
PackageId = e.PackageId;
//对应的是MsiPackage Id="DIAView"
if (e.PackageId.Equals("DIAView", StringComparison.Ordinal))
{
State = e.State == PackageState.Present ? InstallState.Present : InstallState.NotPresent;
}
} private void PlanBegin(object sender, PlanBeginEventArgs e)
{
lock (this)
{
if (InstallEnabled)
{
this.progressPhases = (LaunchAction.Layout == CustomBootstrapperApplication.Model.PlannedAction) ? : ;
}
else
{
LabelBack = false;
}
InstallText = "";
RepairText = "";
OnPropertyChanged("Phases");
OnPropertyChanged("InstallEnabled");
OnPropertyChanged("InstallText");
OnPropertyChanged("RepairText");
this.executingPackageOrderIndex.Clear();
}
}
private void PlanPackageComplete(object sender, PlanPackageCompleteEventArgs e)
{
if (ActionState.None != e.Execute)
{
lock (this)
{
Debug.Assert(!this.executingPackageOrderIndex.ContainsKey(e.PackageId));
this.executingPackageOrderIndex.Add(e.PackageId, this.executingPackageOrderIndex.Count);
}
}
} /// <summary>
/// PlanAction 结束后会触发这个方法
/// </summary>
/// <param name="sender"></param>
/// <param name="e"></param>
protected void PlanComplete(object sender, PlanCompleteEventArgs e)
{
if (State == InstallState.Cancelled)
{
CustomBootstrapperApplication.Dispatcher.InvokeShutdown();
return;
}
State = InstallState.Applying;
model.ApplyAction();
}
/// <summary>
/// ApplyAction 开始
/// </summary>
/// <param name="sender"></param>
/// <param name="e"></param>
protected void ApplyBegin(object sender, ApplyBeginEventArgs e)
{
State = InstallState.Applying;
OnPropertyChanged("ProgressEnabled");
OnPropertyChanged("CancelEnabled");
}
/// <summary>
/// 安装
/// </summary>
/// <param name="sender"></param>
/// <param name="e"></param>
protected void ExecutePackageBegin(object sender, ExecutePackageBeginEventArgs e)
{
if (State == InstallState.Cancelled)
{
e.Result = Result.Cancel;
}
} private void ExecuteMsiMessage(object sender, ExecuteMsiMessageEventArgs e)
{
lock (this)
{
if (e.MessageType == InstallMessage.ActionStart)
{
this.Message = e.Message;
} e.Result = Canceled ? Result.Cancel : Result.Ok;
}
}
private void CacheComplete(object sender, CacheCompleteEventArgs e)
{
lock (this)
{
this.cacheProgress = ;
this.Progress = (this.cacheProgress + this.executeProgress) / this.progressPhases;
}
}
/// <summary>
/// 卸载
/// </summary>
/// <param name="sender"></param>
/// <param name="e"></param>
protected void ExecutePackageComplete(object sender, ExecutePackageCompleteEventArgs e)
{
if (State == InstallState.Cancelled)
{
e.Result = Result.Cancel;
}
}
/// <summary>
/// Apply结束
/// </summary>
/// <param name="sender"></param>
/// <param name="e"></param>
protected void ApplyComplete(object sender, ApplyCompleteEventArgs e)
{
model.FinalResult = e.Status;
State = InstallState.Applied;
isUnstalling = false;
OnPropertyChanged("CompleteEnabled");
OnPropertyChanged("ProgressEnabled");
// CustomBootstrapperApplication.Dispatcher.InvokeShutdown();
} private void ApplyProgress(object sender, ProgressEventArgs e)
{
lock (this)
{
e.Result = Canceled ? Result.Cancel : Result.Ok;
}
}
/// <summary>
/// 刷新命令状态 从而改变UI是否使能
/// </summary>
private void Refresh()
{
CustomBootstrapperApplication.Dispatcher.Invoke(
(Action)(() =>
{
//((RelayCommand)InstallCommand).CanExecute(this);
//.RaiseCanExecuteChanged();
//((RelayCommand)UninstallCommand)
//.RaiseCanExecuteChanged();
//((DelegateCommand)CancelCommand)
//.RaiseCanExecuteChanged();
}));
}
/// <summary>
/// 事件订阅
/// </summary>
private void WireUpEventHandlers()
{
model.BootstrapperApplication.DetectPackageComplete += DetectPackageComplete; model.BootstrapperApplication.PlanComplete += PlanComplete; model.BootstrapperApplication.ApplyComplete += ApplyComplete; model.BootstrapperApplication.ApplyBegin += ApplyBegin; model.BootstrapperApplication.ExecutePackageBegin += ExecutePackageBegin; model.BootstrapperApplication.ExecutePackageComplete += ExecutePackageComplete; }
#endregion }
}
在构造函数内部,WireUpEventHandlers方法里面的事件订阅处理的是安装的状态。其他就是处理安装进度。安装进度是由两部分组成的,CacheAcquireProgress 和ExecuteProgress,基于二者完成的进度平均得到当前的安装进度。Wix3.6书中的代码如下:
     this.model.BootstrapperApplication.CacheAcquireProgress +=

            (sender, args) =>

            {

                this.cacheProgress = args.OverallPercentage;

                this.Progress = (this.cacheProgress + this.executeProgress) / ;

            };

            this.model.BootstrapperApplication.ExecuteProgress +=

            (sender, args) =>

            {

                this.executeProgress = args.OverallPercentage;

                this.Progress = (this.cacheProgress + this.executeProgress) / ;

            };
我按照wix3.8中WixBA的源码调整了下。卸载的时候常数是1而不是2.
3.在Views中新建一个InstallView.Xaml 。
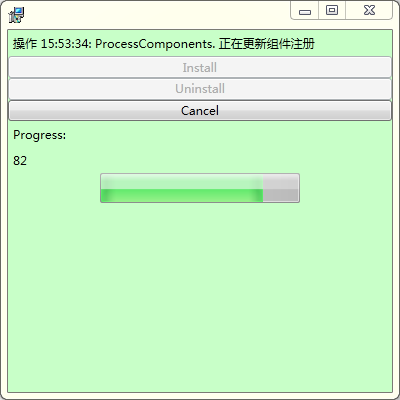
我们先做一个简单的。只有几个按钮。最后的界面如下(美观度先不考虑,;-)): 只有安装,卸载和取消三个按钮,再加一个进度条和一个消息提示。
XAML:
  <Grid>

          <StackPanel>

            <Label Content="{Binding Message}" />

            <Button Command="{Binding InstallCommand}">Install</Button>

            <Button Command="{Binding UninstallCommand}">Uninstall</Button>

            <Button Command="{Binding CancelCommand}">Cancel</Button>

            <Label VerticalAlignment="Center">Progress:</Label>

            <Label Content="{Binding Progress}" />

            <ProgressBar Width="200" Height="30" Value="{Binding Progress}" Minimum="0" Maximum="100" />

        </StackPanel>

    </Grid>
CS:
 public InstallView(InstallViewModel viewModel)

        {

            this.InitializeComponent();

            this.DataContext = viewModel;

            this.Closed += (sender, e) =>

            viewModel.CancelCommand.Execute(this);

        }
4.入口对象CustomBootstrapperApplication。
  public class CustomBootstrapperApplication:BootstrapperApplication

    {

        public static Dispatcher Dispatcher { get; set; }

        static public DiaViewModel Model { get; private set; }

        static public InstallView View { get; private set; }

        protected override void Run()

        {

            Model = new DiaViewModel(this);

            Dispatcher = Dispatcher.CurrentDispatcher;

            var model = new BootstrapperApplicationModel(this);

            var viewModel = new InstallViewModel(model);

            View = new InstallView(viewModel);

            model.SetWindowHandle(View);

            this.Engine.Detect();

            View.Show();

            Dispatcher.Run();

            this.Engine.Quit(model.FinalResult);

        }

    }
  public class DiaViewModel

    {

        private Version _version;

        private const string BurnBundleInstallDirectoryVariable = "InstallFolder";

        private const string BurnBundleLayoutDirectoryVariable = "WixBundleLayoutDirectory";

        public DiaViewModel(BootstrapperApplication bootstrapper)

        {

            Bootstrapper = bootstrapper;

            Telemetry = new List<KeyValuePair<string, string>>();

        }

        /// <summary>

        /// Gets the bootstrapper.

        /// </summary>

        public BootstrapperApplication Bootstrapper { get; private set; }

        /// <summary>

        /// Gets the bootstrapper command-line.

        /// </summary>

        public Command Command { get { return Bootstrapper.Command; } }

        /// <summary>

        /// Gets the bootstrapper engine.

        /// </summary>

        public Engine Engine { get { return Bootstrapper.Engine; } }

        /// <summary>

        /// Gets the key/value pairs used in telemetry.

        /// </summary>

        public List<KeyValuePair<string, string>> Telemetry { get; private set; }

        /// <summary>

        /// Get or set the final result of the installation.

        /// </summary>

        public int Result { get; set; }

        /// <summary>

        /// Get the version of the install.

        /// </summary>

        public Version Version

        {

            get

            {

                if (null == _version)

                {

                    Assembly assembly = Assembly.GetExecutingAssembly();

                    FileVersionInfo fileVersion = FileVersionInfo.GetVersionInfo(assembly.Location);

                    _version = new Version(fileVersion.FileVersion);

                }

                return _version;

            }

        }

        /// <summary>

        /// Get or set the path where the bundle is installed.

        /// </summary>

        public string InstallDirectory

        {

            get

            {

                if (!Engine.StringVariables.Contains(BurnBundleInstallDirectoryVariable))

                {

                    return null;

                }

                return Engine.StringVariables[BurnBundleInstallDirectoryVariable];

            }

            set

            {

                Engine.StringVariables[BurnBundleInstallDirectoryVariable] = value;

            }

        }

        /// <summary>

        /// Get or set the path for the layout to be created.

        /// </summary>

        public string LayoutDirectory

        {

            get

            {

                if (!Engine.StringVariables.Contains(BurnBundleLayoutDirectoryVariable))

                {

                    return null;

                }

                return Engine.StringVariables[BurnBundleLayoutDirectoryVariable];

            }

            set

            {

                Engine.StringVariables[BurnBundleLayoutDirectoryVariable] = value;

            }

        }

        public LaunchAction PlannedAction { get; set; }

        /// <summary>

        /// Creates a correctly configured HTTP web request.

        /// </summary>

        /// <param name="uri">URI to connect to.</param>

        /// <returns>Correctly configured HTTP web request.</returns>

        public HttpWebRequest CreateWebRequest(string uri)

        {

            var request = (HttpWebRequest)WebRequest.Create(uri);

            request.UserAgent = String.Concat("WixInstall", Version.ToString());

            return request;

        }

    }
model.SetWindowHandle(view);
this.Engine.Detect();
Dispatcher.Run()
Engine.Quit

 <BootstrapperApplicationRef Id="ManagedBootstrapperApplicationHost">

      <Payload SourceFile="$(var.CustomBA.TargetDir)CustomBA.dll" />

      <Payload SourceFile="$(var.CustomBA.TargetDir)BootstrapperCore.config" />

      <Payload SourceFile="$(var.CustomBA.TargetDir)Microsoft.Practices.Prism.Composition.dll" />

      <Payload SourceFile="$(var.CustomBA.TargetDir)Microsoft.Practices.Prism.Interactivity.dll" />

      <Payload SourceFile="$(var.CustomBA.TargetDir)Microsoft.Practices.Prism.Mvvm.Desktop.dll" />

      <Payload SourceFile="$(var.CustomBA.TargetDir)Microsoft.Practices.Prism.Mvvm.dll" />

      <Payload SourceFile="$(var.CustomBA.TargetDir)Microsoft.Practices.Prism.PubSubEvents.dll" />

      <Payload SourceFile="$(var.CustomBA.TargetDir)Microsoft.Practices.Prism.SharedInterfaces.dll" />

      <Payload SourceFile="$(var.CustomBA.TargetDir)Microsoft.Practices.ServiceLocation.dll" />

    </BootstrapperApplicationRef>
然后再编译运行,就ok了。 运行一下安装包,wpf界面出来,有点小激动,比起xml配置的界面还是要好多了,主要是给了各种可能。
三、界面优化
当然,上面的界面还不能满足我们的胃口,我就先把WIXBA的界面抓过来了。
修改了下安装界面。明白了安装步骤和事件控制,怎么折腾界面那都是你自己的事情了。这个界面也不是很好,进度条不显示的时候纠结显示些别的什么。
安装前: 卸载中:


<Window x:Class="CustomBA.Views.InstallView"

             xmlns="http://schemas.microsoft.com/winfx/2006/xaml/presentation"

             xmlns:x="http://schemas.microsoft.com/winfx/2006/xaml"

        WindowStartupLocation="CenterScreen"

    WindowStyle="None"

    AllowsTransparency="True"

    Background="{x:Null}"

    Width=""

    Height="">

    <Window.Resources>

        <ResourceDictionary Source="Styles.xaml"    />

    </Window.Resources>

    <Grid>

        <Rectangle MouseLeftButtonDown="Background_MouseLeftButtonDown" Fill="{StaticResource BackgroundBrush}"/>

        <Grid VerticalAlignment="Stretch" Margin="">

            <Grid.RowDefinitions>

                <RowDefinition Height="1*"/>

                <RowDefinition Height="1*"/>

                <RowDefinition Height="1*"  />

            </Grid.RowDefinitions>

            <Grid.ColumnDefinitions>

                <ColumnDefinition Width="1*" />

                <ColumnDefinition Width="1*" />

                <ColumnDefinition Width="1*" />

            </Grid.ColumnDefinitions>

            <Button Grid.Row="" Grid.ColumnSpan="" Background="#33CCFF"   />

            <TextBlock Grid.Row="" Grid.Column="" Grid.ColumnSpan="" Style="{StaticResource StatusTextStyle}" Padding="12 0  0 0" >stoneniqiu</TextBlock>

            <TextBlock Grid.Row=""  Grid.Column="" Grid.ColumnSpan="" Style="{StaticResource StatusTextStyle}" HorizontalAlignment="Right"  Text="{Binding Version}"/>

            <TextBlock Grid.ColumnSpan=""  Grid.Row="" Grid.Column="" HorizontalAlignment="Center" VerticalAlignment="Center" FontSize="" Foreground="White" IsHitTestVisible="False">YourSoft</TextBlock>

            <Label Grid.Row="" Grid.Column=""  Margin=""  Grid.ColumnSpan="" Background="#33CCFF"  ></Label>

            <Grid Grid.Row="" Grid.Column="" ColumnSpan="" >

                <Grid.RowDefinitions>

                    <RowDefinition></RowDefinition>

                    <RowDefinition></RowDefinition>

                </Grid.RowDefinitions>

                <Grid.ColumnDefinitions>

                    <ColumnDefinition></ColumnDefinition>

                    <ColumnDefinition></ColumnDefinition>

                    <ColumnDefinition></ColumnDefinition>

                </Grid.ColumnDefinitions>

                <ProgressBar Grid.Row="" Margin="" VerticalAlignment="Bottom"  Grid.Column=""   Grid.ColumnSpan=""  Width="" Height="" Value="{Binding Progress}" Minimum="" Maximum=""

                             Visibility="{Binding ProgressEnabled, Converter={StaticResource BooleanToVisibilityConverter}}" />

                <Label Grid.Row=""   Grid.Column="" Background="#33CCFF" Foreground="White"  Margin=""  Visibility="{Binding ProgressEnabled, Converter={StaticResource BooleanToVisibilityConverter}}"   Content="{Binding Info}"  ></Label>

                <Button Grid.Row="" Grid.Column="" Click="ButtonBase_OnClick" Content="" VerticalContentAlignment="Center" HorizontalContentAlignment="Center" ></Button>

                <Label  Grid.Row="" Grid.Column=""  Background="#33CCFF"  Foreground="White" Margin=""   Visibility="{Binding ProgressEnabled, Converter={StaticResource BooleanToVisibilityConverter}}"  HorizontalContentAlignment="Right"  Content="{Binding Persent}"   />

            </Grid>

            <!-- Install -->

            <Button Grid.Row="" Grid.ColumnSpan="" Tag="安装"  Grid.Column=""  Command="{Binding InstallCommand}" Visibility="{Binding InstallEnabled, Converter={StaticResource BooleanToVisibilityConverter}}" Content="Install" />

            <Image Grid.Row="" Grid.Column="" Source="..\resources\gear.png"  Visibility="{Binding InstallEnabled, Converter={StaticResource BooleanToVisibilityConverter}}"/>

            <Label Grid.Row="" Grid.Column="" Margin="" Grid.ColumnSpan="" Background="#33CCFF"   Visibility="{Binding ProgressEnabled, Converter={StaticResource BooleanToVisibilityConverter}}" ></Label>

            <!--<TextBlock Grid.Row=""   Grid.ColumnSpan="" Style="{StaticResource StatusTextStyle}"  Visibility="{Binding ProgressEnabled, Converter={StaticResource BooleanToVisibilityConverter}}" Text="{Binding Message}"/>-->

            <Image Grid.Row="" Grid.Column="" Source="..\resources\gear.png"   Visibility="{Binding ProgressEnabled, Converter={StaticResource BooleanToVisibilityConverter}}">

                <Image.RenderTransform>

                    <RotateTransform x:Name="ProgressRotateTransform" Angle=""/>

                </Image.RenderTransform>

                <Image.Triggers>

                    <EventTrigger RoutedEvent="Image.Loaded">

                        <BeginStoryboard>

                            <Storyboard>

                                <DoubleAnimation Storyboard.TargetName="ProgressRotateTransform" Storyboard.TargetProperty="Angle" From="0.0" To="360.0" Duration="0:0:4" RepeatBehavior="Forever"/>

                            </Storyboard>

                        </BeginStoryboard>

                    </EventTrigger>

                </Image.Triggers>

            </Image>

            <!-- Uninstall -->

            <Button Grid.Row="" Grid.Column=""  Command="{Binding UninstallCommand}" Visibility="{Binding UninstallEnabled, Converter={StaticResource BooleanToVisibilityConverter}}" Content="{Binding InstallText}" />

            <!--<Image Grid.Row="" Grid.Column="" Source="..\resources\gear.png"  Visibility="{Binding UninstallEnabled, Converter={StaticResource BooleanToVisibilityConverter}}"/>-->

            <Image Grid.Row="" Grid.Column="" Source="..\resources\gear.png"   Visibility="{Binding UninstallEnabled, Converter={StaticResource BooleanToVisibilityConverter}}">

                <Image.RenderTransform>

                    <RotateTransform x:Name="UpdateRotateTransform" Angle=""/>

                </Image.RenderTransform>

                <Image.Triggers>

                    <EventTrigger RoutedEvent="Image.Loaded">

                        <BeginStoryboard>

                            <Storyboard>

                                <DoubleAnimation Storyboard.TargetName="UpdateRotateTransform" Storyboard.TargetProperty="Angle" From="0.0" To="360.0" Duration="0:0:4" RepeatBehavior="Forever"/>

                            </Storyboard>

                        </BeginStoryboard>

                    </EventTrigger>

                </Image.Triggers>

            </Image>

            <!-- Repair -->

            <Button Grid.Row="" Grid.ColumnSpan="" Grid.Column=""  Command="{Binding RepairCommand}" Visibility="{Binding RepairEnabled, Converter={StaticResource BooleanToVisibilityConverter}}"  Content="Repair"  />

            <Image Grid.Row="" Grid.Column="" Grid.ColumnSpan="" Source="..\resources\wrench.png"   Visibility="{Binding RepairEnabled, Converter={StaticResource BooleanToVisibilityConverter}}"/>

            <!-- Complete -->

            <Button Grid.Row="" Grid.ColumnSpan=""  Grid.Column=""  IsEnabled="False" Visibility="{Binding CompleteEnabled, Converter={StaticResource BooleanToVisibilityConverter}}">Complete</Button>

            <Image Grid.Row="" Grid.Column="" Source="..\resources\gear.png"   Visibility="{Binding CompleteEnabled, Converter={StaticResource BooleanToVisibilityConverter}}"/>

            <TextBlock Grid.Row="" Grid.Column=""  Grid.ColumnSpan="" Style="{StaticResource StatusTextStyle}"  Visibility="{Binding ProgressEnabled, Converter={StaticResource BooleanToVisibilityConverter}}" Text="{Binding Message}"/>

            <!-- Failed -->

            <!--<Button Grid.Row="" Grid.ColumnSpan="" Grid.Column="" Background="#33CCFF"   Command="{Binding TryAgainCommand}" Visibility="{Binding TryAgainEnabled, Converter={StaticResource BooleanToVisibilityConverter}}">Failed. Try Again?</Button>

            <TextBlock Grid.Row="" Grid.Column="" HorizontalAlignment="Center" VerticalAlignment="Center" FontSize="" Foreground="White" IsHitTestVisible="False"    Visibility="{Binding TryAgainEnabled, Converter={StaticResource BooleanToVisibilityConverter}}">X</TextBlock>-->

            <!-- Cancel -->

            <Button Grid.Row="" Grid.Column=""  Visibility="{Binding CancelEnabled, Converter={StaticResource BooleanToVisibilityConverter}}" Command="{Binding CancelCommand}">Cancel</Button>

            <TextBlock Grid.Row="" Grid.Column="" HorizontalAlignment="Center" VerticalAlignment="Center" FontSize="" Foreground="White" IsHitTestVisible="False"   Visibility="{Binding CancelEnabled, Converter={StaticResource BooleanToVisibilityConverter}}">X</TextBlock>

            <!-- Exit -->

            <Button Grid.Row="" Grid.Column=""  Visibility="{Binding ExitEnabled, Converter={StaticResource BooleanToVisibilityConverter}}"  Name="Exit" Click="Exit_OnClick"  >Exit</Button>

            <Image Grid.Row="" Grid.Column="" Source="..\resources\exit.png"  Visibility="{Binding ExitEnabled, Converter={StaticResource BooleanToVisibilityConverter}}" />

        </Grid>

        <!--<StackPanel>

            <Label Content="{Binding Message}" />

            <Label Content="{Binding PackageId}" />

            <Button Command="{Binding InstallCommand}">Install</Button>

            <Button Command="{Binding UninstallCommand}">Uninstall</Button>

            <Button Command="{Binding CancelCommand}">Cancel</Button>

            <Label VerticalAlignment="Center">Username:</Label>

            <TextBox Text="{Binding Username}" Margin=""  MinWidth="" />

            <Label VerticalAlignment="Center">Progress:</Label>

            <Label Content="{Binding Progress}" />

            <ProgressBar Width="" Height="" Value="{Binding Progress}" Minimum="" Maximum="" />

        </StackPanel>-->

    </Grid>

</Window>
小结: 以上就是整个过程,基本走通了,但还没有达到最终目的。要制作想QQ那样三步的安装界面,还有2个关键比较重要的问题没有解决。
1.使用了wpf界面后,bundle无法再先安装.net . 这意味着要在我们的wpf界面之前安装.net(不然wpf界面跑不起来),用wix3.9编译,会给出提示界面。但安装.net失败。
2.用户选择路径问题,原本我们是通过msi的安装界面来让用户选择安装路径,但现在msi的安装界面就显得有些多余。但这是两个工程,如何把安装界面传递过去。也是个问题。
这两个问题解决后,我会在后面的博客中更新。那样才算完整。
需要的demo的留邮箱,觉得可以的就点个赞~
参考资料:
1.书 Wix3.6:A Develop's Guide to Windows Installer XML
2.源码:wix3.8
Wix 安装部署教程(九) --用WPF做安装界面的更多相关文章
- Wix 安装部署教程(四) 添加安装文件及快捷方式
通过之前三篇的介绍,大家对wix的xml部署方式也应该有一些认识,今天天气不错,再来一发.主要介绍桌面,开始菜单,卸载等功能的如何添加.希望园友们支持! 一.如何添加文件 Demo打包程序很简单,就一 ...
- Wix 安装部署教程(三)自定义安装界面和行为
接上一篇自定义安装界面,这篇继续探索,首先介绍下,Wix为我们定义了五种风格,每种风格的UI都是有一定顺序的.我们可以改变安装顺序,也可以完全自定义一个Dialog插入其中.比如Wix_Mondo 风 ...
- WIX 安装部署教程(六) 为你收集的七个知识点
前段时间整理5篇WIX(Windows Installer XML)的安装教程,但还不够完善,这里继续整理了七个知识点分享给大家.WIX最新版本3.8,点击下载 WIX安装部署(一)同MSBuild自 ...
- NideShop项目的安装部署教程
本文档为微信小程序商城NideShop项目的安装部署教程,欢迎star NideShop商城api服务:https://github.com/tumobi/nideshop NideShop微信小程序 ...
- OpenVPN Windows 平台安装部署教程
一.环境准备: 操作系统Windows 服务器IP:192.168.88.123 VPN:192.168.89.1 客户端IP:192.168.78.3 客户端服务端单网卡,路由器做好端口映射 安装 ...
- [转帖]VMware Vsphere 6.0安装部署 (三) vCenter Server安装
VMware Vsphere 6.0安装部署 (三) vCenter Server安装 2016年08月29日 14:59:14 dAng1r0Us 阅读数:72942 版权声明:本文为博主原创文 ...
- Wix 安装部署教程(十五) --CustomAction的七种用法
在WIX中,CustomAction用来在安装过程中执行自定义行为.比如注册.修改文件.触发其他可执行文件等.这一节主要是介绍一下CustomAction的7种用法. 在此之前要了解InstallEx ...
- Wix 安装部署教程 -CustomAction的七种用法
在WIX中,CustomAction用来在安装过程中执行自定义行为.比如注册.修改文件.触发其他可执行文件等.这一节主要是介绍一下CustomAction的7种用法. 在此之前要了解InstallEx ...
- Nginx详细安装部署教程
一.Nginx简介 Nginx是一个web服务器也可以用来做负载均衡及反向代理使用,目前使用最多的就是负载均衡,具体简介我就不介绍了百度一下有很多,下面直接进入安装步骤 二.Nginx安装 1.下载N ...
随机推荐
- iOSDate时间格式(转)
在开发iOS程序时,有时候需要将时间格式调整成自己希望的格式,这个时候我们可以用NSDateFormatter类来处理.例如: //实例化一个NSDateFormatter对象 NSDateForma ...
- windows读取mac格式移动硬盘的方法
本文记录了一些window与mac数据在移动设备上互相拷贝的经验. 一.准备 家里有一台mac电脑,限于硬盘空间比较小,需要定期备份一些数据. 由于备份数据大小在20G左右,并且并没有压缩为一个压缩文 ...
- A multi-faceted language for the Java platform
最近在研究关于groovy 相关的技术 希望有研究交到研究这方面的朋友 Groovy 最新的地址 http://www.groovy-lang.org/
- 网站内容禁止复制和粘贴、另存为的js代码(转)
1.使右键和复制失效 方法1: 在网页中加入以下代码: 代码如下: <script language="Javascript"> document.oncontextm ...
- 【Java学习笔记】集合转数组---toArray()
package p2; import java.util.ArrayList; import java.util.Arrays; import java.util.List; public class ...
- HttpWebRequest 请求数据
string fullUrl = "http://vip.AAA.cn/PreviewInterfaceAction.action?code=vip0008&data_digest= ...
- oracle权限语句大全
Oracle 系统默认的几个用户: sys --------网络管理用户,具有最高数据库管理权限 system------本地管理用户,权限次于sys scott-------普通用户,默认是锁住的( ...
- mvc之文件下载
首先你要有四张图片,也就是数组中的数 public ActionResult Index()//创建视图{ViewBag.list =new int[] { 5, 6, 7,8 };return Vi ...
- win10 上运行 curl_init() 函数一直报错的解决办法
[问题现象] 1.把 APACHE 的 ZIP 包解压到目录,比如 d:\apache24\ 2.把 PHP 的 ZIP 包解压到目录,比如:d:\php56\ apache 与 php 与 MySQ ...
- javascript中array常用属性方法
属性: length 表示一个无符号 32-bit 整数,返回一个数组中的元素个数. 截短数组..截短至长度2 则: .length = 2 方法: Array.from() 方法可以将一个类数 ...