Angular SPA基于Ocelot API网关与IdentityServer4的身份认证与授权(二)
上文已经介绍了Identity Service的实现过程。今天我们继续,实现一个简单的Weather API和一个基于Ocelot的API网关。
回顾
Weather API
Weather API实现非常简单,直接用Visual Studio 2019 Community Edition自带的ASP.NET Core Web Application模板创建就行了,我们的目的不是为了实现Weather API的业务,我们只需要有一个能让IdentityServer4进行保护的API就行,以便能够完成我们的各种实验。
在原有的(也就是Identity Service所在的)解决方案中,新建一个ASP.NET Core Web Application,应用程序模板选择API,并禁用HTTPS和Docker支持,因为目前不需要,也不要启用任何Authentication机制,因为这部分功能会由Ocelot配合IdentityServer4实现。在完成创建之后,我们的Weather API就做好了。
现在,设置启动端口为5000,启动项目,然后通过curl测试API是否工作正常:
curl http://localhost:5000/weatherforecast | json_pp && echo
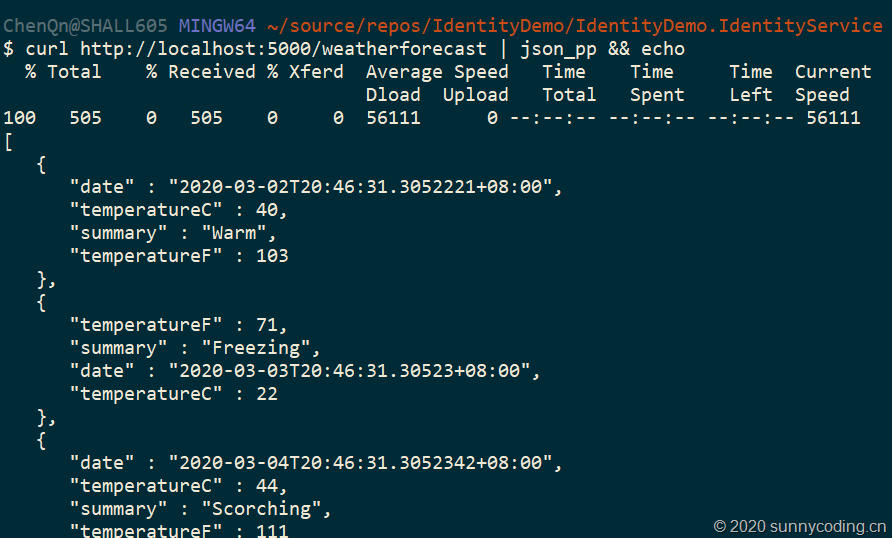
OK,Weather API就成功完成了。
Ocelot API网关
现在我们来创建Ocelot API网关,首先做到能够通过这个网关来访问Weather API,然后再加入认证机制,使得Ocelot API网关能够基于IdentityServer4完成认证。其实这部分实操我已经在《ASP.NET Core中Ocelot的使用:API网关的应用》和《使用Ocelot、IdentityServer4、Spring Cloud Eureka搭建微服务网关:Step by Step(二)》这些文章中介绍过了。为了保证描述的完整性,我还是把这部分工作重新做一次。
搭建网关
新建一个ASP.NET Core Web Application应用程序,模板选择Empty,去掉HTTPS支持。在项目创建后,向项目添加ocelot.config.json文件,内容如下:
{

  "ReRoutes": [

    {

      "DownstreamPathTemplate": "/weatherforecast",

      "DownstreamScheme": "http",

      "DownstreamHostAndPorts": [

        {

          "Host": "localhost",

          "Port": 5000

        }

      ],

      "UpstreamPathTemplate": "/api/weather",

      "UpstreamHttpMethod": [ "Get" ]

    }

  ]

}
然后,向项目添加Ocelot的NuGet包,修改Program.cs文件,将ocelot.config.json文件添加到应用程序配置系统中:
public static IHostBuilder CreateHostBuilder(string[] args) =>

    Host.CreateDefaultBuilder(args)

        .ConfigureWebHostDefaults(webBuilder =>

        {

            webBuilder.UseStartup<Startup>();

        })

        .ConfigureAppConfiguration(configBuilder =>

        {

            configBuilder.AddJsonFile("ocelot.configuration.json");

        });
并且修改Startup.cs文件,加入Ocelot的服务注册以及Middleware:
public void ConfigureServices(IServiceCollection services)

{

    services.AddOcelot();

}

public void Configure(IApplicationBuilder app, IWebHostEnvironment env)

{

    if (env.IsDevelopment())

    {

        app.UseDeveloperExceptionPage();

    }

    app.UseRouting();

    app.UseOcelot();

    app.UseEndpoints(endpoints =>

    {

        endpoints.MapGet("/", async context =>

        {

            await context.Response.WriteAsync("Hello World!");

        });

    });

}
让API网关侦听9000端口,同时启动Weather API和API网关两个项目,于是我们可以直接通过API网关来访问Weather API:
curl http://localhost:9000/api/weather | json_pp && echo
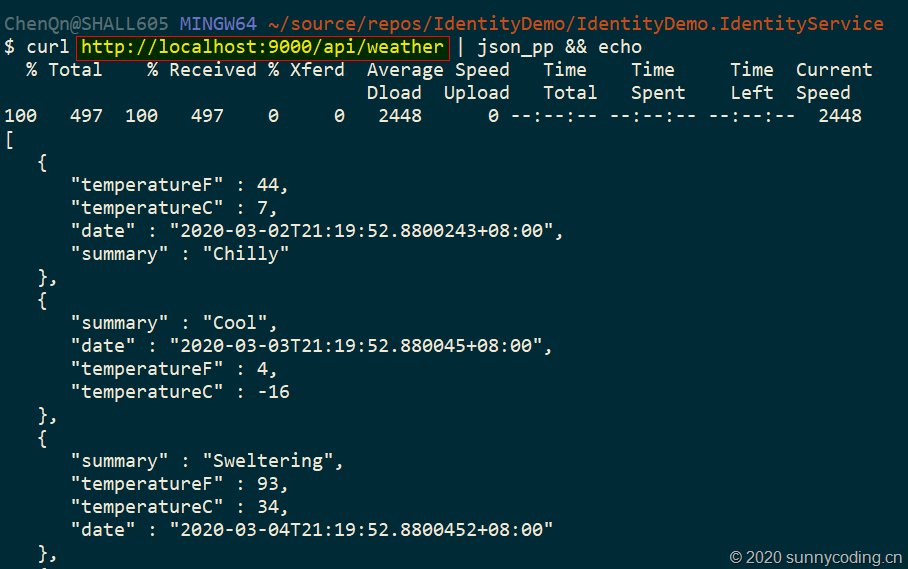
可以看到,我们已经可以直接通过API网关的地址来访问其下游服务了。
在网关上实现身份认证
接下来的这一步,我们会结合前一篇文章中介绍的Identity Service,在API网关上实现身份认证。在Ocelot API网关项目上,添加IdentityServer4.AccessTokenValidation NuGet包的引用,然后在Startup.cs的ConfigureServices中增加对IdentityServer4的认证支持:
public void ConfigureServices(IServiceCollection services)

{

    services.AddOcelot();

    services.AddAuthentication()

        .AddIdentityServerAuthentication("AuthKey", options =>

        {

            options.Authority = "http://localhost:7889";

            options.RequireHttpsMetadata = false;

        });

    services.AddCors(options => options.AddPolicy("AllowAll", p => p.AllowAnyOrigin()

       .AllowAnyMethod()

       .AllowAnyHeader()));

}
当然我们也添加了CORS的Policy,以便能够支持跨域访问,为之后的Angular SPA实现做准备。目前,无需对Configure方法做大的改动,只需要添加app.UseCors("AllowAll");这一调用,以允许跨域访问即可。然后,修改ocelot.config.json文件,在Weather API的ReRoute上增加AuthenticationOptions配置,用以启用基于IdentityServer4的身份认证:
{

  "ReRoutes": [

    {

      "DownstreamPathTemplate": "/weatherforecast",

      "DownstreamScheme": "http",

      "DownstreamHostAndPorts": [

        {

          "Host": "localhost",

          "Port": 5000

        }

      ],

      "UpstreamPathTemplate": "/api/weather",

      "UpstreamHttpMethod": [ "Get" ],

      "AuthenticationOptions": {

        "AuthenticationProviderKey": "AuthKey",

        "AllowedScopes": []

      }

    }

  ]

}
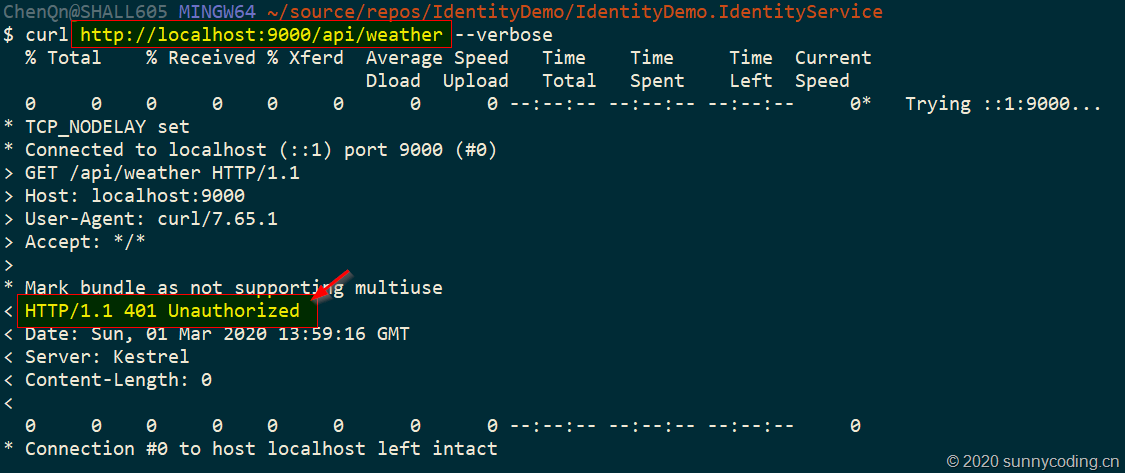
现在,同时启动Identity Service、Weather API和Ocelot网关三个项目,然后再用curl调用上面相同的地址,可以发现,服务端已经返回了401,告诉我们没有认证,无法发起API调用请求:
进一步测试
现在,让我们写一个Console App作为客户端,进行进一步测试。新建一个.NET Core Console App的项目,添加IdentityModel NuGet包,Main方法实现如下:
static async Task Main(string[] args)

{

    using var client = new HttpClient();

    var discoResponse = await client.GetDiscoveryDocumentAsync("https://localhost:7890");

    if (discoResponse.IsError)

    {

        Console.WriteLine(discoResponse.Error);

        return;

    }

    var tokenResponse = await client.RequestPasswordTokenAsync(new PasswordTokenRequest

    {

        Address = discoResponse.TokenEndpoint,

        ClientId = "webapi",

        Scope = "api.weather.full_access",

        ClientSecret = "mysecret",

        UserName = "daxnet",

        Password = "P@ssw0rd123"

    });

    if (tokenResponse.IsError)

    {

        Console.WriteLine(tokenResponse.Error);

        return;

    }

    Console.WriteLine(tokenResponse.Json);

    client.SetBearerToken(tokenResponse.AccessToken);

    var response = await client.GetAsync("http://localhost:9000/api/weather");

    Console.WriteLine(response.IsSuccessStatusCode ?

        $"{response.StatusCode} {await response.Content.ReadAsStringAsync()}" :

        response.StatusCode.ToString());

}
仍然同时启动Identity Service、Weather API和Ocelot网关三个项目,然后调试这个Console App,可以看到,API调用成功:

Console App也返回了正确的结果:
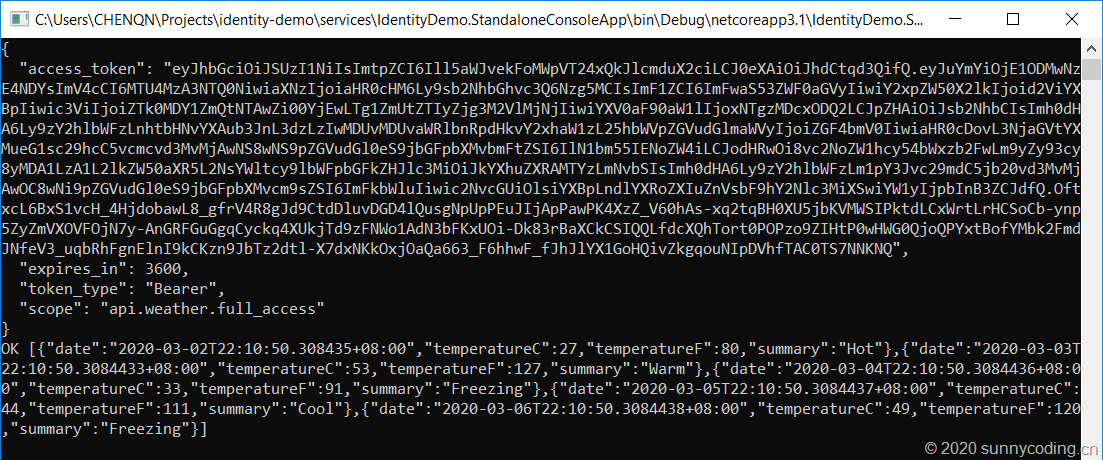
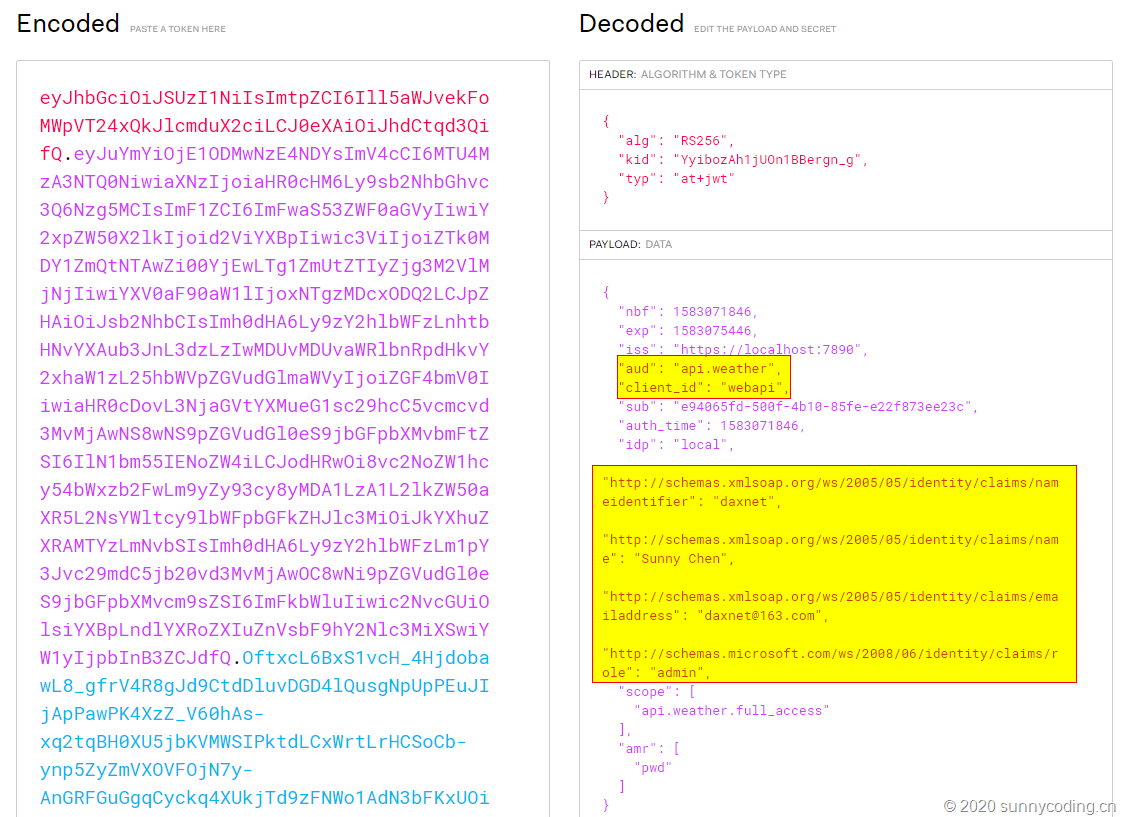
然后,将上面的access_token复制下来,打开https://jwt.io,粘贴到Encoded文本框,在Decoded文本框中可以看到,Identity相关的信息,包括我们在ApiResource上设定的Claims都被包含在了Access Token上:
小结
本文实现了一个实验性质的Weather API,然后搭建了一个Ocelot API网关,并在网关上结合Identity Service完成了身份认证机制,最后通过一个Console App,了解了一下Access Token。下文开始,我会介绍如何在Angular SPA中做身份认证。
源代码
访问以下Github地址以获取源代码:
https://github.com/daxnet/identity-demo
Angular SPA基于Ocelot API网关与IdentityServer4的身份认证与授权(二)的更多相关文章
- Angular SPA基于Ocelot API网关与IdentityServer4的身份认证与授权(四)
在上一讲中,我们已经完成了一个完整的案例,在这个案例中,我们可以通过Angular单页面应用(SPA)进行登录,然后通过后端的Ocelot API网关整合IdentityServer4完成身份认证.在 ...
- Angular SPA基于Ocelot API网关与IdentityServer4的身份认证与授权(三)
在前面两篇文章中,我介绍了基于IdentityServer4的一个Identity Service的实现,并且实现了一个Weather API和基于Ocelot的API网关,然后实现了通过Ocelot ...
- Angular SPA基于Ocelot API网关与IdentityServer4的身份认证与授权(一)
好吧,这个题目我也想了很久,不知道如何用最简单的几个字来概括这篇文章,原本打算取名<Angular单页面应用基于Ocelot API网关与IdentityServer4+ASP.NET Iden ...
- .Netcore 2.0 Ocelot Api网关教程(5)- 认证和授权
本文介绍Ocelot中的认证和授权(通过IdentityServer4),本文只使用最简单的IdentityServer,不会对IdentityServer4进行过多讲解. 1.Identity Se ...
- 微服务(入门三):netcore ocelot api网关结合consul服务发现
简介 api网关是提供给外部调用的统一入口,类似于dns,所有的请求统一先到api网关,由api网关进行指定内网链接. ocelot是基于netcore开发的开源API网关项目,功能强大,使用方便,它 ...
- ASP.NET Core on K8S学习之旅(13)Ocelot API网关接入
本篇已加入<.NET Core on K8S学习实践系列文章索引>,可以点击查看更多容器化技术相关系列文章. 上一篇介绍了Ingress的基本概念和Nginx Ingress的基本配置和使 ...
- .Netcore 2.0 Ocelot Api网关教程(7)- 限流
本文介绍Ocelot中的限流,限流允许Api网关控制一段时间内特定api的总访问次数.限流的使用非常简单,只需要添加配置即可. 1.添加限流 修改 configuration.json 配置文件,对 ...
- .Netcore 2.0 Ocelot Api网关教程(6)- 配置管理
本文介绍Ocelot中的配置管理,配置管理允许在Api网关运行时动态通过Http Api查看/修改当前配置.由于该功能权限很高,所以需要授权才能进行相关操作.有两种方式来认证,外部Identity S ...
- .Netcore 2.0 Ocelot Api网关教程(2)- 路由
.Netcore 2.0 Ocelot Api网关教程(1) 路由介绍 上一篇文章搭建了一个简单的Api网关,可以实现简单的Api路由,本文介绍一下路由,即配置文件中ReRoutes,ReRoutes ...
随机推荐
- Nodejs的介绍
Nodejs的介绍 Node.js的是建立在Chrome的JavaScript的运行时,可方便地构建快速,可扩展的网络应用程序的平台.Node.js使用事件驱动,非阻塞I/O模型,轻量.高效,可以完美 ...
- matlab混合编程向导(vc,vb,.net...)
一.matlab与vc混编 1.通过mcc将matlab的m文件转化为cpp,c文件或dll供vc调用: 这方面的实现推荐精华区Zosco和ljw总结的方法(x-6-1-4-3-1和2) ...
- 算法竞赛进阶指南--在单调递增序列a中查找>=x的数中最小的一个(即x或x的后继)
while (l < r) { int mid = (l + r) / 2; if (a[mid] >= x) r = mid; else l = mid + 1; }
- P1457 城堡 The Castle 位运算+BFS+思维(难题,好题)
题目描述 我们憨厚的USACO主人公农夫约翰(Farmer John)以无法想象的运气,在他生日那天收到了一份特别的礼物:一张"幸运爱尔兰"(一种彩票).结果这张彩票让他获得了这次 ...
- 图论--2-SAT--暴力染色法模板(字典序最小解) RQ的板子
//暴力DFS,求字典序最小的解,也是求字典序唯一的方法 #include<cstdio> #include<cstring> #include<vector> u ...
- AWVS 安全渗透扫描
1.打开软件,点击 New Scan 2.在 website url 中输入被扫描的网址,点击 next 3.在 scanning profile 中选择测试的漏洞类型,默认选择 default(默认 ...
- 题目分享I
题意:2*n的地面,q次操作,每次操作将地面翻转,若该地是地面那翻转就成熔岩,如果是熔岩那翻转就成地面,熔岩人不能走,问人是否能从1,1走到2,n (ps:1,1和2,n不会在翻转的范围内,n,q≤1 ...
- 【Hadoop离线基础总结】HDFS的API操作
HDFS的API操作 创建maven工程并导入jar包 注意 由于cdh版本的所有的软件涉及版权的问题,所以并没有将所有的jar包托管到maven仓库当中去,而是托管在了CDH自己的服务器上面,所以我 ...
- @RequestParam和@RequestBody和@PathVariable用法小结
@RequestParam 使用@RequestParam接收前段参数比较方便,前端传参的URL: url = "${ctx}/main/mm/am/edit?Id=${Id}&na ...
- Python 简明教程 --- 1,搭建Python 环境
微信公众号:码农充电站pro 个人主页:https://codeshellme.github.io 人生苦短,我用Python. -- 龟叔T恤 Python 是一门解释型语言,所以要想运行Pytho ...