Android状态栏着色
版权声明:本文为HaiyuKing原创文章,转载请注明出处!
前言
状态栏着色,也就是我们经常听到的沉浸式状态栏,关于沉浸式的称呼网上也有很多吐槽的,这里就不做过多讨论了,以下我们统称状态栏着色,这样我觉得更加容易理解。
从Android4.4开始,才可以实现状态栏着色,并且从5.0开始系统更加完善了这一功能,可直接在主题中设置<item name="colorPrimaryDark">@color/colorPrimaryDark</item>或者getWindow().setStatusBarColor(color)来实现,但毕竟4.4+的机器还有很大的占比,所以就有必要寻求其它的解决方案。
一般通过Android Studio新建项目时就实现了状态栏着色功能,不过只能在API>19的机型上正常显示。下面是通过Android studio新建项目时的默认样式代码:
styles.xml

colors.xml
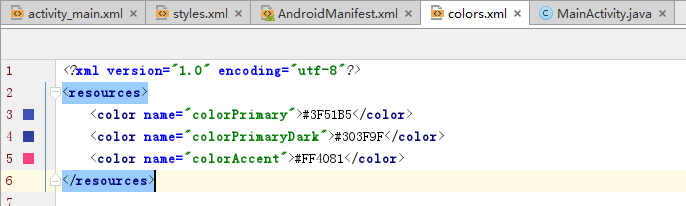
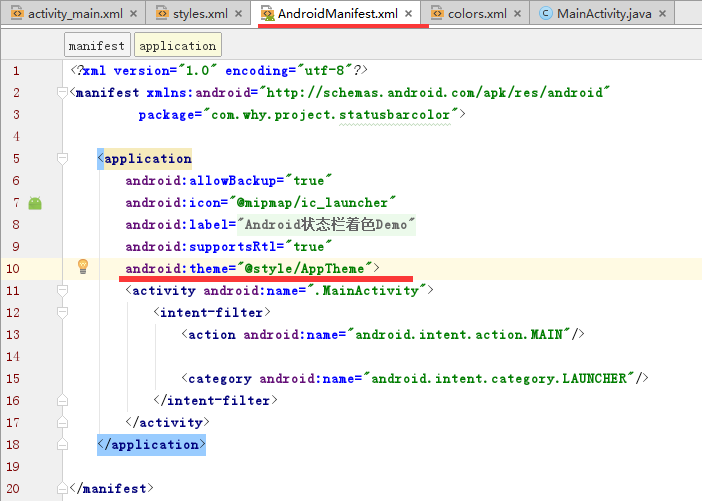
AndroidManifest.xml
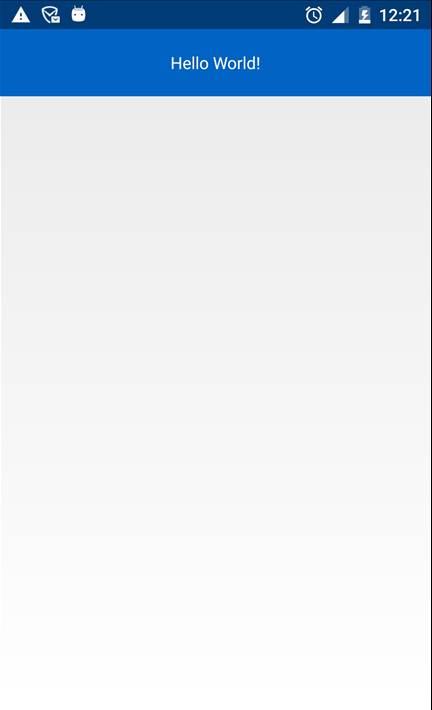
而本文想要实现的效果是在API>19和API<19的机型上都兼容状态栏着色效果。
效果图
| API>19 | API =19 | API <19 |
|

|

|
代码分析
- 首先将手机手机状态栏透明化
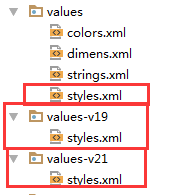
在values、values-v19、values-v21目录下分别创建相应的主题,然后在AndroidManifest.xml中给Application设置该主题。
- 在布局文件中添加
android:fitsSystemWindows="true"属性
我们使用android:fitsSystemWindows="true"属性,不让布局延伸到状态栏,这时状态栏就是透明的,然后添加一个和状态栏高、宽相同的指定颜色View来覆盖被透明化的状态栏。
- 创建View并添加到状态栏
使用步骤
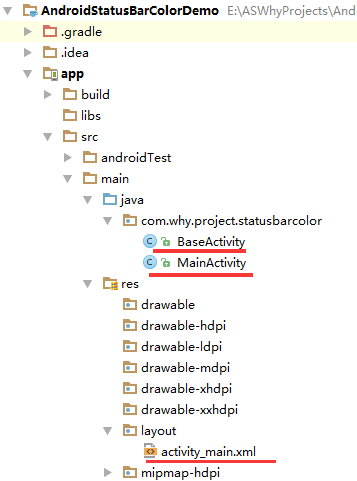
一、项目组织结构图

注意事项:
- 导入类文件后需要change包名以及重新import R文件路径
- values目录下的文件(strings.xml、dimens.xml、colors.xml等),如果项目中存在,则复制里面的内容,不要整个覆盖
二、使用方法
修改valus目录下的styles.xml文件【在eclipse开发环境和Android studio开发环境中建议使用不同的样式】
<resources>

    <!--

        Base application theme, dependent on API level. This theme is replaced

        by AppBaseTheme from res/values-vXX/styles.xml on newer devices.

    -->

    <!--

        Theme customizations available in newer API levels can go in

        res/values-vXX/styles.xml, while customizations related to

        backward-compatibility can go here.

    -->

    <!-- Eclipse开发环境 -->

    <!--<style name="AppBaseTheme" parent="android:Theme.Light.NoTitleBar">

    </style>-->

    <!-- Android Studio开发环境 -->

    <style name="AppBaseTheme" parent="Theme.AppCompat.Light.NoActionBar">

    </style>

    <!-- Application theme. -->

    <style name="AppTheme" parent="AppBaseTheme">

        <!-- All customizations that are NOT specific to a particular API-level can go here. -->

    </style>

    <!-- Android 状态栏着色 -->

    <style name="TranslucentTheme" parent="AppTheme">

    </style>

</resources>
添加\修改values-v19目录下的styles.xml文件【在eclipse开发环境和Android studio开发环境中建议使用不同的样式】
<resources>

    <!--

        Base application theme for API 19+. This theme completely replaces

        AppBaseTheme from BOTH res/values/styles.xml and

        res/values-v11/styles.xml on API 19+ devices.

    -->

    <!-- API 19 theme customizations can go here. -->

    <!-- Eclipse开发环境 -->

    <!--<style name="AppBaseTheme" parent="android:Theme.Light.NoTitleBar">

    </style>-->

    <!-- Android Studio开发环境 -->

    <style name="AppBaseTheme" parent="Theme.AppCompat.Light.NoActionBar">

    </style>

    <!-- Android 状态栏着色 -->

    <style name="TranslucentTheme" parent="AppTheme">

        <item name="android:windowTranslucentStatus">true</item>

        <item name="android:windowTranslucentNavigation">false</item>

    </style>

</resources>
添加\修改values-v21目录下的styles.xml文件【在eclipse开发环境和Android studio开发环境中建议使用不同的样式】
<resources>

    <!--

        Base application theme for API 21+. This theme completely replaces

        AppBaseTheme from BOTH res/values/styles.xml and

        res/values-v11/styles.xml on API 21+ devices.

    -->

    <!-- API 21 theme customizations can go here. -->

    <!-- Eclipse开发环境 -->

    <!--<style name="AppBaseTheme" parent="android:Theme.Light.NoTitleBar">

    </style>-->

    <!-- Android Studio开发环境 -->

    <style name="AppBaseTheme" parent="Theme.AppCompat.Light.NoActionBar">

    </style>

    <!-- Android 状态栏着色 -->

    <style name="TranslucentTheme" parent="AppTheme">

        <item name="android:windowTranslucentStatus">true</item>

        <item name="android:windowTranslucentNavigation">false</item>

        <item name="android:statusBarColor">@android:color/transparent</item>

    </style>

</resources>
在values目录下的colors.xml文件中添加状态栏着色的颜色值代码
<?xml version="1.0" encoding="utf-8"?>

<resources>

    <!-- Android 状态栏着色 -->

    <color name="colorPrimary">#0164C5</color>

</resources>
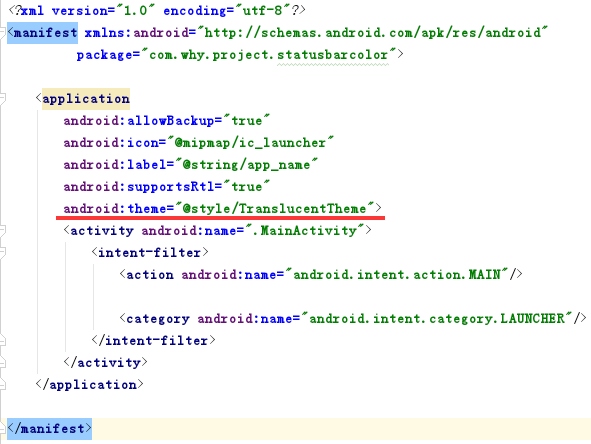
在AndroidManifest.xml中给Application设置TranslucentTheme主题
<?xml version="1.0" encoding="utf-8"?>

<manifest xmlns:android="http://schemas.android.com/apk/res/android"

          package="com.why.project.statusbarcolor">

    <application

        android:allowBackup="true"

        android:icon="@mipmap/ic_launcher"

        android:label="@string/app_name"

        android:supportsRtl="true"

        android:theme="@style/TranslucentTheme">

        <activity android:name=".MainActivity">

            <intent-filter>

                <action android:name="android.intent.action.MAIN"/>

                <category android:name="android.intent.category.LAUNCHER"/>

            </intent-filter>

        </activity>

    </application>

</manifest>
在activity布局文件中的根节点元素中添加android:fitsSystemWindows="true"
<?xml version="1.0" encoding="utf-8"?>

<!-- Android 状态栏着色:android:fitsSystemWindows="true" -->

<RelativeLayout

    xmlns:android="http://schemas.android.com/apk/res/android"

    xmlns:tools="http://schemas.android.com/tools"

    android:id="@+id/activity_main"

    android:layout_width="match_parent"

    android:layout_height="match_parent"

    tools:context="com.why.project.statusbarcolor.MainActivity"

    android:fitsSystemWindows="true">

    <TextView

        android:layout_width="match_parent"

        android:layout_height="56dp"

        android:text="Hello World!"

        android:textColor="#ffffff"

        android:background="@color/colorPrimary"

        android:gravity="center"/>

</RelativeLayout>
在Activity基类以及子类中添加以下标记的代码
package com.why.project.statusbarcolor;

import android.content.Context;

import android.os.Build;

import android.os.Bundle;

import android.support.annotation.Nullable;

import android.support.v4.content.ContextCompat;

import android.support.v7.app.AppCompatActivity;

import android.view.View;

import android.view.ViewGroup;

import android.widget.LinearLayout;

/**

 * Created by HaiyuKing

 * Used activity基类

 */

public class BaseActivity extends AppCompatActivity{

    @Override

    protected void onCreate(@Nullable Bundle savedInstanceState) {

        super.onCreate(savedInstanceState);

    }

    /*==========Android 状态栏着色=============*/

    public void addStatusBarView() {

        int height;

        height = getStatusBarHeight(this);

        if (height <= 0) {

            return;

        }

        View view = new View(this);

        view.setBackgroundColor(ContextCompat.getColor(this,R.color.colorPrimary));

        LinearLayout.LayoutParams params = new LinearLayout.LayoutParams(ViewGroup.LayoutParams.MATCH_PARENT, height);

        ViewGroup decorView = (ViewGroup) findViewById(android.R.id.content);

        decorView.addView(view, params);

    }

    /**

     * 获取状态栏的高度

     * 19API以上 读取到状态栏高度才有意义

     */

    public int getStatusBarHeight(Context context) {

        if (Build.VERSION.SDK_INT >= Build.VERSION_CODES.KITKAT) {

            int resourceId = context.getResources().getIdentifier("status_bar_height", "dimen", "android");

            return resourceId > 0 ? context.getResources().getDimensionPixelSize(resourceId) : 0;

        } else {

            return 0;

        }

    }

}
package com.why.project.statusbarcolor;

import android.os.Bundle;

public class MainActivity extends BaseActivity {

    @Override

    protected void onCreate(Bundle savedInstanceState) {

        super.onCreate(savedInstanceState);

        setContentView(R.layout.activity_main);

        /*==========Android 状态栏着色=============*/

        addStatusBarView();

    }

}
注意:
- Android studio新建的项目默认extends AppCompatActivity !如果是Eclipse开发环境则需要修改为extends Activity或者FragemntActivity或者自定义的activity基类。
- 如果activity布局中含有fragment布局,那么在Activity含有以上代码的基础上只需要在fragment布局文件中添加上android:fitsSystemWindows="true"即可
混淆配置
无
参考资料
项目demo下载地址
https://github.com/haiyuKing/AndroidStatusBarColorDemo
Android状态栏着色的更多相关文章
- Android 透明状态栏&着色状态栏
Android 5.0 及以上实现方式(android在5.0之后引入Material Design 实现方式相对简单) 透明状态栏,背景浸入状态栏 if (Build.VERSION.SDK_INT ...
- Android开发-状态栏着色原理和API版本号兼容处理
介绍 先上实际效果图,有三个版本号请注意区分API版本号 API>=20 API=19 API<19 watermark/2/text/aHR0cDovL2Jsb2cuY3Nkbi5uZX ...
- Android状态栏颜色修改
android状态栏颜色修改 状态栏颜色的修改在4.4和5.x环境下分别有不同的方式,低于4.4以下是不能修改的. 5.x环境下 方式一,状态栏将显示为纯净的颜色,没有渐变效果 /** * 状 ...
- Android状态栏透明(沉浸式效果)
Android状态栏透明(沉浸式效果) 默认效果 沉浸式效果 方式一 源码 下载地址(Android Studio工程):http://download.csdn.net/detail/q487880 ...
- Android如何着色字符串的特定部分
文章选自StackOverflow(简称:SOF)精选问答汇总系列文章之一,本系列文章将为读者分享国外最优质的精彩问与答,供读者学习和了解国外最新技术.本文探讨Android如何着色字符串的特定部分. ...
- android状态栏和NavigationBar的动态控制显示
项目在开发阅读器,阅读器对阅读界面的要求就是在工具栏不显示的状态下,ActionBar和NavigationBar都是不显示的,当工具栏显示时它们都出来,这就需要动态控制它们的显示与隐藏. 第一阶段: ...
- [Android] 状态栏的一些认识
前段时间遇到几个关于状态栏的问题,又了解了一下状态栏相关的知识,现在做一下记录. 本文地址:http://www.cnblogs.com/rossoneri/p/4316343.html 前戏和问题 ...
- android状态栏总结
针对状态栏的操作,只针对4.4kitKat(含)以上的机型,部分国产rom会失效,目前发现的有华为的EMUI Activity必须是noActionbar主题 本文基于StatusBarUtils略作 ...
- Translucent Bar Android状态栏自定义颜色
Android4.4 一个很重要的改变就是透明系统栏..新的系统栏是渐变透明的, 可以最大限度的允许屏幕显示更多内容, 也可以让系统栏和 Action Bar 融为一体, 仅仅留下最低限度的背景保护以 ...
随机推荐
- CentOS6.5 安装Python2.7后, yum出现“No module named yum”错误
安装如下方法安装python2.7: yum install –y python27 python27-devel python-docutils cd /usr/bin/ rm -rf python ...
- sonyflake.go
time := id >> (BitLenSequence + BitLenMachineID) sequence := id & maskSequence > ...
- dummy_backend_queue.go
) } func (d *dummyBackendQueue) Empty() error { return nil }
- registration_db.go
, atomic.LoadInt64(&p.peerInfo.lastUpdate)) if now.Sub(cur) > inactivityTimeout || p. ...
- MySQL数据库创建表报错的解决方案
实体类 package com.tao.pojo; public class Student { private String id; private String name; private Str ...
- 【莫比乌斯反演】BZOJ2005 [NOI2010]能量采集
Description 求sigma gcd(x,y)*2-1,1<=x<=n, 1<=y<=m.n, m<=1e5. Solution f(n)为gcd正好是n的(x, ...
- centos7安装libgdiplus。netcore生成验证码,处理图片
yum install autoconf automake libtool yum install freetype-devel fontconfig libXft-devel yum install ...
- 理解图像分割中的卷积(Understand Convolution for Semantic Segmentation)
以最佳的101 layer的ResNet-DUC为基础,添加HDC,实验探究了几种变体: 无扩张卷积(no dilation):对于所有包含扩张卷积,设置r=1r=1 扩张卷积(dilation Co ...
- 企业私有源代码上传github致入侵之大疆案判决了
事件简单回顾: 1.2017年8月28日,大疆宣布“大疆威胁识别奖励计划”,最高3万美元: 2.然而在此之前,大疆农业事业部某员工将企业私有源代码上传到了github: 3.就职于大疆竞对公司Depa ...
- Java GC性能优化实战
GC优化是必要的吗? 或者更准确地说,GC优化对Java基础服务来说是必要的吗?答案是否定的,事实上GC优化对Java基础服务来说在有些场合是可以省去的,但前提是这些正在运行的Java系统,必须包含以 ...