nginx 的基本配置
安装(mac):关于brew 的问题:http://www.cnblogs.com/adouwt/p/8042201.html
brew install nginx
启动:
brew services start nginx
重启:
brew services restart nginx
停止:
brew services stop nginx
修改配置文件:
安装成功后,会在/etc/nginx 有个 nginx.conf 文件,这里做一些反向代理的操作
http {

    include       mime.types;

    default_type  application/octet-stream;

    #log_format  main  '$remote_addr - $remote_user [$time_local] "$request" '

    #                  '$status $body_bytes_sent "$http_referer" '

    #                  '"$http_user_agent" "$http_x_forwarded_for"';

    #access_log  logs/access.log  main;

    sendfile        on;

    #tcp_nopush     on;

    #keepalive_timeout  0;

    keepalive_timeout  65;

    #gzip  on;

    server {

        listen       80;      // 监听端口

      server_name  localhost;  // 本地访问的域名

      charset utf-8;      // 编码格式

      #access_log  logs/host.access.log  main;

      root   /Users/wangtao/Desktop/my-test-files;  // 访问的根路径  这个是我本地的桌面的某个文件夹的地址

      index  iindex.html iindex.htm;
     // 默认访问的文件, 我把它改了不是 index.html 主要就是想访问的是这个文件夹,不是某个默认的文件

        # 开启目录浏览

        autoindex on;

        autoindex_exact_size off;

        autoindex_localtime on;

        #error_page  404              /404.html;

        # redirect server error pages to the static page /50x.html

        #

        error_page   500 502 503 504  /50x.html;

        location = /50x.html {

            root   html;

        }

        # proxy the PHP scripts to Apache listening on 127.0.0.1:80

        #

        #location ~ \.php$ {

        #    proxy_pass   http://127.0.0.1;

        #}

        # pass the PHP scripts to FastCGI server listening on 127.0.0.1:9000

        #

        #location ~ \.php$ {

        #    root           html;

        #    fastcgi_pass   127.0.0.1:9000;

        #    fastcgi_index  index.php;

        #    fastcgi_param  SCRIPT_FILENAME  /scripts$fastcgi_script_name;

        #    include        fastcgi_params;

        #}

        # deny access to .htaccess files, if Apache's document root

        # concurs with nginx's one

        #

        #location ~ /\.ht {

        #    deny  all;

        #}

    }

    # another virtual host using mix of IP-, name-, and port-based configuration

    #

    #server {

    #    listen       8000;

    #    listen       somename:8080;

    #    server_name  somename  alias  another.alias;

    #    location / {

    #        root   html;

    #        index  index.html index.htm;

    #    }

    #}

    # HTTPS server

    #

    #server {

    #    listen       443 ssl;

    #    server_name  localhost;

    #    ssl_certificate      cert.pem;

    #    ssl_certificate_key  cert.key;

    #    ssl_session_cache    shared:SSL:1m;

    #    ssl_session_timeout  5m;

    #    ssl_ciphers  HIGH:!aNULL:!MD5;

    #    ssl_prefer_server_ciphers  on;

    #    location / {

    #        root   html;

    #        index  index.html index.htm;

    #    }

    #}

    include vhosts/*.conf;  // 这里include 的配置  意思是 同级目录下 vhost 的文件夹下所有 .conf 的配置文件

}
知道这些简单的配置知识,我们就可以进行简单的做一些反向代理了,可以在这个 vhost 下新建我们的配置文件,当然这个文件夹是可以随便取名字的。我们新建一个文件叫myself.conf
server {

  listen ; // 反向代理的时候,基本都是这个80端口,服务启动的是那个端口就代理哪个端口

  server_name test.itlab.wang;  // 访问的域名

  location / {

    root /Users/wangtao/it-cloud-lab/www-mobile-client-phone/dist; // 访问的根目录地址,我这里是webpack 打包的一个地址

    index index.html; // 默认访问的 index.html 的文件

  }

}
修改配置文件后,需要重新加载下配置nginx文件, nginx -s reload 如果这个nginx 服务是root 权限的时候,加sudo 启动 sudo nginx -s reload ,这时候需要输入计算机密码
这个命令可以按字面意思解释: 保存并重载
启动: /usr/sbin/nginx
停止: sudo nginx -s stop
linux (阿里云服务器):
安装依赖:
yum install -y epel-*

yum install -y pcre pcre-devel

yum install -y zlib zlib-devel

yum install -y openssl openssl-devel

安装nginx
yum install nginx
安装好后就是 修改配置文件 。做一些反向代理的操作
下面的就是 将9000端口的服务代理到80端口,通过访问 csa.scampus.cn 就可以看到程序了
server {
listen 80;
server_name csa.scampus.cn;
location / {
proxy_pass http://127.0.0.1:9000;
}
}
出现问题:
nginx 配置静态文件时候 访问出现403
解决:
尝试授权:
新建的静态文件夹权限不够,授权: chmod a+x /root/static 给static文件夹授权 ,nginx 静态文件配置到static的下面的
windows 安装
一. 下载
二. 修改配置文件
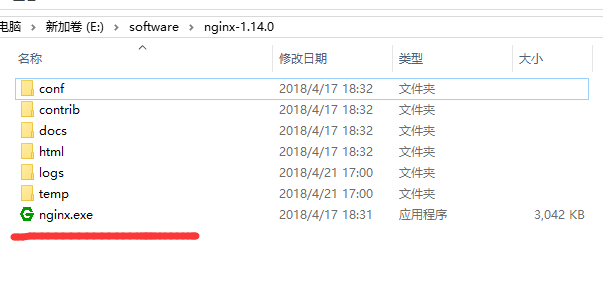
nginx配置文件在 nginx-1.14.0\conf\nginx.conf
#user  nobody;

worker_processes  ;

#error_log  logs/error.log;

#error_log  logs/error.log  notice;

#error_log  logs/error.log  info;

#pid        logs/nginx.pid;

events {

    worker_connections  ;

}

http {

    include       mime.types;

    default_type  application/octet-stream;

    #log_format  main  '$remote_addr - $remote_user [$time_local] "$request" '

    #                  '$status $body_bytes_sent "$http_referer" '

    #                  '"$http_user_agent" "$http_x_forwarded_for"';

    #access_log  logs/access.log  main;

    sendfile        on;

    #tcp_nopush     on;

    #keepalive_timeout  ;

    keepalive_timeout  ;

    #gzip  on;

    server {

        listen       ;

        server_name  localhost;

        #charset koi8-r;

        #access_log  logs/host.access.log  main;

        location / {

            root   E:\vue\vue-dist\dist;

            index  index.html index.htm;

        }

        #error_page                /.html;

        # redirect server error pages to the static page /50x.html

        #

        error_page        /50x.html;

        location = /50x.html {

            root   html;

        }

        # proxy the PHP scripts to Apache listening on 127.0.0.1:

        #

        #location ~ \.php$ {

        #    proxy_pass   http://127.0.0.1;

        #}

        # pass the PHP scripts to FastCGI server listening on 127.0.0.1:

        #

        #location ~ \.php$ {

        #    root           html;

        #    fastcgi_pass   127.0.0.1:;

        #    fastcgi_index  index.php;

        #    fastcgi_param  SCRIPT_FILENAME  /scripts$fastcgi_script_name;

        #    include        fastcgi_params;

        #}

        # deny access to .htaccess files, if Apache's document root

        # concurs with nginx's one

        #

        #location ~ /\.ht {

        #    deny  all;

        #}

    }

    # another virtual host using mix of IP-, name-, and port-based configuration

    #

    server {

        listen       ;

        server_name  localhost;

        location / {

            root   E:\mystatic_folder;

            index  iindex.html iindex.htm;

            autoindex on;        }

    }

    # HTTPS server

    #

    #server {

    #    listen        ssl;

    #    server_name  localhost;

    #    ssl_certificate      cert.pem;

    #    ssl_certificate_key  cert.key;

    #    ssl_session_cache    shared:SSL:1m;

    #    ssl_session_timeout  5m;

    #    ssl_ciphers  HIGH:!aNULL:!MD5;

    #    ssl_prefer_server_ciphers  on;

    #    location / {

    #        root   html;

    #        index  index.html index.htm;

    #    }

    #}

}
三. 启动
nginx -t -c /path/to/nginx.conf 测试nginx配置文件是否正确
关闭nginx:
nginx -s stop :快速停止nginx
nginx -s quit :完整有序的停止nginx
如果遇到报错:
bash: nginx: command not found
有可能是你再linux命令行环境下运行了windows命令,
如果你之前是允许 nginx -s reload报错, 试下 ./nginx -s reload
或者 用windows系统自带命令行工具运行
nginx 的基本配置的更多相关文章
- nginx + SSL优化配置
nginx + SSL优化配置: #http段添加如下配置项: http { ssl_prefer_server_ciphers on; #设置协商加密算法时,优先使用我们服务端的加密套件,而不是客户 ...
- nginx安装与配置
一.在线安装 ubuntu 安装 sudo apt-get install nginx 安装后文件结构为: 配置文件:/etc/nginx ,并且每台虚拟主机已经安排在 /etc/nginx/site ...
- windows下nginx安装、配置与使用(转载)
目前国内各大门户网站已经部署了Nginx,如新浪.网易.腾讯等:国内几个重要的视频分享网站也部署了Nginx,如六房间.酷6等.新近发现Nginx 技术在国内日趋火热,越来越多的网站开始部署Nginx ...
- 阿里云服务器Linux CentOS安装配置(八)nginx安装、配置、域名绑定
阿里云服务器Linux CentOS安装配置(八)nginx安装.配置.域名绑定 1.安装nginx yum -y install nginx 2.启动nginx service nginx star ...
- nginx入门篇----nginx服务器基础配置
1.nginx.conf文件结构... #全局块 events{ ... } http #http块{ ...
- 高流量站点NGINX与PHP-fpm配置优化(译)
使用Nginx搭配PHP已有7年的这份经历让我们学会如何为高流量站点优化NGINX和PHP-fpm配置. 以下正是这方面的一些提示和建议: 1. 将TCP切换为UNIX域套接字 UNIX域套接字相比T ...
- nginx反向代理配置及优化
nginx反向代理配置及优化前言: 由于服务器apache抗不住目前的并发.加上前端squid配置后,问题依然无法解决.而页面程序大部分是动态.无法使用fastcgi来处理.因此想使用nginx做为反 ...
- LVS + Keepalived + Nginx安装及配置
1.概述 上篇文章<架构设计:负载均衡层设计方案(6)——Nginx + Keepalived构建高可用的负载层>(http://blog.csdn.net/yinwenjie/artic ...
- windows下nginx+php简单配置
Nginx+php运行环境搭建 虽然目前nginx使用很广泛,在大陆主流的互联网站点或多或少会用到这个俄国人开发的小应用(占用资源小).但是我这个土鳖还是第一次自己独立配置,网上资料不少,但是还是遇到 ...
- nginx虚拟主机配置
nginx虚拟主机配置 虚拟主机的概念虚拟主机,就是把一台物理服务器划分成多个"虚拟"的服务器,每一个虚拟主机都可以有独立的域名和独立的目录nginx虚拟主机的配置nginx的 ...
随机推荐
- hdu5353 Average
Problem Description There are n soda sitting around a round table. soda are numbered from 1 to n and ...
- java多线程编程核心技术——第七章补漏拾遗
本章主要知识点: 1)线程组的使用 2)如何切换线程状态 3)SimpleDateFormat类与多线程的解决方法 4)如何处理线程异常. 这本书基本来到了终点,其实在第四章来说,核心(基础)的线程知 ...
- WebGL学习(3) - 3D模型
原文地址:WebGL学习(3) - 3D模型 相信很多人是以创建逼真酷炫的三维效果为目标而学习webGL的吧,首先我就是
- pytho核心编程2-1中代码运行问题
书籍是<python核心编程>第三版,学习环境py3.6 2-1 时间戳服务器 附源代码: from socket import * from time import ctime HOST ...
- python集合增删改查,深拷贝浅拷贝
集合 集合是无序的,不重复的数据集合,它里面的元素是可哈希的(不可变类型),但是集合本身是不可哈希(所以集合做不了字典的键)的.以下是集合最重要的两点: 去重,把一个列表变成集合,就自动去重了. 关系 ...
- 《金领简历:敲开苹果、微软、谷歌的大门》【PDF】下载
<金领简历:敲开苹果.微软.谷歌的大门>[PDF]下载链接: https://u253469.ctfile.com/fs/253469-231196331 内容简介 <金领简历:敲开 ...
- JMeter获取CSV文件行数
import java.io.BufferedReader; import java.io.FileReader; BufferedReader br=new BufferedReader(new F ...
- 消息服务框架(MSF)应用实例之分布式事务三阶段提交协议的实现
一,分布式事务简介 在当前互联网,大数据和人工智能的热潮中,传统企业也受到这一潮流的冲击,纷纷响应国家“互联网+”的战略号召,企业开始将越来越多的应用从公司内网迁移到云端和移动端,或者将之前孤立的IT ...
- [数据结构]C语言链表实现
我学数据结构的时候也是感觉很困难,当我学完后我发现了之所以困难时因为我没有系统的进行学习,而且很多教授都只是注重数据结构思想,而忽略了代码方面,为此我写了这些博文给那些试图自学数据结构的朋友,希望你们 ...
- js回到顶部------转载
[1]锚点 使用锚点链接是一种简单的返回顶部的功能实现.该实现主要在页面顶部放置一个指定名称的锚点链接,然后在页面下方放置一个返回到该锚点的链接,用户点击该链接即可返回到该锚点所在的顶部位置 [注意] ...