[UWP]使用Reveal
1. 前言
之前在 如何使用Fluent Design System 这篇文章里已经简单介绍过Reveal的用法,这篇再详细介绍其它内容。
2. 自定义RevealButtonStyle
我觉得常用ItemsControl都已经自动应用了Reveal,用就是了。
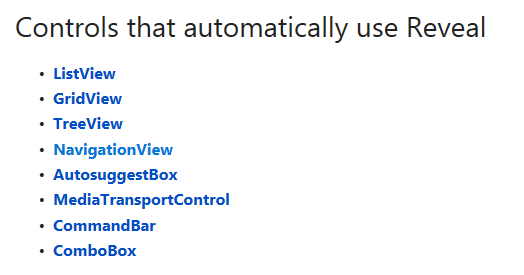
没有默认应用Reveal的控件,UWP也为其中一部分提供了可用的Reveal样式。

只需简单地应用Style即可:
<Button Content="Button Content" Style="{StaticResource ButtonRevealStyle}"/>
其它用法官方文档也有很详细的教程,一时也想不到能玩出什么花样。。
但既然Reveal最大的作用是为一组元素提示其可操作区域,那么对无边框按钮来说Reveal就很重要了。UWP没有提供无边框按钮的Reveal样式,可以自己实现一个:
<Style TargetType="Button">

    <Setter Property="Background"

            Value="{ThemeResource ButtonRevealBackground}" />

    <Setter Property="Foreground"

            Value="{ThemeResource ButtonForeground}" />

    <Setter Property="BorderBrush"

            Value="{ThemeResource ButtonRevealBorderBrush}" />

    <Setter Property="BorderThickness"

            Value="{ThemeResource ButtonRevealBorderThemeThickness}" />

    <Setter Property="Margin"

            Value="3" />

    <Setter Property="HorizontalAlignment"

            Value="Left" />

    <Setter Property="VerticalAlignment"

            Value="Center" />

    <Setter Property="FontFamily"

            Value="{ThemeResource ContentControlThemeFontFamily}" />

    <Setter Property="FontWeight"

            Value="Normal" />

    <Setter Property="FontSize"

            Value="20" />

    <Setter Property="UseSystemFocusVisuals"

            Value="True" />

    <Setter Property="FocusVisualMargin"

            Value="-3" />

    <Setter Property="Height"

            Value="50" />

    <Setter Property="Width"

            Value="50" />

    <Setter Property="Template">

        <Setter.Value>

            <ControlTemplate TargetType="Button">

                <Grid x:Name="RootGrid">

                    <VisualStateManager.VisualStateGroups>

                        <VisualStateGroup x:Name="CommonStates">

                            <VisualState x:Name="Normal">

                                <Storyboard>

                                    <PointerUpThemeAnimation Storyboard.TargetName="RootGrid" />

                                </Storyboard>

                            </VisualState>

                            <VisualState x:Name="PointerOver">

                                <VisualState.Setters>

                                    <Setter Target="RootGrid.(RevealBrush.State)"

                                            Value="PointerOver" />

                                    <Setter Target="BackgroundElement.Fill"

                                            Value="{ThemeResource ButtonRevealBackgroundPointerOver}" />

                                    <Setter Target="BackgroundElement.Stroke"

                                            Value="{ThemeResource ButtonRevealBorderBrushPointerOver}" />

                                    <Setter Target="ContentPresenter.Foreground"

                                            Value="{ThemeResource ButtonForegroundPointerOver}" />

                                </VisualState.Setters>

                                <Storyboard>

                                    <PointerUpThemeAnimation Storyboard.TargetName="RootGrid" />

                                </Storyboard>

                            </VisualState>

                            <VisualState x:Name="Pressed">

                                <VisualState.Setters>

                                    <Setter Target="RootGrid.(RevealBrush.State)"

                                            Value="Pressed" />

                                    <Setter Target="BackgroundElement.Fill"

                                            Value="{ThemeResource ButtonRevealBackgroundPressed}" />

                                    <Setter Target="BackgroundElement.Stroke"

                                            Value="{ThemeResource ButtonRevealBorderBrushPressed}" />

                                    <Setter Target="ContentPresenter.Foreground"

                                            Value="{ThemeResource ButtonForegroundPressed}" />

                                </VisualState.Setters>

                                <Storyboard>

                                    <PointerDownThemeAnimation Storyboard.TargetName="RootGrid" />

                                </Storyboard>

                            </VisualState>

                            <VisualState x:Name="Disabled">

                                <VisualState.Setters>

                                    <Setter Target="BackgroundElement.Fill"

                                            Value="{ThemeResource ButtonRevealBackgroundDisabled}" />

                                    <Setter Target="BackgroundElement.Stroke"

                                            Value="{ThemeResource ButtonRevealBorderBrushDisabled}" />

                                    <Setter Target="ContentPresenter.Foreground"

                                            Value="{ThemeResource ButtonForegroundDisabled}" />

                                </VisualState.Setters>

                            </VisualState>

                        </VisualStateGroup>

                    </VisualStateManager.VisualStateGroups>

                    <Ellipse Stroke="{TemplateBinding BorderBrush}"

                             StrokeThickness="2"

                             Fill="Transparent"

                             x:Name="BackgroundElement" />

                    <ContentPresenter x:Name="ContentPresenter"

                                      Content="{TemplateBinding Content}"

                                      ContentTransitions="{TemplateBinding ContentTransitions}"

                                      ContentTemplate="{TemplateBinding ContentTemplate}"

                                      Padding="{TemplateBinding Padding}"

                                      HorizontalContentAlignment="{TemplateBinding HorizontalContentAlignment}"

                                      VerticalContentAlignment="{TemplateBinding VerticalContentAlignment}"

                                      AutomationProperties.AccessibilityView="Raw" />

                </Grid>

            </ControlTemplate>

        </Setter.Value>

    </Setter>

</Style>
这个样式实现了一个圆形的无边框按钮。看起来各种Reveal的Brush等资源都已高度封装好,不容易自定义。实际运行起来赏心悦目,这种效果,我很喜欢:

刚开始真的觉得这是程序员为了炫技而产生的效果,实际上配合Acrylic用起来整个不仅整个UI闪闪发光(很多人就是喜欢这个效果),而且提示可操作区域的解决方案中Reveal是目前我最满意的一个。像上面那个无边框按钮,它可以比幽灵按钮更进一步的简约,但鼠标接近时又可以清清楚楚提示哪些地方是可以操作的。
3. 注意事项
Reveal虽然很美好,用起来也很多讲究,重复一次以前提过的注意事项:
- 只应该在可操作的元素上使用Reveal。
- 不要在孤立的元素上使用Reveal。
- 不要在大面积的元素上使用Reveal。
- 静态元素(例如文字和背景)不应该使用Reveal。
- 不应该让Reveal干扰重要的信息。
也就是说在List或一组按钮上使用才是正确用法。别一时兴起将SystemControlBackgroundAccentRevealBorderBrush之类的用在背景。
其它事项如Reveal没有生效及版本兼容性,可见之前的文章:如何使用Fluent Design System (下)。
4. 结语
光照一直是设计师梦寐以求的元素,但不要因为可以用就去乱用,要适可而止(讲到我自己都觉得自己很婆婆妈妈了)。
5. 参考
6. 源码
[UWP]使用Reveal的更多相关文章
- [UWP]如何使用Fluent Design System (下)
4. 兼容旧版本 FDS最常见的问题之一是如何与Fall Creators Update之前的版本兼容,其实做起来也挺简单的,ColorfulBox就实现了Creators Update与Fall C ...
- 微软最新设计Fluent Design System初体验
微软最新设计Fluent Design System初体验 本文图片不全!建议移步知乎专栏查看!!! https://zhuanlan.zhihu.com/p/30582886 原创 2017-11- ...
- [UWP]浅谈按钮设计
一时兴起想谈谈UWP按钮的设计. 按钮是UI中最重要的元素之一,可能也是用得最多的交互元素.好的按钮设计可以有效提高用户体验,构造让人眼前一亮的UI.而且按钮通常不会影响布局,小小的按钮无论怎么改也不 ...
- [UWP]如何使用Fluent Design System (上)
1. 前言 微软在Build 2017中公布了新的设计语言Fluent Design System(以下简称FDS),不过官网只是堆砌了各种华丽的词语以及一堆动画.至于在UWP中要做成怎么样,怎么做, ...
- [UWP]使用Acrylic
1. 前言 在 如何使用Fluent Design System 这篇文章里已经简单介绍过Reveal的用法,这篇再详细介绍其它内容. 自Windows 8 放弃Aero后,群众对毛玻璃回归的呼声一致 ...
- UWP 流畅设计中的光照效果(容易的 RevealBorderBrush 和不那么容易的 RevealBackgroundBrush)
在 Windows 10.0.16299 中,RevealBrush 被引入,可以实现炫酷的鼠标滑过高亮效果和点击光照.本文将告诉大家如何完整地实现这样的效果. Reveal 的效果(自带) 在微软官 ...
- [UWP]使用Acrylic(亚克力)
原文:[UWP]使用Acrylic(亚克力) 1. 前言 在 如何使用Fluent Design System 这篇文章里已经简单介绍过Reveal的用法,这篇再详细介绍其它内容. 自Windows ...
- [UWP]从头开始创建并发布一个番茄钟
1. 自己用的番茄钟自己做 在PC上我一直使用"小番茄"作为我的番茄钟软件,我把它打开后放在副显示器最大化,这样不仅可以让它尽到本分,而且还可以告诉我的同事"我正在专心工 ...
- [UWP]推荐一款很Fluent Design的bilibili UWP客户端 : 哔哩
UWP已经有好几个Bilibili的客户端,最近有多了一个: 哔哩 - Microsoft Store 作者云之幻是一位很擅长设计的UWP开发者,我也从他那里学到了很多设计方面的技巧.它还是一位Bil ...
随机推荐
- rm 命令详解
rm 作用: 删除一个目录中的一个或多个文件或目录,也可以将某个目录及下属的所有文件及子目录均删除掉, 对于连接文件只是删除整个连接文件,而保持原有文件. 注意: 使用rm 命令要格外小心,因为一旦 ...
- Disruptor并发框架(一)简介&上手demo
框架简介 Martin Fowler在自己网站上写了一篇LMAX架构的文章,在文章中他介绍了LMAX是一种新型零售金融交易平台,它能够以很低的延迟产生大量交易.这个系统是建立在JVM平台上,其核心是一 ...
- 用Python玩转微信(一)
欢迎大家访问我的个人网站<刘江的博客和教程>:www.liujiangblog.com 主要分享Python 及Django教程以及相关的博客 交流QQ群:453131687 今天偶然看见 ...
- sql sever模糊查询和聚合函数
使用is null 的时候 要确保 查询的列 可以为空! null: 01.标识 空值 02.不是0,也不是空串"" 03.只能出现在定义 允许为null的字段 04.只 ...
- dubbo源码—service export
在应用编写好服务并进行之后,dubbo负责将服务export出去,dubbo export服务的时候主要做了以下几件事: 将服务export到本地(根据scope的配置) 创建Invoker(启动本地 ...
- linux系统编程:自己动手写一个who命令
who命令的作用用于显示当前有哪些用户登录到系统. 这个命令执行的原理是读取了系统上utmp文件中记录的所有登录信息,直接显示出来的 utmp文件在哪里呢? man who的时候,在手册下面有这么一段 ...
- IDEA第八章----远程调试
大家有没有遇到相同分支的代码在本地就是没有问题的,但是到测试环境死活不能实现功能,且还不报错.通常我们的解决办法就是打日志,然后一点一点跟踪日志. 这时我们在想如果也可以按照本地一样能断点测试的程序就 ...
- iOS学习——属性引用self.xx与_xx的区别
在iOS开发过程中,我们用@proprety声明一个属性后,在代码中我们可以用self.xx与_xx来获取到这个属性.但是一直有一个疑惑,那就是这两个之间有什么区别呢?最初我一直觉得这两个之间没什么区 ...
- thinkphp->add方法错误
$group_id=$model->add($add); 以上这句代码如果执行成功,返回它存储的id,但是,会有一种情况一直返回1. 代码完全没有问题,检查数据库发现有两个主键id,删除一个就O ...
- 自学Aruba1.1-Aruba体系结构-产品线
点击返回:自学Aruba之路Aruba产品线 IP switches: 1500.2500.3500 Controllers:7200 .70x0 Series.7005 Meridian:基于ACE ...