CentOS7 无法使用yum命令,无法更新解决方法
- 前言
- 设置网卡开机自动启动
- 设置国内dns服务器系统
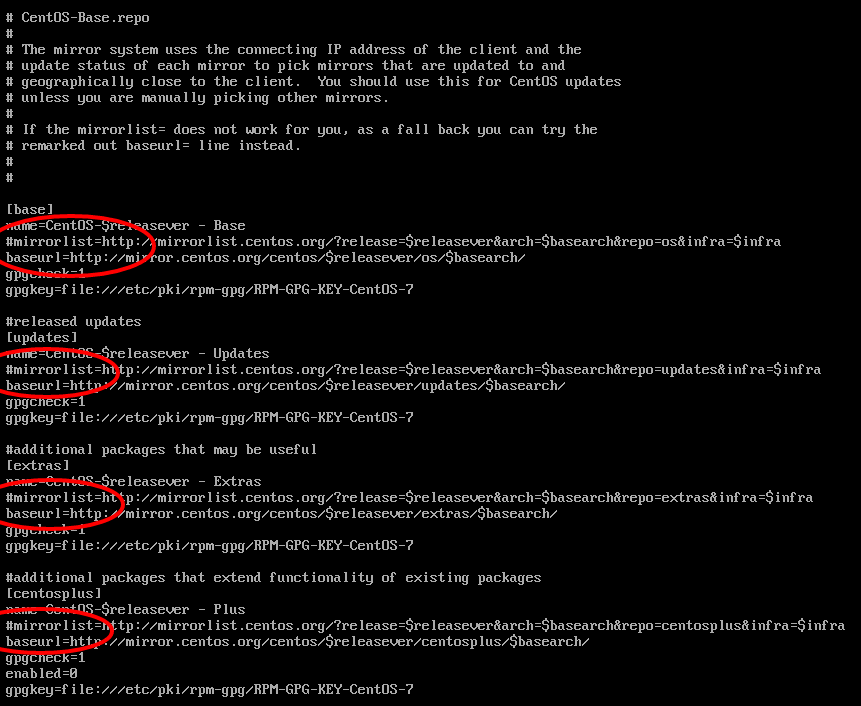
- 修改CentOS-Base.repo中的地址
- 所参考的文章地址
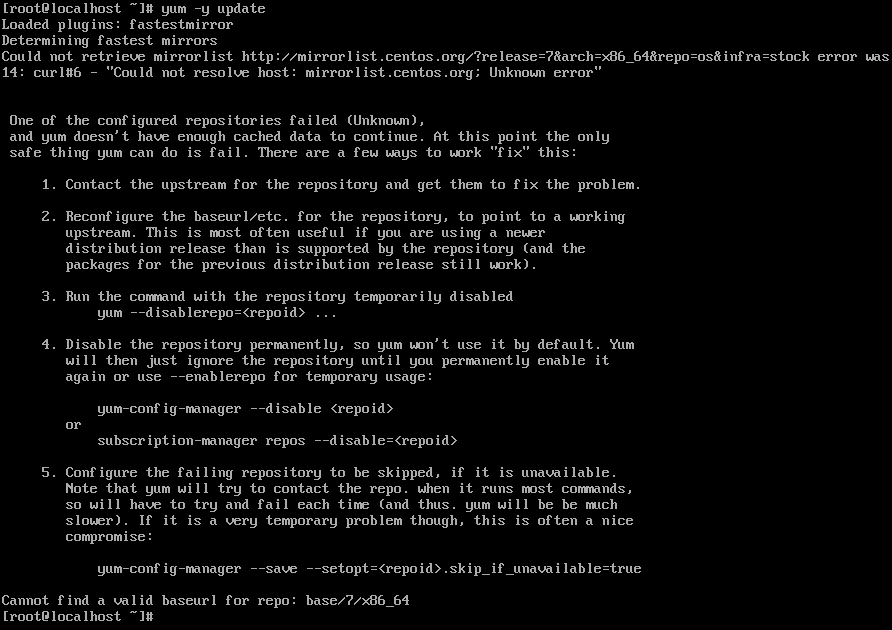
前言
 One of the configured repositories failed (Unknown),

 and yum doesn't have enough cached data to continue. At this point the only

 safe thing yum can do is fail. There are a few ways to work "fix" this:

     1. Contact the upstream for the repository and get them to fix the problem.

     2. Reconfigure the baseurl/etc. for the repository, to point to a working

        upstream. This is most often useful if you are using a newer

        distribution release than is supported by the repository (and the

        packages for the previous distribution release still work).

     3. Disable the repository, so yum won't use it by default. Yum will then

        just ignore the repository until you permanently enable it again or use

        --enablerepo for temporary usage:

            yum-config-manager --disable <repoid>

     4. Configure the failing repository to be skipped, if it is unavailable.

        Note that yum will try to contact the repo. when it runs most commands,

        so will have to try and fail each time (and thus. yum will be be much

        slower). If it is a very temporary problem though, this is often a nice

        compromise:

yum-config-manager --save --setopt=<repoid>.skip_if_unavailable=trueOne of the configured repositories failed (Unknown),
and yum doesn't have enough cached data to continue. At this point the only
safe thing yum can do is fail. There are a few ways to work "fix" this:
1. Contact the upstream for the repository and get them to fix the problem.
2. Reconfigure the baseurl/etc. for the repository, to point to a working
upstream. This is most often useful if you are using a newer
distribution release than is supported by the repository (and the
packages for the previous distribution release still work).
3. Disable the repository, so yum won't use it by default. Yum will then
just ignore the repository until you permanently enable it again or use
--enablerepo for temporary usage:
yum-config-manager --disable <repoid>
4. Configure the failing repository to be skipped, if it is unavailable.
Note that yum will try to contact the repo. when it runs most commands,
so will have to try and fail each time (and thus. yum will be be much
slower). If it is a very temporary problem though, this is often a nice
compromise:
yum-config-manager --save --setopt=<repoid>.skip_if_unavailable=true
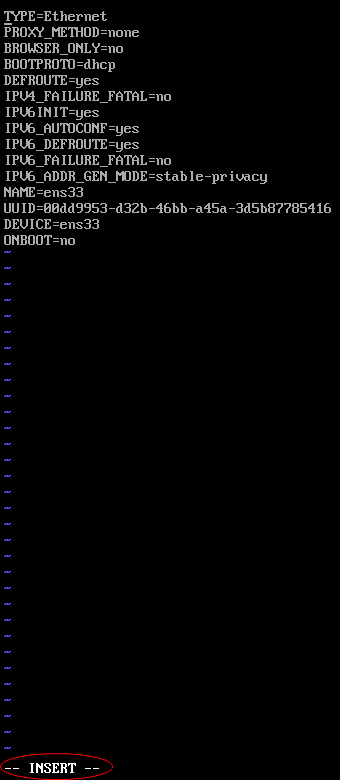
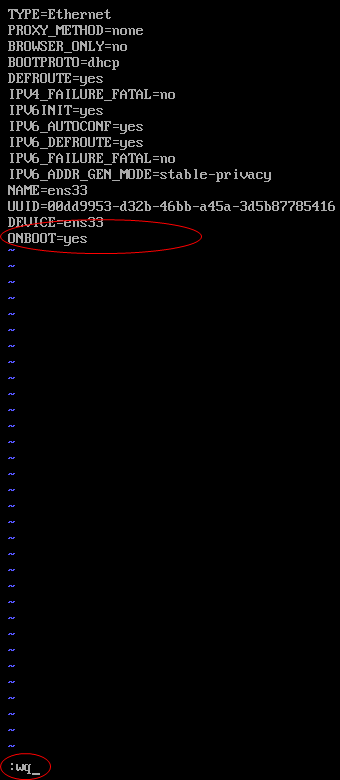
设置网卡开机自动启动

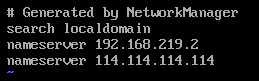
设置国内dns服务器
修改CentOS-Base.repo中的地址
参考文章
CentOS7 无法使用yum命令,无法更新解决方法的更多相关文章
- Red Hat Linux 无法使用yum命令
一:首先提供部分Red Hat 镜像下载地址 1.rhel-server-6.8-i386-dvd.iso 链接: https://pan.baidu.com/s/18VqxRgBMuAJE7Ty0H ...
- CentOS忘记密码修改方案以及centos卡在开机登录界面,命令失效的解决方法
CentOS忘记密码修改方案 应用场景 linux管理员忘记root密码,需要进行找回操作. 注意事项:本文基于CentOS7.2环境进行操作的,由于CentOS的版本之间是有差异的,继续之前请先确定 ...
- CentOS7使用yum命令安装Java1.8
CentOS7使用yum命令安装Java1.8 首先更新已安装的包:#yum update查看系统当前的java版本:#java -version==================== CentOS ...
- Linux yum操作无效的解决方法
1.没网,试着:ping www.baidu.com 如果显示没有连接的话,就说明没网,也就无法使用yum 命令. 2.ping通了的话,还是是用不了yum命令,说明是yum镜像没有了,那么就得下载一 ...
- Oracle数据导入导出imp/exp sp2-0734:未知的命令开头'imp...解决方法
Oracle数据导入导出imp/exp sp2-0734:未知的命令开头'imp...解决方法 sp2-0734:未知的命令开头'imp 忽略了剩余行默认分类 www.2cto.com 应该 ...
- 02: 安装epel 解决centos7无法使用yum安装nginx
参考网址: http://www.mamicode.com/info-detail-1671603.html 1.yum命令安装 yum install epel-release -y 2.更新数据 ...
- 安装redis 执行make命令时报错解决方法
一.未安装GCC 解决方法:执行yum install gcc-c++命令安装GCC,完成后再次执行make命令 yum install gcc-c++ Linux无法连接网络 http://www. ...
- CentOS系统找不到setup命令工具的解决方法
如果你的CentOS系统中没有setup命令,很有可能是因为你安装CentOS系统时采用了最小化安装(minimal).这时,你执行setup命令时,就会报错: 错误信息: 1[root@localh ...
- NAT模式下VMware中CentOS7无法连接外网的解决方法
故障现象 ----------------------------------------------------------------------------------------------- ...
随机推荐
- setTimeout里的函数是何时进入任务队列里的
先看一段代码 setTimeout(function () { console.log('abc') }, 1000) for (var i = 0; i <= 800000000; i++) ...
- 【16.67%】【codeforces 667C】Reberland Linguistics
time limit per test1 second memory limit per test256 megabytes inputstandard input outputstandard ou ...
- EasyUI入门:怎样引入及简单使用
或许,仅仅有当做比較大的项目的时候,才会发现封装好的东西会为程序员们带来多少方便.合作开发的时候更应该强调复用,才干更加发挥团队的优势. 今天使用了一些EasyUI,发现非常wonderful! 比方 ...
- vmware tools 的安装(Read-only file system 的解决)
安装 vmware tools 之后,才能将 vmware 创建的虚拟机以全屏的形式显示. 下载:在 vmware 软件的菜单栏点击[虚拟机],在[虚拟机]的主菜单中选择[安装 VMware Tool ...
- android点击屏幕隐藏小键盘
原文:android点击屏幕隐藏小键盘 fragment 下隐藏点击空白处隐藏小键盘 view.setOnTouchListener(new OnTouchListener() { @Overri ...
- LockWindowUpdate的函数的用法
Application.ProcessMessages;LockWindowUpdate(Self.Handle); //锁住当前窗口 LockWindowUpdate(0)//解除锁定窗口 Lock ...
- hdu - 4971 - A simple brute force problem.(最大权闭合图)
题意:n(n <= 20)个项目,m(m <= 50)个技术问题,做完一个项目能够有收益profit (<= 1000),做完一个项目必须解决对应的技术问题,解决一个技术问题须要付出 ...
- 3-2 从降级的例子 认识Polly套路
1 没有返回值的降级 Policy policy = Policy.Handle<Exception>().Fallback(() => { Console.WriteLine(&q ...
- PHP设置时区,记录日志文件的方法
关键字:PHP 时区 时间 日志 <html> <body> <?php date_default_timezone_set('Asia/Hong_Kong'); //s ...
- 用WPF窗体打造个性化界面的图片浏览器
原文:用WPF窗体打造个性化界面的图片浏览器 本文使用WPF窗体(XAML及C#)与Win Form控件(FolderBrowserDialog)结合的方式, 演示制作了一个简易漂亮的WPF图片浏览器 ...