Android(java)学习笔记175:Android进程间通讯(IPC)之AIDL
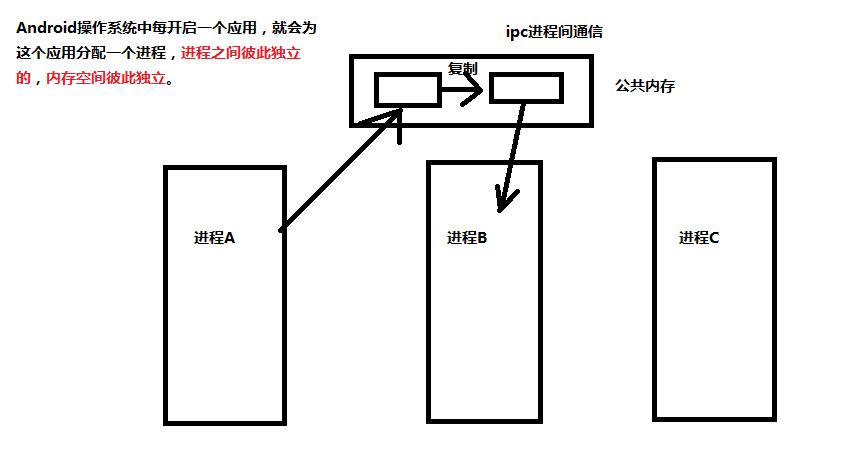
一、IPC
inter process communication 进程间通讯
二、AIDL
android interface defination language 安卓接口定义语言
满足两个进程之间 接口数据的交换(ipc)
首先我们搞清楚两个概念 远程服务和本地服务 ?
本地服务:服务的代码在应用程序工程的内部
远程服务:服务的代码在另一个应用程序的里面
三、下面通过案例说明AIDL(IPC)在远程服务中使用
1.首先创建一个Android项目,命名为"远程服务";
(1)工程一栏表如下:
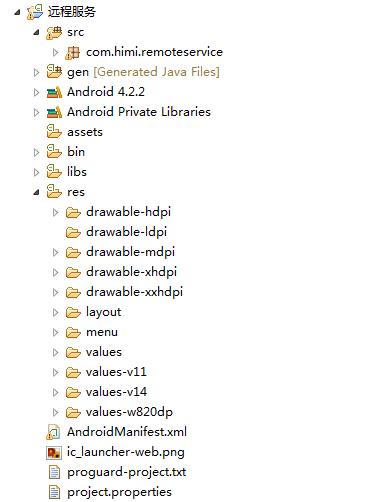
(2)既然是远程服务,我们就先创建远程服务为RemoteServiceDemo.java,同时也需要在AndroidMainfest.xml的清单文件中注册,如下:
AndroidMainfest.xml:
 <?xml version="1.0" encoding="utf-8"?>

 <manifest xmlns:android="http://schemas.android.com/apk/res/android"

     package="com.himi.remoteservice"

     android:versionCode="1"

     android:versionName="1.0" >

     <uses-sdk

         android:minSdkVersion="15"

         android:targetSdkVersion="17" />

     <application

         android:allowBackup="true"

         android:icon="@drawable/ic_launcher"

         android:label="@string/app_name"

         android:theme="@style/AppTheme" >

         <activity

             android:name=".MainActivity"

             android:label="@string/app_name" >

             <intent-filter>

                 <action android:name="android.intent.action.MAIN" />

                 <category android:name="android.intent.category.LAUNCHER" />

             </intent-filter>

         </activity>

         <service android:name="com.himi.remoteservice.RemoteServiceDemo">

             <intent-filter >

                 <action android:name="com.himi.remoteservice"/>

             </intent-filter>

         </service>

     </application>

 </manifest>
这里我们定义了service的action,这是因为倘若应用程序自己调用服务,直接使用显式意图即可,也就是如下这种形式:
Intent intent = new Intent(this,Service.class);
startActivity(intent);
但是,我们这里是自己定义的远程服务程序,也就是这个程序在远程,让本地(或者其他用户)去调用的,所以这里使用了隐式意图。
与此同时,我们编写RemoteServiceDemo.java代码如下:
 package com.himi.remoteservice;

 import android.app.Service;

 import android.content.Intent;

 import android.os.Binder;

 import android.os.IBinder;

 public class RemoteServiceDemo extends Service {

     private class MyBinder extends Binder implements IService {

         public void callMethodInService() {

             methodInservice();

         }

     }

     @Override

     public IBinder onBind(Intent intent) {

         System.out.println("远程的服务被绑定 onBind");

         return new MyBinder();

     }

     @Override

     public boolean onUnbind(Intent intent) {

         System.out.println("远程的服务被解除绑定 onUnbind");

         return super.onUnbind(intent);

     }

     @Override

     public void onCreate() {

         System.out.println("远程的服务onCreate");

         super.onCreate();

     }

     @Override

     public void onDestroy() {

         System.out.println("远程的服务onDestroy");

         super.onDestroy();

     }

     public void methodInservice() {

         System.out.println("我是远程服务里面的方法,我被调用了");

     }

 }
这里我们定义的methodInservice(),是远程服务中的方法,这也是本地用户(或者其他用户)希望调用和访问的方法。
现在我们的需求,就是可以由别的用户程序调用这个methodInservice()方法。
上面接口IService.java为如下:
 package com.himi.remoteservice;

 public interface IService {

     public void callMethodInService();

 }
(3)其他的MainActivity和activity_main布局文件我们这里没有修改
(4)这样一个远程的服务就搭建好了
工程一览表如下:
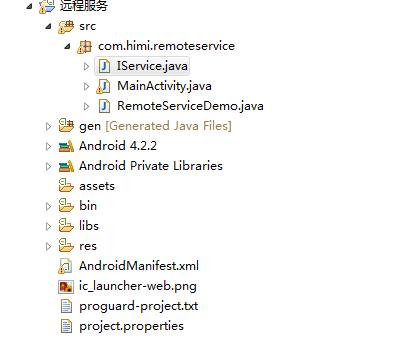
2.接下来我们再新建一个Android项目,命名为" 调用远程服务的方法 ",如下:
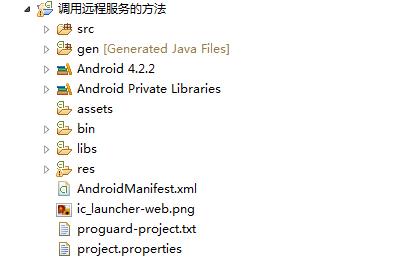
(1)项目一览表:
(2)先编写布局文件activity_main.xml,如下:
 <LinearLayout xmlns:android="http://schemas.android.com/apk/res/android"

     xmlns:tools="http://schemas.android.com/tools"

     android:layout_width="match_parent"

     android:layout_height="match_parent"

     android:orientation="vertical"

     tools:context="com.himi.remotecall.MainActivity" >

     <Button

         android:onClick="bind"

         android:layout_width="match_parent"

         android:layout_height="wrap_content"

         android:text="绑定远程服务" />

      <Button

         android:onClick="call"

         android:layout_width="match_parent"

         android:layout_height="wrap_content"

         android:text="调用远程服务方法" />

 </LinearLayout>
布局效果如下:

(3)实现一下MainActivity里面的代码,如下:
 package com.himi.remotecall;

 import android.app.Activity;

 import android.content.ComponentName;

 import android.content.Intent;

 import android.content.ServiceConnection;

 import android.os.Bundle;

 import android.os.IBinder;

 import android.view.View;

 public class MainActivity extends Activity {

     private MyConn conn;

     @Override

     protected void onCreate(Bundle savedInstanceState) {

         super.onCreate(savedInstanceState);

         setContentView(R.layout.activity_main);

     }

     /**

      * 绑定远程服务

      * @param view

      */

     public void bind(View view) {

         Intent service = new Intent();

         service.setAction("com.himi.remoteservice");

         conn = new MyConn();

         bindService(service, conn, BIND_AUTO_CREATE);

     }

     private class MyConn implements ServiceConnection {

         public void onServiceConnected(ComponentName name, IBinder service) {

         }

         public void onServiceDisconnected(ComponentName name) {

         }

     }

     public void call(View view) {

     }

 }
这个客户端访问远程服务的框架,我们搭建好了;
但是我们不能访问远端的服务方法,因为这里的
public void onServiceConnected(ComponentName name, IBinder service),这个方法是绑定服务成功的时候调用的,Service.java会反馈一个IBinder service的信息,但是我们这里并不像远程服务那样,具备这个IService的接口,通过接口类型转化,也就是如下:
IService iService = (IService)service;
iService.callMethodInService();
现在不能这样调用methodInservice()方法,因为根本就不能接收到 IBinder service
所以不能调用远程服务的methodInservice()方法。
3.该怎么办?如何调用远程服务方法?这里要利用到AIDL(IPC)
(1)第一步,我们回到"远程服务”的项目,如下:

IService.java文件在工程目录下的路径,如下:

找到这个路径如下:
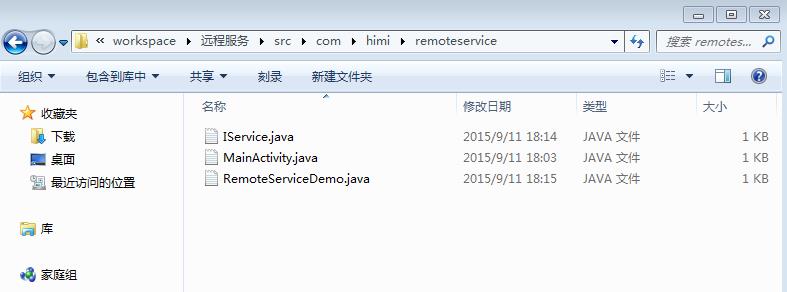
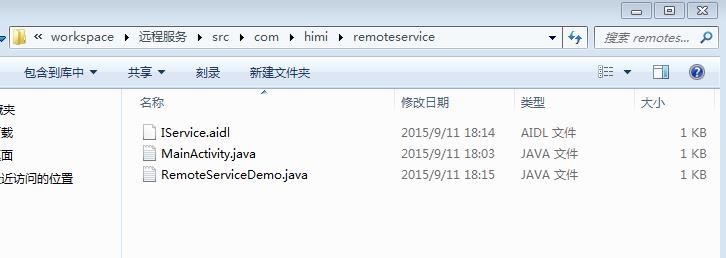
看到上面的IService.java文件了,这里我们修改它的扩展名,由java 改成 aidl,如下:
回到"远程服务"这个工程,刷新它,结果如下:
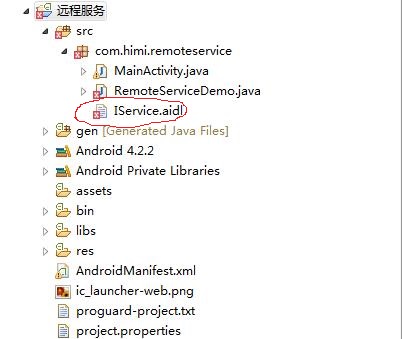
这会我们发现这里的IService.java变成了IService.aidl,但是报错了,不用担心我们慢慢修改错误;
(2)来到IService.aidl文件下,如下:
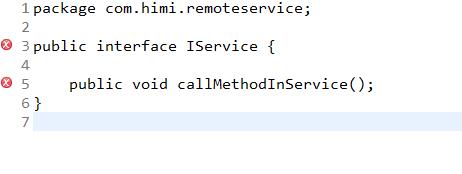
aidl作为两个进程之间的接口,当然是共有的,不是共有的无法互相通信了,这里aidl中没有权限修饰符,所以删除上下两个public,结果如下:
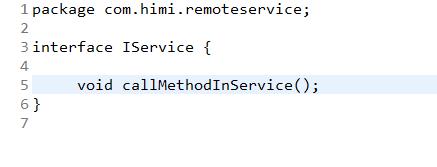
现在IService.aidl文件也就不报错了;
(3)接着,我们来到RemoteServiceDemo.java如下:
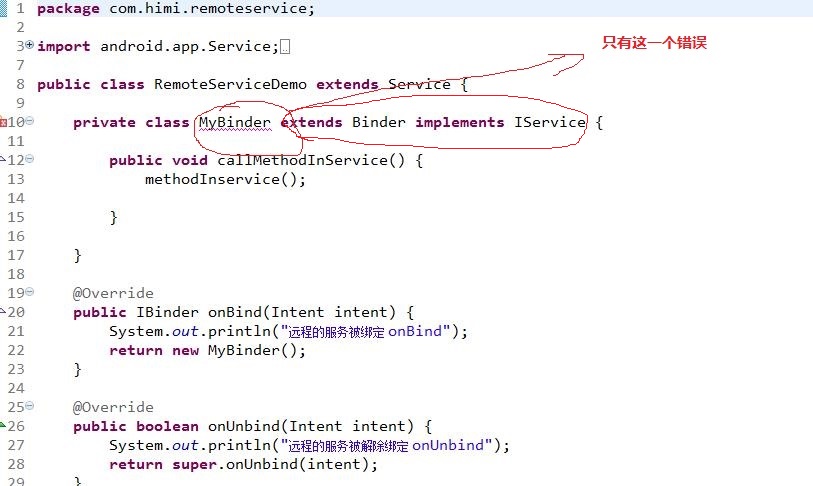
修改成如下形式,即可:
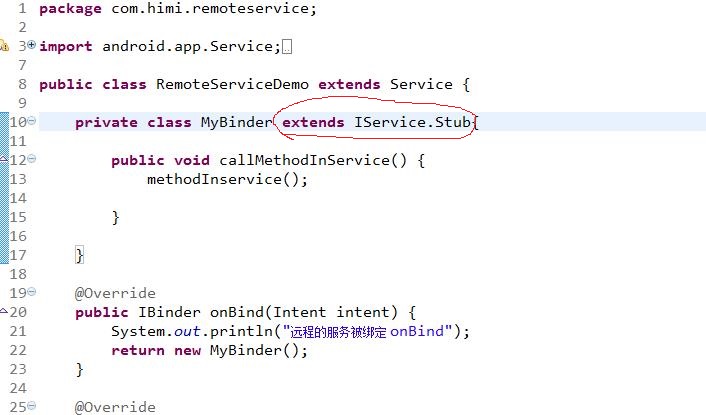
为什么这样修改?
相应我们在gen目录下,生成一个IService.java,如下:
因为IService.Stub在gen目录下生成的IService.java的实现了接口com.himi.remoteservice.IService,同时继承了android.os.Binder,如下:
 /*

  * This file is auto-generated.  DO NOT MODIFY.

  * Original file: C:\\Users\\Administrator.GDIZOK2X2LA0SQG\\workspace\\远程服务\\src\\com\\himi\\remoteservice\\IService.aidl

  */

 package com.himi.remoteservice;

 public interface IService extends android.os.IInterface

 {

 /** Local-side IPC implementation stub class. */

 public static abstract class Stub extends android.os.Binder implements com.himi.remoteservice.IService

 {

 private static final java.lang.String DESCRIPTOR = "com.himi.remoteservice.IService";

 /** Construct the stub at attach it to the interface. */

 public Stub()

 {

 this.attachInterface(this, DESCRIPTOR);

 }

 /**

  * Cast an IBinder object into an com.himi.remoteservice.IService interface,

  * generating a proxy if needed.

  */

 public static com.himi.remoteservice.IService asInterface(android.os.IBinder obj)

 {

 if ((obj==null)) {

 return null;

 }

 android.os.IInterface iin = obj.queryLocalInterface(DESCRIPTOR);

 if (((iin!=null)&&(iin instanceof com.himi.remoteservice.IService))) {

 return ((com.himi.remoteservice.IService)iin);

 }

 return new com.himi.remoteservice.IService.Stub.Proxy(obj);

 }

 @Override public android.os.IBinder asBinder()

 {

 return this;

 }

 @Override public boolean onTransact(int code, android.os.Parcel data, android.os.Parcel reply, int flags) throws android.os.RemoteException

 {

 switch (code)

 {

 case INTERFACE_TRANSACTION:

 {

 reply.writeString(DESCRIPTOR);

 return true;

 }

 case TRANSACTION_callMethodInService:

 {

 data.enforceInterface(DESCRIPTOR);

 this.callMethodInService();

 reply.writeNoException();

 return true;

 }

 }

 return super.onTransact(code, data, reply, flags);

 }

 private static class Proxy implements com.himi.remoteservice.IService

 {

 private android.os.IBinder mRemote;

 Proxy(android.os.IBinder remote)

 {

 mRemote = remote;

 }

 @Override public android.os.IBinder asBinder()

 {

 return mRemote;

 }

 public java.lang.String getInterfaceDescriptor()

 {

 return DESCRIPTOR;

 }

 @Override public void callMethodInService() throws android.os.RemoteException

 {

 android.os.Parcel _data = android.os.Parcel.obtain();

 android.os.Parcel _reply = android.os.Parcel.obtain();

 try {

 _data.writeInterfaceToken(DESCRIPTOR);

 mRemote.transact(Stub.TRANSACTION_callMethodInService, _data, _reply, 0);

 _reply.readException();

 }

 finally {

 _reply.recycle();

 _data.recycle();

 }

 }

 }

 static final int TRANSACTION_callMethodInService = (android.os.IBinder.FIRST_CALL_TRANSACTION + 0);

 }

 public void callMethodInService() throws android.os.RemoteException;

 }
(4)这样"远端服务",我们就修改好了,如下洁白无瑕:
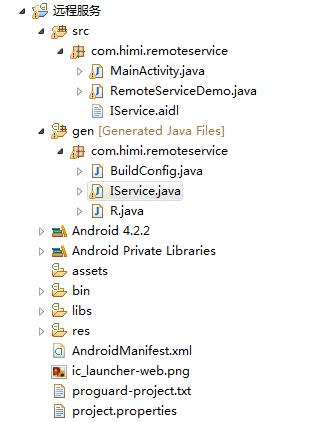
4. 接着回到"调用远程服务的方法”这个项目下:
(1)在src目录下,创建一个包名,这个包名要 和 远程服务下的RemoteServiceDemo.java的包名一致, 这里都是com.himi.remoteservice,如下:

(2)把工程"远程服务"中的IService.aidl 复制到 工程”调用远程服务的方法"的src/com.himi.remoteservice,如下:
工程”调用远程服务的方法"的gen目录下也生成了IService.java
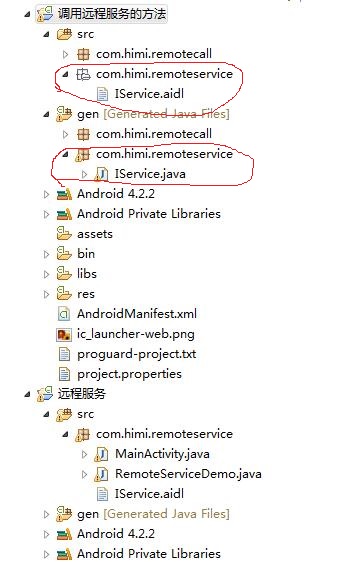
(3)回到工程”调用远程服务的方法"的MainActivity,编写代码如下:
 package com.himi.remotecall;

 import com.himi.remoteservice.IService;

 import android.app.Activity;

 import android.content.ComponentName;

 import android.content.Intent;

 import android.content.ServiceConnection;

 import android.os.Bundle;

 import android.os.IBinder;

 import android.os.RemoteException;

 import android.view.View;

 public class MainActivity extends Activity {

     private MyConn conn;

     private IService iservice;

     @Override

     protected void onCreate(Bundle savedInstanceState) {

         super.onCreate(savedInstanceState);

         setContentView(R.layout.activity_main);

     }

     /**

      * 绑定远程服务

      * @param view

      */

     public void bind(View view) {

         Intent service = new Intent();

         service.setAction("com.himi.remoteservice");

         conn = new MyConn();

         bindService(service, conn, BIND_AUTO_CREATE);

     }

     private class MyConn implements ServiceConnection {

         public void onServiceConnected(ComponentName name, IBinder service) {

             iservice = IService.Stub.asInterface(service);

         }

         public void onServiceDisconnected(ComponentName name) {

         }

     }

     public void call(View view) {

         try {

             iservice.callMethodInService();

         } catch (RemoteException e) {

             // TODO 自动生成的 catch 块

             e.printStackTrace();

         }

     }

 }
(4)布署程序到模拟器上演示:
首先布署"远端服务" 到模拟器上,如下:
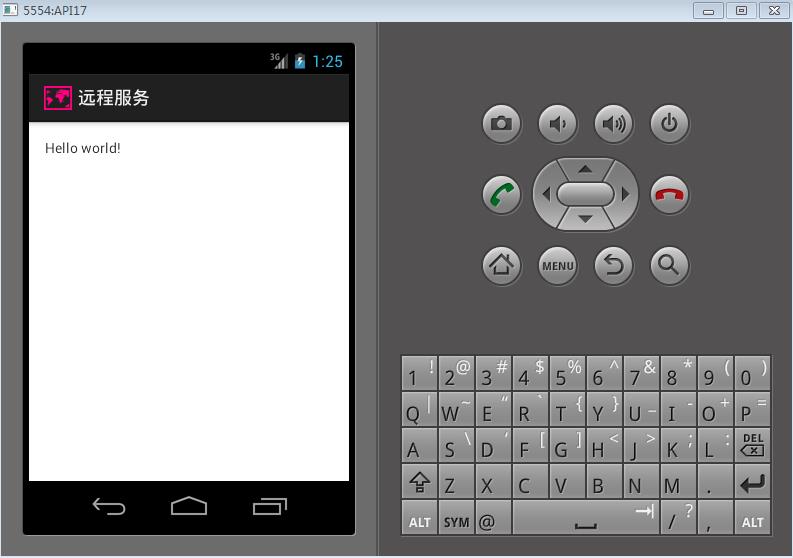
最小化 "远程服务", 然后布署" 调用远程服务的方法"到模拟器上,如下:
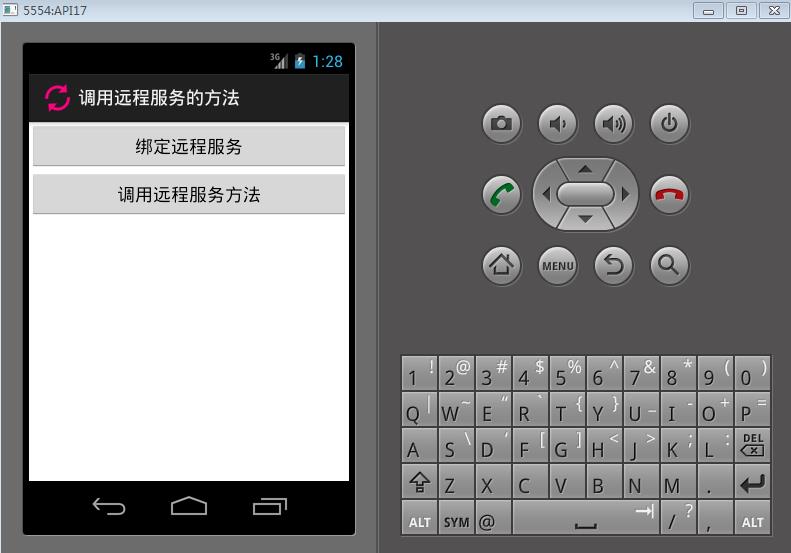
接下我们点击 按钮----绑定远程服务 ,观察logcat打印的日志,如下:
这两条日志是 工程"远程服务"中的RemoteServiceDemo中打印的;

我们再点击多次这个 按钮----调用远程服务的方法 ,在观察logcat打印的日志,如下:
这两条日志是 工程"调用远程服务的方法"中的MainActivity中call点击事件,调用工程“远程服务”中RemoteServiceDemo的methodInservice()方法打印的;如下:

四、使用 AIDL 远程服务绑定调用的步骤:
()采用bind的方法绑定开启服务。
Intent intent = new Intent();//隐式的意图
intent.setAction("action");
bindService(intent, conn, BIND_AUTO_CREATE);
() .java的接口文件改成.aidl文件,删除public 访问修饰符。
() 在工程目录gen目录下会自动编译生成IService.java的接口文件
生成的IService.java,是通过aidl文件生成的。服务的中间人想暴露什么方法,就怎么定义接口
() 远程服务代码为private class MyBinder extends IService.Stub
同时在返回代理人对象,如下:
public IBinder onBind(Intent intent){……}
()实现ServiceConnection接口里面的方法
private class MyConn implements ServiceConnection{
@Override
public void onServiceConnected(ComponentName name, IBinder service) {
IService.Sub.asInterface(service);
System.out.println("Activity,得到代理人对象");
}
注意:iService = IService.Stub.asInterface(service)
() iService.callMethodInService();
Android(java)学习笔记175:Android进程间通讯(IPC)之AIDL的更多相关文章
- Android AIDL 进行进程间通讯(IPC)
编写AIDL文件时,需要注意: 1.接口名和aidl文件名相同. 2.接口和方法前不用加访问权限修饰符 (public.private.protected等,也不能用final.static). 3. ...
- High Performance Networking in Google Chrome 进程间通讯(IPC) 多进程资源加载
小结: 1. 小文件存储于一个文件中: 在内部,磁盘缓存(disk cache)实现了它自己的一组数据结构, 它们被存储在一个单独的缓存目录里.其中有索引文件(在浏览器启动时加载到内存中),数据文件( ...
- QSharedMemory共享内存实现进程间通讯(IPC)及禁止程序多开
版权声明:若无来源注明,Techie亮博客文章均为原创. 转载请以链接形式标明本文标题和地址: 本文标题:QSharedMemory共享内存实现进程间通讯(IPC)及禁止程序多开 本文地址:h ...
- 服务 进程间通讯 IPC AIDL Parcelable 简介
1.IBinder和Binder是什么鬼? 我们来看看官方文档怎么说: 中文翻译: IBinder是远程对象的基本接口,是为了高性能而设计的轻量级远程调用机制的核心部分. 但他不仅用于远程调用,也用 ...
- 服务 远程服务 AIDL 进程间通讯 IPC
Activity aidl接口文件 package com.bqt.aidlservice; interface IBinderInterface { /* 更改文件后缀为[.aidl]去掉 ...
- Android开发学习笔记-关于Android的消息推送以及前后台切换
下面是最简单的Android的消息推送的实现方法 package com.example.shownotic; import java.util.Random; import android.supp ...
- Adnroid 源码学习笔记:Handler 线程间通讯
常见的使用Handler线程间通讯: 主线程: Handler handler = new Handler() { @Override public void handleMessage(Messag ...
- 服务 远程服务 AIDL 进程间通讯 IPC 深化
示例 aidl接口文件 package com.bqt.aidlservice.aidl; parcelable Person; package com.bqt.aidlservice.aidl; ...
- 进程间通讯IPC的几种方式总结
Linux进程间的通讯 Unix发展做出重大贡献的两大主力AT&T的贝尔实验室及BSD(加州大学伯克利分校的伯克利软件发布中心)在进程间通信方面的侧重点有所不同.前者对Unix早期的进程间通信 ...
- Java学习笔记-基础语法Ⅹ-进程线程
学习快一个月了,现在学到了黑马Java教程的300集 打印流的特点: 只负责输出数据,不负责读取数据 有自己的特有方法 字节打印流:PrintStream,使用指定的文件名创建新的打印流 import ...
随机推荐
- 【CQ18阶梯赛第一场】题解
[A-风格不统一如何写程序] 输入字符串,得到长度,对于每个字符:如果是大写,则改为:‘_’+小写:如果是‘_’则忽略‘_’,并且把后面的小写改为大写. #include<cstdio> ...
- BZOJ_1406_[AHOI2007]密码箱_枚举+数学
BZOJ_1406_[AHOI2007]密码箱_枚举+数学 Description 在一次偶然的情况下,小可可得到了一个密码箱,听说里面藏着一份古代流传下来的藏宝图,只要能破解密码就能打开箱子,而箱子 ...
- Barn Repair
链接 分析:我们不断统计相邻两个元素之间的差值,按照差值从大到小排序,在进行贪心即可 /* PROB:barn1 ID:wanghan LANG:C++ */ #include "iostr ...
- C++ set和map的简单使用
C++中的STL模板库的功能可谓相当强大.今天我们来简单说一下set和map的使用方法. 1.pair 我们先来说一下pair.pair定义在头文件<utility>中,其本身相当于一个已 ...
- 后缀自动机SAM BZOJ 2806
终于遇到了一道后缀数组不能过 一定要学SAM的题... (看了半个下午+半个上午) 现在总结一下(是给我自己总结..所以只总结了我觉得重要的 .. 看不太懂的话可以To http://blog.c ...
- javascript之常遇到的浏览器兼容问题和解决方法
转自http://www.cnblogs.com/duenyang/p/6066737.html 常遇到的关于浏览器的宽高问题: var winW=document.body.clientWidth| ...
- Watir: 应用Watir,调用AutoIT清空IE浏览器的Cookies
require 'win32ole'ai = WIN32OLE.new("AutoItX3.Control")ai.RunWait("RunDll32.exe InetC ...
- 在msys里进行复制和粘贴操作
You can copy text from an MSYS window to the clipboard simply by selecting the text you want to copy ...
- 【旧文章搬运】Windows内核常见数据结构(线程相关)
原文发表于百度空间,2008-7-24========================================================================== 线程是进程的 ...
- docker使用问题
在deepin linux操作系统中安装docker-engine后启动失败. Version: 1.12.3API version: 1.24Go version: go1.6.3 错误1: 使用d ...
