60查找nanopim1plus的HDMI为720p输出的问题
60查找nanopim1plus的HDMI为720p输出的问题
大文实验室/大文哥
壹捌陆捌零陆捌捌陆捌贰
21504965 AT qq.com
完成时间:2017/12/5 17:51
版本:V1.0
开发板:NanoPi M1 Plus/zh
SDK:Android4.4.2
1、显示器老是显示这个提示画面:
屏幕画面没有被设置成建议分辨率.
设定电脑的分辨率为1080p/60Hz.
输入分辨率:720p/50Hz
建议分辨率:1080p/60Hz
于是在Android中使用dumpsys SurfaceFlinger查看分辨率:
127|root@nanopi-h3:/ #
127|root@nanopi-h3:/ #
127|root@nanopi-h3:/ # dumpsys SurfaceFlinger
Build configuration: [sf] [libui] [libgui]
Sync configuration: [using: EGL_ANDROID_native_fence_sync]
Visible layers (count = 6)
+ LayerDim 0xb8d6ee80 (DimLayer)
Region transparentRegion (this=0xb8d6efe4, count=1)
[ 0, 0, 0, 0]
Region visibleRegion (this=0xb8d6ee88, count=1)
[ 0, 0, 0, 0]
layerStack= 0, z= 0, pos=(0,0), size=( 16, 16), crop=( 0, 0, -1, -1), isOpaque=0, invalidate=0, alpha=0xff, flags=0x00000001, tr=[1.00, 0.00][0.00, 1.00]
client=0xb8d817d0
format= 0, activeBuffer=[ 0x 0: 0, 0], queued-frames=0, mRefreshPending=0
mTexName=3 mCurrentTexture=-1
mCurrentCrop=[18,0,46,0] mCurrentTransform=0
mAbandoned=0
-BufferQueue mMaxAcquiredBufferCount=1, mDequeueBufferCannotBlock=0, default-size=[1x1], default-format=1, transform-hint=00, FIFO(0)={}
+ LayerDim 0xb8d70128 (DimLayer)
Region transparentRegion (this=0xb8d7028c, count=1)
[ 0, 0, 0, 0]
Region visibleRegion (this=0xb8d70130, count=1)
[ 0, 0, 0, 0]
layerStack= 0, z= 0, pos=(0,0), size=( 16, 16), crop=( 0, 0, -1, -1), isOpaque=0, invalidate=0, alpha=0xff, flags=0x00000001, tr=[1.00, 0.00][0.00, 1.00]
client=0xb8d817d0
format= 0, activeBuffer=[ 0x 0: 0, 0], queued-frames=0, mRefreshPending=0
mTexName=4 mCurrentTexture=-1
mCurrentCrop=[0,0,0,0] mCurrentTransform=0
mAbandoned=0
-BufferQueue mMaxAcquiredBufferCount=1, mDequeueBufferCannotBlock=0, default-size=[1x1], default-format=1, transform-hint=00, FIFO(0)={}
+ Layer 0xb8d76cb8 (com.android.systemui.ImageWallpaper)
Region transparentRegion (this=0xb8d76e1c, count=1)
[ 0, 0, 0, 0]
Region visibleRegion (this=0xb8d76cc0, count=1)
[-368, -280, 1647, 1000]
layerStack= 0, z= 21000, pos=(-368,-280), size=(2015,1280), crop=( 0, 0,2015,1280), isOpaque=1, invalidate=0, alpha=0xff, flags=0x00000000, tr=[1.00, 0.00][0.00, 1.00]
client=0xb8d5c808
format= 4, activeBuffer=[2015x1280:2016, 1], queued-frames=0, mRefreshPending=0
mTexName=6 mCurrentTexture=-1
mCurrentCrop=[0,0,0,0] mCurrentTransform=0
mAbandoned=0
-BufferQueue mMaxAcquiredBufferCount=1, mDequeueBufferCannotBlock=0, default-size=[2015x1280], default-format=4, transform-hint=00, FIFO(0)={}
+ Layer 0xb8d79d70 (com.android.launcher/com.android.launcher2.Launcher)
Region transparentRegion (this=0xb8d79ed4, count=1)
[ 0, 0, 0, 0]
Region visibleRegion (this=0xb8d79d78, count=1)
[ 0, 0, 1280, 720]
layerStack= 0, z= 21005, pos=(0,0), size=(1280, 720), crop=( 0, 0,1280, 720), isOpaque=0, invalidate=0, alpha=0xff, flags=0x00000000, tr=[1.00, 0.00][0.00, 1.00]
client=0xb8d79c70
format= 1, activeBuffer=[1280x 720:1280, 1], queued-frames=0, mRefreshPending=0
mTexName=7 mCurrentTexture=2
mCurrentCrop=[0,0,0,0] mCurrentTransform=0
mAbandoned=0
-BufferQueue mMaxAcquiredBufferCount=1, mDequeueBufferCannotBlock=0, default-size=[1280x720], default-format=1, transform-hint=00, FIFO(0)={}
[00:0xb8d78080] state=FREE , 0xb8d73cc8 [1280x 720:1280, 1]
[01:0xb8d75d58] state=FREE , 0xb8d76090 [1280x 720:1280, 1]
>[02:0xb8d5fba0] state=ACQUIRED, 0xb8d5c198 [1280x 720:1280, 1]
+ Layer 0xb8d728e0 (FocusedStackFrame)
Region transparentRegion (this=0xb8d72a44, count=1)
[ 0, 0, 0, 0]
Region visibleRegion (this=0xb8d728e8, count=1)
[ 0, 0, 0, 0]
layerStack= 0, z= 21006, pos=(0,0), size=( 1, 1), crop=( 0, 0, -1, -1), isOpaque=0, invalidate=0, alpha=0x4d, flags=0x00000001, tr=[1.00, 0.00][0.00, 1.00]
client=0xb8d817d0
format= 1, activeBuffer=[ 0x 0: 0, 0], queued-frames=0, mRefreshPending=0
mTexName=5 mCurrentTexture=-1
mCurrentCrop=[0,0,0,0] mCurrentTransform=0
mAbandoned=0
-BufferQueue mMaxAcquiredBufferCount=1, mDequeueBufferCannotBlock=0, default-size=[1x1], default-format=1, transform-hint=00, FIFO(0)={}
+ Layer 0xb8d65d10 (Sprite)
Region transparentRegion (this=0xb8d65e74, count=1)
[ 0, 0, 0, 0]
Region visibleRegion (this=0xb8d65d18, count=1)
[ 0, 0, 0, 0]
layerStack= 0, z= 281000, pos=(982.652,329.302), size=( 22, 28), crop=( 0, 0, -1, -1), isOpaque=0, invalidate=0, alpha=0x05, flags=0x00000001, tr=[1.00, 0.00][0.00, 1.00]
client=0xb8d68010
format= 1, activeBuffer=[ 22x 28: 32, 1], queued-frames=0, mRefreshPending=0
mTexName=8 mCurrentTexture=0
mCurrentCrop=[0,0,0,0] mCurrentTransform=0
mAbandoned=0
-BufferQueue mMaxAcquiredBufferCount=1, mDequeueBufferCannotBlock=0, default-size=[22x28], default-format=1, transform-hint=00, FIFO(0)={}
>[00:0xb8d632e8] state=ACQUIRED, 0xb8d55728 [ 22x 28: 32, 1]
Displays (1 entries)
+ DisplayDevice: Built-in Screen
type=0, hwcId=0, layerStack=0, (1280x 720), ANativeWindow=0xb8d59828, orient= 0 (type=00000000), flips=244, isSecure=1, secureVis=0, acquired=1, numLayers=2
v:[0,0,1280,720], f:[0,0,1280,720], s:[0,0,1280,720],transform:[[1.000,0.000,0.000][0.000,1.000,0.000][0.000,0.000,1.000]]
mAbandoned=0
-BufferQueue mMaxAcquiredBufferCount=1, mDequeueBufferCannotBlock=0, default-size=[1280x720], default-format=1, transform-hint=00, FIFO(0)={}
>[00:0xb8d5a9e8] state=ACQUIRED, 0xb8d5b600 [1280x 720:1280, 1]
[01:0xb8d84130] state=DEQUEUED, 0xb8d841e8 [1280x 720:1280, 1]
[02:0xb8d636b8] state=FREE , 0xb8d76170 [1280x 720:1280, 1]
SurfaceFlinger global state:
EGL implementation : 1.4 Linux-r4p0-00rel0
EGL_KHR_image EGL_KHR_image_base EGL_KHR_image_pixmap EGL_KHR_gl_texture_2D_image EGL_KHR_gl_texture_cubemap_image EGL_KHR_gl_renderbuffer_image EGL_KHR_fence_sync EGL_ANDROID_image_native_buffer EGL_ANDROID_recordable EGL_ANDROID_native_fence_sync EGL_ANDROID_framebuffer_target EGL_EXT_create_context_robustness EGL_ANDROID_blob_cache
GLES: ARM, Mali-400 MP, OpenGL ES 2.0
GL_EXT_debug_marker GL_OES_texture_npot GL_OES_compressed_ETC1_RGB8_texture GL_OES_standard_derivatives GL_OES_EGL_image GL_OES_depth24 GL_ARM_rgba8 GL_ARM_mali_shader_binary GL_OES_depth_texture GL_OES_packed_depth_stencil GL_EXT_texture_format_BGRA8888 GL_OES_vertex_half_float GL_EXT_blend_minmax GL_OES_EGL_image_external GL_OES_EGL_sync GL_OES_rgb8_rgba8 GL_EXT_multisampled_render_to_texture GL_EXT_discard_framebuffer GL_OES_get_program_binary GL_ARM_mali_program_binary GL_EXT_shader_texture_lod GL_EXT_robustness GL_OES_depth_texture_cube_map GL_KHR_debug
Region undefinedRegion (this=0xb8d560f4, count=1)
[ 0, 0, 0, 0]
orientation=0, canDraw=1
last eglSwapBuffers() time: 740.625000 us
last transaction time : 26.917000 us
transaction-flags : 00000000
refresh-rate : 50.000000 fps
x-dpi : 213.000000
y-dpi : 213.000000
EGL_NATIVE_VISUAL_ID : 5
gpu_to_cpu_unsupported : 0
eglSwapBuffers time: 0.000000 us
transaction time: 0.000000 us
VSYNC state: disabled
soft-vsync: disabled
numListeners=6,
events-delivered: 107
0xb8d5c7d0: count=-1
0xb8d71bd8: count=-1
0xb8d74948: count=-1
0xb8d762e8: count=-1
0xb8d7d440: count=-1
0xb8d84590: count=-1
h/w composer state:
h/w composer present and enabled
Hardware Composer state (version 1010000):
mDebugForceFakeVSync=0
Display[0] : 1280x720, xdpi=213.000000, ydpi=213.000000, refresh=20000000
numHwLayers=3, flags=00000000
type | handle | hints | flags | tr | blend | format | video_format | interlace | topFieldFirst | source crop | frame name
------------+----------+----------+----------+----+-------+----------+--------------+-----------+---------------+--------------------------+---------------------------------
HWC | b8d7b010 | 00000000 | 00000000 | 00 | 00100 | 00000001 | 00000000 | 00000000 | 00000000 | [ 368, 280, 1648, 1000] | [ 0, 0, 1280, 720] com.android.systemui.ImageWallpaper
HWC | b8d5c198 | 00000000 | 00000000 | 00 | 00105 | 00000001 | 00000000 | 00000000 | 00000000 | [ 0, 0, 1280, 720] | [ 0, 0, 1280, 720] com.android.launcher/com.android.launcher2.Launcher
FB TARGET | b8d5b600 | 00000000 | 00000000 | 00 | 00105 | 00000001 | 00000000 | 00000000 | 00000000 | [ 0, 0, 1280, 720] | [ 0, 0, 1280, 720] HWC_FRAMEBUFFER_TARGET
Allocated buffers:
0xb8d55728: 3.50 KiB | 22 ( 32) x 28 | 1 | 0x00000933
0xb8d5b600: 3600.00 KiB | 1280 (1280) x 720 | 1 | 0x00001e02
0xb8d5c198: 3600.00 KiB | 1280 (1280) x 720 | 1 | 0x00000f02
0xb8d73cc8: 3600.00 KiB | 1280 (1280) x 720 | 1 | 0x00000f02
0xb8d76090: 3600.00 KiB | 1280 (1280) x 720 | 1 | 0x00000f02
0xb8d76170: 3600.00 KiB | 1280 (1280) x 720 | 1 | 0x00001e02
0xb8d7b010: 10080.00 KiB | 2015 (2016) x 1280 | 1 | 0x00000f02
0xb8d841e8: 3600.00 KiB | 1280 (1280) x 720 | 1 | 0x00001e02
Total allocated (estimate): 31683.50 KB
root@nanopi-h3:/ #
root@nanopi-h3:/ #
root@nanopi-h3:/ #
最终确认分辨率为720p。(也可以使用360手机助手连接之后截图看屏幕分辨率!Total Control竟然无法使用!)
2、拷贝当前开发板的sys_config.fex(尝试1080p60Hz失败)
兼容版本
W:\nanopi_h3_bsp\lichee\tools\pack\chips\sun8iw7p1\configs\nanopi-h3\board\sys_config_nanopi-air.fex
W:\nanopi_h3_bsp\lichee\tools\pack\chips\sun8iw7p1\configs\nanopi-h3\board\sys_config_nanopi-m1.fex
W:\nanopi_h3_bsp\lichee\tools\pack\chips\sun8iw7p1\configs\nanopi-h3\board\sys_config_nanopi-m1-plus.fex
W:\nanopi_h3_bsp\lichee\tools\pack\chips\sun8iw7p1\configs\nanopi-h3\board\sys_config_nanopi-neo.fex
W:\nanopi_h3_bsp\lichee\tools\pack\chips\sun8iw7p1\configs\nanopi-h3\sys_config.fex
[boot_disp]
advert_disp = 0
auto_hpd = 1
output_type = 4
hdmi_channel = 0
hdmi_mode = 4
cvbs_channel = 1
cvbs_mode = 11
output_full = 1
hdmi_mode_check = 1
[disp_init]
disp_init_enable = 1
disp_mode = 0
screen0_output_type = 3
screen0_output_mode = 5
screen1_output_type = 2
screen1_output_mode = 14
fb0_format = 0
fb0_width = 0
fb0_height = 0
fb1_format = 0
fb1_width = 0
fb1_height = 0
[hdmi_para]
hdmi_used = 1
hdmi_power = "vcc-hdmi-18"
修改为:
;全志A20的屏幕参数:
;-------------------------------------------------------------------------------
;disp init configuration
;
;disp_mode (0:screen0<screen0,fb0> 1:screen1<screen1,fb0> 2:two_diff_screen_diff_contents<screen0,screen1,fb0,fb1>
; 3:two_same_screen_diff_contets<screen0,screen1,fb0> 4:two_diff_screen_same_contents<screen0,screen1,fb0>)
;screenx_output_type (0:none; 1:lcd; 2:tv; 3:hdmi; 4:vga)
;screenx_output_mode (used for tv/hdmi output, 0:480i 1:576i 2:480p 3:576p 4:720p50 5:720p60 6:1080i50 7:1080i60 8:1080p24 9:1080p50 10:1080p60 11:pal 14:ntsc)
;screenx_output_mode (used for vga output, 0:1680*1050 1:1440*900 2:1360*768 3:1280*1024 4:1024*768 5:800*600 6:640*480 10:1920*1080 11:1280*720)
;fbx format (4:RGB655 5:RGB565 6:RGB556 7:ARGB1555 8:RGBA5551 9:RGB888 10:ARGB8888 12:ARGB4444)
;fbx pixel sequence (0:ARGB 1:BGRA 2:ABGR 3:RGBA) --- 0 for linux, 2 for android
;lcd0_bright (lcd0 init bright,the range:[0,256],default:197
;lcd1_bright (lcd1 init bright,the range:[0,256],default:197
;-------------------------------------------------------------------------------
[boot_disp]
advert_disp = 0
auto_hpd = 1
output_type = 4
hdmi_channel = 0
;hdmi_mode = 4
hdmi_mode = 10
cvbs_channel = 1
cvbs_mode = 11
output_full = 1
hdmi_mode_check = 1
[disp_init]
disp_init_enable = 1
disp_mode = 0
screen0_output_type = 3
;screen0_output_mode = 5
screen0_output_mode = 10
screen1_output_type = 3
screen1_output_mode = 10
fb0_format = 0
fb0_width = 0
fb0_height = 0
fb1_format = 0
fb1_width = 0
fb1_height = 0
[hdmi_para]
hdmi_used = 1
hdmi_power = "vcc-hdmi-18"
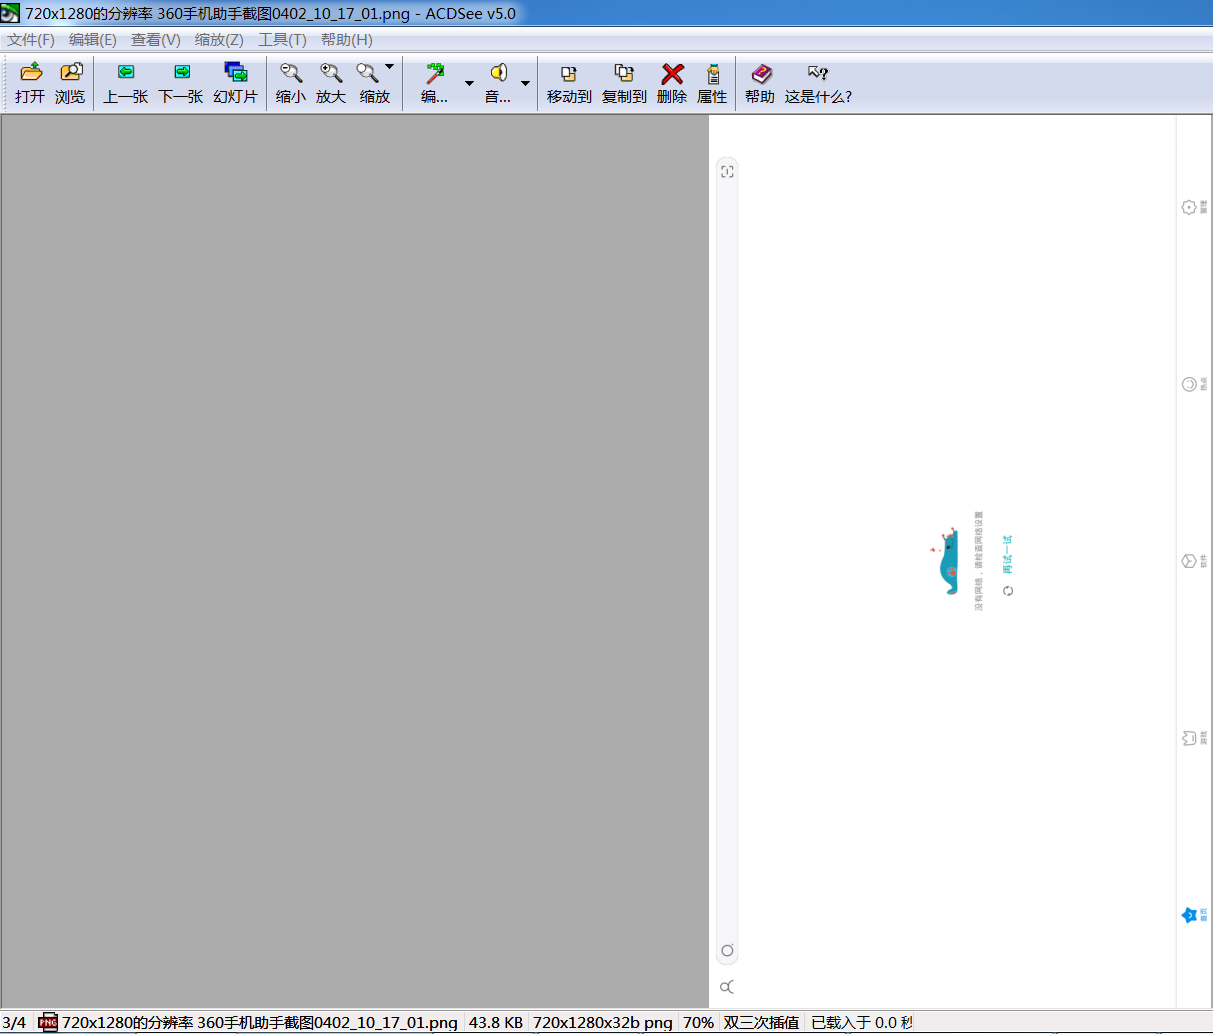
通过360手机助手截屏,确认只有720p:
60查找nanopim1plus的HDMI为720p输出的问题的更多相关文章
- 61配置nanopim1plus的HDMI为1080p输出
61配置nanopim1plus的HDMI为1080p输出 大文实验室/大文哥 壹捌陆捌零陆捌捌陆捌贰 21504965 AT qq.com 完成时间:2018/4/4 10:21 版本:V1.1 开 ...
- 60使用nanopim1plus查看HDMI显示分辨率的问题(分色排版)V1.0
60使用nanopim1plus查看HDMI显示分辨率的问题(分色排版)V1.0 大文实验室/大文哥 壹捌陆捌零陆捌捌陆捌贰 21504965 AT qq.com 完成时间:2017/12/5 17: ...
- Linux 在文档中查找满足条件的行并输出到文件:
Linux 在文档中查找满足条件的行并输出到文件: 文件名称: dlog.log 输出文件: out.log 1.满足一个条件(包含 “TJ” )的语句: grep “TJ” dlog. ...
- linux中文件查找、whereis、which、输出命令
1.文件查找(find):find是最常⻅和最强⼤的查找命令 格式:find / -name 文件名,比如:find / -name mysql. (1).模糊查找:*是代表所有的,?是代表⼀个字 ...
- laravel的firstOrCreate的作用:先查找表,如果有就输出数据,如果没有就插入数据
public function zan(Post $post){ $param=[ 'user_id'=>\Auth::id(), 'post_id'=>$post->id ] Za ...
- 用 string 进行插入、替代、查找输出下标等操作
string s; s = "; string::iterator it; it = s.begin();//让s指向第一个元素 cout << s; system(" ...
- Linux查找命令:grep,awk,sed
grep grep (global search regular expression(RE) and print out the line,全面搜索正则表达式并把行打印出来)是一种强大的文本搜索工具 ...
- linux下find查找命令用法
Linux下find命令在目录结构中搜索文件,并执行指定的操作.Linux下find命令提供了相当多的查找条件,功能很强大.由于find具有强大的功能,所以它的选项也很多,其中大部分选项都值得我们花时 ...
- [转载] linux查找目录下的所有文件中是否含有某个字符串
链接自 http://blog.sina.com.cn/s/blog_691a84f301015khx.html,并略加修订. 查找目录下的所有文件中是否含有某个字符串 find .|xargs gr ...
随机推荐
- Redis官方文档资源
官方文档: 如果要深入研究时,官方提供的文档是最权威的. 英文: https://redis.io/documentation 中文: http://www.redis.cn/documentatio ...
- delphi异步选择模型编程TCP
Server端: unit U_FrmServer; interface uses Windows, Messages, SysUtils, Classes, Graphics, Controls, ...
- 微信小程序 wafer2框架摘要
微信小程序 wafer2框架摘要 帮助文档:https://github.com/tencentyun/wafer2-startup/wiki 使用了knex.js进行数据库交互,使用了koa.js进 ...
- iOS开发——高级篇——线程同步、线程依赖、线程组
前言 对于iOS开发中的网络请求模块,AFNet的使用应该是最熟悉不过了,但你是否把握了网络请求正确的完成时机?本篇文章涉及线程同步.线程依赖.线程组等专用名词的含义,若对上述名词认识模糊,可先进行查 ...
- mysql_connect 等待时间长,修改连接地址为127.0.0.1即可
程序搬家后,运行非常慢分析流程: 1.外网的等待时间太长 2.内容等待时间也很长 3.断点查到仅仅一句 mysql_connect ("localhost",***,***)就要1 ...
- ionic2 在执行ionic serve后报 build dev failed: Cannot set property 'fileSystem' of null
ionic2 真是烦人,因为环境依赖的问题还有网络的问题,不知砸的,项目放一段事件不运行就会出问题. 我一开始是 用 cnpm install安装的依赖,其中也报了错, 然后执行 ionic serv ...
- go8---函数function
package main /* 函数function Go 函数 不支持 嵌套.重载和默认参数. 但支持以下特性: 无需声明原型(C语言在使用函数之前需要声明函数的原型).不定长度变参.多返回值.命名 ...
- Python Tricks(十九)—— switch 的实现
python 原生语法不支持 switch,体现了 Python 大道至简的设计思路,有时为了避免啰嗦的 if elif等判断语句,我们可以用字典来代替 switch 的各分支,也即建立表达式和操作的 ...
- D1 模拟赛
T1 note 数组开小 菜的真实 60分 题目大意: 一个字符串 分成若干段 使每段内都没有重复的字符 求最少的段数 思路: 可以贪心 #include<iostream> #inclu ...
- flask装饰器route实现路由功能理解
利用装饰器的方式实现了路由函数,这是一个十分简单清晰的结构,而这个功能的实现,有着很大的学习意义 @appweb.route('index',methods=['GET','POST'] def st ...