吴裕雄 python深度学习与实践(18)
# coding: utf-8 import time
import numpy as np
import tensorflow as tf
import _pickle as pickle
import matplotlib.pyplot as plt def unpickle(filename):
import pickle
with open(filename, 'rb') as fo:
data = pickle.load(fo, encoding='latin1')
return data def onehot(labels):
n_sample = len(labels)
n_class = max(labels) + 1
onehot_labels = np.zeros((n_sample, n_class))
onehot_labels[np.arange(n_sample), labels] = 1
return onehot_labels # 训练数据集
data1 = unpickle('F:\\TensorFlow_deep_learn\\cifar-10-batches-py\\data_batch_1')
data2 = unpickle('F:\\TensorFlow_deep_learn\\cifar-10-batches-py\\data_batch_2')
data3 = unpickle('F:\\TensorFlow_deep_learn\\cifar-10-batches-py\\data_batch_3')
data4 = unpickle('F:\\TensorFlow_deep_learn\\cifar-10-batches-py\\data_batch_4')
data5 = unpickle('F:\\TensorFlow_deep_learn\\cifar-10-batches-py\\data_batch_5') X_train = np.concatenate((data1['data'], data2['data'], data3['data'], data4['data'], data5['data']), axis=0)
y_train = np.concatenate((data1['labels'], data2['labels'], data3['labels'], data4['labels'], data5['labels']), axis=0)
y_train = onehot(y_train)
# 测试数据集
test = unpickle('F:\\TensorFlow_deep_learn\\cifar-10-batches-py\\test_batch')
X_test = test['data'][:5000, :]
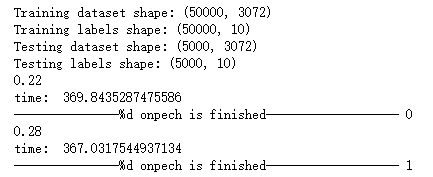
y_test = onehot(test['labels'])[:5000, :] print('Training dataset shape:', X_train.shape)
print('Training labels shape:', y_train.shape)
print('Testing dataset shape:', X_test.shape)
print('Testing labels shape:', y_test.shape) with tf.device('/cpu:0'): # 模型参数
learning_rate = 1e-3
training_iters = 200
batch_size = 50
display_step = 5
n_features = 3072 # 32*32*3
n_classes = 10
n_fc1 = 384
n_fc2 = 192 # 构建模型
x = tf.placeholder(tf.float32, [None, n_features])
y = tf.placeholder(tf.float32, [None, n_classes]) W_conv = {
'conv1': tf.Variable(tf.truncated_normal([5, 5, 3, 32], stddev=0.0001)),
'conv2': tf.Variable(tf.truncated_normal([5, 5, 32, 64],stddev=0.01)),
'fc1': tf.Variable(tf.truncated_normal([8*8*64, n_fc1], stddev=0.1)),
'fc2': tf.Variable(tf.truncated_normal([n_fc1, n_fc2], stddev=0.1)),
'fc3': tf.Variable(tf.truncated_normal([n_fc2, n_classes], stddev=0.1))
}
b_conv = {
'conv1': tf.Variable(tf.constant(0.0, dtype=tf.float32, shape=[32])),
'conv2': tf.Variable(tf.constant(0.1, dtype=tf.float32, shape=[64])),
'fc1': tf.Variable(tf.constant(0.1, dtype=tf.float32, shape=[n_fc1])),
'fc2': tf.Variable(tf.constant(0.1, dtype=tf.float32, shape=[n_fc2])),
'fc3': tf.Variable(tf.constant(0.0, dtype=tf.float32, shape=[n_classes]))
} x_image = tf.reshape(x, [-1, 32, 32, 3])
# 卷积层 1
conv1 = tf.nn.conv2d(x_image, W_conv['conv1'], strides=[1, 1, 1, 1], padding='SAME')
conv1 = tf.nn.bias_add(conv1, b_conv['conv1'])
conv1 = tf.nn.relu(conv1)
# 池化层 1
pool1 = tf.nn.avg_pool(conv1, ksize=[1, 3, 3, 1], strides=[1, 2, 2, 1], padding='SAME')
# LRN层,Local Response Normalization
norm1 = tf.nn.lrn(pool1, 4, bias=1.0, alpha=0.001/9.0, beta=0.75)
# 卷积层 2
conv2 = tf.nn.conv2d(norm1, W_conv['conv2'], strides=[1, 1, 1, 1], padding='SAME')
conv2 = tf.nn.bias_add(conv2, b_conv['conv2'])
conv2 = tf.nn.relu(conv2)
# LRN层,Local Response Normalization
norm2 = tf.nn.lrn(conv2, 4, bias=1.0, alpha=0.001/9.0, beta=0.75)
# 池化层 2
pool2 = tf.nn.avg_pool(norm2, ksize=[1, 3, 3, 1], strides=[1, 2, 2, 1], padding='SAME')
reshape = tf.reshape(pool2, [-1, 8*8*64]) fc1 = tf.add(tf.matmul(reshape, W_conv['fc1']), b_conv['fc1'])
fc1 = tf.nn.relu(fc1)
# 全连接层 2
fc2 = tf.add(tf.matmul(fc1, W_conv['fc2']), b_conv['fc2'])
fc2 = tf.nn.relu(fc2)
# 全连接层 3, 即分类层
fc3 = tf.nn.softmax(tf.add(tf.matmul(fc2, W_conv['fc3']), b_conv['fc3'])) # 定义损失
loss = tf.reduce_mean(tf.nn.softmax_cross_entropy_with_logits(logits=fc3, labels=y))
optimizer = tf.train.GradientDescentOptimizer(learning_rate=learning_rate).minimize(loss)
# 评估模型
correct_pred = tf.equal(tf.argmax(fc3, 1), tf.argmax(y, 1))
accuracy = tf.reduce_mean(tf.cast(correct_pred, tf.float32)) init = tf.global_variables_initializer() with tf.Session() as sess:
sess.run(init)
c = []
total_batch = int(X_train.shape[0] / batch_size)
# for i in range(training_iters):
start_time = time.time()
for i in range(200):
for batch in range(total_batch):
batch_x = X_train[batch*batch_size : (batch+1)*batch_size, :]
batch_y = y_train[batch*batch_size : (batch+1)*batch_size, :]
sess.run(optimizer, feed_dict={x: batch_x, y: batch_y})
acc = sess.run(accuracy, feed_dict={x: batch_x, y: batch_y})
print(acc)
c.append(acc)
end_time = time.time()
print('time: ', (end_time - start_time))
start_time = end_time
print("---------------%d onpech is finished-------------------",i)
print("Optimization Finished!") # Test
test_acc = sess.run(accuracy, feed_dict={x: X_test, y: y_test})
print("Testing Accuracy:", test_acc)
plt.plot(c)
plt.xlabel('Iter')
plt.ylabel('Cost')
plt.title('lr=%f, ti=%d, bs=%d, acc=%f' % (learning_rate, training_iters, batch_size, test_acc))
plt.tight_layout()
plt.savefig('F:\\cnn-tf-cifar10-%s.png' % test_acc, dpi=200)
吴裕雄 python深度学习与实践(18)的更多相关文章
- 吴裕雄 python深度学习与实践(17)
import tensorflow as tf from tensorflow.examples.tutorials.mnist import input_data import time # 声明输 ...
- 吴裕雄 python深度学习与实践(16)
import struct import numpy as np import matplotlib.pyplot as plt dateMat = np.ones((7,7)) kernel = n ...
- 吴裕雄 python深度学习与实践(15)
import tensorflow as tf import tensorflow.examples.tutorials.mnist.input_data as input_data mnist = ...
- 吴裕雄 python深度学习与实践(14)
import numpy as np import tensorflow as tf import matplotlib.pyplot as plt threshold = 1.0e-2 x1_dat ...
- 吴裕雄 python深度学习与实践(13)
import numpy as np import matplotlib.pyplot as plt x_data = np.random.randn(10) print(x_data) y_data ...
- 吴裕雄 python深度学习与实践(12)
import tensorflow as tf q = tf.FIFOQueue(,"float32") counter = tf.Variable(0.0) add_op = t ...
- 吴裕雄 python深度学习与实践(11)
import numpy as np from matplotlib import pyplot as plt A = np.array([[5],[4]]) C = np.array([[4],[6 ...
- 吴裕雄 python深度学习与实践(10)
import tensorflow as tf input1 = tf.constant(1) print(input1) input2 = tf.Variable(2,tf.int32) print ...
- 吴裕雄 python深度学习与实践(9)
import numpy as np import tensorflow as tf inputX = np.random.rand(100) inputY = np.multiply(3,input ...
随机推荐
- 浏览器打开aspx文件 ,提示:XML 解析错误:找不到根元素
在使用VS2013这个IDE创建aspx文件后,在浏览器打开后居然发现了以下错误:XML 解析错误:找不到根元素 详细查看里面的信息,发现了这么一个链接位置:http://localh ...
- 调整Eclipse中代码字体字号
Window-->preferences-->general-->appearence-->Colors and fonts中的Basic节点选text font,Edit一下
- mi家前端面经
已经好久没想写面经了……菜鸟面到生无可恋. 1.用CSS实现下面圆形 答案: <!DOCTYPE html> <html> <head> <style typ ...
- 创建maven工程的时候卡死的解决办法
在idea的maven,runner,properties里面添加 archetypeCatalog=internal
- Office365维护命令
# 会议室日历相关# 日语:予定表# 汉语:日历Set-MailboxFolderPermission -Identity "XXXXX@qq.com:\Calendar" -ac ...
- python基础知识1---python相关介绍
阅读目录 一 编程与编程语言 二 编程语言分类 三 主流编程语言介绍 四 python介绍 五 安装python解释器 六 第一个python程序 七 变量 八 用户与程序交互 九 基本数据类型 十 ...
- mac下常用命令
常用命令 ls 查看当前目录下的文件 cd 进入某目录 . cd - 跳转回前一目录 . cd ~ 进入当前用户个人目录 pwd 输出当前所在路径 mkdir 新建文件夹. touch 新建文件 fi ...
- three.js:使用createMultiMaterialObject创建的多材质对象无法使用光线跟踪Raycaster选中
创建多材质对象: var loader = new THREE.DDSLoader(); var map = loader.load('../assets/textures/Mountains_arg ...
- Java文件File类学习总结
java.io.File类 代表文件和目录,在开发中,读取文件.生成文件.删除文件.修改文件的属性都会用到该类. 常见构造方法: public File(String pathName){} 以pat ...
- Python【每日一问】11
问: 请简单说明一下以下代码的执行过程以及最终的输出结果 def fib(max): n, a, b = 0, 0, 1 while n < max: yield b a, b = b, a + ...