Centos7中yum安装jdk及配置环境变量
系统版本
[root@localhost ~]# cat /etc/redhat-release

CentOS Linux release 7.4.1708 (Core)
#安装之前先查看一下有无系统自带jdk
rpm -qa |grep java

rpm -qa |grep jdk

rpm -qa |grep gcj
#如果有就使用批量卸载命令
rpm -qa | grep java | xargs rpm -e --nodeps
直接yum安装1.8.0版本openjdk
[root@localhost ~]# yum install java-1.8.0-openjdk* -y
查看版本
[root@localhost ~]# java -version

openjdk version "1.8.0_161"

OpenJDK Runtime Environment (build 1.8.0_161-b14)

OpenJDK 64-Bit Server VM (build 25.161-b14, mixed mode)
默认jre jdk 安装路径是/usr/lib/jvm 下面
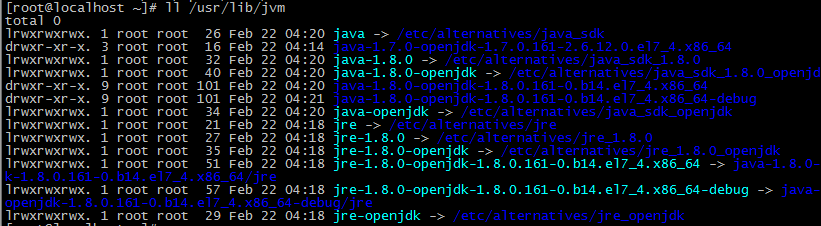
JAVA_HOME指向一个含有java可执行程序的目录(一般是在 bin/java中,此目录为/bin/java的上级目录),用cd 命令进入到 jvm下唯一的一个目录中 java-1.8.0-openjdk-1.8.0.161-0.b14.el7_3.x86_64,发现其下目录为
[root@localhost ~]# export JAVA_HOME=/usr/lib/jvm/<span style="font-family: Arial;">jre-1.8.0-openjdk-1.8.0.121-0.b13.el7_3.x86_64</span>
#当前用户生效的配置
vim ~/.bashrc

#在文件底部加入下面一句

export  JAVA_HOME=/usr/lib/jvm/jre-1.8.0-openjdk-1.8.0.161-0.b14.el7_4.x86_64
#如果使所有用户生效的配置
vim /etc/profile
#set java environment
export JAVA_HOME=/usr/lib/jvm/java

export CLASSPATH=.:$JAVA_HOME/lib/dt.jar:$JAVA_HOME/lib/tools.jar:$JAVA_HOME/jre/lib/rt.jar

export PATH=$PATH:$JAVA_HOME/bin
#使得配置生效
. /etc/profile
#查看变量
[root@localhost ~]#  echo $JAVA_HOME

/usr/lib/jvm/jre-1.8.0-openjdk-1.8.0.161-0.b14.el7_4.x86_64
[root@localhost ~]# echo $CLASSPATH
.:/usr/lib/jvm/jre-1.8.0-openjdk-1.8.0.161-0.b14.el7_4.x86_64/lib/dt.jar:/usr/lib/jvm/jre-1.8.0-openjdk-1.8.0.161-0.b14.el7_4.x86_64/lib/tools.jar
javac 和java 命令都有输出设置提示就表示安装和环境配置成功了
案例如下:
[root@instanc]# yum -y list java
Loaded plugins: langpacks, versionlock
Error: No matching Packages to list
[root@instanc]# rpm -qa |grep java
[root@instanc]# rpm -qa |grep jdk
[root@instanc]# rpm -qa |grep gcj
[root@instanc]# yum install java-1.8.0-openjdk* -y
--------中间有安装过程,最后complete
Complete!
[root@instance-ozyu8y37 ~]# java -version
openjdk version "1.8.0_191"
OpenJDK Runtime Environment (build 1.8.0_191-b12)
OpenJDK 64-Bit Server VM (build 25.191-b12, mixed mode)
[root@instance-ozyu8y37 ~]# cd /usr
[root@instance-ozyu8y37 usr]# ls
bin etc games include lib lib64 libexec local sbin share src tmp
[root@instance-ozyu8y37 usr]# cd lib
[root@instance-ozyu8y37 lib]# cd jvm
[root@instance-ozyu8y37 jvm]# ls
java
java-1.8.0
java-1.8.0-openjdk
java-1.8.0-openjdk-1.8.0.191.b12-0.el7_5.x86_64
java-1.8.0-openjdk-1.8.0.191.b12-0.el7_5.x86_64-debug
java-openjdk
jre
jre-1.8.0
jre-1.8.0-openjdk
jre-1.8.0-openjdk-1.8.0.191.b12-0.el7_5.x86_64
jre-1.8.0-openjdk-1.8.0.191.b12-0.el7_5.x86_64-debug
jre-openjdk
[root@instance-ozyu8y37 jvm]# vim /etc/profile # 配置java环境变量(所有用户)
# System wide environment and startup programs, for login setup
# Functions and aliases go in /etc/bashrc
# It's NOT a good idea to change this file unless you know what you
# are doing. It's much better to create a custom.sh shell script in
# /etc/profile.d/ to make custom changes to your environment, as this
# will prevent the need for merging in future updates.
pathmunge () {
case ":${PATH}:" in
*:"$1":*)
;;
*)
if [ "$2" = "after" ] ; then
PATH=$PATH:$1
else
PATH=$1:$PATH
fi
esac
}
if [ -x /usr/bin/id ]; then
if [ -z "$EUID" ]; then
# ksh workaround
EUID=`/usr/bin/id -u`
UID=`/usr/bin/id -ru`
fi
USER="`/usr/bin/id -un`"
LOGNAME=$USER
MAIL="/var/spool/mail/$USER"
fi
#set java environment
export JAVA_HOME=/usr/lib/jvm/java
export CLASSPATH=.:$JAVA_HOME/lib/dt.jar:$JAVA_HOME/lib/tools.jar:$JAVA_HOME/jre/lib/rt.jar
export PATH=$PATH:$JAVA_HOME/bin
# Path manipulation
if [ "$EUID" = "0" ]; then
pathmunge /usr/sbin
pathmunge /usr/local/sbin
else
pathmunge /usr/local/sbin after
pathmunge /usr/sbin after
fi
HOSTNAME=`/usr/bin/hostname 2>/dev/null`
HISTSIZE=1000
if [ "$HISTCONTROL" = "ignorespace" ] ; then
export HISTCONTROL=ignoreboth
else
export HISTCONTROL=ignoredups
fi
export PATH USER LOGNAME MAIL HOSTNAME HISTSIZE HISTCONTROL
# By default, we want umask to get set. This sets it for login shell
# Current threshold for system reserved uid/gids is 200
# You could check uidgid reservation validity in
# /usr/share/doc/setup-*/uidgid file
if [ $UID -gt 199 ] && [ "`/usr/bin/id -gn`" = "`/usr/bin/id -un`" ]; then
umask 002
else
umask 022
fi
for i in /etc/profile.d/*.sh /etc/profile.d/sh.local ; do
if [ -r "$i" ]; then
if [ "${-#*i}" != "$-" ]; then
. "$i"
else
. "$i" >/dev/null
fi
fi
done
unset i
unset -f pathmunge
setterm -blank 0 &> /dev/null
setterm -powersave off &> /dev/null
setterm -powerdown 0 &> /dev/null
ulimit -SHn 65535
[root@instance-ozyu8y37 jvm]# . /etc/profile #使配置生效
[root@instance-ozyu8y37 jvm]# java
Usage: java [-options] class [args...]
(to execute a class)
or java [-options] -jar jarfile [args...]
(to execute a jar file)
where options include:
-d32 use a 32-bit data model if available
-d64 use a 64-bit data model if available
-server to select the "server" VM
The default VM is server.
-cp <class search path of directories and zip/jar files>
-classpath <class search path of directories and zip/jar files>
A : separated list of directories, JAR archives,
and ZIP archives to search for class files.
-D<name>=<value>
set a system property
-verbose:[class|gc|jni]
enable verbose output
-version print product version and exit
-version:<value>
Warning: this feature is deprecated and will be removed
in a future release.
require the specified version to run
-showversion print product version and continue
-jre-restrict-search | -no-jre-restrict-search
Warning: this feature is deprecated and will be removed
in a future release.
include/exclude user private JREs in the version search
-? -help print this help message
-X print help on non-standard options
-ea[:<packagename>...|:<classname>]
-enableassertions[:<packagename>...|:<classname>]
enable assertions with specified granularity
-da[:<packagename>...|:<classname>]
-disableassertions[:<packagename>...|:<classname>]
disable assertions with specified granularity
-esa | -enablesystemassertions
enable system assertions
-dsa | -disablesystemassertions
disable system assertions
-agentlib:<libname>[=<options>]
load native agent library <libname>, e.g. -agentlib:hprof
see also, -agentlib:jdwp=help and -agentlib:hprof=help
-agentpath:<pathname>[=<options>]
load native agent library by full pathname
-javaagent:<jarpath>[=<options>]
load Java programming language agent, see java.lang.instrument
-splash:<imagepath>
show splash screen with specified image
See http://www.oracle.com/technetwork/java/javase/documentation/index.html for more details.
[root@instance-ozyu8y37 jvm]# javac
Usage: javac <options> <source files>
where possible options include:
-g Generate all debugging info
-g:none Generate no debugging info
-g:{lines,vars,source} Generate only some debugging info
-nowarn Generate no warnings
-verbose Output messages about what the compiler is doing
-deprecation Output source locations where deprecated APIs are used
-classpath <path> Specify where to find user class files and annotation processors
-cp <path> Specify where to find user class files and annotation processors
-sourcepath <path> Specify where to find input source files
-bootclasspath <path> Override location of bootstrap class files
-extdirs <dirs> Override location of installed extensions
-endorseddirs <dirs> Override location of endorsed standards path
-proc:{none,only} Control whether annotation processing and/or compilation is done.
-processor <class1>[,<class2>,<class3>...] Names of the annotation processors to run; bypasses default discovery process
-processorpath <path> Specify where to find annotation processors
-parameters Generate metadata for reflection on method parameters
-d <directory> Specify where to place generated class files
-s <directory> Specify where to place generated source files
-h <directory> Specify where to place generated native header files
-implicit:{none,class} Specify whether or not to generate class files for implicitly referenced files
-encoding <encoding> Specify character encoding used by source files
-source <release> Provide source compatibility with specified release
-target <release> Generate class files for specific VM version
-profile <profile> Check that API used is available in the specified profile
-version Version information
-help Print a synopsis of standard options
-Akey[=value] Options to pass to annotation processors
-X Print a synopsis of nonstandard options
-J<flag> Pass <flag> directly to the runtime system
-Werror Terminate compilation if warnings occur
@<filename> Read options and filenames from file
至此jdk安装成功
Centos7中yum安装jdk及配置环境变量的更多相关文章
- LInux_CentosOS中yum安装jdk及配置环境变量
系统版本 [root@localhost ~]# cat /etc/redhat-release CentOS Linux release 7.6.1810 (Core) #安装之前先查看一下有无系统 ...
- window 远程在Linux(centOS7.0)上安装JDK以及配置环境变量
本人是在windows 7 上安装了虚拟机,虚拟机安装的是linux(centOS7.0)系统现在在Windows 上安装SecureCRT 远程虚拟机的linux系统,安装JDK以及配置环境变量. ...
- Ubuntu安装JDK与配置环境变量
Ubuntu14.04安装JDK与配置环境变量 工具/原料 Ubuntu14.04系统 方法/步骤 先从Oracle官网下载JDK.先选择同意按钮,然后根据自己的系统下载相应版本.我的系统 ...
- 安装JDK并配置环境变量以及Hello World
摘要:本文主要说明在Windows环境下JDK的安装,以及安装完成之后环境变量的配置,并通过DOS运行简单的Java程序. 安装JDK 说明 SDK:软件开发工具包(Software Developm ...
- Linux环境下安装JDK并配置环境变量
首先查看是否已经安装了JDK并配置环境变量. [root@dhcc_plat opt]# java -version -bash: java: command not found [root@dhcc ...
- Java入门——在Linux环境下安装JDK并配置环境变量
Java入门——在Linux环境下安装JDK并配置环境变量 摘要:本文主要说明在Linux环境下JDK的安装,以及安装完成之后环境变量的配置. 使用已下载的压缩包进行安装 下载并解压 在Java的官网 ...
- 安装jdk并配置环境变量
安装jdk并配置环境变量 安装jdk 点击访问官网 https://www.oracle.com/downloads/或直接下载 https://www.jdkdownload.com/ 推荐使用后面 ...
- Linux安装JDK并配置环境变量
Linux - 安装jdk并配置环境变量 1. 前往JDK官网, 地址:https://www.oracle.com/java/technologies/downloads/ 复制下载链接 2. ...
- centos6.5下安装jdk并配置环境变量
链接: https://blog.csdn.net/wawawawawawaa/article/details/81158943 以下链接供参考: https://blog.csdn.net/Bugg ...
随机推荐
- 洛谷P4841 城市规划(多项式求逆)
传送门 这题太珂怕了……如果是我的话完全想不出来…… 题解 //minamoto #include<iostream> #include<cstdio> #include< ...
- Java | 基础归纳 | Gson && Json
JSON: JSON就是一种数据的组织形式,用于数据传输. 地址:https://mvnrepository.com/artifact/net.sf.json-lib/json-lib/2.4 Mav ...
- LightOj 1088 - Points in Segments (二分枚举)
题目链接: http://www.lightoj.com/volume_showproblem.php?problem=1088 题目描述: 给出一个n位数升序排列的数列,然后q个查询,每个查询问指定 ...
- [BZOJ3916/WOJ3815]Friends
题目链接: 传送门 题目: Description 有三个好朋友喜欢在一起玩游戏,A君写下一个字符串S,B君将其复制一遍得到T,C君在T的任意位置(包括首尾)插入一个字符得到U.现在你得到了U,请你找 ...
- 从一个n位数中选出m位按顺序组成新数并使其最大 || Erasing and Winning UVA - 11491
就是从n位数中取出n-d个数字按顺序排成一排组成一个新数使得其最大 算法: 从前往后确定每一位.找第i位时,要求后面留下d-i位的空间, 因此第i位应该从第i-1位原来位置+1到第d+i位寻找 用线段 ...
- Mysql选择合适的存储引擎
Myisam:默认的mysql插件式存储引擎.如果应用是以读操作和插入操作为主,只有很少的更新和删除操作,并且对事务的完整性.并发性要求不是很高,那么选择这个存储引擎是非常合适的.Myisam是在we ...
- CF765C Table Tennis Game 2
题意: Misha and Vanya have played several table tennis sets. Each set consists of several serves, each ...
- XDroidMvp 轻量级的Android MVP快速开发框架
XDroidMvp是XDroidAndroid快速开发框架的MVP版本,其使用方式类似于XDroid,大部分源码也来自XDroid. XDroidMvp主要会有这些特性: 无需写Contract! 无 ...
- Android Platform Version 和 API Level对照
Platform Version API Level VERSION_CODE Notes Android 5.1 22 LOLLIPOP_MR1 Platform Highlights Androi ...
- vb6如何调用delphi DLL中的函数并返回字符串?
1,问题描述 最近发现vb6调用delphi DLL中的函数并返回字符串时出现问题,有时正常,有时出现?号,有时干脆导致VB程序退出 -- :: 将金额数字转化为可读的语音文字:1转化为1元 ???? ...