15_activity生命周期方法说明

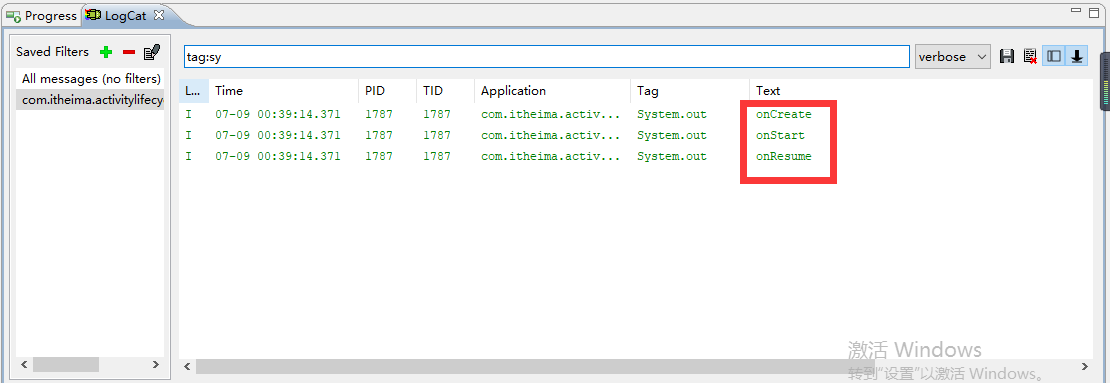
现在是可见并且可以被操作,所以现在是一个前台的Activity。
按一下Home键,它是先onPause然后onStop.

现在它就处于一个Stop停止的状态。停止的状态如果我当前内存够用的情况下,它会依然保留当前的所有信息。

如果按多一次Home键还可以把这个东西重新给调出来。
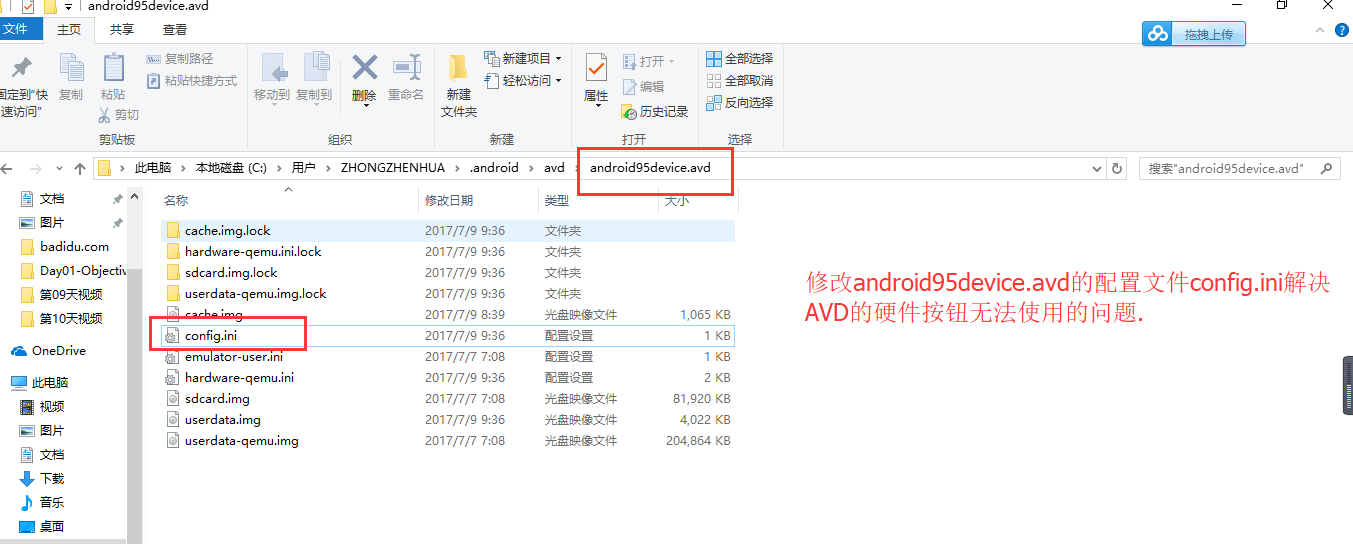


应该不是实体键设置的问题,是操作的问题。按住电脑的home键再点击安卓虚拟设备/模拟器AVD里面的实体键按钮home就可以把当前正在运行的进程调出来。记住电脑的小键盘num lock要打开才可以使用小键盘的home键。
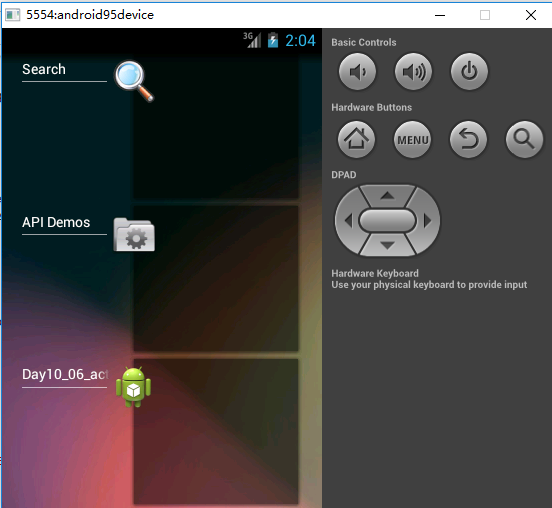
只不过这个时候它是不可见不可被操作。但是所有的状态还会被保存。
重新再把进程调出来运行,这个时候它又处于可见并且可以被操作的状态。这些就是这些生命周期方法。
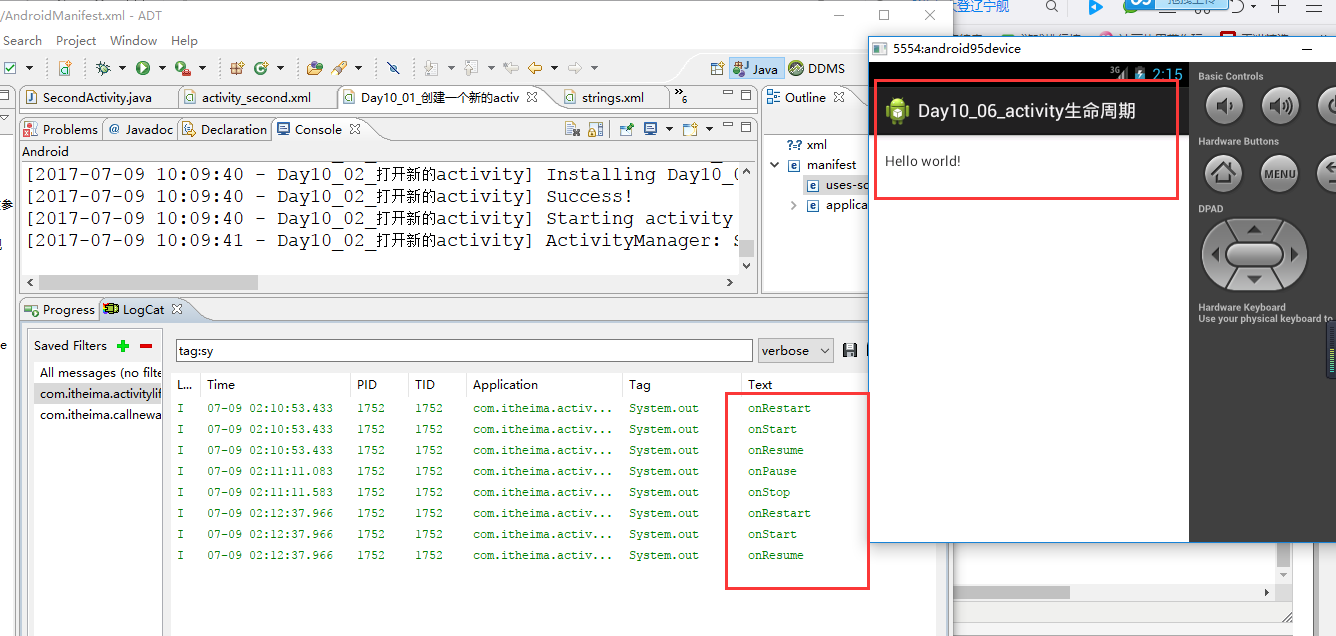
什么时候它会处于onPause?
为了能让它正确打开必须在清单文件里面声明第二个Activity。怎么能让它处于一个暂停的状态,创建一个透明的应用。
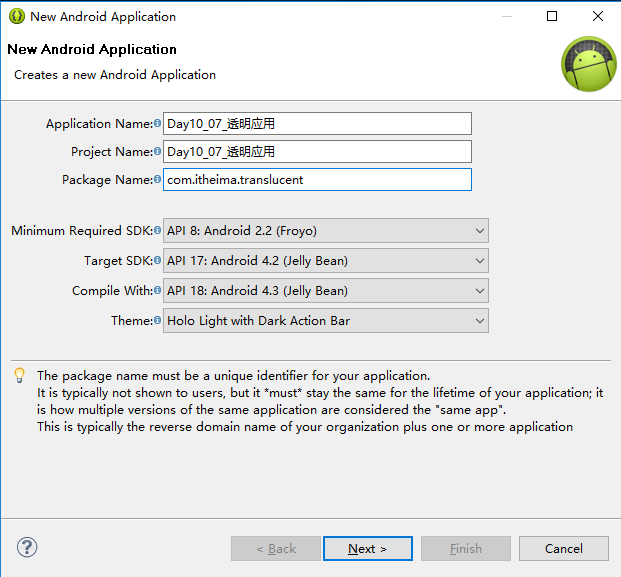
Theme.Translucent.NoTitleBar.Fullscreen
透明主题没有标题栏并且是全屏的。
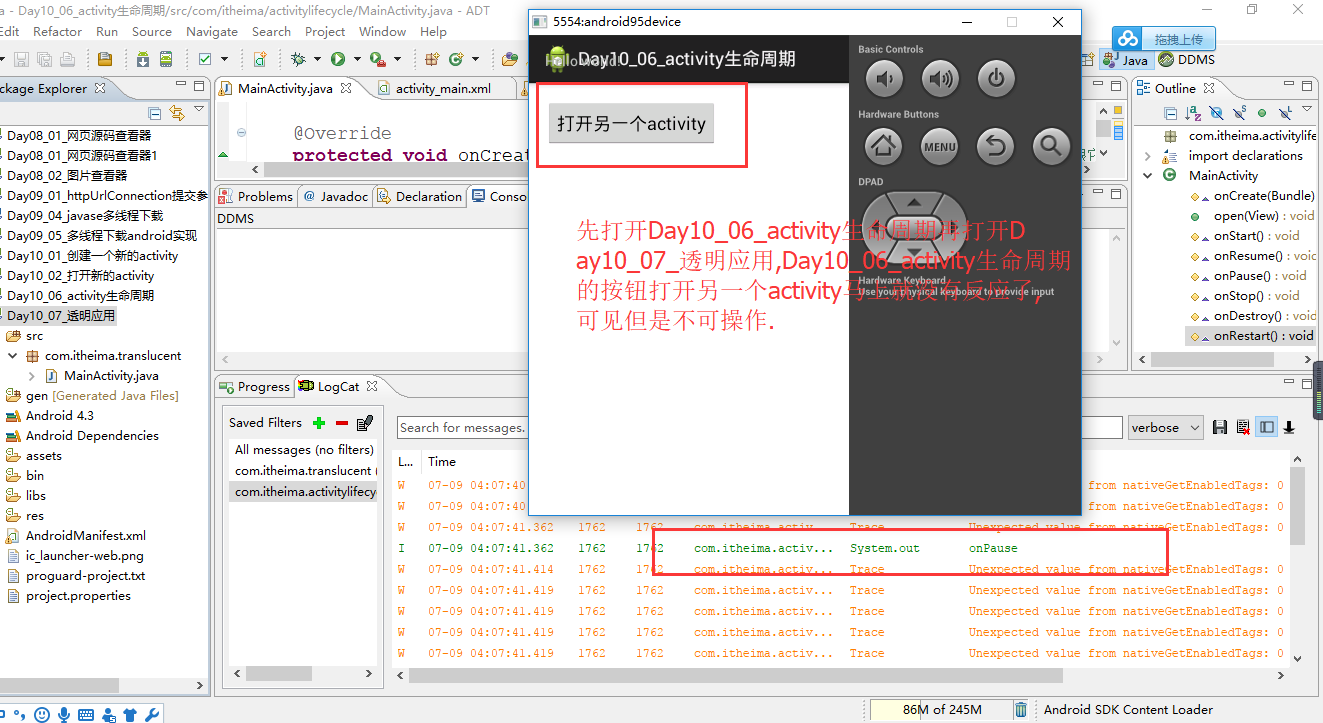
先运行Day10_06_activity生命周期再运行Day10_07_透明应用,Day10_06_activity生命周期这个应用可见但是不可操作,它处于暂停状态onPause了.
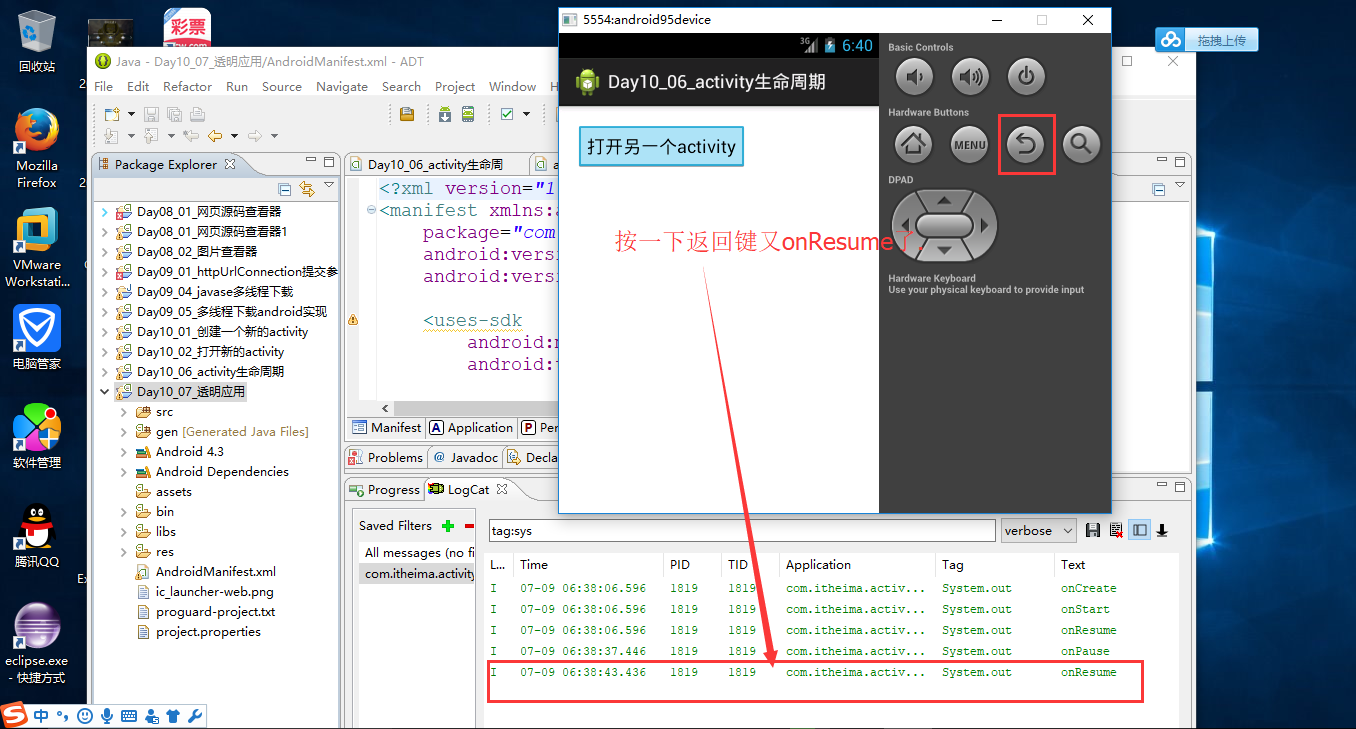
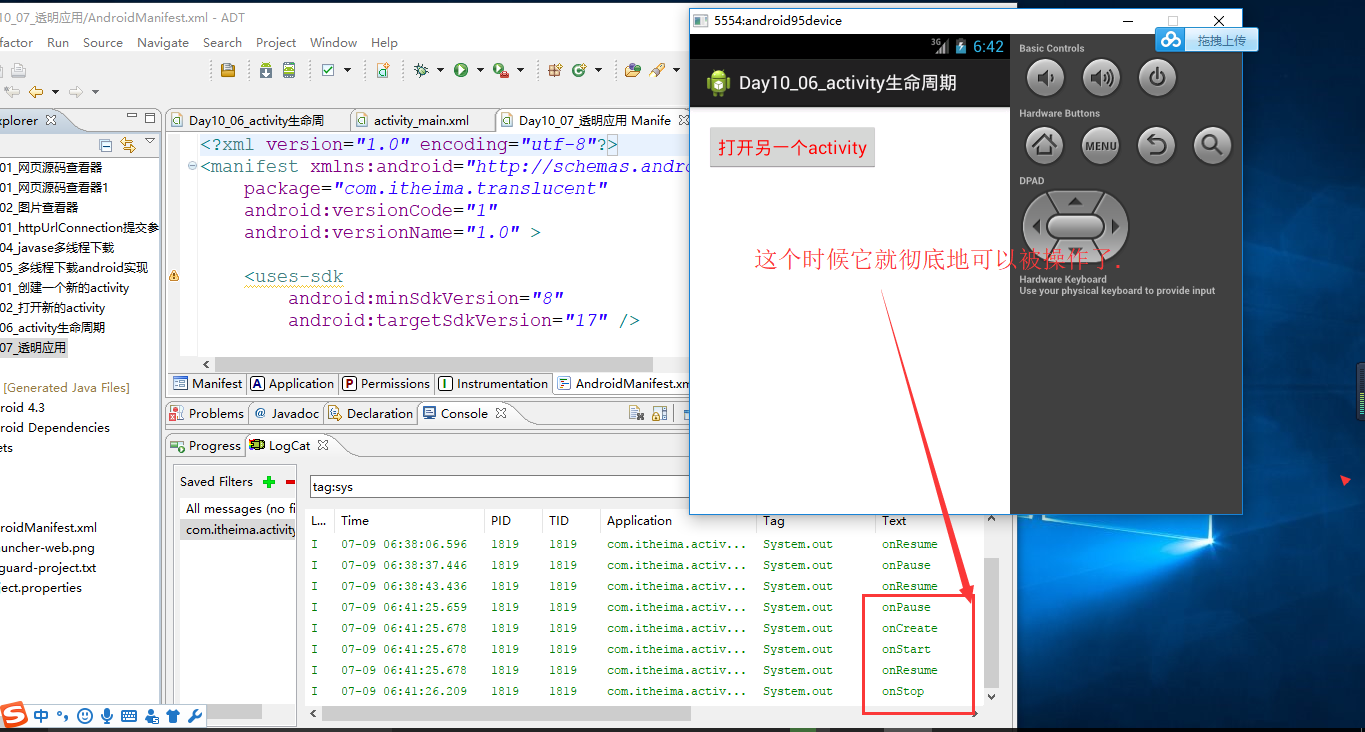
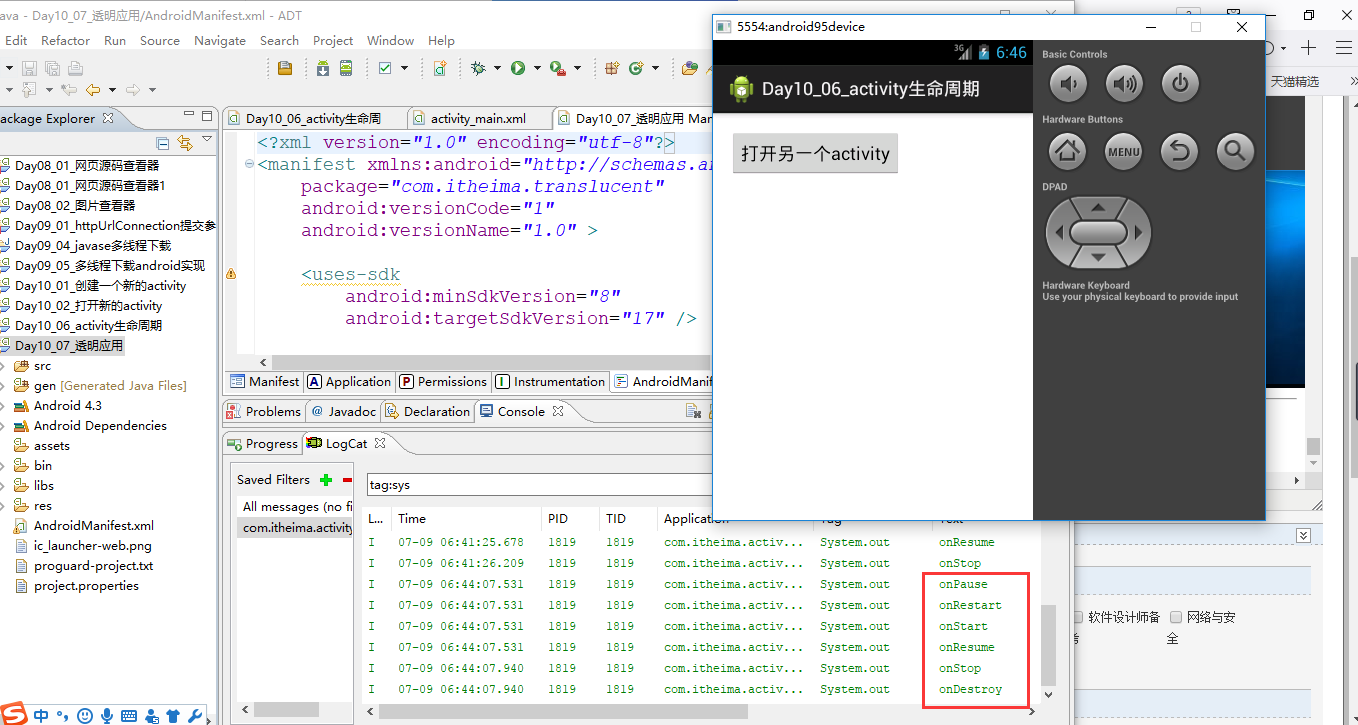
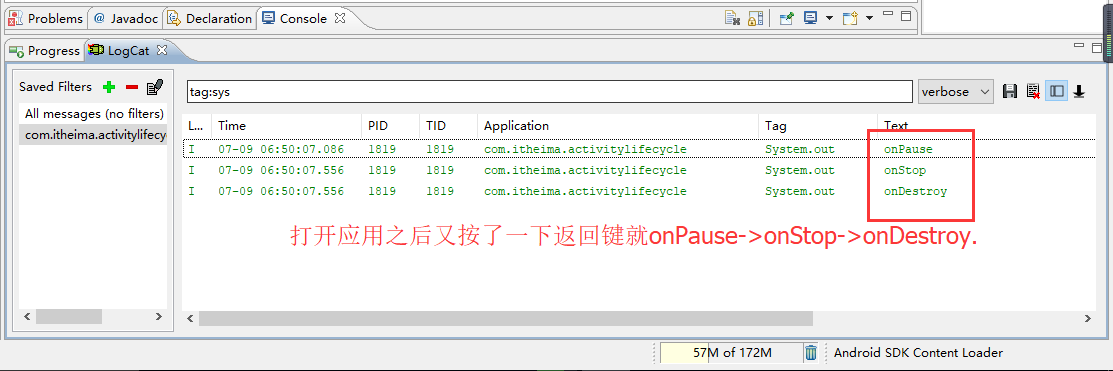
如果开启了应用Day10_06_activity生命周期,然后按一下返回键就onPause->onStop->onDestroy.
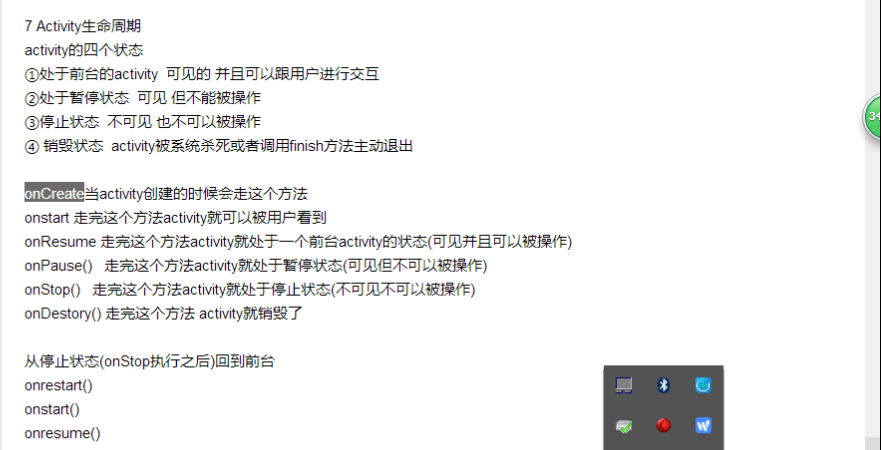
如果是处于前台状态,那么就说明onResume被执行完了。前台状态->暂停状态,要执行onPause().暂停状态->前台状态,要执行onResume().
前台状态->停止状态,要执行onPause()和onStop().
销毁状态,就是onPasue()->onStop()->onDestroy().
从停止状态->前台状态,执行onrestart()->onstart()->onresume().但是没有执行onCreate(),说明Activity还是以前的,并没有创建出一个新的Activity.
Activity生命周期的七个方法必须得牢记在心。
package com.itheima.activitylifecycle;

import android.os.Bundle;

import android.app.Activity;

import android.content.Intent;

import android.view.Menu;

import android.view.View;

public class MainActivity extends Activity {

    @Override

    protected void onCreate(Bundle savedInstanceState) {//onCreate()每一天都在跟它打交道

        super.onCreate(savedInstanceState);

        setContentView(R.layout.activity_main);

        System.out.println("onCreate");

    }

    public void open(View v){

        startActivity(new Intent(this, SecondActivity.class));//显式意图

    }

    @Override

    protected void onStart() {

        // TODO Auto-generated method stub

        super.onStart();

        System.out.println("onStart");

    }

     @Override

    protected void onResume() {

        // TODO Auto-generated method stub

        super.onResume();

        System.out.println("onResume");

    }

    @Override

    protected void onPause() {

        // TODO Auto-generated method stub

        super.onPause();

        System.out.println("onPause");

    }

    @Override

    protected void onStop() {

        // TODO Auto-generated method stub

        super.onStop();

        System.out.println("onStop");

    }

    @Override

    protected void onDestroy() {

        // TODO Auto-generated method stub

        super.onDestroy();

        System.out.println("onDestroy");

    }

    @Override

    protected void onRestart() {

        // TODO Auto-generated method stub

        super.onRestart();

        System.out.println("onRestart");

    }

}
package com.itheima.activitylifecycle;

import android.os.Bundle;

import android.app.Activity;

import android.view.Menu;

public class SecondActivity extends Activity {

    @Override

    protected void onCreate(Bundle savedInstanceState) {//onCreate()每一天都在跟它打交道

        super.onCreate(savedInstanceState);

        setContentView(R.layout.activity_second);

        System.out.println("onCreate");

    }

    @Override

    protected void onStart() {

        // TODO Auto-generated method stub

        super.onStart();

        System.out.println("onStart");

    }

     @Override

    protected void onResume() {

        // TODO Auto-generated method stub

        super.onResume();

        System.out.println("onResume");

    }

    @Override

    protected void onPause() {

        // TODO Auto-generated method stub

        super.onPause();

        System.out.println("onPause");

    }

    @Override

    protected void onStop() {

        // TODO Auto-generated method stub

        super.onStop();

        System.out.println("onStop");

    }

    @Override

    protected void onDestroy() {

        // TODO Auto-generated method stub

        super.onDestroy();

        System.out.println("onDestroy");

    }

    @Override

    protected void onRestart() {

        // TODO Auto-generated method stub

        super.onRestart();

        System.out.println("onRestart");

    }

}
<RelativeLayout xmlns:android="http://schemas.android.com/apk/res/android"

    xmlns:tools="http://schemas.android.com/tools"

    android:layout_width="match_parent"

    android:layout_height="match_parent"

    android:paddingBottom="@dimen/activity_vertical_margin"

    android:paddingLeft="@dimen/activity_horizontal_margin"

    android:paddingRight="@dimen/activity_horizontal_margin"

    android:paddingTop="@dimen/activity_vertical_margin"

    tools:context=".MainActivity" >

    <Button

        android:layout_width="wrap_content"

        android:layout_height="wrap_content"

        android:onClick="open"

        android:text="打开另一个activity" />

</RelativeLayout>
<RelativeLayout xmlns:android="http://schemas.android.com/apk/res/android"

    xmlns:tools="http://schemas.android.com/tools"

    android:layout_width="match_parent"

    android:layout_height="match_parent"

    android:paddingBottom="@dimen/activity_vertical_margin"

    android:paddingLeft="@dimen/activity_horizontal_margin"

    android:paddingRight="@dimen/activity_horizontal_margin"

    android:paddingTop="@dimen/activity_vertical_margin"

    tools:context=".MainActivity" >

    <Button

        android:layout_width="wrap_content"

        android:layout_height="wrap_content"

        android:onClick="open"

        android:textColor="#ff0000"

        android:text="打开另一个activity" />

</RelativeLayout>
package com.itheima.translucent;

import android.os.Bundle;

import android.app.Activity;

import android.view.Menu;

public class MainActivity extends Activity {

    @Override

    protected void onCreate(Bundle savedInstanceState) {

        super.onCreate(savedInstanceState);

        setContentView(R.layout.activity_main);

    }

    @Override

    public boolean onCreateOptionsMenu(Menu menu) {

        // Inflate the menu; this adds items to the action bar if it is present.

        getMenuInflater().inflate(R.menu.main, menu);

        return true;

    }

}
<?xml version="1.0" encoding="utf-8"?>

<manifest xmlns:android="http://schemas.android.com/apk/res/android"

    package="com.itheima.translucent"

    android:versionCode="1"

    android:versionName="1.0" >

    <uses-sdk

        android:minSdkVersion="8"

        android:targetSdkVersion="17" />

    <application

        android:allowBackup="true"

        android:icon="@drawable/ic_launcher"

        android:label="@string/app_name"

        android:theme="@android:style/Theme.Translucent.NoTitleBar.Fullscreen" >

        <activity

            android:name="com.itheima.translucent.MainActivity"

            android:label="@string/app_name" >

            <intent-filter>

                <action android:name="android.intent.action.MAIN" />

                <category android:name="android.intent.category.LAUNCHER" />

            </intent-filter>

        </activity>

    </application>

</manifest>
<RelativeLayout xmlns:android="http://schemas.android.com/apk/res/android"

    xmlns:tools="http://schemas.android.com/tools"

    android:layout_width="match_parent"

    android:layout_height="match_parent"

    android:paddingBottom="@dimen/activity_vertical_margin"

    android:paddingLeft="@dimen/activity_horizontal_margin"

    android:paddingRight="@dimen/activity_horizontal_margin"

    android:paddingTop="@dimen/activity_vertical_margin"

    tools:context=".MainActivity" >

    <TextView

        android:layout_width="wrap_content"

        android:layout_height="wrap_content"

        android:text="@string/hello_world" />

</RelativeLayout>
15_activity生命周期方法说明的更多相关文章
- Spring中Bean的生命周期方法
Bean的生命周期方法 src\dayday\Car.java package dayday;import com.sun.org.apache.xpath.internal.SourceTree;i ...
- Activity的生命周期及各生命周期方法的作用
一.Activity的生命周期中各个方法的作用 onCreate(): 做Activity上所需要数据的初始化工作. onStart(): 显示Activity界面,此时用户对界面可见但不可交互. o ...
- Info.plist和pch文件的作用,UIApplication,iOS程序的启动过程,AppDelegate 方法解释,UIWindow,生命周期方法
Info.plist常见的设置 建立一个工程后,会在Supporting files文件夹下看到一个“工程名-Info.plist”的文件,该文件对工程做一些运行期的配置,非常重要,不能删除 注:在旧 ...
- Android 切横竖屏时走的生命周期方法?222
第一种情况: 不设置Activity的android:configChanges时,切屏会重新调用各个生命周期,切横屏时会执行一次,切竖屏时会执行两次 第二种情况: 设置Activity的androi ...
- 微信小程序开发之详解生命周期方法
生命周期是指一个小程序从创建到销毁的一系列过程 在小程序中 ,通过App()来注册一个小程序 ,通过Page()来注册一个页面 先来看一张小程序项目结构 从上图可以看出,根目录下面有包含了app.js ...
- Fragment与Fragment相互切换之间的生命周期方法
Fragment 1 切换到 Fragment 2时生命周期变化 1.通过 add hide show 方式来切换 Fragment Fragment1 的生命周期变化为:onCreate().onC ...
- Spring(十二):IOC容器中Bean的生命周期方法
IOC容器中Bean的生命周期方法 1)Spring IOC容器可以管理Bean的声明周期,Spring允许在Bean生命周期的特定点执行定制的任务. 2)Spring IOC容器对Bean的生命周期 ...
- 生命周期方法调用,以及在onStop()方法中处理草稿信息
生命周期方法调用顺序 1. 从会话列表界面跳转到信息列表界面. 07-17 17:29:18.718: I/txrjsms(19370): MessageListActivity.onCreate 0 ...
- Android之Activity界面跳转--生命周期方法调用顺序
这本是一个很基础的问题,很惭愧,很久没研究这一块了,已经忘得差不多了.前段时间面试,有面试官问过这个问题.虽然觉得没必要记,要用的时候写个Demo,打个Log就清楚了.但是今天顺手写了个Demo,也就 ...
随机推荐
- CSU1160
十进制-十六进制 Time Limit: 1 Sec Memory Limit: 128 MB Description 把十进制整数转换为十六进制,格式为0x开头,10~15由大写字母A~F表示. ...
- 集训第六周 古典概型 期望 C题
http://acm.hust.edu.cn/vjudge/problem/viewProblem.action?id=30728 一个立体方块,每个单位方块都是关闭状态,每次任两个点,以这两点为对角 ...
- SSL 握手协议详解
这里重点介绍一下服务端的验证和密钥交换.这个阶段的前面的(a)证书 和(b)服务器密钥交换是基于密钥交换方法的.而在SSL中密钥交换算法有6种:无效(没有密钥交换).RSA.匿名Diffie-Hell ...
- HTML5中手势原理分析与数学知识的实践
摘要:在这触控屏的时代,人性化的手势操作已经深入了我们生活的每个部分.现代应用越来越重视与用户的交互及体验,手势是最直接且最为有效的交互方式,一个好的手势交互,能降低用户的使用成本和流程,大大提高了用 ...
- Leetcode 208.实现前缀树
实现前缀树 实现一个 Trie (前缀树),包含 insert, search, 和 startsWith 这三个操作. 示例: Trie trie = new Trie(); trie.insert ...
- add favorite & 收藏夹
add favorite // 收藏夹 function favorite (){ var ctrl = (navigator.userAgent.toLowerCase()).indexOf(&qu ...
- 洛谷P1186 玛丽卡
题目描述 麦克找了个新女朋友,玛丽卡对他非常恼火并伺机报复. 因为她和他们不住在同一个城市,因此她开始准备她的长途旅行. 在这个国家中每两个城市之间最多只有一条路相通,并且我们知道从一个城市到另一个城 ...
- 【IntelliJ 】IntelliJ IDEA 15 创建maven项目
说明 创建Maven项目的方式:手工创建 好处:参考IntelliJ IDEA 14 创建maven项目二(此文章描述了用此方式创建Maven项目的好处)及idea14使用maven创建web工程(此 ...
- JDBC的流数据
以下内容引用自http://wiki.jikexueyuan.com/project/jdbc/streaming-data.html: PreparedStatement对象必须具备使用输入和输出流 ...
- GDAL源码编译
转自阿Fai, GDAL源码编译 在这里,我使用源码编译出C#可以使用的dll静态文件. 一.简单的编译 1.简单的认识 首先进入GDAL的源代码目录,可以看到有几个sln为后缀的文件名,比如make ...
