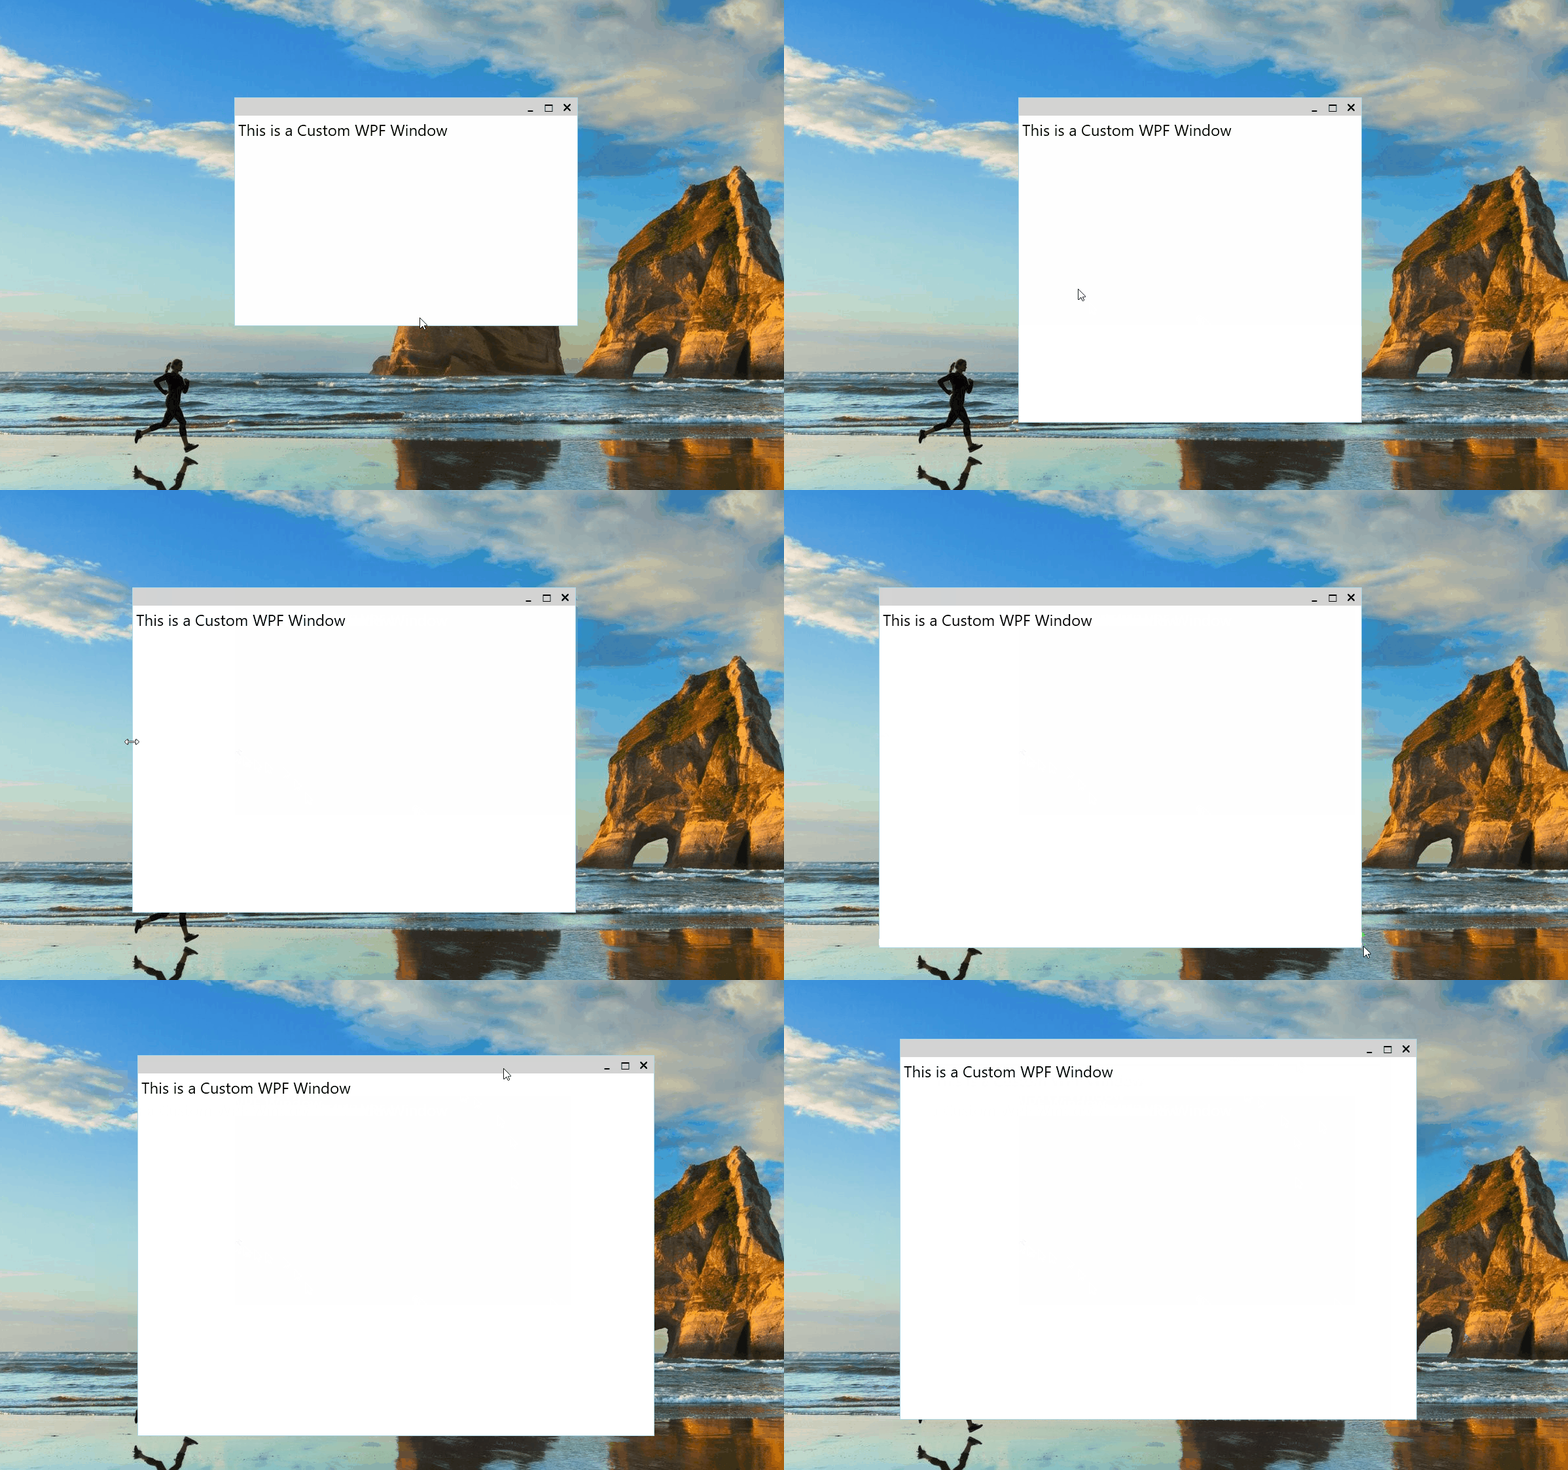
WPF 创建自定义窗体
在前面的一篇博客"WPF 自定义Metro Style窗体",展示了如何创建一个类似于Metro Style的Window,并在程序中使用。但是这个窗体不能够自由的改变大小。今天的博客中将展示如何创建一个可以通过拖拽来改变大小的Metro Style窗体。
实现思路,在Windows ControlTemplate中增加8个背景透明Rectangle,分别放置于Left, Right, Top, TopLeft, TopRight, Bottom, BottomLeft, BottomRight这8个位置,
XAML:
    <ControlTemplate x:Key="MetroWindowControlTemplate" TargetType="{x:Type Window}">

        <Border BorderThickness="1" BorderBrush="LightBlue" Background="White">

            <Grid>

                <Grid>

                    <Grid.RowDefinitions>

                        <RowDefinition Height="Auto"/>

                        <RowDefinition />

                    </Grid.RowDefinitions>

                    <Grid.ColumnDefinitions>

                        <ColumnDefinition />

                        <ColumnDefinition Width="Auto"/>

                    </Grid.ColumnDefinitions>

                    <Rectangle x:Name="MoveableRectangle" Fill="LightGray" Grid.Row="0" Grid.Column="0"/>

                    <StackPanel Grid.Row="0" Grid.Column="1" Orientation="Horizontal" Background="LightGray">

                        <Button x:Name="MinimizeButton" Style="{StaticResource WindowButtonStyle}" Content="0" />

                        <Button x:Name="RestoreButton" Style="{StaticResource WindowButtonStyle}" Content="1" />

                        <Button x:Name="CloseButton" Style="{StaticResource WindowButtonStyle}" Content="r" />

                    </StackPanel>

                    <Grid Background="{TemplateBinding Background}" Grid.Row="1" Grid.ColumnSpan="2" Margin="5,5,5,5">

                        <AdornerDecorator>

                            <ContentPresenter/>

                        </AdornerDecorator>

                    </Grid>

                </Grid>

                <Grid x:Name="ResizeGrid">

                    <Rectangle

                            Stroke="{x:Null}"

                            Fill="Transparent"

                            VerticalAlignment="Top"

                            Height="5"

                            x:Name="Top"

                            Margin="5,0,5,0" />

                    <Rectangle

                            Stroke="{x:Null}"

                            Fill="Transparent"

                            x:Name="Bottom"

                            Height="5"

                            VerticalAlignment="Bottom"

                            Margin="5,0,5,0" />

                    <Rectangle

                            Stroke="{x:Null}"

                            Fill="Transparent"

                            HorizontalAlignment="Left"

                            Margin="0,5,0,5"

                            Width="5"

                            x:Name="Left"/>

                    <Rectangle

                            Stroke="{x:Null}"

                            Fill="Transparent"

                            Margin="0,5,0,5"

                            Width="5"

                            HorizontalAlignment="Right"

                            x:Name="Right" />

                    <Rectangle

                            Stroke="{x:Null}"

                            Fill="Transparent"

                            HorizontalAlignment="Left"

                            VerticalAlignment="Bottom"

                            Width="5"

                            Height="5"

                            x:Name="BottomLeft" />

                    <Rectangle

                            Stroke="{x:Null}"

                            Fill="Transparent"

                            VerticalAlignment="Bottom"

                            Height="5"

                            Width="5"

                            HorizontalAlignment="Right"

                            x:Name="BottomRight" />

                    <Rectangle

                            Stroke="{x:Null}"

                            Fill="Transparent"

                            HorizontalAlignment="Right"

                            Width="5"

                            Height="5"

                            VerticalAlignment="Top"

                            x:Name="TopRight" />

                    <Rectangle

                            Stroke="{x:Null}"

                            Fill="Transparent"

                            HorizontalAlignment="Left"

                            Width="6"

                            VerticalAlignment="Top"

                            Height="5"

                            x:Name="TopLeft" />

                </Grid>

            </Grid>

        </Border>

    </ControlTemplate>
C#:
    ControlTemplate template = App.Current.FindResource("MetroWindowControlTemplate") as ControlTemplate;

    if(template != null)

    {

        //....

        Grid resizeGrid = template.FindName("ResizeGrid", this) as Grid;

        if(resizeGrid != null)

        {

            foreach (UIElement element in resizeGrid.Children)

            {

                Rectangle resizeRectangle = element as Rectangle;

                if (resizeRectangle != null)

                {

                    resizeRectangle.PreviewMouseDown += ResizeRectangle_PreviewMouseDown;

                    resizeRectangle.MouseMove += ResizeRectangle_MouseMove;

                }

            }

        }

    }

            private void ResizeRectangle_PreviewMouseDown(object sender, MouseButtonEventArgs e)

        {

            Rectangle rectangle = sender as Rectangle;

            if(rectangle != null)

            {

                switch(rectangle.Name)

                {

                    case "Top":

                        Cursor = Cursors.SizeNS;

                        ResizeWindow(ResizeDirection.Top);

                        break;

                    case "Bottom":

                        Cursor = Cursors.SizeNS;

                        ResizeWindow(ResizeDirection.Bottom);

                        break;

                    case "Left":

                        Cursor = Cursors.SizeWE;

                        ResizeWindow(ResizeDirection.Left);

                        break;

                    case "Right":

                        Cursor = Cursors.SizeWE;

                        ResizeWindow(ResizeDirection.Right);

                        break;

                    case "TopLeft":

                        Cursor = Cursors.SizeNWSE;

                        ResizeWindow(ResizeDirection.TopLeft);

                        break;

                    case "TopRight":

                        Cursor = Cursors.SizeNESW;

                        ResizeWindow(ResizeDirection.TopRight);

                        break;

                    case "BottomLeft":

                        Cursor = Cursors.SizeNESW;

                        ResizeWindow(ResizeDirection.BottomLeft);

                        break;

                    case "BottomRight":

                        Cursor = Cursors.SizeNWSE;

                        ResizeWindow(ResizeDirection.BottomRight);

                        break;

                    default:

                        break;

                }

            }

        }

        private void ResizeRectangle_MouseMove(object sender, MouseEventArgs e)

        {

            Rectangle rectangle = sender as Rectangle;

            if (rectangle != null)

            {

                switch (rectangle.Name)

                {

                    case "Top":

                        Cursor = Cursors.SizeNS;

                        break;

                    case "Bottom":

                        Cursor = Cursors.SizeNS;

                        break;

                    case "Left":

                        Cursor = Cursors.SizeWE;

                        break;

                    case "Right":

                        Cursor = Cursors.SizeWE;

                        break;

                    case "TopLeft":

                        Cursor = Cursors.SizeNWSE;

                        break;

                    case "TopRight":

                        Cursor = Cursors.SizeNESW;

                        break;

                    case "BottomLeft":

                        Cursor = Cursors.SizeNESW;

                        break;

                    case "BottomRight":

                        Cursor = Cursors.SizeNWSE;

                        break;

                    default:

                        break;

                }

            }

        }

        [DllImport("user32.dll", CharSet = CharSet.Auto)]

        private static extern IntPtr SendMessage(IntPtr hWnd, UInt32 msg, IntPtr wParam, IntPtr lParam);

        private void ResizeWindow(ResizeDirection direction)

        {

            SendMessage(_hwndSource.Handle, 0x112, (IntPtr)( + direction), IntPtr.Zero);

        }
到此为止,就实现了一个可以拖拽改变大小的自定义窗体。
运行效果:

感谢您的阅读,代码点击这里下载。
WPF 创建自定义窗体的更多相关文章
- WPF 之 自定义窗体标题栏
在WPF中自定义窗体标题栏,首先需要将窗体的WindowStyle属性设置为None,隐藏掉WPF窗体的自带标题栏.然后可以在窗体内部自定义一个标题栏. 例如,标题栏如下: <WrapPanel ...
- WPF设计の自定义窗体
效果图如下: 实现思路: 1.继承Window类 2.为自定义的CustomWindow类设计窗体样式(使用Blend很方便!) 3.为窗体增加最大最小化和关闭按钮,并实现鼠标拖拽改变窗体大小(使用D ...
- wpf 自定义窗体的实现
首先创建自定义窗体的资源文件 <ControlTemplate x:Key="BaseWindowControlTemplate" TargetType="Wind ...
- Winform自定义窗体样式,实现标题栏可灵活自定义
最近在编写C/S结构应用程序时,感觉窗体的标题栏样式太死板了,标题文字不能更改大小.颜色.字体等,按钮不能隐藏等问题,在网上也查找了许多相关的资料,没有找到合适的解决方案,发现许多人也在寻求这个问题, ...
- WPF自定义控件与样式(13)-自定义窗体Window & 自适应内容大小消息框MessageBox
一.前言 申明:WPF自定义控件与样式是一个系列文章,前后是有些关联的,但大多是按照由简到繁的顺序逐步发布的等,若有不明白的地方可以参考本系列前面的文章,文末附有部分文章链接. 本文主要内容: 自定义 ...
- WPF移动Window窗体(鼠标点击左键移动窗体自定义行为)
XAML代码部分:1.引用System.Windows.Interactivity 2.为指定的控件添加一个拖动的行为 3.很简单的了解行为的作用和用法 <Window xmlns=" ...
- 【转】WPF自定义控件与样式(13)-自定义窗体Window & 自适应内容大小消息框MessageBox
一.前言 申明:WPF自定义控件与样式是一个系列文章,前后是有些关联的,但大多是按照由简到繁的顺序逐步发布的等. 本文主要内容: 自定义Window窗体样式: 基于自定义窗体实现自定义MessageB ...
- WPF换肤之一:创建圆角窗体
原文:WPF换肤之一:创建圆角窗体 我们都期望自己的软件能够有一套看上去很吸引人眼球的外衣,使得别人看上去既专业又有美感.这个系列就带领着大家一步一步的讲解如何设计出一套自己的WPF的窗体皮肤,如果文 ...
- 使用 DotNet CLI 创建自定义的 WPF 项目模板
描述 当我们安装完 DotNetCore 3.0 版本的 SDK 后,我们就可以创建基于 DotNetCore 的 WPF 项目模板,通过如下 CLI 可以方便快捷的创建并运行我们的项目: dotne ...
随机推荐
- Colorful tree
cnbb 我被数组清零卡了一天.. 子树改色询问子树颜色数.. 先考虑颜色为x的节点对祖先答案的贡献,那么我们考虑把所有这些节点都搞出来,按dfs序排序,然后考虑每个节点a掌管的祖先是它和按dfs序的 ...
- ubuntu安装skype
1.添加源 sudo add-apt-repository "deb http://archive.canonical.com/ $(lsb_release -sc) partner&quo ...
- css常用代码
透明度: filter:alpha(opacity=50); -moz-opacity:0.5; opacity:0.5; 英文大小写: div{text-transform:capitalize|U ...
- UNIX进程
UNIX进程控制的博客 http://blog.csdn.net/yang_yulei/article/details/17404021 Linux的概念与体系 http://www.cnb ...
- Python之调用WebService:suds
suds官方: https://fedorahosted.org/suds/wiki/Documentation 互联网公开WSDL: http://www.webxml.com.cn/zh_cn/w ...
- (转)关于Certificate、Provisioning Profile、App ID的介绍及其之间的关系
转自http://www.cnblogs.com/cywin888/p/3263027.html 刚接触iOS开发的人难免会对苹果的各种证书.配置文件等不甚了解,可能你按照网上的教程一步一步的成功申请 ...
- [Linux]centOS7-1-1503-x86_64下安装VM-TOOLS
1.安装Perl. 2.如果提示 The path "" is not a valid path to the 3.10.0-229.el7.x86_64 kernel heade ...
- SQL Server 无法在服务器上访问指定的路径或文件解决方法
SQL Server 无法在服务器上访问指定的路径或文件解决方法 在SQL Server附加数据库或备份数据库时出现:无法在服务器上访问指定的路径或文件. 请确保您具有必需的安全权限且该路径或文件存在 ...
- oracle触发器加条件判断
oracle触发器加条件判断,如果某个字段,isnode=0,那么不执行下面的方法,数据如下: create or replace trigger tr_basestation_insert_emp ...
- 【linux】sudo su切换到root权限
在用户有sudo权限但不知道root密码时可用 sudo su切换到root用户
