[转]Material使用08 MdDialogModule、MdAutocompleteModule
本文转自:https://www.cnblogs.com/NeverCtrl-C/p/8125346.html
1 MatDialog
1.1 简要描述
MdDialog是一个服务,可以利用它来打开一个具有material风格和动画效果的对话框
技巧01:虽然已经在模块级别导入了MdDialogModule但是在需要依赖注入MdDialog服务的组件仍然需要单独导入MdDialog服务
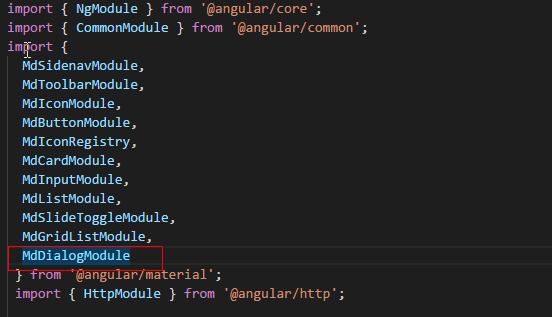

import { NgModule } from '@angular/core';

import { CommonModule } from '@angular/common';

import {

  MdSidenavModule,

  MdToolbarModule,

  MdIconModule,

  MdButtonModule,

  MdIconRegistry,

  MdCardModule,

  MdInputModule,

  MdListModule,

  MdSlideToggleModule,

  MdGridListModule,

  MdDialogModule

 } from '@angular/material';

 import { HttpModule } from '@angular/http';

@NgModule({

  imports: [

    CommonModule,

    HttpModule,

    MdSidenavModule,

    MdToolbarModule,

    MdIconModule,

    MdButtonModule,

    MdCardModule,

    MdInputModule,

    MdListModule,

    MdSlideToggleModule,

    MdGridListModule,

    MdDialogModule

  ],

  declarations: [],

  exports: [

    CommonModule,

    MdSidenavModule,

    MdToolbarModule,

    MdIconModule,

    MdButtonModule,

    HttpModule,

    MdCardModule,

    MdInputModule,

    MdListModule,

    MdSlideToggleModule,

    MdGridListModule,

    MdDialogModule

  ],

  providers: [

    // MdDialog

  ]

})

export class SharedModule { }

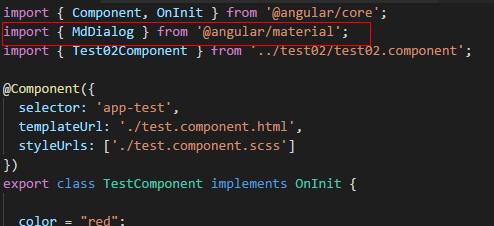

import { Component, OnInit } from '@angular/core';

import { MdDialog } from '@angular/material';

import { Test02Component } from '../test02/test02.component';

@Component({

  selector: 'app-test',

  templateUrl: './test.component.html',

  styleUrls: ['./test.component.scss']

})

export class TestComponent implements OnInit {

  color = "red";

  constructor(

    private dialog: MdDialog

  ) { }

  ngOnInit() {

  }

  openNewProjectDialog() {

    this.dialog.open(Test02Component, {

      height: `400px`,

      width: '400px',

      data: `hello world`

    });

  }

}

1.2 MdDialog服务的用途
利用MdDialog服务提供的open方法可以打开对话框
格式:this.MdDialog服务实例.open(对话框组件,参数和数据);
例子:

技巧01:需要在使用MdDialog服务的组件引入并引来注入MdDialog服务

import { Component, OnInit } from '@angular/core';

import { MdDialog } from '@angular/material';

import { Test02Component } from '../test02/test02.component';

@Component({

  selector: 'app-test',

  templateUrl: './test.component.html',

  styleUrls: ['./test.component.scss']

})

export class TestComponent implements OnInit {

  color = "red";

  constructor(

    private dialog: MdDialog

  ) { }

  ngOnInit() {

  }

  openNewProjectDialog() {

    this.dialog.open(Test02Component, {

      height: `400px`,

      width: '400px',

      data: `hello world`

    });

  }

}

技巧02:需要将对话框组件
技巧03:作为MdDialog组件的书写格式和md-card组件很类似,只不过是利用指令实现的


<form>
<h2 md-dialog-title>新建项目</h2>
<div md-dialog-content>
<md-input-container class="fill-width">
<input mdInput type="text" placeholder="项目名称" />
</md-input-container>
<md-input-container class="fill-width">
<input mdInput type="text" placeholder="项目描述" />
</md-input-container>
</div>
<div md-dialog-actions>
<button md-raised-button type="button" color="primary">
<md-icon>save</md-icon>
<span>保存</span>
</button>
<button md-raised-button type="button" color="accent" (click)="onCloseNewProjectDialog()">
<md-icon>cancel</md-icon>
<span>取消</span>
</button>
</div>
</form>

1.3 对话框组件
由于MdDialog是在运行期间进行实例化的,所以Angular需要一些额外的信息才能够在运行期间创建对话框组件实例。因此,必须将对话框组件在模块级别进行个别的声明 -> 将要作为对话框的组件再在entryComponents中进行一次声明
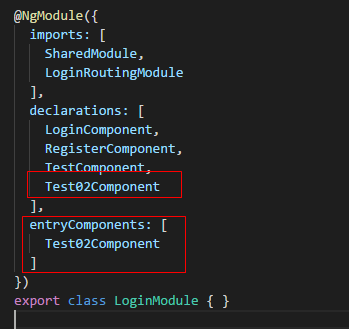

import { NgModule } from '@angular/core';

import { SharedModule } from '../shared/shared.module';

import { LoginComponent } from './login/login.component';

import { LoginRoutingModule } from './login-routing.module';

import { RegisterComponent } from './register/register.component';

import { TestComponent } from './test/test.component';

import { Test02Component } from './test02/test02.component';

@NgModule({

  imports: [

    SharedModule,

    LoginRoutingModule

  ],

  declarations: [

    LoginComponent,

    RegisterComponent,

    TestComponent,

    Test02Component

  ],

  entryComponents: [

    Test02Component

  ]

})

export class LoginModule { }

2 MdDialogRef
2.1 简要描述
通过MdDialog创建的对话框组件可以依赖注入MdDialogRef服务,该服务的close方法可以用来关闭对话框,并向触发对话框的组件传递一些信息
技巧01:虽然在模块级别已经导入了MdDialogModule,但是在对话框组件任然要单独引入MdDialogRef并且通过构造器进行依赖注入
2.2 MdDialogRef的用途
2.2.1 关闭对话框
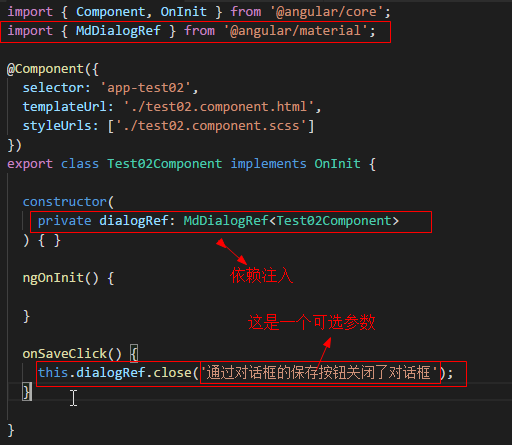

import { Component, OnInit } from '@angular/core';

import { MdDialogRef } from '@angular/material';

@Component({

  selector: 'app-test02',

  templateUrl: './test02.component.html',

  styleUrls: ['./test02.component.scss']

})

export class Test02Component implements OnInit {

  constructor(

    private dialogRef: MdDialogRef<Test02Component>

  ) { }

  ngOnInit() {

  }

  onSaveClick() {

    this.dialogRef.close('通过对话框的保存按钮关闭了对话框');

  }

}


从MdDialogRef的源码可以看出close方法的参数是一个可选参数(可传可不传)

/**

 * @license

 * Copyright Google Inc. All Rights Reserved.

 *

 * Use of this source code is governed by an MIT-style license that can be

 * found in the LICENSE file at https://angular.io/license

 */

import { OverlayRef } from '../core';

import { DialogPosition } from './dialog-config';

import { Observable } from 'rxjs/Observable';

import { MdDialogContainer } from './dialog-container';

import 'rxjs/add/operator/filter';

/**

 * Reference to a dialog opened via the MdDialog service.

 */

export declare class MdDialogRef<T> {

    private _overlayRef;

    private _containerInstance;

    /** The instance of component opened into the dialog. */

    componentInstance: T;

    /** Whether the user is allowed to close the dialog. */

    disableClose: boolean;

    /** Subject for notifying the user that the dialog has finished closing. */

    private _afterClosed;

    /** Result to be passed to afterClosed. */

    private _result;

    constructor(_overlayRef: OverlayRef, _containerInstance: MdDialogContainer);

    /**

     * Close the dialog.

     * @param dialogResult Optional result to return to the dialog opener.

     */

    close(dialogResult?: any): void;

    /**

     * Gets an observable that is notified when the dialog is finished closing.

     */

    afterClosed(): Observable<any>;

    /**

     * Updates the dialog's position.

     * @param position New dialog position.

     */

    updatePosition(position?: DialogPosition): this;

    /**

     * Updates the dialog's width and height.

     * @param width New width of the dialog.

     * @param height New height of the dialog.

     */

    updateSize(width?: string, height?: string): this;

    /** Fetches the position strategy object from the overlay ref. */

    private _getPositionStrategy();

}

2.2.2 触发对话框的组件可以利用MdDialogRef来接收对话框关闭时传递的数据
技巧01:MdDialog的open方法返回的其实是一个MdDialogRef对象,我们可以利用这个MdDialogRef来获取对话框传递过来的数据
技巧02:在利用MdDialogRef对象接收对话框组件传递数据的组件不需要在导入和依赖注入MdDialogRef,


import { Component, OnInit } from '@angular/core';

import { MdDialog } from '@angular/material';

import { Test02Component } from '../test02/test02.component';

@Component({

  selector: 'app-test',

  templateUrl: './test.component.html',

  styleUrls: ['./test.component.scss']

})

export class TestComponent implements OnInit {

  color = "red";

  constructor(

    private dialog: MdDialog

  ) { }

  ngOnInit() {

  }

  openNewProjectDialog() {

    const dialogRef = this.dialog.open(Test02Component, {

      height: `400px`,

      width: '400px',

      data: `hello world`

    });

    dialogRef.afterClosed().subscribe(result => console.log(result));

  }

}

3 MD_DIALOG_DATA指令
3.1 简要描述
MdDialog服务的open方法在打开服务的同时可以向对话框发送一些数据,但是对话框必须依赖一个服务才能够接收到这些数据;这个服务对应的令牌就是MD_DIALOG_DATA
技巧01:在对话框组件引入MAT_DIALOG_DATA令牌,在对话框组件的构造器中依赖注入MD_DIALOG_DATA令牌对应的服务
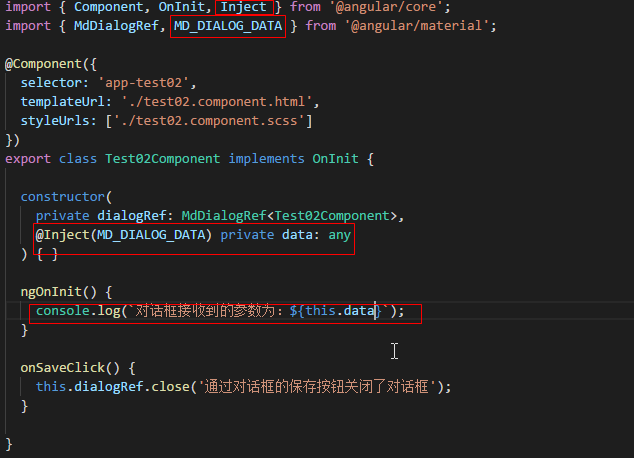

import { Component, OnInit, Inject } from '@angular/core';

import { MdDialogRef, MD_DIALOG_DATA } from '@angular/material';

@Component({

  selector: 'app-test02',

  templateUrl: './test02.component.html',

  styleUrls: ['./test02.component.scss']

})

export class Test02Component implements OnInit {

  constructor(

    private dialogRef: MdDialogRef<Test02Component>,

    @Inject(MD_DIALOG_DATA) private data: any

  ) { }

  ngOnInit() {

    console.log(`对话框接收到的参数为:${this.data}`);

  }

  onSaveClick() {

    this.dialogRef.close('通过对话框的保存按钮关闭了对话框');

  }

}

4 对话框主题设置
4.1 简要描述
对话框是不受应用主题控制的,因为对话框是浮动在上面的
4.2 解决办法
在对话框组件中引入并依赖注入OverlayContainer服务来设置对话框的主题
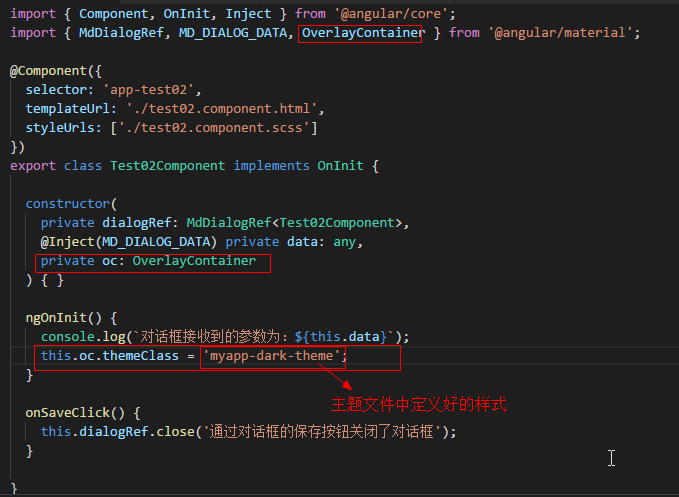

import { Component, OnInit, Inject } from '@angular/core';

import { MdDialogRef, MD_DIALOG_DATA, OverlayContainer } from '@angular/material';

@Component({

  selector: 'app-test02',

  templateUrl: './test02.component.html',

  styleUrls: ['./test02.component.scss']

})

export class Test02Component implements OnInit {

  constructor(

    private dialogRef: MdDialogRef<Test02Component>,

    @Inject(MD_DIALOG_DATA) private data: any,

    private oc: OverlayContainer

  ) { }

  ngOnInit() {

    console.log(`对话框接收到的参数为:${this.data}`);

    this.oc.themeClass = 'myapp-dark-theme';

  }

  onSaveClick() {

    this.dialogRef.close('通过对话框的保存按钮关闭了对话框');

  }

}

5 MdDialog、MdDialogRef、MD_DIALOG_DATA、OverlayContainer总和应用
5.1 需求描述
点击一个按钮 -> 弹出一个新建项目的对话框,并可以向该对话框传递数据 -> 点击对话框的关闭按钮可以关闭对话框 -> 点击对话框的保存按钮也可以关闭对话框并能向触发对话框的组件传递数据 -> 对话框的主题可以根据传递给对话框的数据进行灵活设置
5.2 编程步骤
5.2.1 在共享模块中导入MdDialogModule
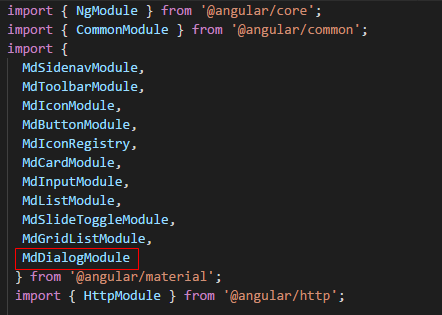

import { NgModule } from '@angular/core';

import { CommonModule } from '@angular/common';

import {

  MdSidenavModule,

  MdToolbarModule,

  MdIconModule,

  MdButtonModule,

  MdIconRegistry,

  MdCardModule,

  MdInputModule,

  MdListModule,

  MdSlideToggleModule,

  MdGridListModule,

  MdDialogModule

 } from '@angular/material';

 import { HttpModule } from '@angular/http';

@NgModule({

  imports: [

    CommonModule,

    HttpModule,

    MdSidenavModule,

    MdToolbarModule,

    MdIconModule,

    MdButtonModule,

    MdCardModule,

    MdInputModule,

    MdListModule,

    MdSlideToggleModule,

    MdGridListModule,

    MdDialogModule

  ],

  declarations: [],

  exports: [

    CommonModule,

    MdSidenavModule,

    MdToolbarModule,

    MdIconModule,

    MdButtonModule,

    HttpModule,

    MdCardModule,

    MdInputModule,

    MdListModule,

    MdSlideToggleModule,

    MdGridListModule,

    MdDialogModule

  ],

  providers: [

    // MdDialog

  ]

})

export class SharedModule { }

5.2.2 将作为对话框的组件在模块界别进行特别的声明
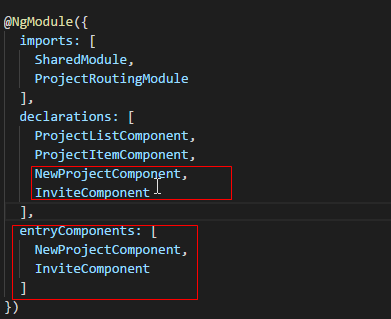

import { NgModule } from '@angular/core';

import { SharedModule } from '../shared/shared.module';

import { ProjectListComponent } from './project-list/project-list.component';

import { ProjectItemComponent } from './project-item/project-item.component';

import { NewProjectComponent } from './new-project/new-project.component';

import { InviteComponent } from './invite/invite.component';

import { ProjectRoutingModule } from './project-routing.module';

@NgModule({

  imports: [

    SharedModule,

    ProjectRoutingModule

  ],

  declarations: [

    ProjectListComponent,

    ProjectItemComponent,

    NewProjectComponent,

    InviteComponent

  ],

  entryComponents: [

    NewProjectComponent,

    InviteComponent

  ]

})

export class ProjectModule { }

5.2.3 在需要触发对话框的组件引入MdDialog并进行依赖注入,通过MdDialog的open方法打开对话框
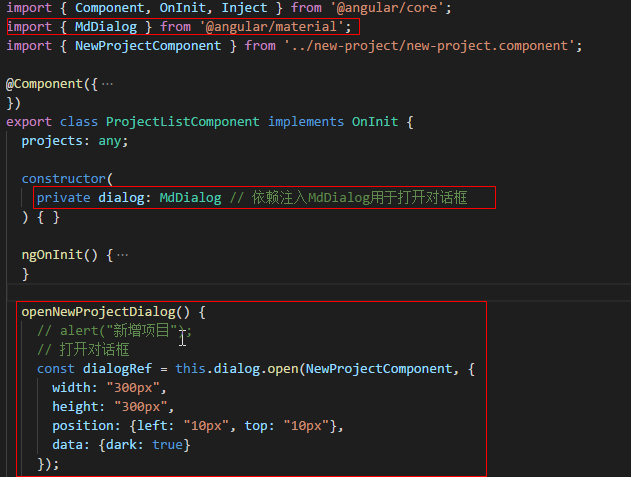

import { Component, OnInit, Inject } from '@angular/core';

import { MdDialog } from '@angular/material';

import { NewProjectComponent } from '../new-project/new-project.component';

@Component({

  selector: 'app-project-list',

  templateUrl: './project-list.component.html',

  styleUrls: ['./project-list.component.scss']

  // providers: [MdDialog]

})

export class ProjectListComponent implements OnInit {

  projects: any;

  constructor(

    private dialog: MdDialog // 依赖注入MdDialog用于打开对话框

  ) { }

  ngOnInit() {

    this.projects = [

      {

        "name": "MES管理系统",

        "des": "MES管理系统描述",

        "coverImg": "assets/img/covers/3.jpg"

      },

      {

        "name": "青春不朽客户管理系统",

        "des": "青春不朽客户管理系统描述",

        "coverImg": "assets/img/covers/4.jpg"

      }

    ];

  }

  openNewProjectDialog() {

    // alert("新增项目");

    // 打开对话框

    const dialogRef = this.dialog.open(NewProjectComponent, {

      width: "300px",

      height: "300px",

      position: {left: "10px", top: "10px"},

      data: {dark: true}

    });

    // 对话框关闭时接收对话框传过来的数据

    dialogRef.afterClosed().subscribe(result => console.log(result));

  }

}

5.2.4 在对话框组件中引入MD_DIALOG_DATA, MdDialogRef, OverlayContainer 并进行依赖注入,调用相关的方法接收数据、设置对话框主题、关闭对话框
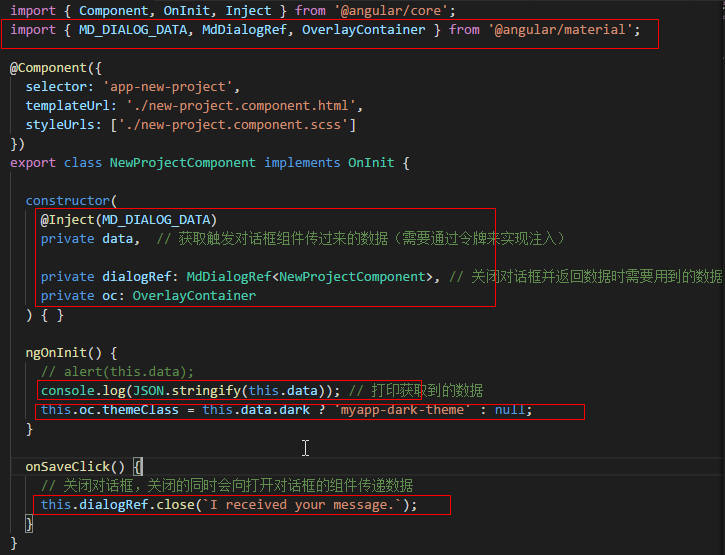

import { Component, OnInit, Inject } from '@angular/core';

import { MD_DIALOG_DATA, MdDialogRef, OverlayContainer } from '@angular/material';

@Component({

  selector: 'app-new-project',

  templateUrl: './new-project.component.html',

  styleUrls: ['./new-project.component.scss']

})

export class NewProjectComponent implements OnInit {

  constructor(

    @Inject(MD_DIALOG_DATA)

    private data,  // 获取触发对话框组件传过来的数据(需要通过令牌来实现注入)

    private dialogRef: MdDialogRef<NewProjectComponent>, // 关闭对话框并返回数据时需要用到的数据

    private oc: OverlayContainer

  ) { }

  ngOnInit() {

    // alert(this.data);

    console.log(JSON.stringify(this.data)); // 打印获取到的数据

    this.oc.themeClass = this.data.dark ? 'myapp-dark-theme' : null;

  }

  onSaveClick() {

    // 关闭对话框,关闭的同时会向打开对话框的组件传递数据

    this.dialogRef.close(`I received your message.`);

  }

}

5.2.5 效果展示

5.2.6 官方文档
6 MdAutocompleteModule
6.1 简单介绍
MdAutocompleteModule是一个文本输入框,它必须配合input标签使用
6.2 使用步骤
6.2.1 在共享模块中导入MdAutocompleteModule模块
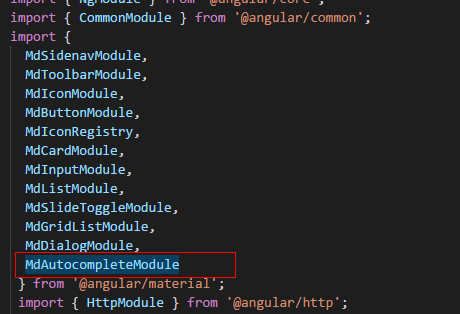

import { NgModule } from '@angular/core';

import { CommonModule } from '@angular/common';

import {

  MdSidenavModule,

  MdToolbarModule,

  MdIconModule,

  MdButtonModule,

  MdIconRegistry,

  MdCardModule,

  MdInputModule,

  MdListModule,

  MdSlideToggleModule,

  MdGridListModule,

  MdDialogModule,

  MdAutocompleteModule

 } from '@angular/material';

 import { HttpModule } from '@angular/http';

@NgModule({

  imports: [

    CommonModule,

    HttpModule,

    MdSidenavModule,

    MdToolbarModule,

    MdIconModule,

    MdButtonModule,

    MdCardModule,

    MdInputModule,

    MdListModule,

    MdSlideToggleModule,

    MdGridListModule,

    MdDialogModule,

    MdAutocompleteModule

  ],

  declarations: [],

  exports: [

    CommonModule,

    MdSidenavModule,

    MdToolbarModule,

    MdIconModule,

    MdButtonModule,

    HttpModule,

    MdCardModule,

    MdInputModule,

    MdListModule,

    MdSlideToggleModule,

    MdGridListModule,

    MdDialogModule,

    MdAutocompleteModule

  ],

  providers: [

    // MdDialog

  ]

})

export class SharedModule { }

6.2.2 在input标签中使用md-autocomplete的模板变量
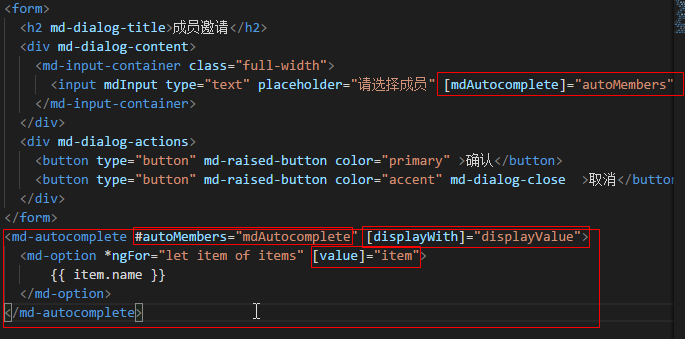

<form>

  <h2 md-dialog-title>成员邀请</h2>

  <div md-dialog-content>

    <md-input-container class="full-width">

      <input mdInput type="text" placeholder="请选择成员" [mdAutocomplete]="autoMembers" />

    </md-input-container>

  </div>

  <div md-dialog-actions>

    <button type="button" md-raised-button color="primary" >确认</button>

    <button type="button" md-raised-button color="accent" md-dialog-close  >取消</button>

  </div>

</form>

<md-autocomplete #autoMembers="mdAutocomplete" [displayWith]="displayValue">

  <md-option *ngFor="let item of items" [value]="item">

      {{ item.name }}

  </md-option>

</md-autocomplete>

6.2.3 编写md-autocomplete组件最终的显示结果内容
技巧01:如果不给md-autocomplete组件设定displayWith,那么在input组件显示的就会是md-input组件value属性的值
技巧02:给md-input组件指定一个对象时,input的只会是一个对象;利用md-autocomplete组件的displayWith属性可以解决这个问题;displayWith的属性值是一个方法名,该方法的参数就是md-input组件value属性的值,该方法返回的值就是input组件最后显示的值


import { Component, OnInit } from '@angular/core';

@Component({

  selector: 'app-invite',

  templateUrl: './invite.component.html',

  styleUrls: ['./invite.component.scss']

})

export class InviteComponent implements OnInit {

  items : any;

  constructor() { }

  ngOnInit() {

    this.items = [

      {

        id: 1,

        name: '乔峰'

      },

      {

        id: 2,

        name: '慕容复'

      },

      {

        id: 3,

        name: '段誉'

      },

      {

        id: 4,

        name: '虚竹'

      }

    ];

  }

  // 设置显示内容

  displayValue(member: {id: number; name: string}) {

    return member ? member.name : null;

  }

}

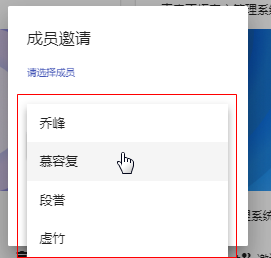
6.3 效果展示
6.4 官方文档
[转]Material使用08 MdDialogModule、MdAutocompleteModule的更多相关文章
- Material使用08 MdDialogModule、MdAutocompleteModule
1 MatDialog 1.1 简要描述 MdDialog是一个服务,可以利用它来打开一个具有material风格和动画效果的对话框 技巧01:虽然已经在模块级别导入了MdDialogModule但是 ...
- Material使用10 MdRadioModule、MdDatepickerModule、MdNativeDateModule、MdSelectModule
1 MdRadioModule 相当于<input type="radio"> 2 使用步骤 2.1 在共享模块导入MdRadioModule import { NgM ...
- Material使用09 MdCheckboxModule、MdMenuModule、MdTooltipModule
1 MdCheckboxModule的使用 md-checkbox 实现的功能和 <input type="checkbox"> 相同,只不过 md-checkbo ...
- Material使用05 MdListModule模块 MdButtonToggleModule模块
1 在共享模块中导入MdListModule模块 import { NgModule } from '@angular/core'; import { CommonModule } from '@an ...
- Material04 MdListModule模块
1 在共享模块中导入MdListModule模块 import { NgModule } from '@angular/core'; import { CommonModule } from '@an ...
- Angular11 模板表单、响应式表单(自定义验证器)、HTTP、表单元素双向绑定
1 模板表单 模型通过指令隐式创建 技巧01:需要在模块级别引入 FormsModule ,通常在共享模块中引入再导出,然后在需要用到 FormsModule 的模块中导入共享模块就可以啦 impor ...
- Waves:类Material Design 的圆形波浪(涟漪)点击特效插件
Waves:类Material Design 的圆形波浪(涟漪)点击特效插件 2014/08/06 分类:前端开发, 素材分享 浏览:6,734次 来源:原创 1个评论 6,734 ...
- Material使用07 MatGridListModule的使用
1 MatGridListModule简介 对相似数据的展现,尤其是像是图片的展示 使用起来很像表格 官方文档:点击前往 2 MatGridListModule提供的指令 2.1 mat-grid-l ...
- Angular 学习笔记 ( timezone + moment + material date-picker + date pipe + asp.net core )
参考 : https://stackoverflow.com/questions/29979609/time-conversion-with-timezoneinfo-for-past-years h ...
随机推荐
- .NET Core 中使用GB2312编码报错的问题
错误描述 环境 dotnet 2.1.4 现象 当代码中使用 System.Text.Encoding.GetEncoding("GB2312") //或者 System.Text ...
- Innodb IO优化-配置优化
作者:吴炳锡 来源:http://www.mysqlsupport.cn/ 联系方式: wubingxi#gmail.com 转载请注明作/译者和出处,并且不能用于商业用途,违者必究. 对于数据库来讲 ...
- 把router-link标签渲染成指定的标签
<router-link>标签默认渲染成 <a>标签,可以通过tag属性把router-link渲染成指定的标签,如: <router-link to="/&q ...
- myeclipse 自动部署web项目(自动编译)
打开自动编译:project->build automatically; 注:以下两种方法适用tomcat配置在myeclipse中的情况. 1.如果在myeclipse中tomcat是以deb ...
- .gitignore无效解决方案以及git rm和rm的区别
一. gitignore 先来了解一下gitignore的常用语法 斜杠“/”表示目录, 是否已斜杠开头有很大区别,如 /build 与 build/ 的区别:其中 build/ 表示不管在哪个位置的 ...
- 4k项目--PHY通道绑定的两种模式
1.通道绑定有两种模式: • PMA bonding• PMA and PCS bonding GT通道是不支持通道绑定的 2.PMA绑定 PMA绑定减少了PMA之间的通道之间的Skew.并且在PMA ...
- VIP之Switch
Switch II 最大能连接12路输入与12路输出 不能合并数据数 每个输入可以驱动多个输出 每个输出只能被一个输入驱动 当输入没有连接到输出时,可以禁止掉 每个被禁止的输入可以设置成停止或者消耗模 ...
- BASH 基本语法
本节内容 1. 什么是shell script 2. 变量 3. 运算符 4. 流程控制 5. 函数 6. 计划任务 crontab 一 什么是shell script 将OS命令堆积到 ...
- dubbo实现示例
创建MAVEN项目 项目结构: 在项目pom.xml中添加依赖 <dependency> <groupId>org.apache.zookeeper</groupId&g ...
- 如何将已有的本地Git 库推送到远端仓库?
以Github 为例 step 1. 在Github建立一个空的仓库 Step 2. 建立远端仓库的别名 >$ git remote add origin https://github.com/ ...
