SpringBoot整合Shiro 一:搭建环境
Java项目的安全框架一般使用 shiro 与 spring security
具体怎么选择可以参考文章:安全框架 Shiro 和 Spring Security 如何选择
我这里选择使用Shiro
环境搭建
创建SpringBoot项目
导入Maven依赖
<dependency>
<groupId>org.springframework.boot</groupId>
<artifactId>spring-boot-starter-web</artifactId>
</dependency>
<dependency>
<groupId>org.apache.shiro</groupId>
<artifactId>shiro-spring</artifactId>
<version>1.5.1</version>
</dependency>
<dependency>
<groupId>org.springframework.boot</groupId>
<artifactId>spring-boot-starter-thymeleaf</artifactId>
<version>2.2.5.RELEASE</version>
</dependency>
创建 Realm 类
需要继承 AuthorizingRealm
package com.zy.config;
import org.apache.shiro.authc.AuthenticationException;
import org.apache.shiro.authc.AuthenticationInfo;
import org.apache.shiro.authc.AuthenticationToken;
import org.apache.shiro.authz.AuthorizationInfo;
import org.apache.shiro.realm.AuthorizingRealm;
import org.apache.shiro.subject.PrincipalCollection;
public class UserRealm extends AuthorizingRealm {
//授权
@Override
protected AuthorizationInfo doGetAuthorizationInfo(PrincipalCollection principalCollection) {
System.out.println("执行了=>授权doGetAuthorizationInfo");
return null;
}
//认证
@Override
protected AuthenticationInfo doGetAuthenticationInfo(AuthenticationToken authenticationToken) throws AuthenticationException {
System.out.println("执行了=>认证doGetAuthenticationInfo");
return null;
}
}
Shiro配置类
步骤1
创建realm对象
//创建realm对象(步骤1)

 @Bean(name = "userRealm")

 public UserRealm userRealm(){

     return new UserRealm();

 }
步骤2
DefaultWebSecurityManager
--> import org.apache.shiro.web.mgt.DefaultWebSecurityManager;
//DefaultWebSecurityManager(步骤2)
@Bean(name = "defaultWebSecurityManager")
public DefaultWebSecurityManager defaultWebSecurityManager(@Qualifier("userRealm") UserRealm userRealm){
DefaultWebSecurityManager securityManager=new DefaultWebSecurityManager();
securityManager.setRealm(userRealm());
return securityManager;
}
步骤3
ShiroFilterFactoryBean
//ShiroFilterFactoryBean(步骤3)
@Bean(name = "shiroFilterFactoryBean")
//@Bean
public ShiroFilterFactoryBean shiroFilterFactoryBean(@Qualifier("defaultWebSecurityManager")DefaultWebSecurityManager defaultWebSecurityManager){
ShiroFilterFactoryBean bean=new ShiroFilterFactoryBean();
bean.setSecurityManager(defaultWebSecurityManager);
return bean;
}
ShiroConfig搭建完成
package com.zy.config;
import org.apache.shiro.spring.web.ShiroFilterFactoryBean;
import org.apache.shiro.web.mgt.DefaultWebSecurityManager;
import org.springframework.beans.factory.annotation.Qualifier;
import org.springframework.context.annotation.Bean;
import org.springframework.context.annotation.Configuration;
@Configuration
public class ShiroConfig {
//ShiroFilterFactoryBean(步骤3)
@Bean(name = "shiroFilterFactoryBean")
//@Bean
public ShiroFilterFactoryBean shiroFilterFactoryBean(@Qualifier("defaultWebSecurityManager")DefaultWebSecurityManager defaultWebSecurityManager){
ShiroFilterFactoryBean bean=new ShiroFilterFactoryBean();
bean.setSecurityManager(defaultWebSecurityManager);
return bean;
}
//DefaultWebSecurityManager(步骤2)
@Bean(name = "defaultWebSecurityManager")
public DefaultWebSecurityManager defaultWebSecurityManager(@Qualifier("userRealm") UserRealm userRealm){
DefaultWebSecurityManager securityManager=new DefaultWebSecurityManager();
securityManager.setRealm(userRealm());
return securityManager;
}
//创建realm对象(步骤1)
@Bean(name = "userRealm")
public UserRealm userRealm(){
return new UserRealm();
}
}
Controller
首先是index页面
index.html
<!DOCTYPE html>
<html lang="en" xmlns:th="http://www.thymeleaf.org"
xmlns:shiro="http://www.thymeleaf.org/thymeleaf-extras-shiro">
<head>
<meta charset="UTF-8">
<title>Title</title>
</head>
<body>
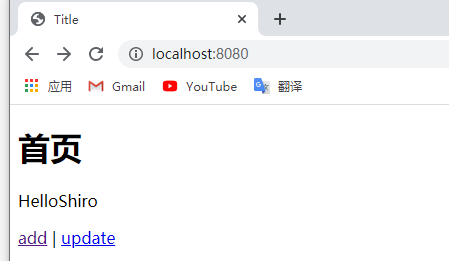
<h1>首页</h1>
<p th:text="${msg}"></p>
<a th:href="@{/user/add}">add</a> | <a th:href="@{/user/update}">update</a>
</body>
</html>
对应Controller
@RequestMapping({"/","/index"})
public String toIndex(Model model){
model.addAttribute("msg","HelloShiro");
return "index";
}
add页面
add.html
<!DOCTYPE html>
<html lang="en">
<head>
<meta charset="UTF-8">
<title>Title</title>
</head>
<body>
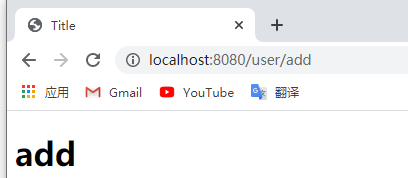
<h1>add</h1>
</body>
</html>
对应Controller
@RequestMapping("/user/add")
public String add(){
return "user/add";
}
update页面
update.html
<!DOCTYPE html>
<html lang="en">
<head>
<meta charset="UTF-8">
<title>Title</title>
</head>
<body>
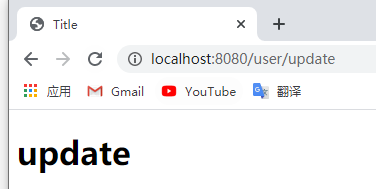
<h1>update</h1>
</body>
</html>
对应Controller
@RequestMapping("/user/update")
public String update(){
return "user/update";
}
MyController(总)
package com.zy.controller;
import org.springframework.stereotype.Controller;
import org.springframework.ui.Model;
import org.springframework.web.bind.annotation.RequestMapping;
@Controller
public class MyController {
@RequestMapping({"/","/index"})
public String toIndex(Model model){
model.addAttribute("msg","HelloShiro");
return "index";
}
@RequestMapping("/user/add")
public String add(){
return "user/add";
}
@RequestMapping("/user/update")
public String update(){
return "user/update";
}
}
测试
index界面
add界面
update界面
测试成功,搭建完成
SpringBoot整合Shiro 一:搭建环境的更多相关文章
- SpringBoot整合Shiro实现基于角色的权限访问控制(RBAC)系统简单设计从零搭建
SpringBoot整合Shiro实现基于角色的权限访问控制(RBAC)系统简单设计从零搭建 技术栈 : SpringBoot + shiro + jpa + freemark ,因为篇幅原因,这里只 ...
- SpringBoot整合Shiro+MD5+Salt+Redis实现认证和动态权限管理(上)----筑基中期
写在前面 通过前几篇文章的学习,我们从大体上了解了shiro关于认证和授权方面的应用.在接下来的文章当中,我将通过一个demo,带领大家搭建一个SpringBoot整合Shiro的一个项目开发脚手架, ...
- SpringBoot整合Shiro 四:认证+授权
搭建环境见: SpringBoot整合Shiro 一:搭建环境 shiro配置类见: SpringBoot整合Shiro 二:Shiro配置类 shiro整合Mybatis见:SpringBoot整合 ...
- SpringBoot整合Shiro 三:整合Mybatis
搭建环境见: SpringBoot整合Shiro 一:搭建环境 shiro配置类见: SpringBoot整合Shiro 二:Shiro配置类 整合Mybatis 添加Maven依赖 mysql.dr ...
- SpringBoot整合Shiro 二:Shiro配置类
环境搭建见上篇:SpringBoot整合Shiro 一:搭建环境 Shiro配置类配置 shiro的配置主要集中在 ShiroFilterFactoryBean 中 关于权限: anon:无需认证就可 ...
- 补习系列(6)- springboot 整合 shiro 一指禅
目标 了解ApacheShiro是什么,能做什么: 通过QuickStart 代码领会 Shiro的关键概念: 能基于SpringBoot 整合Shiro 实现URL安全访问: 掌握基于注解的方法,以 ...
- SpringBoot系列十二:SpringBoot整合 Shiro
声明:本文来源于MLDN培训视频的课堂笔记,写在这里只是为了方便查阅. 1.概念:SpringBoot 整合 Shiro 2.具体内容 Shiro 是现在最为流行的权限认证开发框架,与它起名的只有最初 ...
- springboot整合Shiro功能案例
Shiro 核心功能案例讲解 基于SpringBoot 有源码 从实战中学习Shiro的用法.本章使用SpringBoot快速搭建项目.整合SiteMesh框架布局页面.整合Shiro框架实现用身份认 ...
- SpringBoot 整合Shiro 一指禅
目标 了解ApacheShiro是什么,能做什么: 通过QuickStart 代码领会 Shiro的关键概念: 能基于SpringBoot 整合Shiro 实现URL安全访问: 掌握基于注解的方法,以 ...
- SpringBoot整合Shiro+MD5+Salt+Redis实现认证和动态权限管理|前后端分离(下)----筑基后期
写在前面 在上一篇文章<SpringBoot整合Shiro+MD5+Salt+Redis实现认证和动态权限管理(上)----筑基中期>当中,我们初步实现了SpringBoot整合Shiro ...
随机推荐
- 国产Linux服务器-Jexus的初步使用
题记:年末研究了一些关于Net跨平台的东西,没错,就是Jexus,就是Windows下面的IIS. 官网:https://www.jexus.org/ 先看看官网的解释再说其他的问题,Jexus就是L ...
- Python | 标识符命名规范
简单地理解,标识符就是一个名字,就好像我们每个人都有属于自己的名字,它的主要作用就是作为变量.函数.类.模块以及其他对象的名称. Python 中标识符的命名不是随意的,而是要遵守一定的命令规则,比如 ...
- 字符串可以这样加索引,你知吗?《死磕MySQL系列 七》
系列文章 三.MySQL强人"锁"难<死磕MySQL系列 三> 四.S 锁与 X 锁的爱恨情仇<死磕MySQL系列 四> 五.如何选择普通索引和唯一索引&l ...
- Python打包成exe可执行文件
Python打包成exe可执行文件 安装pyinstaller pyinstaller打包机制 Pyinstaller打包exe 总结命令 可能会碰到的一些常见问题 我们开发的脚本一般都会用到一些第三 ...
- docker容器运行java后台程序,存到数据库的时间差一天的问题
主要原因是docker容器中的时间用的是标准时间,不是用的宿主机的时间. 修改方法: docker run -e TZ="Asia/Shanghai" -d -p 80:80 -- ...
- sqlalchemy delete object
In SQL Alchemy you are deleting Objects that you get with a query from the database. This you can do ...
- UE4中C++编程(一)
一: C++工程和Gameplay框架 GameInstance 它适合放置独立于关卡的信息,比如说显示UI. GameMode 表示游戏玩法, 包含游戏进行的规则和胜利条件等等信息,游戏模式是和关卡 ...
- Veeam Backup & Replication 10.0.0.4461安装部署(包含补丁)
Veeam Backup & Replication 是一款数据保护软件,为VMware 和Hyper-V 虚拟机.物理与云环境提供了备份.复制与恢复选项.如有需要请去官方购买正版授权:htt ...
- 0-pyqt介绍
1.QT 的特点 2.QT的历史 3.搭建pyQT的开发环境 python pyqt包 pycharm 4.搭建pyQT第一个应用 必须使用两个类:QApplication和QWidget.都在P ...
- Spring Cloud Gateway限流实战
欢迎访问我的GitHub https://github.com/zq2599/blog_demos 内容:所有原创文章分类汇总及配套源码,涉及Java.Docker.Kubernetes.DevOPS ...