Kaggle上的犬种识别(ImageNet Dogs)
Kaggle上的犬种识别(ImageNet Dogs)
Dog Breed Identification (ImageNet Dogs) on Kaggle
在本节中,将解决在Kaggle竞赛中的犬种识别挑战。比赛的网址是
https://www.kaggle.com/c/dog-breed-identification
在这场竞赛中,试图鉴别120种不同品种的狗。本次竞赛中使用的数据集实际上是著名的ImageNet数据集的一个子集。与CIFAR-10数据集中的图像不同,ImageNet数据集中的图像更高更宽,尺寸不一致。
图1显示了比赛网页上的信息。为了提交结果,请先在Kaggle网站注册一个帐户。
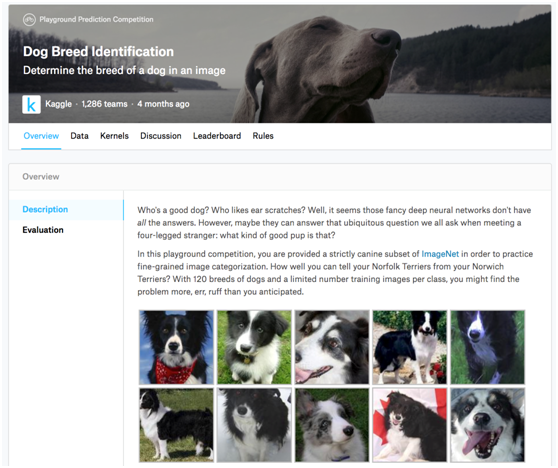
Fig. 1 Dog breed identification competition website. The dataset for the competition can be accessed by clicking the “Data” tab.
首先,导入比赛所需的软件包或模块。
import collections
from d2l import mxnet as d2l
import math
from mxnet import autograd, gluon, init, npx
from mxnet.gluon import nn
import os
import time
npx.set_np()
1. Obtaining and Organizing the Dataset
比赛数据分为训练集和测试集。训练集包含10222帧图像和测试集包含10357帧图像。两组图像均为JPEG格式。这些图像包含三个RGB通道(颜色),具有不同的高度和宽度。训练集中有120种狗,包括拉布拉多犬、贵宾犬、腊肠犬、萨摩耶犬、哈士奇犬、吉娃娃犬和约克郡梗(Labradors, Poodles, Dachshunds, Samoyeds, Huskies, Chihuahuas, and Yorkshire Terriers)。
1.1. Downloading the Dataset
登录Kaggle后,点击图1所示犬种识别比赛网页上的“数据”选项卡,点击“全部下载”按钮下载数据集。在../data中解压缩下载的文件后,将在以下路径中找到整个数据集:
- ../data/dog-breed-identification/labels.csv
- ../data/dog-breed-identification/sample_submission.csv
- ../data/dog-breed-identification/train
- ../data/dog-breed-identification/test
可能已经注意到,上述结构与第13.13节中的CIFAR-10竞赛非常相似,其中文件夹分别训练/和测试/包含训练和测试狗图像,以及标签.csv有训练图像的标签。
类似地,为了更容易开始,提供了上面提到的数据集的小规模样本,“train_valid_test_tiny.zip”. 如果要为Kaggle竞赛使用完整的数据集,还需要将下面的demo变量更改为False。
#@save
d2l.DATA_HUB['dog_tiny'] = (d2l.DATA_URL + 'kaggle_dog_tiny.zip',
'7c9b54e78c1cedaa04998f9868bc548c60101362')
# If you use the full dataset downloaded for the Kaggle competition, change
# the variable below to False
demo = True
if demo:
data_dir = d2l.download_extract('dog_tiny')
else:
data_dir = os.path.join('..', 'data', 'dog-breed-identification')
1.2. Organizing the Dataset
组织数据集,即将验证集与训练集分离,并将图像移动到按标签分组的子文件夹中。
下面的reorg_dog_data函数用于读取训练数据标签、分割验证集并组织训练集。
def reorg_dog_data(data_dir, valid_ratio):
labels = d2l.read_csv_labels(os.path.join(data_dir, 'labels.csv'))
d2l.reorg_train_valid(data_dir, labels, valid_ratio)
d2l.reorg_test(data_dir)
batch_size = 1 if demo else 128
valid_ratio = 0.1
reorg_dog_data(data_dir, valid_ratio)
2. Image Augmentation
此部分中的图像的大小大于上一部分中的图像。下面是一些可能有用的图像增强操作。
transform_train = gluon.data.vision.transforms.Compose([
# Randomly crop the image to obtain an image with an area of 0.08 to 1 of
# the original area and height to width ratio between 3/4 and 4/3. Then,
# scale the image to create a new image with a height and width of 224
# pixels each
gluon.data.vision.transforms.RandomResizedCrop(224, scale=(0.08, 1.0),
ratio=(3.0/4.0, 4.0/3.0)),
gluon.data.vision.transforms.RandomFlipLeftRight(),
# Randomly change the brightness, contrast, and saturation
gluon.data.vision.transforms.RandomColorJitter(brightness=0.4,
contrast=0.4,
saturation=0.4),
# Add random noise
gluon.data.vision.transforms.RandomLighting(0.1),
gluon.data.vision.transforms.ToTensor(),
# Standardize each channel of the image
gluon.data.vision.transforms.Normalize([0.485, 0.456, 0.406],
[0.229, 0.224, 0.225])])
在测试过程中,只使用明确的图像预处理操作。
transform_test = gluon.data.vision.transforms.Compose([
gluon.data.vision.transforms.Resize(256),
# Crop a square of 224 by 224 from the center of the image
gluon.data.vision.transforms.CenterCrop(224),
gluon.data.vision.transforms.ToTensor(),
gluon.data.vision.transforms.Normalize([0.485, 0.456, 0.406],
[0.229, 0.224, 0.225])])
3. Reading the Dataset
与上一节一样,可以创建一个ImageFolderDataset实例来读取包含原始图像文件的数据集。
train_ds, valid_ds, train_valid_ds, test_ds = [
gluon.data.vision.ImageFolderDataset(
os.path.join(data_dir, 'train_valid_test', folder))
for folder in ('train', 'valid', 'train_valid', 'test')]
在这里,创建DataLoader实例。
train_iter, train_valid_iter = [gluon.data.DataLoader(
dataset.transform_first(transform_train), batch_size, shuffle=True,
last_batch='keep') for dataset in (train_ds, train_valid_ds)]
valid_iter, test_iter = [gluon.data.DataLoader(
dataset.transform_first(transform_test), batch_size, shuffle=False,
last_batch='keep') for dataset in (valid_ds, test_ds)]
4. Defining the Model
本次比赛的数据集是ImageNet数据集的一个子集。因此,选择一个在整个ImageNet数据集上预先训练的模型,并使用来提取图像特征,以便输入到定制的小规模输出网络中。Gluon提供了一系列预先训练的模型。这里,将使用经过预先训练的ResNet-34模型。由于竞争数据集是预训练数据集的一个子集,因此只需重用预训练模型输出层的输入,即提取的特征。然后,可以用一个可以训练的小的定制输出网络来代替原来的输出层,例如一系列中两个完全连接的层。不重新训练用于特征提取的预训练模型。这减少了训练时间和存储模型参数梯度所需的内存。
必须注意,在图像增强过程中,使用整个ImageNet数据集的三个RGB通道的平均值和标准差进行标准化。这与预训练模型的规范化是一致的。
def get_net(ctx):
finetune_net = gluon.model_zoo.vision.resnet34_v2(pretrained=True)
# Define a new output network
finetune_net.output_new = nn.HybridSequential(prefix='')
finetune_net.output_new.add(nn.Dense(256, activation='relu'))
# There are 120 output categories
finetune_net.output_new.add(nn.Dense(120))
# Initialize the output network
finetune_net.output_new.initialize(init.Xavier(), ctx=ctx)
# Distribute the model parameters to the CPUs or GPUs used for computation
finetune_net.collect_params().reset_ctx(ctx)
return finetune_net
在计算损失时,首先利用成员变量特征来获取预先训练模型输出层的输入,即提取的特征。然后,使用这个特性作为小型定制输出网络的输入并计算输出。
loss = gluon.loss.SoftmaxCrossEntropyLoss()
def evaluate_loss(data_iter, net, ctx):
l_sum, n = 0.0, 0
for X, y in data_iter:
y = y.as_in_ctx(ctx)
output_features = net.features(X.as_in_ctx(ctx))
outputs = net.output_new(output_features)
l_sum += float(loss(outputs, y).sum())
n += y.size
return l_sum / n
5. Defining the Training Functions
将根据模型在验证集上的性能来选择模型并调整超参数。模型训练功能训练只训练小型定制输出网络。
def train(net, train_iter, valid_iter, num_epochs, lr, wd, ctx, lr_period,
lr_decay):
# Only train the small custom output network
trainer = gluon.Trainer(net.output_new.collect_params(), 'sgd',
{'learning_rate': lr, 'momentum': 0.9, 'wd': wd})
for epoch in range(num_epochs):
train_l_sum, n, start = 0.0, 0, time.time()
if epoch > 0 and epoch % lr_period == 0:
trainer.set_learning_rate(trainer.learning_rate * lr_decay)
for X, y in train_iter:
y = y.as_in_ctx(ctx)
output_features = net.features(X.as_in_ctx(ctx))
with autograd.record():
outputs = net.output_new(output_features)
l = loss(outputs, y).sum()
l.backward()
trainer.step(batch_size)
train_l_sum += float(l)
n += y.size
time_s = "time %.2f sec" % (time.time() - start)
if valid_iter is not None:
valid_loss = evaluate_loss(valid_iter, net, ctx)
epoch_s = ("epoch %d, train loss %f, valid loss %f, "
% (epoch + 1, train_l_sum / n, valid_loss))
else:
epoch_s = ("epoch %d, train loss %f, "
% (epoch + 1, train_l_sum / n))
print(epoch_s + time_s + ', lr ' + str(trainer.learning_rate))
6. Training and Validating the Model
现在,可以训练和验证模型。可以调整以下超参数。例如,可以增加纪元的数量。由于lr_period and lr_decay分别设置为10和0.1,因此优化算法的学习率每10个周期将乘以0.1。
ctx, num_epochs, lr, wd = d2l.try_gpu(), 1, 0.01, 1e-4
lr_period, lr_decay, net = 10, 0.1, get_net(ctx)
net.hybridize()
train(net, train_iter, valid_iter, num_epochs, lr, wd, ctx, lr_period,
lr_decay)
epoch 1, train loss 4.879428, valid loss 4.834594, time 8.79 sec, lr 0.01
7. Classifying the Testing Set and Submitting Results on Kaggle
在获得满意的模型设计和超参数后,使用所有训练数据集(包括验证集)对模型进行再训练,然后对测试集进行分类。请注意,预测是由刚刚训练的输出网络做出的。
net = get_net(ctx)
net.hybridize()
train(net, train_valid_iter, None, num_epochs, lr, wd, ctx, lr_period,
lr_decay)
preds = []
for data, label in test_iter:
output_features = net.features(data.as_in_ctx(ctx))
output = npx.softmax(net.output_new(output_features))
preds.extend(output.asnumpy())
ids = sorted(os.listdir(
os.path.join(data_dir, 'train_valid_test', 'test', 'unknown')))
with open('submission.csv', 'w') as f:
f.write('id,' + ','.join(train_valid_ds.synsets) + '\n')
for i, output in zip(ids, preds):
f.write(i.split('.')[0] + ',' + ','.join(
[str(num) for num in output]) + '\n')
epoch 1, train loss 4.848448, time 10.14 sec, lr 0.01
执行上述代码后,将生成一个“submission.csv “文件。此文件的格式符合Kaggle竞赛要求。
8. Summary
- We can use a model pre-trained on the ImageNet dataset to extract features and only train a small custom output network. This will allow us to classify a subset of the ImageNet dataset with lower computing and storage overhead.
Kaggle上的犬种识别(ImageNet Dogs)的更多相关文章
- 软件公司的两种管理方式 总体来说,这个世界上存在两种不同的软件公司的组织结构。我把他们叫做 Widget Factory(小商品工厂) 和 Film Crews(电影工作组
软件公司的两种管理方式 一个简单的回答应该是——“因为在我们的社会里,我们总是会认为薪水和会和职位的层次绑在一起”.但是,这个答案同时也折射出一个事实——我们的薪资是基于我们的所理解的价值,但这并没有 ...
- Android | 教你如何在安卓上实现通用卡证识别,一键各种卡绑定
目录 前言 通用卡证识别的应用场景 如何使用通用卡证识别服务 集成通用卡证识别服务的关键流程 开发实战 1 开发准备 1.1 在项目级gradle里添加华为maven仓 1.2 在应用级的build. ...
- 执行Asp.net应用程序在Linux上的3种托管方式
执行Asp.net应用程序在Linux上的3种托管方式 想要执行Asp.net应用程序在Linux上.我们有3种选择: 1.使用Apache作为Webserver.使用mod_mono:http:// ...
- 头像截图上传三种方式之一(一个简单易用的flash插件)(asp.net版本)
flash中有版权声明,不适合商业开发.这是官网地址:http://www.hdfu.net/ 本文参考了http://blog.csdn.net/yafei450225664/article/det ...
- trape 一种识别工具
trape是一种识别工具,可以让你跟踪任何人,你可以得到的信息非常详细.通过去识别现有的网站所登录的用户,来追踪一个人的虚拟身份 如何使用它首先卸载工具.git clone https://githu ...
- USB闪存驱动器未显示在MacOS的Finder或磁盘工具上?为什么Mac无法识别USB该如何解决?
您可能会在Mac上无法显示的闪存驱动器上形成困扰.您确定驱动器正常,但Mac计算机无法检测到. 阅读这篇文章,闪存驱动器未显示在MacOS的Finder或磁盘工具上?为什么Mac无法识别USB该如何 ...
- 当 dotnet-monitor 遇上 Prometheus, 是种什么样的体验?
对于开发和运维人员来说, 监控大屏很棒, 让我们来做一个 Dashboard 吧! 大家可能听说过一些 CLI 诊断工具, 比如 dotnet-counters,dotnet-dump 和 dotne ...
- 【Java程序】tesseract_orc java上的一种实现方法
今天想着把以前做过的一个Android的文字检测识别应用好好的回顾一下,因为以前写java程序,目的就是能用就行,不会仔细看每一个部分代码,也不会记他们的用法,不回会去查API,借鉴别人的例程,用过就 ...
- Android | 教你如何在安卓上实现二代身份证识别,一键实名认证
@ 目录 前言 场景 开发前准备 android studio 安装 在项目级gradle里添加华为maven仓 在应用级的build.gradle里面加上SDK依赖 在AndroidManifest ...
随机推荐
- android CVE
本文收集网上android cve的一些分析供后续学习: Android uncovers master-key:android1.6-4.0 由于ZIP格式允许存在两个或以上完全相同的路径,而安卓系 ...
- hdu4515 小模拟
题意: 给你当期日期,问前D天和后D天的年月日. 思路: 直接模拟就行了水题,对了别忘了题目2013,3,5要输出这样的2013/03/05. #include<stdio ...
- 【JavaScript】JS从入门到深入(复习查漏向
[JavaScript]JS从入门到深入(复习查漏向 pre 精细得学过一遍JS后才发现,原来之前CTF中有些nodejs的题目以及一些游戏题的payload就变得很好理解了. 基础知识 ECMASc ...
- 8张图带你了解iptables的前世今生
1 安全技术和防火墙 1 安全技术和防火墙 入侵检测系统(Intrusion Detection Systems):特点是不阻断任何网络访问,量化.定位来自内 外网络的威胁情况,主要以提供报警和事后监 ...
- ES6新增常用方法
字符串新增方法 padStart.padEnd 如果原字符串不够指定长度,则会在左侧(右侧)填充字符串,用以补全 padStart( length: number, fillStr?: string ...
- Windows进程间通讯(IPC)----消息队列
消息队列 windows系统是通过消息驱动的,每移动一下鼠标,点击一下屏幕都会产生一个消息.这些消息会先被放在windows的一个系统消息队列(先进先出)中,windows系统会为每一个GUI线程创建 ...
- MzzTxx——团队贡献分分配方案
项目 内容 这个作业属于哪个课程 2021春季计算机学院软件工程(罗杰 任健) 这个作业的要求在哪里 团队贡献分分配规则制定 我在这个课程的目标是 进一步提升工程化开发能力,积累团队协作经验,熟悉全栈 ...
- DNS和BIND
https://www.jianshu.com/p/296b2c7ea76f DNS和BIND 毛利卷卷发关注 0.482018.07.25 10:33:44字数 4,919阅读 4,909 DNS ...
- g77介绍 g77 是 Fortran77 的编译器。它对 Fortran 77 标准提供完备的支持,并支持 Fortran 90 和 95 的部分特性。 由于 Fortran 77 标准在数值计算中的影响力,g77 可能是应用最广的Fortran编译器。 在 GCC 4.0 之前,g77 是 GCC 的一部分,但现在,g77 已经停止开发。
GFORTRAN 维基百科,自由的百科全书 跳到导航 跳到搜索 此条目需要扩充. (2018年11月2日)请协助改善这篇条目,更进一步的信息可能会在讨论页或扩充请求中找到.请在扩充条目后将此模 ...
- 常见判断错误 (Day_30)
写给自己的话: 这是一个卡了我小半天的BUG,也是一个很低端的BUG,写篇博客吧,以后回来看看,会发现曾经的自己是如何的菜. 同样,以此记录我的进步 步入正题,这是我实现多条件分页时遇到的一个BUG, ...