测开之路一百五十五:jquery-validation前台数据验证
前面做的wtform验证是服务器端的验证,需要把数据传输到服务器,服务器验证后再吧结果传输到前端,网络慢的时候,用户体验不好,所以需要前端验证,且后端验证不能少
传统的js或者jquery如果要验证信息,需要把一个个元素下的信息拿下来,再验证,而validation可以根据元素定位,可以直接就验证了
validation官网:https://jqueryvalidation.org/
cnd引用地址:https://www.bootcdn.cn/jquery-validate/
引用标签:
<script src="https://cdn.bootcss.com/jquery-validate/1.15.1/jquery.validate.js"></script>
<script src="https://cdn.bootcss.com/jquery-validate/1.15.0/additional-methods.min.js"></script>

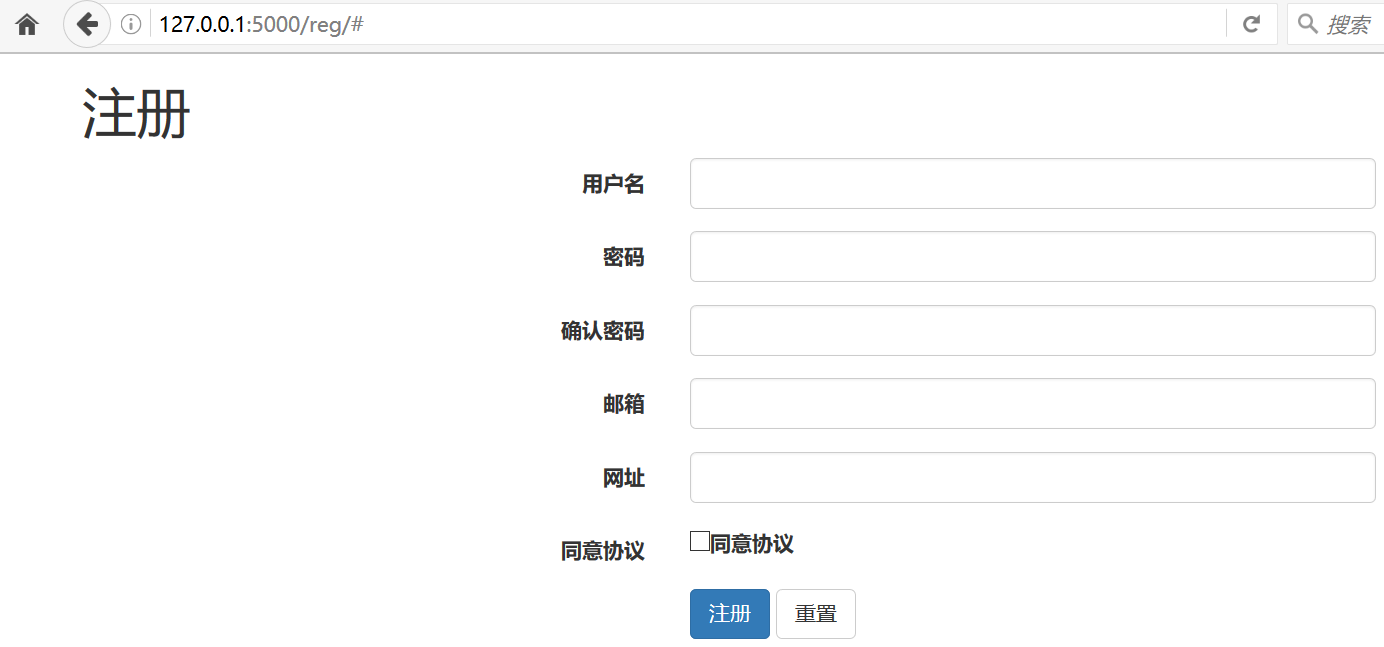
页面
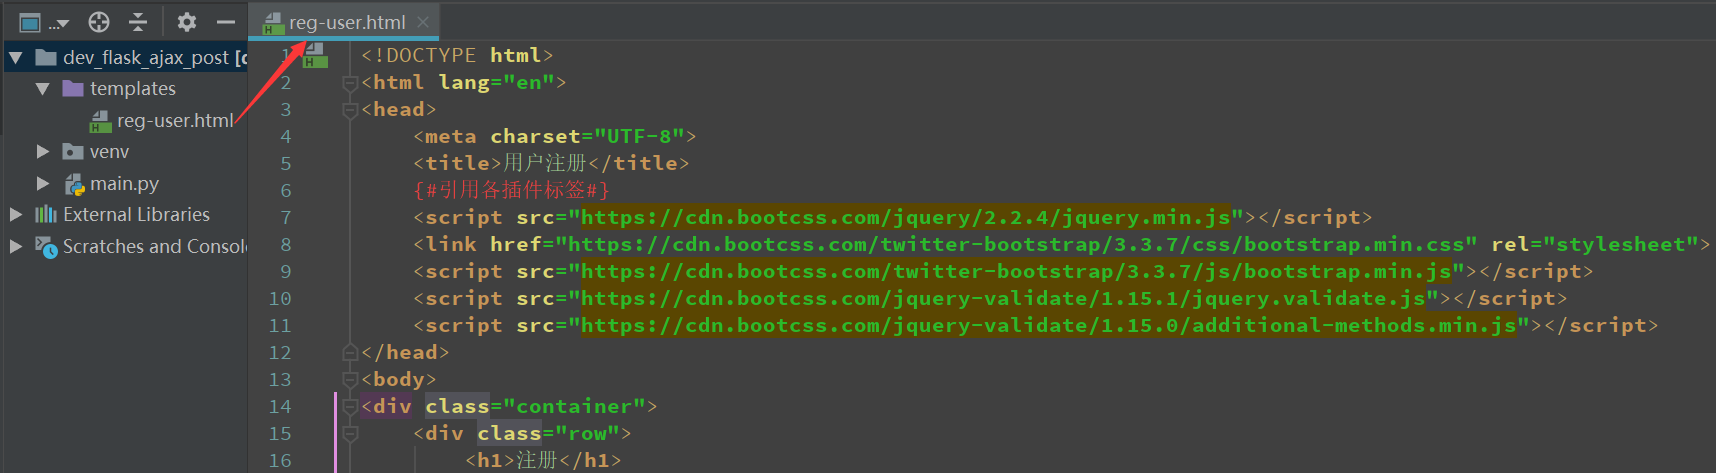
<!DOCTYPE html>
<html lang="en">
<head>
<meta charset="UTF-8">
<title>用户注册</title>
{#引用各插件标签#}
<script src="https://cdn.bootcss.com/jquery/2.2.4/jquery.min.js"></script>
<link href="https://cdn.bootcss.com/twitter-bootstrap/3.3.7/css/bootstrap.min.css" rel="stylesheet">
<script src="https://cdn.bootcss.com/twitter-bootstrap/3.3.7/js/bootstrap.min.js"></script>
<script src="https://cdn.bootcss.com/jquery-validate/1.15.1/jquery.validate.js"></script>
<script src="https://cdn.bootcss.com/jquery-validate/1.15.0/additional-methods.min.js"></script>
</head>
<body>
<div class="container">
<div class="row">
<h1>注册</h1>
</div>
<div class="row">
<div class="col-md-6 col-md-offset-3">
<form action="#" method="post" id="regForm" autocomplete="off" class="form-horizontal">
{# <form action="#" id="regForm" autocomplete="off" class="form-horizontal">#}
<div class="form-group">
<label for="username" class="control-label col-md-2">用户名</label>
<div class="col-md-10">
<input type="text" class="form-control" id="username" name="username">
</div>
</div>
<div class="form-group">
<label for="pwd" class="control-label col-md-2">密码</label>
<div class="col-md-10">
<input type="password" class="form-control" id="pwd" name="pwd">
</div>
</div>
<div class="form-group">
<label for="confirm" class="control-label col-md-2">确认密码</label>
<div class="col-md-10">
<input type="password" class="form-control" id="confirm" name="confirm">
</div>
</div>
<div class="form-group">
<label for="email" class="control-label col-md-2">邮箱</label>
<div class="col-md-10">
<input type="email" class="form-control" id="email" name="email">
</div>
</div>
<div class="form-group">
<label for="website" class="control-label col-md-2">网址</label>
<div class="col-md-10">
<input type="text" class="form-control" id="website" name="website">
</div>
</div>
<div class="form-group">
<label for="agree" class="control-label col-md-2">同意协议</label>
<div class="col-md-10">
<input type="checkbox" id="agree" name="agree"><label for="agree">同意协议</label>
</div>
</div>
<div class="form-group">
<div class="col-md-10 col-md-offset-2">
<input type="submit" class="btn btn-primary" id="idSubmit" value="注册">
{# <input type="button" class="btn btn-primary" id="idSubmit" value="注册">#}
<input type="reset" class="btn btn-default" value="重置">
</div>
</div>
</form>
</div>
</div>
</div>
</body>
</html>
<script>
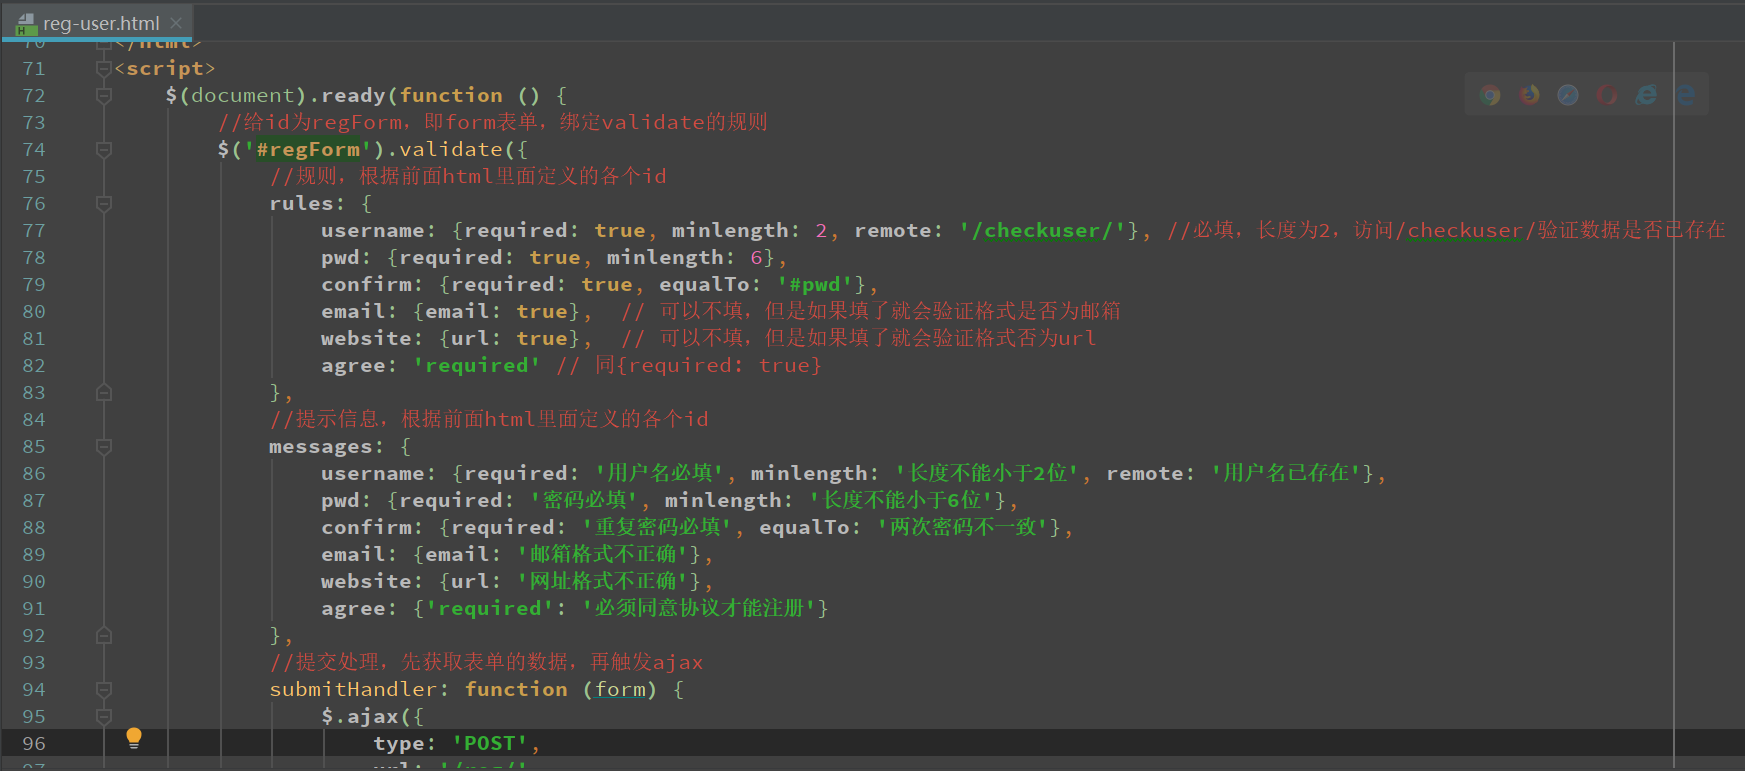
$(document).ready(function () {
//给id为regForm,即form表单,绑定validate的规则
$('#regForm').validate({
//规则,根据前面html里面定义的各个id
rules: {
username: {required: true, minlength: 2, remote: '/checkuser/'}, //必填,长度为2,访问/checkuser/验证数据是否已存在
pwd: {required: true, minlength: 6},
confirm: {required: true, equalTo: '#pwd'},
email: {email: true}, // 可以不填,但是如果填了就会验证格式是否为邮箱
website: {url: true}, // 可以不填,但是如果填了就会验证格式否为url
agree: 'required' // 同{required: true}
},
//提示信息,根据前面html里面定义的各个id
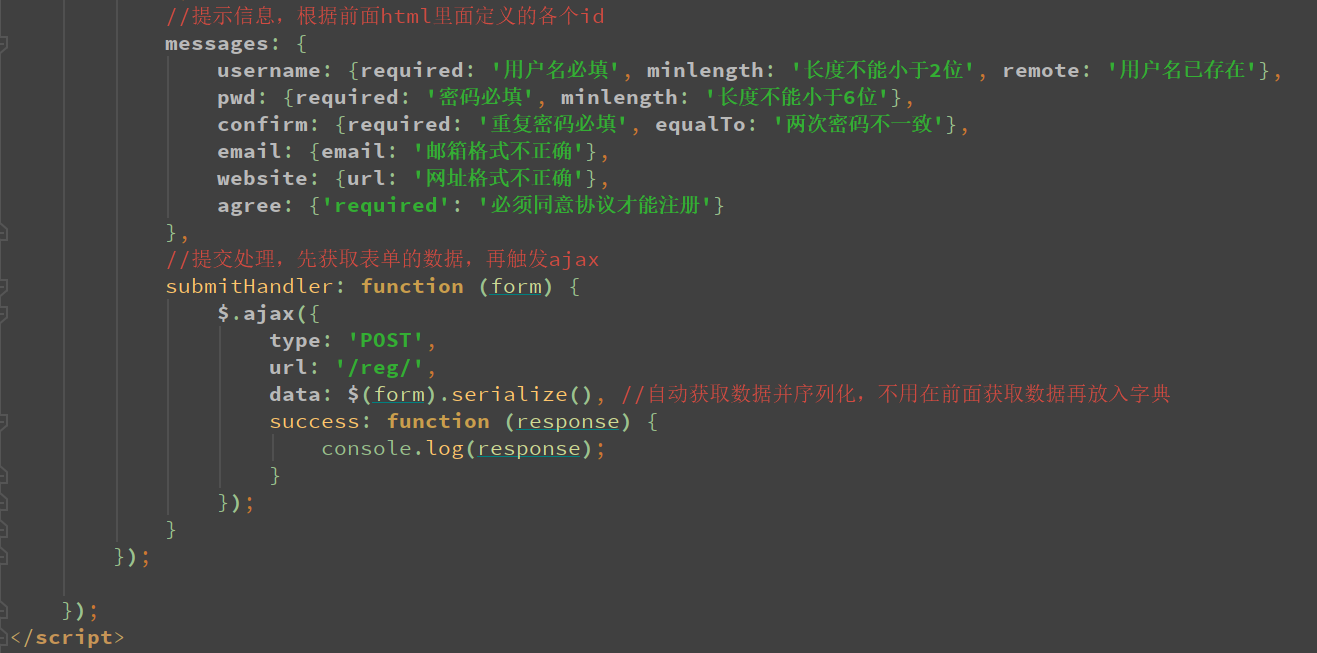
messages: {
username: {required: '用户名必填', minlength: '长度不能小于2位', remote: '用户名已存在'},
pwd: {required: '密码必填', minlength: '长度不能小于6位'},
confirm: {required: '重复密码必填', equalTo: '两次密码不一致'},
email: {email: '邮箱格式不正确'},
website: {url: '网址格式不正确'},
agree: {'required': '必须同意协议才能注册'}
},
//提交处理,先获取表单的数据,再触发ajax
submitHandler: function (form) {
$.ajax({
type: 'POST',
url: '/reg/',
data: $(form).serialize(), //自动获取数据并序列化,不用在前面获取数据再放入字典
success: function (response) {
console.log(response);
}
});
}
}); });
</script>
后台代码
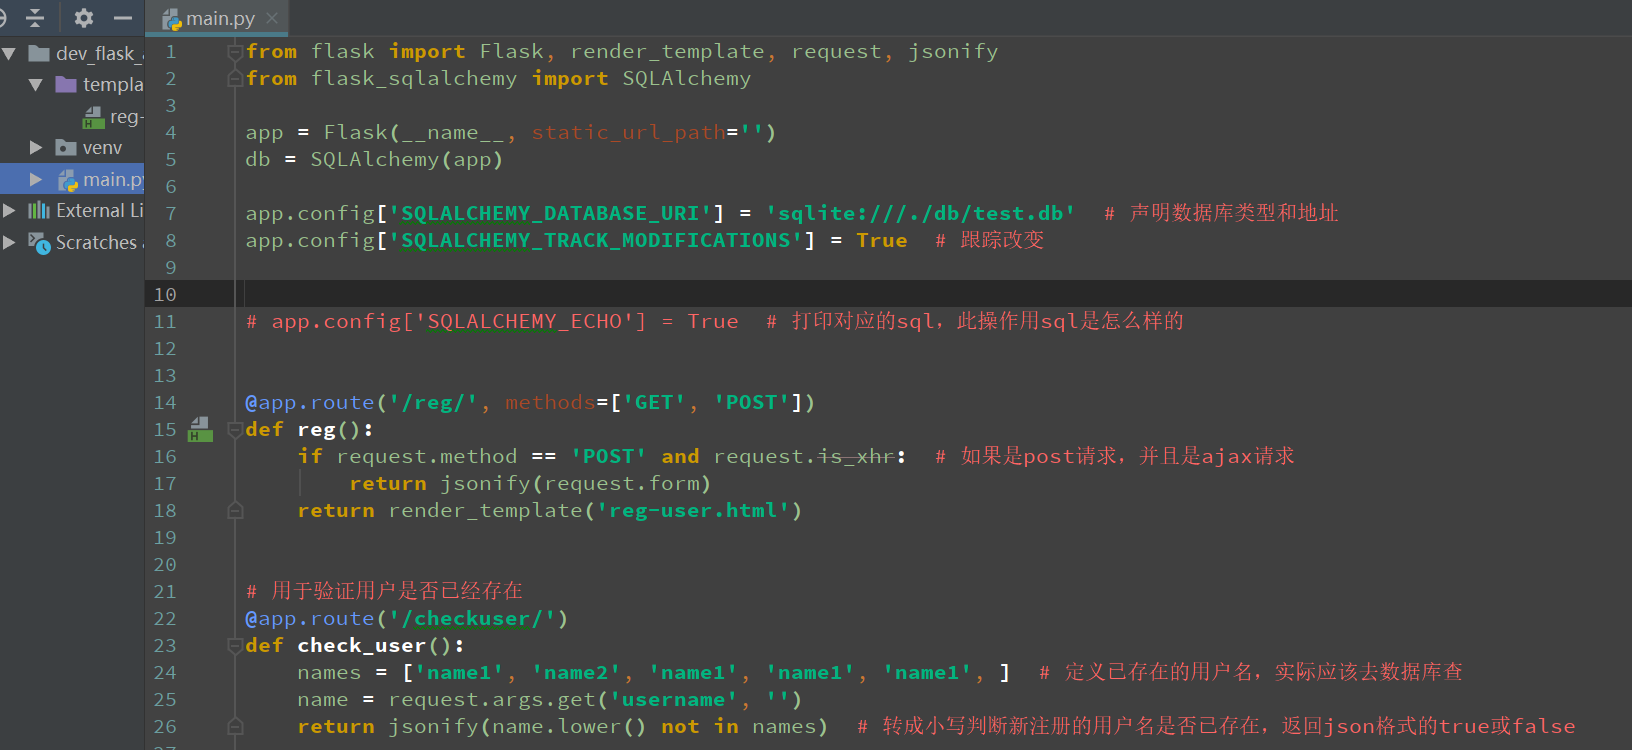
from flask import Flask, render_template, request, jsonify
from flask_sqlalchemy import SQLAlchemy

app = Flask(__name__, static_url_path='')
db = SQLAlchemy(app)

app.config['SQLALCHEMY_DATABASE_URI'] = 'sqlite:///./db/test.db'  # 声明数据库类型和地址
app.config['SQLALCHEMY_TRACK_MODIFICATIONS'] = True  # 跟踪改变

# app.config['SQLALCHEMY_ECHO'] = True  # 打印对应的sql,此操作用sql是怎么样的

@app.route('/reg/', methods=['GET', 'POST'])
def reg():
    if request.method == 'POST' and request.is_xhr:  # 如果是post请求,并且是ajax请求
        return jsonify(request.form)
    return render_template('reg-user.html')

# 用于验证用户是否已经存在
@app.route('/checkuser/')
def check_user():
    names = ['name1', 'name2', 'name1', 'name1', 'name1', ]  # 定义已存在的用户名,实际应该去数据库查
    name = request.args.get('username', '')
    return jsonify(name.lower() not in names)  # 转成小写判断新注册的用户名是否已存在,返回json格式的true或false

if __name__ == '__main__':
    app.run(debug=True)
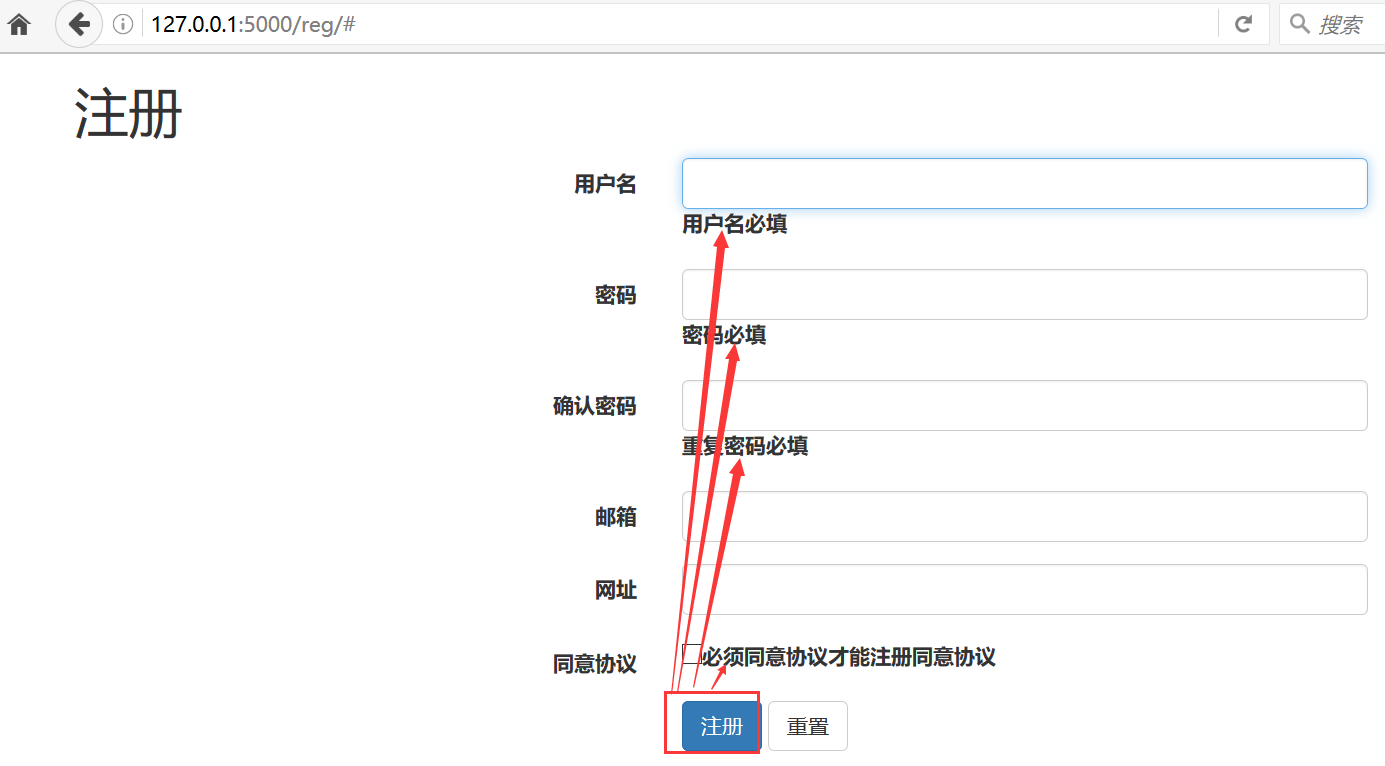
页面
拦截
通过

测开之路一百五十五:jquery-validation前台数据验证的更多相关文章
- 测开之路一百二十五:flask之urlencode参数传递和解析
当get请求传参时,用?分隔参数和域名,用&分隔参数,如果参数里面本身就有&符号就会识别不出来,还是会当成分隔符,所以这些数据在传输的时候,就需要转义,现在普遍是转成urlencode ...
- 测开之路一百四十五:SQLAlchemy与后台模板整合之新增、查询、删除
实现在页面上点击展示页就展示内容,点击新增页就触发新增功能 项目结构 admin.__init__ from flask import Blueprint admin = Blueprint('adm ...
- 测开之路一百三十九:会话管理之cookie写入、读取、和更新
机制:服务器端发送的小段文本信息存储在客户端硬盘 功能:记录用户偏好,请求.页面.站点间共享信息 特点:易丢失.安全隐患 添加cookie,需要用到make_respons.set_cookie @a ...
- 测开之路一百三十八:会话管理之session
session管理和使用,需要用到flask的session模块和设置安全码:app.secret_key 比如列表页和编辑功能只能给admin用 列表页 编辑页 添加session 登录成功时,把u ...
- 测开之路一百二十九:jinja2模板语法
flask用的是jinja2模板,有自己特定的语法 形参: 在html里面留占位参数: {{ 参数名 }},后端传值时,参数名=参数值 <!DOCTYPE html><html la ...
- 测开之路一百二十八:flask之重定向和404
a.b两个视图,分别返回a的页面和b的页面 重定向:redirect 重定向到路由:请求/a/时,重定向到/b/ 重定向到视图函数:url_for(“函数名“),访问/a/时,重定向到函数b() 主动 ...
- 测开之路一百二十六:flask之获取request请求数据
可以根据flask的request对象获取所有的请求信息 path = request.path # 获取请求地址method = request.method # 获取请求方法ip = reques ...
- 测开之路一百二十四:flask之MVC响应过程
MVC流程 原本的请求响应 结构: 视图: from flask import Flask, render_template app = Flask(__name__) @app.route(&quo ...
- 测开之路一百四十八:WTForms表单验证
使用WTForms表单验证,可以在数据建模时就设置验证信息和错误提示 创建模型时,设置验证内容,如必填.格式.长度 from flask_wtf import Formfrom wtforms imp ...
- 测开之路一百零四:jquery操作样式
jquery操作样式 添加样式.删除样式 切换样式 css("属性","值") css("属性","值"), 修改多个 ...
随机推荐
- 60. Permutation Sequence (JAVA)
The set [1,2,3,...,n] contains a total of n! unique permutations. By listing and labeling all of the ...
- CentOS 基础命令
命令格式: 命令字 选项 参数1 参数2 ..... CentOS 7 主目录介绍 [xbb@localhost ~]$ ls -l /total 16lrwxrwxrwx. 1 root ro ...
- winmm.dll包含函数
DLL 文件: winmm 或者 winmm.dll DLL 名称: Windows Multimedia API 描述: winmm.dll是Windows多媒体相关应用程序接口,用于低档的音频和游 ...
- Codeforces 985 最短水桶分配 沙堆构造 贪心单调对列
A B /* Huyyt */ #include <bits/stdc++.h> #define mem(a,b) memset(a,b,sizeof(a)) #define mkp(a, ...
- 前端matrix矩阵的变化
css3 transform中的matrix矩阵 CSS3中的矩阵CSS3中的矩阵指的是一个方法,书写为matrix()和matrix3d(),前者是元素2D平面的移动变换(transform), ...
- Spring 整合过滤器
过滤器Filter是Servlet的一个技术,可通过过滤器对请求进行拦截,比如读取session判断用户是否登录.判断访问的请求URL是否有权限. 1.使用@WebFilter注解 controlle ...
- 2018 ACM-ICPC 区域赛(青岛站)题解整理
题目链接 C - Flippy Sequence(组合数学+分类讨论) 两区间异或一下,分段考虑,如果全为0则任选两相同区间,答案为$C_{n+1}^{2}=\frac{n(n+1)}{2}$,只有一 ...
- github readme 添加图片预览
 
链接: https://vjudge.net/problem/HDU-3416 题意: Do not sincere non-interference. Like that show, now sta ...
- vue的transition的name作用
记录一下今天在vue的transition中遇到的坑 <!DOCTYPE html> <html> <head> <title>Vue中CSS动画原理& ...