Spring component-scan 标签的实现
在以前文章Spring自定义标签实现中,曾说过,在sprin g 配置文件中,除了be an beans import 常用的标签意外,其他的标签都是遵循Spring 自定义标签的扩展机制进行实现功能的,
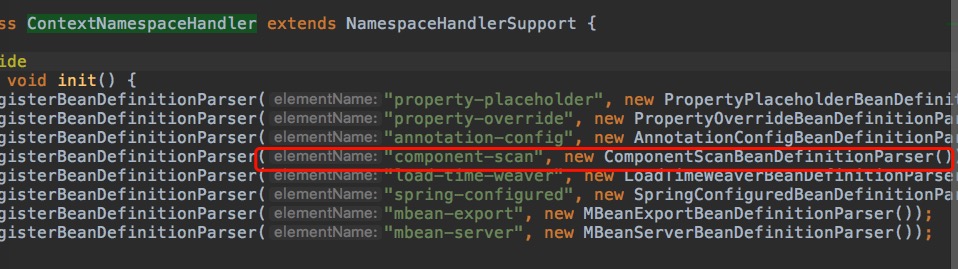
component-scan标签也不例外,关于component-scan标签的实现逻辑则是在Spring-context 包下 org.springframework.context.config.ContextNamespaceHandler 类中定义
我们看一看它的parse 解析方法:

接下来就分析它的parse 方法:主要就是三步:
- .找到 我们定义的 base-package 属性内容
- .定义扫描器
- .扫描包内容
第一步是拿到 base-package 属性来确定我们需要扫描的包的路径,不同的包我们可以用,;进行分割 <context:component-scan base-package="com.project" />
- String[] basePackages = StringUtils.tokenizeToStringArray(element.getAttribute("base-package"), ",; \t\n");
第二步 确定 ClassPathBeanDefinitionScanner 扫描器,这个扫描器大有学问
- 我们点进去 ClassPathBeanDefinitionScanner scanner = this.configureScanner(parserContext, element);
- XmlReaderContext readerContext = parserContext.getReaderContext();
- boolean useDefaultFilters = true;
- if (element.hasAttribute("use-default-filters")) {
- useDefaultFilters = Boolean.valueOf(element.getAttribute("use-default-filters"));
- }
- ClassPathBeanDefinitionScanner scanner = this.createScanner(readerContext, useDefaultFilters);
这里就创建了 ClassPathBeanDefinitionScanner对象,并且使用了默认的拦截器 useDefaultFilters,这个拦截器大有作用,我们往下看一些父类方法的调用
- return new ClassPathBeanDefinitionScanner(readerContext.getRegistry(), useDefaultFilters);
- this(registry, useDefaultFilters, getOrCreateEnvironment(registry));
- super(useDefaultFilters, environment);
我们继续,除去一些定义:往下
- if (useDefaultFilters) {
- registerDefaultFilters();
- }
- this.environment = environment;
我们使用了默认的拦截器,这里的 useDefaultFilters 是true ,然后执行 registerDefaultFilters();注册默认的拦截器,我们看一看这个默认的注册方法,很关键
- /**
- * Register the default filter for {@link Component @Component}.
- * <p>This will implicitly register all annotations that have the
- * {@link Component @Component} meta-annotation including the
- * {@link Repository @Repository}, {@link Service @Service}, and
- * {@link Controller @Controller} stereotype annotations.
- * <p>Also supports Java EE 6's {@link javax.annotation.ManagedBean} and
- * JSR-330's {@link javax.inject.Named} annotations, if available.
- *
- */
- @SuppressWarnings("unchecked")
- protected void registerDefaultFilters() {
- this.includeFilters.add(new AnnotationTypeFilter(Component.class));
- ClassLoader cl = ClassPathScanningCandidateComponentProvider.class.getClassLoader();
- try {
- this.includeFilters.add(new AnnotationTypeFilter(
- ((Class<? extends Annotation>) cl.loadClass("javax.annotation.ManagedBean")), false));
- logger.debug("JSR-250 'javax.annotation.ManagedBean' found and supported for component scanning");
- }
- catch (ClassNotFoundException ex) {
- // JSR-250 1.1 API (as included in Java EE 6) not available - simply skip.
- }
- try {
- this.includeFilters.add(new AnnotationTypeFilter(
- ((Class<? extends Annotation>) cl.loadClass("javax.inject.Named")), false));
- logger.debug("JSR-330 'javax.inject.Named' annotation found and supported for component scanning");
- }
- catch (ClassNotFoundException ex) {
- // JSR-330 API not available - simply skip.
- }
- }
就是上面这段代码,我们姑且先不看代码,先看一看它的注释翻译:
- /**
- * Register the default filter for {@link Component @Component}.
- * <p>This will implicitly register all annotations that have the
- * {@link Component @Component} meta-annotation including the
- * {@link Repository @Repository}, {@link Service @Service}, and
- * {@link Controller @Controller} stereotype annotations.
- * <p>Also supports Java EE 6's {@link javax.annotation.ManagedBean} and
- * JSR-330's {@link javax.inject.Named} annotations, if available.
- *
- */
注册一个带有@Component 的默认拦截器,将隐士的注册所有的带有@Component 的元注解,包含@Repository @Service @Controller 注解
通过这个解释,我们可以得知,默认的拦截器会拦截带有@Component 注解的类,我们看一下@Controller @Repository @Service的定义
- @Target({ElementType.TYPE})
- @Retention(RetentionPolicy.RUNTIME)
- @Documented
- @Component
- public @interface Controller {
- @Target(ElementType.TYPE)
- @Retention(RetentionPolicy.RUNTIME)
- @Documented
- public @interface Component {
- @Target({ElementType.TYPE})
- @Retention(RetentionPolicy.RUNTIME)
- @Documented
- @Component
- public @interface Repository {
看一看出来什么呢,这三个注解都实现了@Componet 的注解,所以都会被拦截住;
其实通过它的注释我们就已经明白了,我们就看一下代码逻辑吧,这个 includeFilters 其实是一个链表
- private final List<TypeFilter> includeFilters = new LinkedList<TypeFilter>();
进行注册Component 拦截器:
- this.includeFilters.add(new AnnotationTypeFilter(Component.class));
第三步具体的逻辑大家可以往下点点;我们有了扫描器了,我们其实可以进行第三步扫描了:
- Set<BeanDefinitionHolder> beanDefinitions = scanner.doScan(basePackages);
这个方法,扫描到匹配的class文件,装入Set<File>容器里:可以看出获取文件如果是文件目录采用了递归的方式进行下一层寻找
- protected void doRetrieveMatchingFiles(String fullPattern, File dir, Set<File> result) throws IOException {
- if (logger.isDebugEnabled()) {
- logger.debug("Searching directory [" + dir.getAbsolutePath() +
- "] for files matching pattern [" + fullPattern + "]");
- }
- File[] dirContents = dir.listFiles();
- if (dirContents == null) {
- if (logger.isWarnEnabled()) {
- logger.warn("Could not retrieve contents of directory [" + dir.getAbsolutePath() + "]");
- }
- return;
- }
- for (File content : dirContents) {
- String currPath = StringUtils.replace(content.getAbsolutePath(), File.separator, "/");
- if (content.isDirectory() && getPathMatcher().matchStart(fullPattern, currPath + "/")) {
- if (!content.canRead()) {
- if (logger.isDebugEnabled()) {
- logger.debug("Skipping subdirectory [" + dir.getAbsolutePath() +
- "] because the application is not allowed to read the directory");
- }
- }
- else {
- doRetrieveMatchingFiles(fullPattern, content, result);
- }
- }
- if (getPathMatcher().match(fullPattern, currPath)) {
- result.add(content);
- }
- }
- }
转换成Resource【】数组:
- return result.toArray(new Resource[result.size()]);
将每一个resource 封装成 MetadataReader 对象,就可以获取这个class文件的 所有信息,比如是不是接口啊,实现类等信息,这个封装过程需要好好看一下,asm的操作
- MetadataReader metadataReader = this.metadataReaderFactory.getMetadataReader(resource);
然后就是拦截器的判断:
- isCandidateComponent(metadataReader)
拦截器的过滤匹配
- /**
- * Determine whether the given class does not match any exclude filter
- * and does match at least one include filter.
- * @param metadataReader the ASM ClassReader for the class
- * @return whether the class qualifies as a candidate component
- */
- protected boolean isCandidateComponent(MetadataReader metadataReader) throws IOException {
- for (TypeFilter tf : this.excludeFilters) {
- if (tf.match(metadataReader, this.metadataReaderFactory)) {
- return false;
- }
- }
- for (TypeFilter tf : this.includeFilters) {
- if (tf.match(metadataReader, this.metadataReaderFactory)) {
- return isConditionMatch(metadataReader);
- }
- }
- return false;
- }
- if (isCandidateComponent(sbd)) {
- if (debugEnabled) {
- logger.debug("Identified candidate component class: " + resource);
- }
- candidates.add(sbd);
- }
通过这个的学习,大家可以去看一下Mybatis 的包扫描了,它则是继承了Spring的扫描类,但并没有使用默认的拦截器,而是配置了自己的一套拦截器及拦截接口等一些配置;
Spring component-scan 标签的实现的更多相关文章
- [Spring Boot] Use Component Scan to scan for Bean
Component Scan is important concept when we want to create Bean. Currently we know what, for the cla ...
- Spring <context:component-scan>标签属性 use-default-filters 以及子标签 include-filter使用说明
Spring <context:component-scan>标签作用有很多,最基本就是 开启包扫描,可以使用@Component.@Service.@Component等注解: 今天要作 ...
- 基于Spring开发——自定义标签及其解析
1. XML Schema 1.1 最简单的标签 一个最简单的标签,形式如: <bf:head-routing key="1" value="1" to= ...
- Spring源码学习-容器BeanFactory(三) BeanDefinition的创建-解析Spring的默认标签
写在前面 上文Spring源码学习-容器BeanFactory(二) BeanDefinition的创建-解析前BeanDefinition的前置操作中Spring对XML解析后创建了对应的Docum ...
- Spring中bean标签的属性和值:
Spring中bean标签的属性和值: <bean name="user" class="com.pojo.User" init-method=" ...
- Spring——使用自定义标签
文章内容参考了<Spring源码深度解析>一书.自己照着书中内容做了一遍,不懂的地方以及采坑的地方会在文中记录. 推荐一篇post,关于Spring配置文件的命名空间: https://w ...
- Spring表单标签
虽然我们可以使用HTML原生的form表单标签来轻松的写出一个表单,其实我一直都是这样做的,但是使用Spring表单标签可以更方便我们完成例如:验证失败后表单数据的回填功能(虽然你可以使用EL+JST ...
- spring:使用<prop>标签为Java持久属性集注入值
spring:使用<prop>标签为Java持久属性集注入值 使用 spring 提供的<prop>为Java持久属性集注入值,也就是向 java.util.Propertie ...
- not registered via @EnableConfigurationProperties or marked as Spring component
利用@ConfigurationProperties(prefix = "")来绑定属性时报错: not registered via @EnableConfigurationPr ...
- Spring IoC 自定义标签解析
前言 本系列全部基于 Spring 5.2.2.BUILD-SNAPSHOT 版本.因为 Spring 整个体系太过于庞大,所以只会进行关键部分的源码解析. 本篇文章主要介绍 Spring IoC 容 ...
随机推荐
- Layout-3相关代码:3列布局代码演化[二]
<!doctype html> <html> <head> <meta charset="utf-8"> <title> ...
- Angular CLI: 全局脚本
全局脚本 有的时候,我们需要加载全局脚本,例如 jQuery 脚本库,第三方的控件库等等.比如 jQuery 可以直接加载到 window 对象上,这就需要我们使用 Angular 中的全局脚本来处理 ...
- java反射应用
package cn.sxt.TestClass; import java.lang.reflect.Field; import java.lang.reflect.InvocationTargetE ...
- LeetCode 237. Delete Node in a Linked List 删除链表结点(只给定要删除的结点) C++/Java
Write a function to delete a node (except the tail) in a singly linked list, given only access to th ...
- zabbix3.0.4 探索主机Discovery自动发现agent主机和zabbix-agent自动注册详细图文教程
Zabbix 自动发现(Discovery)功能使用 随着监控主机不断增多,有的时候需要添加一批机器,特别是刚用zabbix的运维人员需要将公司的所有服务器添加到zabbix,如果使用传统办法去单个添 ...
- 嵌入式linux——时钟(三)
今天写第一篇,S3C2440的时钟,配置好时钟系统,各个模块才能正常有效的工作,为了了解始终系统,必须要阅读芯片手册,尽量看英文版的,这样还能捎带着增加一下阅读英语计数文档的能力. 概览 在2440数 ...
- mount命令和自动挂载实例
前言 介绍mount命令和一个实例. mount命令 作用 作用:挂载linux系统外的文件 命令格式 mount [-hV] mount -a [-fFnrsvw] [-t vfstype] mou ...
- gitkraken clone报错 Configured SSH key is invalid
gitkraken clone远程仓库时报错 Configured SSH key is invalid. Please confirm that is properly associated wit ...
- centos 7.2 同步北京时间 ,多台机器同步时间
linux 系统没有北京时间,同步的是上海时间 linux 系统有两个时钟:一个是硬件时钟,即BIOS时间:另一个是系统时钟,是linux系统Kernel(内核)时间. 系统开启时,系统会读取硬件时间 ...
- php解决高并发问题
我们通常衡量一个Web系统的吞吐率的指标是QPS(Query Per Second,每秒处理请求数),解决每秒数万次的高并发场景,这个指标非常关键.举个例子,我们假设处理一个业务请求平均响应时间为10 ...