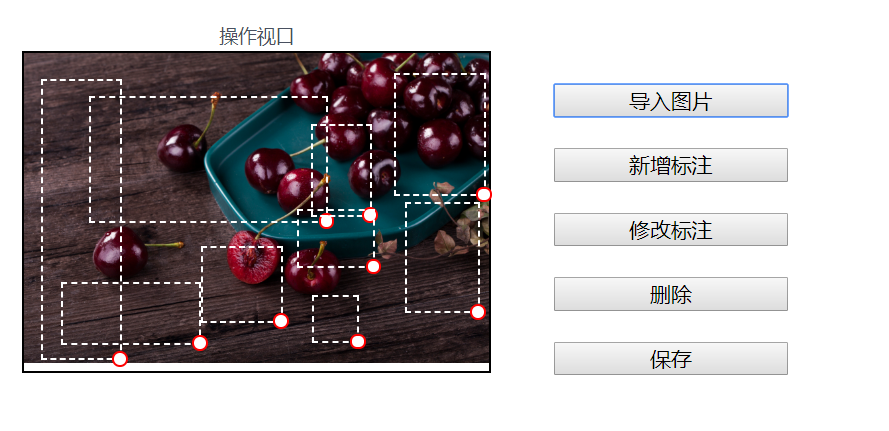
双层拖拽事件,用鼠标画矩形,拖动右下角可以再次改变矩形大小,方案一 有BUG
<template>

  <div class="mycanvas-container">

    <vue-drag-resize :isActive = 'true'/>>

    <div class="left">

      <p>展示视口</p>

      <div class="myshow">

        <img :src="mysrc" alt width="100%" />

        <!-- <div id="canvas" style="width:100%;height:100%" class="mycanvas"></div> -->

      </div>

    </div>

    <div class="center">

      <p>操作视口</p>

      <div class="myedit" ref="myedit"

      @mousedown.prevent=""

      @mousemove.prevent=""

      @mouseup.prevent=""

      @contextmenu.prevent="">

        <!-- <img src="@/assets/jia.svg" alt=""> -->

        <img :src="mysrc"  @mousedown.prevent="onMousedown" @mousemove="onMousemove" />

        <div

          class="myedit-span"

          v-for="(item, index) in mydata"

          :key="index"

          :style="getSpanStyle(item)"

          @contextmenu.prevent="onContextmenu(item, $event)">

          <div class="br"

          @mousedown.prevent="onMousedownbr(item,$event)"

          @mousemove="onMousemovebr(item,$event)"

          @mouseup="onMouseupbr(item,$event)"

          ></div>

        </div>

        <!-- <div id="canvas" style="width:100%;height:100%" class="mycanvas"></div> -->

      </div>

    </div>

    <div class="right">

      <img src alt class="mybutton" />

      <input v-show="0" ref="file" type="file" class="mybutton" @change="onChange" />

      <button class="mybutton" @click="selectFile">导入图片</button>

      <button class="mybutton">新增标注</button>

      <button class="mybutton">修改标注</button>

      <button class="mybutton">删除</button>

      <button class="mybutton">保存</button>

    </div>

    <div class="myMenu" v-show="mymenu.current" :style="mymenu.style">

      <!-- <button @click="onRemoveItem">删除</button> -->

      <ui-button type="primary" @click="onRemoveItem">删除</ui-button>

      <ui-select></ui-select>

      <select name="" id="">

        <option value="1">ceshi</option>

      </select>

    </div>

  </div>

</template>

<script>

import jiaIcon from "./jia.svg";

export default {

  data() {

    return {

      mysrc: "",

      mydata: [],

      mymenu: { current: null, style: { left: 0, top: 0 } }

    };

  },

  mounted() {

    document.addEventListener('mouseup', this.onMouseup)

    this.getData()

  },

  beforeDestroy() {

    document.removeEventListener('mouseup', this.onMouseup)

  },

  methods: {

    getData(){

      let url='/index'

      this.axios(url,{params:{status:1}}).then(data=>{

        console.log(data)

      }).catch(err => this.$Message.error(err.message))

    },

    getXY(e) {

      let rect = this.$refs.myedit.getBoundingClientRect()

      return {

        x: e.clientX - rect.left,

        y: e.clientY - rect.top

      }

    },

    // 上传图片1

    onChange(e) {

      this.mysrc = window.URL.createObjectURL(e.target.files[0]);

      e.target.value = ''

    },

    // 上传图片2,

    selectFile() {

      this.$refs.file.click();

    },

    // 矩形右下角拖动事件1

    onMousedownbr(item,e){

      e.target.removeEventListener('mousemove',this.onMousemove)

      e.target.removeEventListener('mouseup',this.onMouseup)

      this.canmove=true

      console.log(1)

      console.log(this.getXY(e))

      this.startPosbr=this.getXY(e)

      console.log(2)

      console.log(this.startPosbr)

      e.target.addEventListener('mousemove',this.onMousemovebr)

      e.target.addEventListener('mouseup',this.onMouseupbr)

    },

    onMousemovebr(item,e){

      if(this.canmove){

      let { x, y } = this.getXY(e)

      console.log(3)

      console.log(this.getXY(e))

      item.w=item.w+(x-this.startPosbr.x)

      item.h=item.h+(y-this.startPosbr.y)

      console.log(4)

      console.log(item.w)

      // Math.sqrt(9)

      // 9**.5

      }

    },

    onMouseupbr(item,e){

      this.canmove=false

      this.startPos =this.startPosbr= null;

      e.target.removeEventListener('mousemove',this.onMousemovebr)

      e.target.removeEventListener('mouseup',this.onMouseupbr)

    },

    // 矩形右下角拖动事件2

    onMousedown(e) {

      e.target.addEventListener('mousemove',this.onMousemove)

      e.target.addEventListener('mouseup',this.onMouseup)

      this.mymenu.current = null

      let { x, y } = this.getXY(e)

      this.currentItem = { x, y, w: 0, h: 0, now: Date.now() }

      this.startPos = { x, y }

      this.mydata.push(this.currentItem)

    },

    onMousemove(e) {

      if (!this.currentItem) return;

      let { x, y } = this.getXY(e)

      this.currentItem.w = Math.abs(x - this.startPos.x)

      this.currentItem.h = Math.abs(y - this.startPos.y)

    },

    onMouseup(e) {

      this.currentItem = this.startPos =this.startPosbr= null;

      // this.mydata = this.mydata.filter(_ => _.w > 10 && _.h > 10)

      e.target.removeEventListener('mousemove',this.onMousemove)

      e.target.removeEventListener('mouseup',this.onMouseup)

    },

    onContextmenu(item, e) {

      this.mymenu = {

        current: item,

        style: {

          top: e.clientY + 'px',

          left: e.clientX + 'px'

        }

      }

    },

    onRemoveItem() {

      this.mydata.splice(this.mydata.indexOf(this.mymenu.current), 1)

      this.mymenu = { ...this.mymenu, current: null }

    },

    getSpanStyle(item) {

      return {

        width: `${item.w}px`,

        height: `${item.h}px`,

        top: `${item.y}px`,

        left: `${item.x}px`

      };

    }

  }

};

</script>

<style lang="less" scoped>

// 设置绘图样式1

body {

  user-select: none;

}

.myMenu {

  position: fixed;

  top: 400px;

  left: 400px;

  width: 100px;

  padding: 8px 0;

  background-color: #fff;

  > * {

    width: 100%;

  }

}

#canvas > div {

  /* border: 2px solid green; */

  position: absolute;

  background-color: transparent;

}

#canvas > div > span {

  position: absolute;

  top: 50%;

  left: 50%;

  transform: translate(-50%, -50%);

  font-family: simsun;

  font-size: 9pt;

}

// 设置绘图样式2

.mycanvas-container {

  display: flex;

  justify-content: center;

  align-items: center;

  .left,

  .center,

  .right {

    width: 300px;

    // height: 520px;

    margin: 20px;

    p {

      text-align: center;

    }

    .myshow,

    .myedit {

      width: 300px;

      // height: 500px;

      border: 1px solid #000;

      position: relative;

      .myedit-span {

        position: absolute;

        border: 1px dashed #fff;

        // background: url("./jia.svg") no-repeat center center;

        background-size: contain;

      }

      .br,.divcenter{

        width: 10px;

        height: 10px;

        position: absolute;

        border: 1px solid #f00;

        background: #fff;

        border-radius: 50%;

        bottom:-5px;

        right:-5px;

        cursor:nwse-resize;

      }

      .divcenter{

        top:50%;

        left:50%;

        transform:translate(-5px ,-5px);

        cursor:move;

      }

      .mycanvas {

        border: 1px solid pink;

        position: absolute;

        top: 0;

        left: 0;

      }

      img {

        width: 100%;

      }

    }

  }

  .right {

    width: 150px;

    display: flex;

    justify-content: center;

    align-items: left;

    flex-direction: column;

    .mybutton {

      margin-top: 20px;

      display: block;

    }

  }

}

</style>
双层拖拽事件,用鼠标画矩形,拖动右下角可以再次改变矩形大小,方案一 有BUG的更多相关文章
- html5拖拽事件 xhr2 实现文件上传 含进度条
<!DOCTYPE html> <html> <head> <meta http-equiv="Content-Type" content ...
- 完美实现鼠标拖拽事件,解决各种小bug,基于jquery
鼠标拖拽事件是web中使用频率极高的事件,之前写过的代码包括网上的代码,总存在各种各样的问题,包括拖拽体验差,松开鼠标后拖拽效果仍存在以及代码冗余过大等 本次我才用jQuery实现一个尽可能高效的拖拽 ...
- HTML5深入学习之鼠标跟随,拖拽事件
知识点(鼠标跟随): mousedown: 当用户用鼠标点击在某一元素上就会触发该事件 mouseover: 当鼠标指针在某一元素上移动就会触发改事件 下面这个例子的效果就是鼠标点击元素后,元素跟着 ...
- JS Event 鼠标拖拽事件
<!DOCTYPE html><html> <head> <meta charset="UTF-8"> ...
- day50—JavaScript鼠标拖拽事件
转行学开发,代码100天——2018-05-05 今天通过鼠标拖拽事件复习巩固一下鼠标事件. 鼠标拖拽事件需要记住两点: 1.距离不变 2.鼠标事件(按下,移动,抬起) <div id=&quo ...
- day52—JavaScript拖拽事件的应用(自定义滚动条)
转行学开发,代码100天——2018-05-07 前面的记录里展示了JavaScript中鼠标拖拽功能,今天利用拖拽功能实现另一个应用场景——自定义滚动条(作为控制器)的用法. 常通过自定义滚动条控制 ...
- H5原生拖拽事件
使用原生js实现简单的拖拽事件 <!DOCTYPE html> <html lang="en"> <head> <meta charset ...
- HTML5 02. 多媒体控件、拖拽事件、历史记录、web存储、应用程序缓存、地理定位、网络状态
多媒体 video:是行内块(text-align: center; 对行内块适用) <figure></figure>: 多媒体标签 : <figcaption> ...
- 拖拽事件--select外边框拖拽
地图上面的搜索框要可拖拽 但是搜索框是有点击事件的,点击显隐下拉菜单,如果拖拽的事件源选择select框的话,会有样式(十字拖动符cursor:move与selelt默认点击的箭头)冲突 思索良久,就 ...
随机推荐
- python不确定性计算之粗糙集属性约简
粗糙集属性约简 本实验同时采用区别矩阵和依赖度约简. 在依赖度约简中,设置依赖度计算函数和相对约简函数,对读取的数据进行处理,最后根据依赖度约简. 在读取数据后判断有无矛盾,若有则进行决策表分解,然后 ...
- Vivado_8位流水灯
Design 代码中的计数器设置是因为我的开发板的时钟是100MHZ的,也就是1秒完成了100_000_000次时钟信号,所以我设置计数器为100_000_000次. 也就是说,我让流水灯的变化周期为 ...
- 【iOS逆向】某车之家sign签名分析
阅读此文档的过程中遇到任何问题,请关注公众号[移动端Android和iOS开发技术分享]或加QQ群[309580013] 1.目标 分析某车之家sign签名算法的实现 2.操作环境 frida mac ...
- toB应用私有化交付发展历程、技术对比和选型
由于数据隐私和网络安全的考虑,大多数toB场景的客户需要私有化应用交付,也就是需要交付到客户的环境里,这样的客户有政府.金融.军工.公安.大型企业.特色行业等,这些私有化场景限制很多,如何提高私有化应 ...
- 图扑 Web SCADA 零代码组态水泥生产工艺流程 HMI
前言 水泥是建筑工业三大基本材料之一,素有"建筑工业的粮食"之称.2022 年 1-9 月水泥产量为 15.63 亿吨,生产方法包括新型干法.立窑.湿窑.干法中空窑和立波尔窑等. ...
- 重新认识下JVM级别的本地缓存框架Guava Cache(3)——探寻实现细节与核心机制
大家好,又见面了. 本文是笔者作为掘金技术社区签约作者的身份输出的缓存专栏系列内容,将会通过系列专题,讲清楚缓存的方方面面.如果感兴趣,欢迎关注以获取后续更新. 通过<重新认识下JVM级别的本地 ...
- Apache Dubbo 多语言体系再添新员:首个 Rust 语言版本正式发布
Dubbo Rust 定位为 Dubbo 多语言体系的重要实现,提供高性能.易用.可扩展的 RPC 框架,同时通过接入 Dubbo Mesh 体系提供丰富的服务治理能力.本文主要为大家介绍 Dubbo ...
- 产生10个1-20以内的随机数,要求不能重复(集合)Java
public class Demo{ //产生10个1-20以内的随机数,要求不能重复 public static void main(String[] args){ //新建集合存放随机数 Set& ...
- 【大数据面试】ClickHouse:介绍、特点、数据类型、引擎、操作、副本、分片
1.介绍 开源的列式存储数据库(DBMS),由C++编写,用于在线分析处理查询(OLAP) 可以通过SQL查询实时生成分析数据报告 解释: DBMS:数据库管理系统 常见的列式存储数据库:Hbase. ...
- 如何在SpringBoot中优雅地重试调用第三方API?
前言 作为后端程序员,我们的日常工作就是调用一些第三方服务,将数据存入数据库,返回信息给前端.但你不能保证所有的事情一直都很顺利.像有些第三方API,偶尔会出现超时.此时,我们要重试几次,这取决于你的 ...