Android之Fragment学习笔记①
Android Fragment完全解析,关于碎片你所需知道的一切
一. 什么是Fragment
Fragment(碎片)就是小型的Activity,它是在Android3.0时出现的。Fragment是表现Activity中UI的一个行为或者一部分。
可以把fragment想象成activity的一个模块化区域,有它自己的生命周期,接收属于它自己的输入事件,并且可以在activity运行期间添加和删除(有点像一个可以在不同的activity中重用的“子Activity”)。
Fragment必须被嵌入到一个activity中。它们的生命周期直接受其宿主activity的生命周期影响。当一个activity正在运行时,就可以独立地操作每一个Fragment,比如添加或删除它们。
Fragment可以定义自己的布局、生命周期回调方法,因此可以将fragment重用到多个activity中,因此可以根据不同的屏幕尺寸或者使用场合改变fragment组合。
二. 如何创建一个Fragment
1、为Fragment定义一个布局
2、定义类继承Fragment
3、重写类中的onCreateView方法,返回一个View对象作为当前Fragment的布局。
fragment第一次绘制它的用户界面的时候,系统会调用onCreateView()方法。为了绘制fragment的UI,此方法必须返回一个作为fragment布局的根的view。如果fragment不提供UI,可以返回null。
代码:如Fragment01和Fragment02所示。
三. 如何将Fragment添加到Activity
Activity必须在清单文件中进行声明,但是Fragment不需要,Fragment只需要在Activity的布局文件layout_main.xml中声明就可以了。
 <LinearLayout xmlns:android="http://schemas.android.com/apk/res/android"

     android:layout_width="match_parent"

     android:layout_height="match_parent"

     android:baselineAligned="false" >

     <fragment

         android:id="@+id/fragment1"

         android:name="com.example.fragmentdemo.Fragment01"

         android:layout_width="0dip"

         android:layout_height="match_parent"

         android:layout_weight="1" />

     <fragment

         android:id="@+id/fragment2"

         android:name="com.example.fragmentdemo.Fragment02"

         android:layout_width="0dip"

         android:layout_height="match_parent"

         android:layout_weight="1" />

 </LinearLayout>
Fragment的代码:
 package com.example.fragmentdemo;

 import android.app.Fragment;

 import android.os.Bundle;

 import android.view.LayoutInflater;

 import android.view.View;

 import android.view.ViewGroup;

 /**

  * Created by gary on 2016/4/12.

  */

 public class Fragment01 extends Fragment {

     @Override

     public View onCreateView(LayoutInflater inflater, ViewGroup container, Bundle savedInstanceState) {

         //return super.onCreateView(inflater, container, savedInstanceState);

         return inflater.inflate(R.layout.fragment1,container,false);

     }

 }

 package com.example.fragmentdemo;

 import android.app.Fragment;

 import android.os.Bundle;

 import android.view.LayoutInflater;

 import android.view.View;

 import android.view.ViewGroup;

 /**

  * Created by gary on 2016/4/12.

  */

 public class Fragment02 extends Fragment {

     @Override

     public View onCreateView(LayoutInflater inflater, ViewGroup container, Bundle savedInstanceState) {

         //return super.onCreateView(inflater, container, savedInstanceState);

         return inflater.inflate(R.layout.fragment1,container,false);

     }

 }
Fragment的布局文件
 fragment1.xml

 <?xml version="1.0" encoding="utf-8"?>

 <LinearLayout xmlns:android="http://schemas.android.com/apk/res/android"

     android:layout_width="match_parent"

     android:layout_height="match_parent"

     android:background="#00ff00">

     <TextView

         android:layout_width="wrap_content"

         android:layout_height="wrap_content"

         android:text="第一个Fragment"

         android:textColor="#ff0000"

         android:textSize="25sp"/>

 </LinearLayout>

 ------------------------

 fragment2.xml

 <?xml version="1.0" encoding="utf-8"?>

 <LinearLayout xmlns:android="http://schemas.android.com/apk/res/android"

     android:layout_width="match_parent"

     android:layout_height="match_parent"

     android:background="#ff0000">

     <TextView

         android:layout_width="wrap_content"

         android:layout_height="wrap_content"

         android:text="第二个Fragment"

         android:textColor="#00ff00"

         android:textSize="25sp"/>

 </LinearLayout>
Activity代码:
 package com.example.fragmentdemo;

 import android.app.Activity;

 import android.os.Bundle;

 /**

  * Created by gary on 2016/4/12.

  */

 public class MainActivity extends Activity {

     @Override

     protected void onCreate(Bundle savedInstanceState) {

         super.onCreate(savedInstanceState);

         setContentView(R.layout.layout_main);

     }

 }
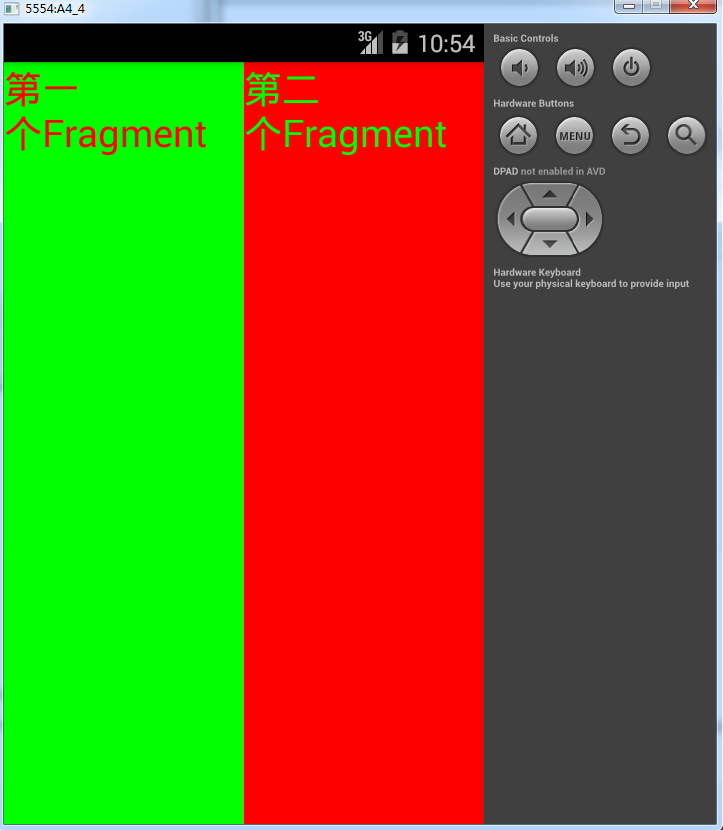
效果:
 http://i.cnblogs.com/EditPosts.aspx?postid=5380639
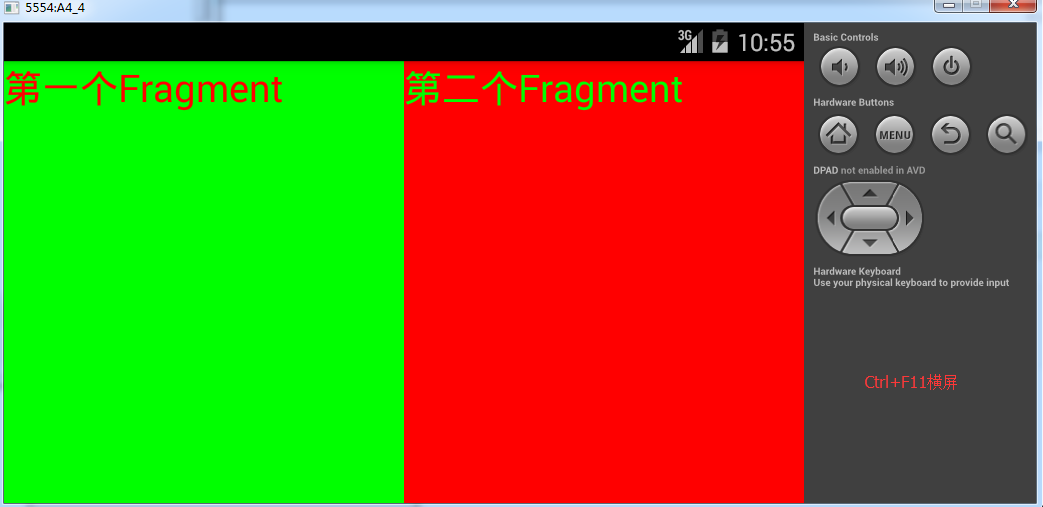
注意:代码中的四个属性是必须的要给的,“android:name”属性:指定了在layout中实例化的Fragment类是哪个。
当系统创建这个activitylayout时,它实例化每一个在layout中指定的Fragment,并调用它们的onCreateView()方法,来获取每一个Fragment的layout,系统将从Fragment返回的View直接插入到<fragment>元素所在的地方。
四. 如何动态何切换Fragment
要在Activity中管理Fragment,需要四步
1. 获取FragmentManger对象,在Activity可以通过getFragementManager()来获取实例。
  //1.获取Fragment管理器对象

  FragmentManager manager = getFragmentManager();
2.开启一个事务,通过调用beginTransaction方法开启。
  //2. 开启事务

   FragmentTransaction transaction = manager.beginTransaction();
3.向容器中加入Fragment,一般使用replace方法实现,需要传入容器的id和Fragment的实例。
  //3. 将FrameLayout控件替换成Fragment对象

    transaction.replace(R.id.frame, new GamesFragment());
4. 提交事务,调用commit方法提交。
 //4. 提交事务

   transaction.commit();
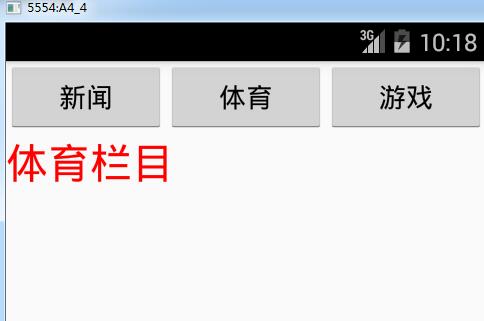
案例:点击不同的按钮切换到不同的Fragment进行显示。
具体实现步骤:
1. 设置布局文件layout_main.xml中添加三个按钮用于切换Fragment,并在按钮下方添加一个FrameLayout用来替换成相应的Fragment布局。
 <?xml version="1.0" encoding="utf-8"?>

 <LinearLayout xmlns:android="http://schemas.android.com/apk/res/android"

     android:layout_width="match_parent"

     android:layout_height="match_parent"

     android:orientation="vertical">

     <LinearLayout

         android:layout_width="match_parent"

         android:layout_height="wrap_content"

         android:orientation="horizontal">

         <Button

             android:layout_width="wrap_content"

             android:layout_height="wrap_content"

             android:layout_weight="1"

             android:text="新闻"

             android:onClick="news"/>

         <Button

             android:layout_width="wrap_content"

             android:layout_height="wrap_content"

             android:layout_weight="1"

             android:text="体育"

             android:onClick="sports"/>

         <Button

             android:layout_width="wrap_content"

             android:layout_height="wrap_content"

             android:layout_weight="1"

             android:text="游戏"

             android:onClick="games"/>

     </LinearLayout>

 <FrameLayout

     android:layout_width="match_parent"

     android:layout_height="wrap_content"

     android:id="@+id/frame"/>

 </LinearLayout>
2. 创建Fragment的布局文件,fragment_news.xml
 <?xml version="1.0" encoding="utf-8"?>

 <LinearLayout xmlns:android="http://schemas.android.com/apk/res/android"

     android:layout_width="match_parent"

     android:layout_height="match_parent">

     <TextView

         android:layout_width="match_parent"

         android:layout_height="match_parent"

         android:text="新闻栏目"

         android:textSize="28sp"

         android:textColor="#0000ff"/>

 </LinearLayout>
fragment_sports.xml
 <?xml version="1.0" encoding="utf-8"?>

 <LinearLayout xmlns:android="http://schemas.android.com/apk/res/android"

     android:layout_width="match_parent"

     android:layout_height="match_parent">

     <TextView

         android:layout_width="match_parent"

         android:layout_height="match_parent"

         android:text="体育栏目"

         android:textSize="28sp"

         android:textColor="#ff0000"/>

 </LinearLayout>
fragment_games.xml
 <?xml version="1.0" encoding="utf-8"?>

 <LinearLayout xmlns:android="http://schemas.android.com/apk/res/android"

     android:layout_width="match_parent"

     android:layout_height="match_parent">

     <TextView

         android:layout_width="match_parent"

         android:layout_height="match_parent"

         android:text="游戏栏目"

         android:textSize="28sp"

         android:textColor="#00ff00"/>

 </LinearLayout>
3. 创建三个Fragment,SportsFragment、NewsFragment、GameFragment。
 public class NewsFragment extends Fragment {

     @Override

     public View onCreateView(LayoutInflater inflater, ViewGroup container, Bundle savedInstanceState) {

        // return super.onCreateView(inflater, container, savedInstanceState);

         return inflater.inflate(R.layout.fragment_news,null);

     }

 }
SportFragment和GamesFragment中代码和NewsFragment相似。
4. 添加切换Fragment的逻辑,分别添加新闻、体育、游戏的点击事件。
 public class MainActivity extends Activity {

     @Override

     protected void onCreate(Bundle savedInstanceState) {

         super.onCreate(savedInstanceState);

         setContentView(R.layout.layout_main);

     }

     public void news(View v){

         //获取Fragment管理器对象

         FragmentManager manager = getFragmentManager();

         //开启事务

         FragmentTransaction transaction = manager.beginTransaction();

         //将FrameLayout控件替换成Fragment对象

         transaction.replace(R.id.frame, new NewsFragment());

         //提交事务

         transaction.commit();

     }

     public void games(View v){

         //获取Fragment管理器对象

         FragmentManager manager = getFragmentManager();

         //开启事务

         FragmentTransaction transaction = manager.beginTransaction();

         //将FrameLayout控件替换成Fragment对象

         transaction.replace(R.id.frame, new GamesFragment());

         //提交事务

         transaction.commit();

     }

     public void sports(View v){

         //获取Fragment管理器对象

         FragmentManager manager = getFragmentManager();

         //开启事务

         FragmentTransaction transaction = manager.beginTransaction();

         //将FrameLayout控件替换成Fragment对象

         transaction.replace(R.id.frame, new SportsFragment());

         //提交事务

         transaction.commit();

     }

 }
sports()方法、games()方法同上
5. 运行效果
Android之Fragment学习笔记①的更多相关文章
- [android]p7-1 fragment学习笔记
本文源自<android权威编程指南第3版>第7章UI fragment与fragment 第7章主要内容是实现一个记录不良行为的APP(部分实现),有列表,有具体的行为内容显示.第7章主 ...
- Android之Fragment学习笔记②(Fragment生命周期)
一. Fragment生命周期图 二.Fragment生命周期方法介绍 Fragment的生命周期和activity生命周期很像,其生 ...
- Android安装器学习笔记(一)
Android安装器学习笔记(一) 一.Android应用的四种安装方式: 1.通过系统应用PackageInstaller.apk进行安装,安装过程中会让用户确认 2.系统程序安装:在开机的时候自动 ...
- Android应用开发学习笔记之Fragment
作者:刘昊昱 博客:http://blog.csdn.net/liuhaoyutz Fragment翻译成中文就是“碎片”.“片断”的意思,Fragment通常用来作为一个Activity用户界面的一 ...
- android cocos2d-x for Android安装和学习笔记(请用adt-bundle21.1或以上导入)
引用:http://weimingtom.iteye.com/blog/1483566 (20121108)注意:这篇文章用cdt编译ndk工程的内容已过时(现在可以用adt-bundle,避免配置繁 ...
- 33.Android之Fragment学习
Fragment Android是在Android 3.0 (API level 11)开始引入Fragment的. 可以把Fragment想成Activity中的模块,这个模块有自己的布局,有自己的 ...
- Fragment 学习笔记(1)
网上关于Fragment相关的博客资料很多,写关于这个知识笔记是加深记忆,大神略过: 0x01 了解Fragment 当然看官方文档(http://www.android-doc.com/refere ...
- Fragment学习笔记
Fragment为大量型号,尺寸,分辨率的设备提供了一种统一的UI优化方案.将Activity分解为多个Fragment,将极大地提高UI的灵活性,也更容易为一些新的设备配置带来更好的用户体验. on ...
- Android Fragment学习笔记(二)----Fragment界面添加和管理
Fragment界面添加 了解过fragment的生命周期等简单知识,于是去看官方文档来了解更多相关内容,要添加fragment到我们的UI界面中,给出了两种常用的方法,第一个是在activity的布 ...
随机推荐
- 解决:Google代码achartengine曲线代码报错问题(转)
原文地址链接 官网:http://code.google.com/p/achartengine/ 下载代码部署项目会报下面的错误: java.lang.NoClassDefFoundError: or ...
- android 检测sqlite数据表中字段(列)是否存在 (转)
原文摘自 http://www.tuicool.com/articles/jmmMnu 一般数据库升级时,需要检测表中是否已存在相应字段(列),因为列名重复会报错.方法有很多,下面列举2种常见的方式: ...
- MySQL监控系统MySQL MTOP的搭建
MySQLMTOP是一个由Python+PHP开发的MySQL企业级监控系统.系统由Python实现多进程数据采集和告警,PHP实现WEB展示和管理.最重要是MySQL服务器无需安装任何Agent,只 ...
- CodeForces 656B
C - C Time Limit:2000MS Memory Limit:65536KB 64bit IO Format:%I64d & %I64u Submit Status ...
- libswscale图像格式转换与放大缩小
缩放,例如640x360拉伸为1280x720 注意:没有裁剪! ======================== 有2种使用方法: 简单的初始化方法 (1) sws_getContext ...
- 合成模式(Composite)-结构型
原理 合成模式属于对象的结构模式,有时又叫做“部分——整体”模式.合成模式将对象组织到树结构中,可以用来描述整体与部分的关系.合成模式可以使客户端将单纯元素与复合元素同等看待. 有时候又叫做部分-整体 ...
- Ubuntu 安装Redis体验
背景:由于之前一直没有试过Linux的环境,今天加了内存之后,虚拟机开了3G,速度大大提高,对照博客试一下安装Redis的过程. 体验: 下载源码,解压,编译 $ wget http://do ...
- Code 128 规则解析
1.CODE 128 标准 1.1 code 128码格式: 格式: 从左起: 空白区域,起始字符(Start),数据区域(data),校验码(check),结束字符(Stop),空白区域. ...
- BZOJ3325 : [Scoi2013]密码
从以每一位为中心的回文串长度可以用Manacher倒推出$O(n)$对相等和不等关系. 将相等的用并查集维护,不等的连边. 然后输出方案时若还没被染过色,则求一个mex. #include<cs ...
- LightOJ 1422 (区间DP)
题目链接: http://acm.hust.edu.cn/vjudge/problem/viewProblem.action?id=27130 题目大意:按顺序去参加舞会.每个舞会对衣服都有要求.可以 ...