Django实现用户注册登录
学习Django中:试着着写一个用户注册登录系统,开始搞事情 =====O(∩_∩)O哈哈~=====
=================
Ubuntu
python 2.7.12
Django 1.10.4
IDE:Pycharm
Bootstrap(其实没怎么用~~)
=================
新建项目:(我是直接用pycharm直接生成的)
使用终端:
(创建项目)django-admin.py startproject mysite
(进入mysite新建app)django-admin.py startapp app01
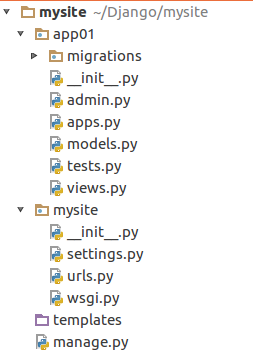
记得在settings.py里面添加app

设计模型:
/mysite/app01/models.py:
 from __future__ import unicode_literals

 from django.db import models

 # Create your models here.

 class User(models.Model):

     username = models.CharField(max_length=50)

     password = models.CharField(max_length=50)

     email = models.EmailField()
创建User类,存放 username、password、email三个字段
同步数据库:
Python manage.py makemigrations
python manage.py migrate
Django会自动创建一系列表

没有自动创建superuser.......咱们手动创建:
python manage.py createsuperuser

设计逻辑视图(views):(使用表单)
/mysite/app01/views.py:
 #coding=utf-8

 from django.shortcuts import render,render_to_response

 from django.http import HttpResponse

 from django import forms

 from models import User

 # Create your views here.

 class UserForm(forms.Form):

     username = forms.CharField(label='用户名',max_length=50)

     password = forms.CharField(label='密码',widget=forms.PasswordInput())

     email = forms.EmailField(label='邮箱')

 def regist(request):

     if request.method == 'POST':

         userform = UserForm(request.POST)

         if userform.is_valid():

             username = userform.cleaned_data['username']

             password = userform.cleaned_data['password']

             email = userform.cleaned_data['email']

             User.objects.create(username=username,password=password,email=email)

             User.save()

             return HttpResponse('regist success!!!')

     else:

         userform = UserForm()

     return render_to_response('regist.html',{'userform':userform})

 def login(request):

     if request.method == 'POST':

         userform = UserForm(request.POST)

         if userform.is_valid():

             username = userform.cleaned_data['username']

             password = userform.cleaned_data['password']

             user = User.objects.filter(username__exact=username,password__exact=password)

             if user:

                 return render_to_response('index.html',{'userform':userform})

             else:

                 return HttpResponse('用户名或密码错误,请重新登录')

     else:

         userform = UserForm()

     return render_to_response('login.html',{'userform':userform})
注释:
label:标签
widget:装饰
widget=forms.PasswordInput():设置密码字段
设计模板文件
在templates里面新建index.html、regist.html、login.html
regist.html
<!DOCTYPE html>

{% load static %}

<html lang="zh-CN"><head>

<meta http-equiv="content-type" content="text/html; charset=UTF-8">

    <meta charset="utf-8">

    <meta http-equiv="X-UA-Compatible" content="IE=edge">

    <meta name="viewport" content="width=device-width, initial-scale=1">

    <!-- 上述3个meta标签*必须*放在最前面,任何其他内容都*必须*跟随其后! -->

    <meta name="description" content="">

    <meta name="author" content="">

    <title>Regist</title>

    <!-- Bootstrap core CSS -->

    <link href="{% static 'css/bootstrap.css' %}" rel="stylesheet">

    <!-- IE10 viewport hack for Surface/desktop Windows 8 bug -->

    <link href="{% static 'css/ie10-viewport-bug-workaround.css' %}" rel="stylesheet">

    <!-- Custom styles for this template -->

    <link href="{% static 'css/signin.css' %}" rel="stylesheet">

    <!-- Just for debugging purposes. Don't actually copy these 2 lines! -->

    <!--[if lt IE 9]><script src="../../assets/js/ie8-responsive-file-warning.js"></script><![endif]-->

    <script src="{% static 'js/ie-emulation-modes-warning.js' %}"></script>

    <!-- HTML5 shim and Respond.js for IE8 support of HTML5 elements and media queries -->

    <!--[if lt IE 9]>

      <script src="https://cdn.bootcss.com/html5shiv/3.7.3/html5shiv.min.js"></script>

      <script src="https://cdn.bootcss.com/respond.js/1.4.2/respond.min.js"></script>

    <![endif]-->

  </head>

<style>

        html,body{text-align:center;margin:0px auto;}

</style>

<body>

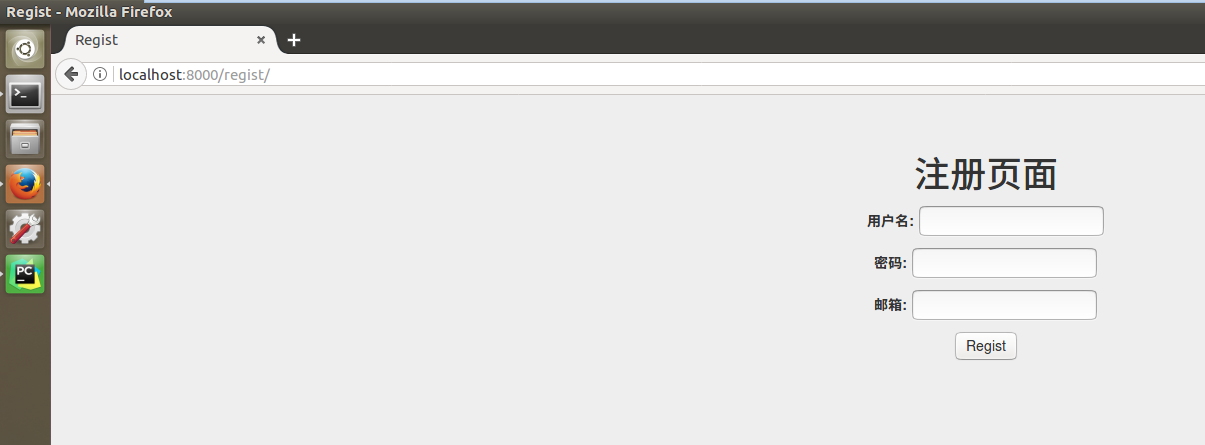
<h1>注册页面</h1>

<form method = 'post' enctype="multipart/form-data">

{{userform.as_p}}

<input type="submit" value = "Regist" />

</form>

</body>

</html>
login.html
<!DOCTYPE html>

{% load static %}

<html lang="zh-CN"><head>

<meta http-equiv="content-type" content="text/html; charset=UTF-8">

    <meta charset="utf-8">

    <meta http-equiv="X-UA-Compatible" content="IE=edge">

    <meta name="viewport" content="width=device-width, initial-scale=1">

    <!-- 上述3个meta标签*必须*放在最前面,任何其他内容都*必须*跟随其后! -->

    <meta name="description" content="">

    <meta name="author" content="">

    <title>Login</title>

    <!-- Bootstrap core CSS -->

    <link href="{% static 'css/bootstrap.css' %}" rel="stylesheet">

    <!-- IE10 viewport hack for Surface/desktop Windows 8 bug -->

    <link href="{% static 'css/ie10-viewport-bug-workaround.css' %}" rel="stylesheet">

    <!-- Custom styles for this template -->

    <link href="{% static 'css/signin.css' %}" rel="stylesheet">

    <!-- Just for debugging purposes. Don't actually copy these 2 lines! -->

    <!--[if lt IE 9]><script src="../../assets/js/ie8-responsive-file-warning.js"></script><![endif]-->

    <script src="{% static 'js/ie-emulation-modes-warning.js' %}"></script>

    <!-- HTML5 shim and Respond.js for IE8 support of HTML5 elements and media queries -->

    <!--[if lt IE 9]>

      <script src="https://cdn.bootcss.com/html5shiv/3.7.3/html5shiv.min.js"></script>

      <script src="https://cdn.bootcss.com/respond.js/1.4.2/respond.min.js"></script>

    <![endif]-->

  </head>

<style>

        html,body{text-align:center;margin:0px auto;}

</style>

<body>

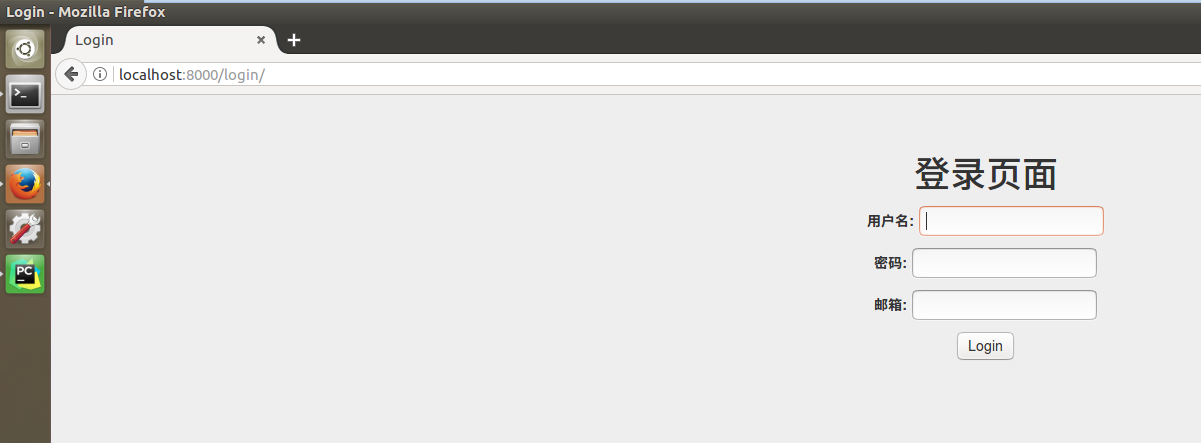
<h1>登录页面</h1>

<form method = 'post' enctype="multipart/form-data">

{{userform.as_p}}

<input type="submit" value = "Login" />

</form>

</body>

</html>
index.html
<!DOCTYPE html>

<html lang="en">

<head>

    <meta charset="UTF-8">

    <title>主页</title>

</head>

<style>

        html,body{text-align:center;margin:0px auto;}

</style>

<body>

<h1>Hello Word!</h1>

</body>

</html>
设计urls
/mysite/urls.py
from django.conf.urls import url,include

from django.contrib import admin

from app01 import urls

import app01

urlpatterns = [

    url(r'^admin/', admin.site.urls),

    url(r'',include(app01.urls)),

]
/mysite/app01/urls.py
from django.conf.urls import url,include

from django.contrib import admin

import views

admin.autodiscover()

urlpatterns = [

    url(r'^index/$',views.index),

    url(r'^login/$',views.login),

    url(r'^regist/$',views.regist),

]
使用admin后台管理注册的用户
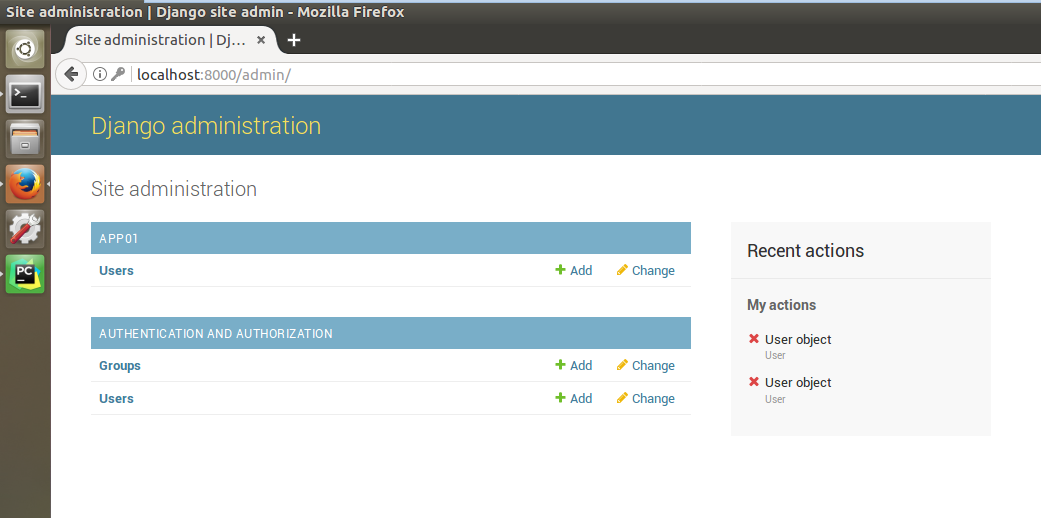
在models.py里面设计一个UserAdmin类,用来记录注册用户的信息
/mysite/app01/models.py
from __future__ import unicode_literals

from django.contrib import admin

from django.db import models

# Create your models here.

class User(models.Model):

    username = models.CharField(max_length=50)

    password = models.CharField(max_length=50)

    email = models.EmailField()

class UserAdmin(admin.ModelAdmin):

    list_display = ('username','password','email')

admin.site.register(User,UserAdmin)
同步一下数据库(方法同上)
效果图
主页:

注册页:
登录页面:
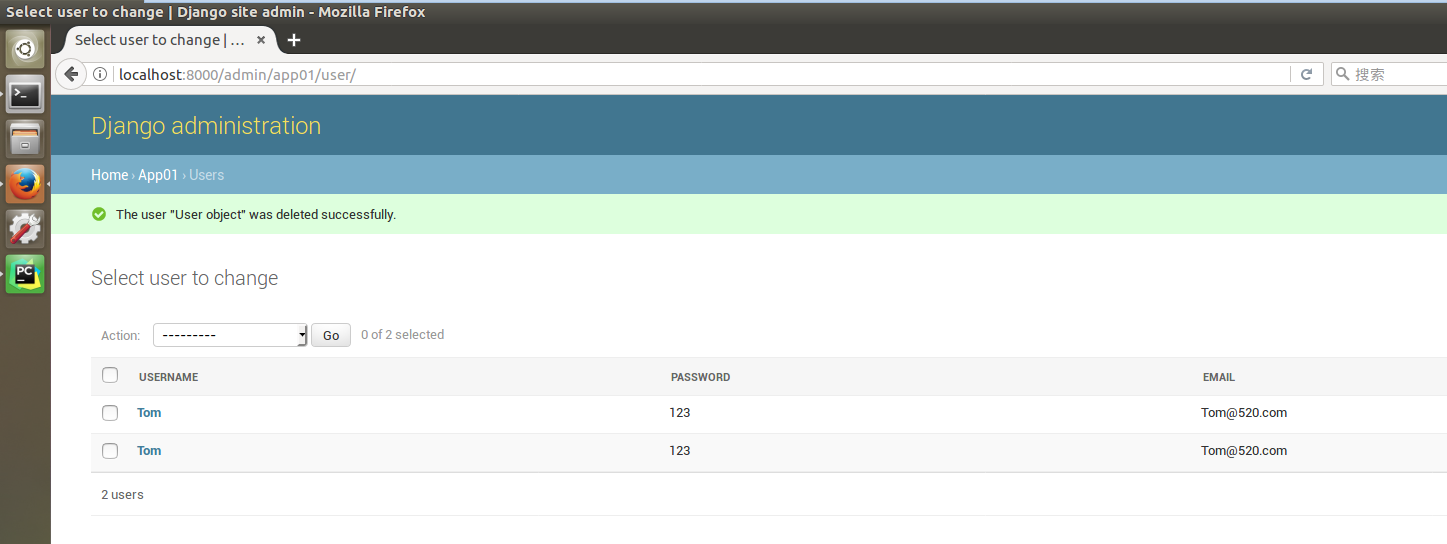
后台:
Django实现用户注册登录的更多相关文章
- Django之auth登录认证
前言:我们在开发一个网站的时候,无可避免的需要设计实现网站的用户系统.此时我们需要实现包括用户注册.用户登录.用户认证.注销.修改密码等功能,这还真是个麻烦的事情呢. Django作为一个完美主义者的 ...
- Django+bootstrap+注册登录系统
转自:https://www.cnblogs.com/robindong/p/9610057.html Robin_D 博客园 首页 新随笔 联系 订阅 管理 随笔 - 10 文章 - 0 评论 ...
- 传智播客JavaWeb day07、day08-自定义标签(传统标签和简单标签)、mvc设计模式、用户注册登录注销
第七天的课程主要是讲了自定义标签.简单介绍了mvc设计模式.然后做了案例 1. 自定义标签 1.1 为什么要有自定义标签 前面所说的EL.JSTL等技术都是为了提高jsp的可读性.可维护性.方便性而取 ...
- 基于xml的用户注册登录案例
用户注册登录 要求:3层框架,使用验证码 1 功能分析 l 注册 l 登录 1.1 JSP页面 l regist.jsp 注册表单:用户输入注册信息: 回显错误信息:当注册失败时, ...
- express框架+jade+bootstrap+mysql开发用户注册登录项目
完整的项目代码(github):https://github.com/suqinhui/express-demo express是基于Node.js平台的web应用开发框架,用express框架开发w ...
- 用户注册登录系统 V2.0
# 准备空列表 users = [] # 准备当前在线用户 online_user = {} while True: # 打印系统提示 print("欢迎使用 用户注册登录系统V2.0&qu ...
- redis实践:用户注册登录功能
本节将使用PHP和Redis实现用户注册登录功能,下面分模块来介绍具体实现方法. 1.注册 需求描述:用户注册时需要提交邮箱.登录密码和昵称.其中邮箱是用户的唯一标识,每个用户的邮箱不能重复,但允许用 ...
- 超全面的JavaWeb笔记day14<用户注册登录>
案例:用户注册登录 要求:3层框架,使用验证码 1 功能分析 l 注册 l 登录 1.1 JSP页面 l regist.jsp Ø 注册表单:用户输入注册信息: Ø 回显错误信息:当注册失败时,显示错 ...
- Django:用户登录实例
Django:用户登录实例 一.源代码 1,login.html代码(登录界面): <!DOCTYPE html> <html lang="zh-CN"> ...
随机推荐
- 今日头条视频Url嗅探
1.打开http://toutiao.com/a6309254755004875010/,查看网页源代码获取videoid = 0425d8f0c2bb425d9361c0eb2eeb4f16 2.拼 ...
- pypi 的使用
关于本人的package,情况比较简单,所有的.py文件全部放到了一个叫做FundsData的文件夹下(package下),上层目录也叫FundsData(其实叫什么都可以),其下放了setup.py ...
- java系列--重载和覆盖小结
继承中属性的隐藏和方法的覆盖 java中规定,子类用于隐藏的变量可以和父类的访问权限不同,如果访问权限被改变,则以子类的权限为准 java中允许子类的变量与父类变量的类型完全不同, ...
- 如何在Eclipse下安装myeclipse插件
来自http://www.blogjava.net/show911/archive/2008/04/27/86284.html 下载myeclipse插件 支持eclipse3.1.x, 具体安装步骤 ...
- html bottom html submit按钮表单控件与CSS美化
一.html submit与bottom按钮基本语法结构 1.html submit按钮在input标签里设置type="submit"即可设置此表单控件为按钮. submit按钮 ...
- jQuery如何创建元素
1.$("<ul>").attr("id","taglist").appendTo("#tagCloud") ...
- SQL 日期筛选的两种方式
主要解决的是后一天的问题~容易漏掉最后一天~第一种方法,拼接String,第二种方法直接在最后一天加一天 第一: <if test="beginDate != null and beg ...
- sqlloader外部表
一创建目录 先在系统下创建 $ cd /home/oracle $ mkdir dir $ cd dir $ pwd 再在sqlplus里创建,让oracle知道这个目录 SQL> create ...
- #图# #最大生成树# #kruskal# ----- OpenJudge 799:Heavy Transportation
OpenJudge 799:Heavy Transportation 总时间限制: 3000ms 内存限制: 65536kB 描述BackgroundHugo Heavy is happy. Afte ...
- EXP/IMP 命令参数
http://www.cnblogs.com/sopost/archive/2010/01/19/2190125.html 1.EXP: 1.完全: EXP ...
