SpringBoot(十):SpringBoot整合Memcached
一、环境准备
memcached 1.4.5
SpringBoot 1.5.10.RELEASE
java_memcached-release_2.6.6.jar
memcached 1.4.5 windows 下载地址:http://www.runoob.com/memcached/window-install-memcached.html
danga memcached java client 下载地址:https://github.com/gwhalin/Memcached-Java-Client/downloads
pom依赖:
<dependency>
<groupId>commons-pool</groupId>
<artifactId>commons-pool</artifactId>
<version>1.5.6</version>
</dependency>
<dependency>
<groupId>com.danga</groupId>
<artifactId>java_memcached-release</artifactId>
<version>2.6.6</version>
<scope>system</scope>
<systemPath>${project.basedir}/src/main/webapp/WEB-INF/lib/java_memcached-release_2.6.6.jar</systemPath>
</dependency>
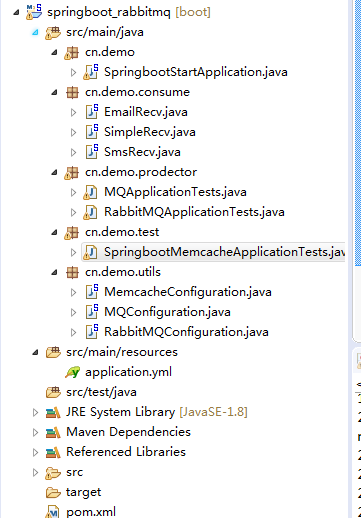
二、项目结构
三、代码详情
application.yml :
spring:
datasource:
driver-class-name: com.mysql.jdbc.Driver
url: jdbc:mysql://192.168.1.20:3306/test?useSSL=false
username: root
password: root123
rabbitmq:
host: 192.168.1.123
port: 5672
username: admin
password: 1234
# virtual-host: /vhost_test
# publisher-confirms: true
## Memcache 配置 ##
memcache:
servers: 127.0.0.1:11211
failover: true
initConn: 100
minConn: 20
maxConn: 1000
maintSleep: 50
nagel: false
socketTO: 3000
aliveCheck: true
logging.level.com.demo.mapper: debug
MemcacheConfiguration.java
import com.danga.MemCached.MemCachedClient;

import com.danga.MemCached.SockIOPool;

import org.springframework.beans.factory.annotation.Value;

import org.springframework.context.annotation.Bean;

import org.springframework.context.annotation.Configuration;

/**

* @author zh

* @ClassName cn.saytime.config.config.MemcacheConfiguration

* @Description Memcache配置

*/

@Configuration

public class MemcacheConfiguration {

@Value("${memcache.servers}")

private String[] servers;

@Value("${memcache.failover}")

private boolean failover;

@Value("${memcache.initConn}")

private int initConn;

@Value("${memcache.minConn}")

private int minConn;

@Value("${memcache.maxConn}")

private int maxConn;

@Value("${memcache.maintSleep}")

private int maintSleep;

@Value("${memcache.nagel}")

private boolean nagel;

@Value("${memcache.socketTO}")

private int socketTO;

@Value("${memcache.aliveCheck}")

private boolean aliveCheck;

@Bean

public SockIOPool sockIOPool () {

SockIOPool pool = SockIOPool.getInstance();

pool.setServers(servers);

pool.setFailover(failover);

pool.setInitConn(initConn);

pool.setMinConn(minConn);

pool.setMaxConn(maxConn);

pool.setMaintSleep(maintSleep);

pool.setNagle(nagel);

pool.setSocketTO(socketTO);

pool.setAliveCheck(aliveCheck);

pool.initialize();

return pool;

}

@Bean

public MemCachedClient memCachedClient(){

return new MemCachedClient();

}

}
测试类 SpringbootMemcacheApplicationTests.java
import com.danga.MemCached.MemCachedClient;

import org.junit.Test;

import org.junit.runner.RunWith;

import org.springframework.beans.factory.annotation.Autowired;

import org.springframework.boot.test.context.SpringBootTest;

import org.springframework.test.context.junit4.SpringRunner;

import java.util.Date;

@RunWith(SpringRunner.class)

@SpringBootTest

public class SpringbootMemcacheApplicationTests {

@Autowired

private MemCachedClient memCachedClient;

@Test

public void contextLoads() throws InterruptedException {

// 放入缓存

boolean flag = memCachedClient.set("a", 1);

// 取出缓存

Object a = memCachedClient.get("a");

System.out.println(a);

// 3s后过期

memCachedClient.set("b", "2", new Date(3000));

Object b = memCachedClient.get("b");

System.out.println(b);

Thread.sleep(3000);

b = memCachedClient.get("b");

System.out.println(b);

}

}
先运行memcached,然后执行test,输出结果为:
1
2
null
测试memcached存取以及失效时间成功。
四、部分操作方法
set与add在key不存在时效果一致,add在key存在时不会成功。
set与replace在key存在时效果一致,replace在key不存在不会成功。
五、注意点
使用danga memcached设置失效时间有两种方式:
第一种
memCachedClient.set("xx", "xx", new Date(3000));
第二种
memCachedClient.set("xx", "xx", new Date(System.currentTimeMillis() + 3 * 1000));
对比两种形式,第一种是指定key在3s后过期,第二种是指定key在xxxx-xx-xx xx:xx:xx 时间点失效,如果服务器时间跟客户端时间不一致,就会跟想要的结果不一样,比如客户端现在时间点为2018-01-01 00:00:00,服务端时间为2018-01-01 00:00:10,服务端时间快10s,那么如果客户端使用第二种方式设置30s后失效,也就是2018-01-01 00:00:30失效,实际上客户端想要的是30s后失效,而服务端20s就将key失效了。
从上可以发现,最好是使用第一种形式,但是第一种形式在某些时间也会存在问题,比如如果设定的时间小于1s,会发现key会永久保存,不会在指定时间失效,原因可以通过源码得到。
说明当时间小于1s的时候,使用第一种方式会造成指定时间不生效,key永久存在,这种时间如果客户端服务端时间没有误差的时候,使用第二种形式。
关于memcached最大设置30天有效的情形暂时没有测试。
SpringBoot(十):SpringBoot整合Memcached的更多相关文章
- SpringBoot(十):SpringBoot的简单事务管理
SpringBoot集成Mybatis之后,进行事务管理.SpringBoot使用事务非常简单,底层依然采用的是Spring本身提供的事务. 1.在入口类中使用注解@EnableTransaction ...
- springboot(十)SpringBoot消息中间件RabbitMQ
github地址:https://github.com/showkawa/springBoot_2017/tree/master/spb-demo/spb-brian-query-service 1. ...
- SpringBoot进阶教程(二十九)整合Redis 发布订阅
SUBSCRIBE, UNSUBSCRIBE 和 PUBLISH 实现了 发布/订阅消息范例,发送者 (publishers) 不用编程就可以向特定的接受者发送消息 (subscribers). Ra ...
- SpringBoot进阶教程(二十八)整合Redis事物
Redis默认情况下,事务支持被禁用,必须通过设置setEnableTransactionSupport(true)为使用中的每个redistplate显式启用.这样做会强制将当前重新连接绑定到触发m ...
- SpringBoot进阶教程(二十六)整合Redis之共享Session
集群现在越来越常见,当我们项目搭建了集群,就会产生session共享问题.因为session是保存在服务器上面的.那么解决这一问题,大致有三个方案,1.通过nginx的负载均衡其中一种ip绑定来实现( ...
- SpringBoot进阶教程(二十五)整合Redis之@Cacheable、@CachePut、@CacheEvict的应用
在上一篇文章(<SpringBoot(二十四)整合Redis>)中,已经实现了Spring Boot对Redis的整合,既然已经讲到Cache了,今天就介绍介绍缓存注解.各家互联网产品现在 ...
- SpringBoot进阶教程(五十九)整合Codis
上一篇博文<详解Codis安装与部署>中,详细介绍了codis的安装与部署,这篇文章主要介绍介绍springboot整合codis.如果之前看过<SpringBoot进阶教程(五十二 ...
- springboot(十四):springboot整合shiro-登录认证和权限管理(转)
springboot(十四):springboot整合shiro-登录认证和权限管理 .embody{ padding:10px 10px 10px; margin:0 -20px; border-b ...
- Activiti7整合SpringBoot(十二)
1 SpringBoot 整合 Activiti7 的配置 为了能够实现 SpringBoot 与 Activiti7 整合开发,首先我们要引入相关的依赖支持.所以,我们在工程的 pom.xml 文件 ...
- spring-boot(八) springboot整合shiro-登录认证和权限管理
学习文章:springboot(十四):springboot整合shiro-登录认证和权限管理 Apache Shiro What is Apache Shiro? Apache Shiro是一个功能 ...
随机推荐
- SpringBoot2 整合 ClickHouse数据库,实现高性能数据查询分析
本文源码:GitHub·点这里 || GitEE·点这里 一.ClickHouse简介 1.基础简介 Yandex开源的数据分析的数据库,名字叫做ClickHouse,适合流式或批次入库的时序数据.C ...
- iOS的常用类库
target 'NewCompass' do #UI通用 pod 'SVProgressHUD' pod 'MJRefresh' pod 'SnapKit' #pod 'RTRootNavigatio ...
- ASP.NET Core 3.0 使用 gRPC无法编译问题
一.问题 创建了gRPC项目后,编译发现报错: 二.解决 1.检查项目路径是否存在中文 2.检查当前Windows用户目录是否为非英文字符,如果是则必须改为英文 修改方法: https://jingy ...
- Unity3D_Transform_位置、角度、缩放及其他
1.位置 transforn.position 世界位置 transform.localPosition 相对父类位置 在屏幕左上方显示方法: private void OnGUI() { GUIL ...
- java简单实现用语音读txt文档
最近比较无聊,随便翻着博客,无意中看到了有的人用VBS读文本内容,也就是读几句中文,emmm,挺有趣的,实现也很简单,都不需要安装什么环境,直接新建txt文件,输入一些简单的vbs读文本的代码,然后将 ...
- Python 中運算子 + 與 * 的 Overload 方法重載功能
字串 String 原本不能像數值一樣有加減乘除運算,但有例外.例如: >>> 'Good' + 'Morning''GoodMorning' 運算子 + 可將2個字串,串接起來. ...
- 树莓派 raspbian Linux 系统命令行 快捷键
在 Linux 下使用命令操作的时候,光标的移动令人头痛.命令输入完了,执行之后发现缺少权限,然后不得不移动光标到行首加 sudo,而命令又极长……当我学会了命令行相关的快捷键之后,不仅效率提高了,更 ...
- Octave中的常用操作2
>> ones(2:3)ans = 1 1 1 1 1 1 >> 2*ones(2:3)ans = 2 2 2 2 2 2 >> rand(3,3) 产生0~1中的 ...
- Druid-代码段-1-4
所属文章:池化技术(一)Druid是如何管理数据库连接的? 本代码段对应流程1.3,连接可用性测试: //数据库连接可用性测试 protected boolean testConnectionInte ...
- day83_11_1 阿里配python使用。
一.环境准备. 1.首先需要在支付包中注册开发者模式,并注册沙箱,模拟支付过程. https://openhome.alipay.com/platform/appDaily.htm?tab=info ...