Spring boot实战项目整合阿里云RocketMQ (非开源版)消息队列实现发送普通消息,延时消息 --附代码
一.为什么选择RocketMQ消息队列?
- 首先RocketMQ是阿里巴巴自研出来的,也已开源。其性能和稳定性从双11就能看出来,借用阿里的一句官方介绍:历年双 11 购物狂欢节零点千万级 TPS、万亿级数据洪峰,创造了全球最大的业务消息并发以及流转纪录(日志类消息除外);
- 在始终保证高性能前提下,支持亿级消息堆积,不影响集群的正常服务,在削峰填谷(蓄洪)、微服务解耦的场景下尤为重要;这,就能说明RocketMQ的强大。
二.RocketMQ的特点和优势(可跳过看三的整合代码)
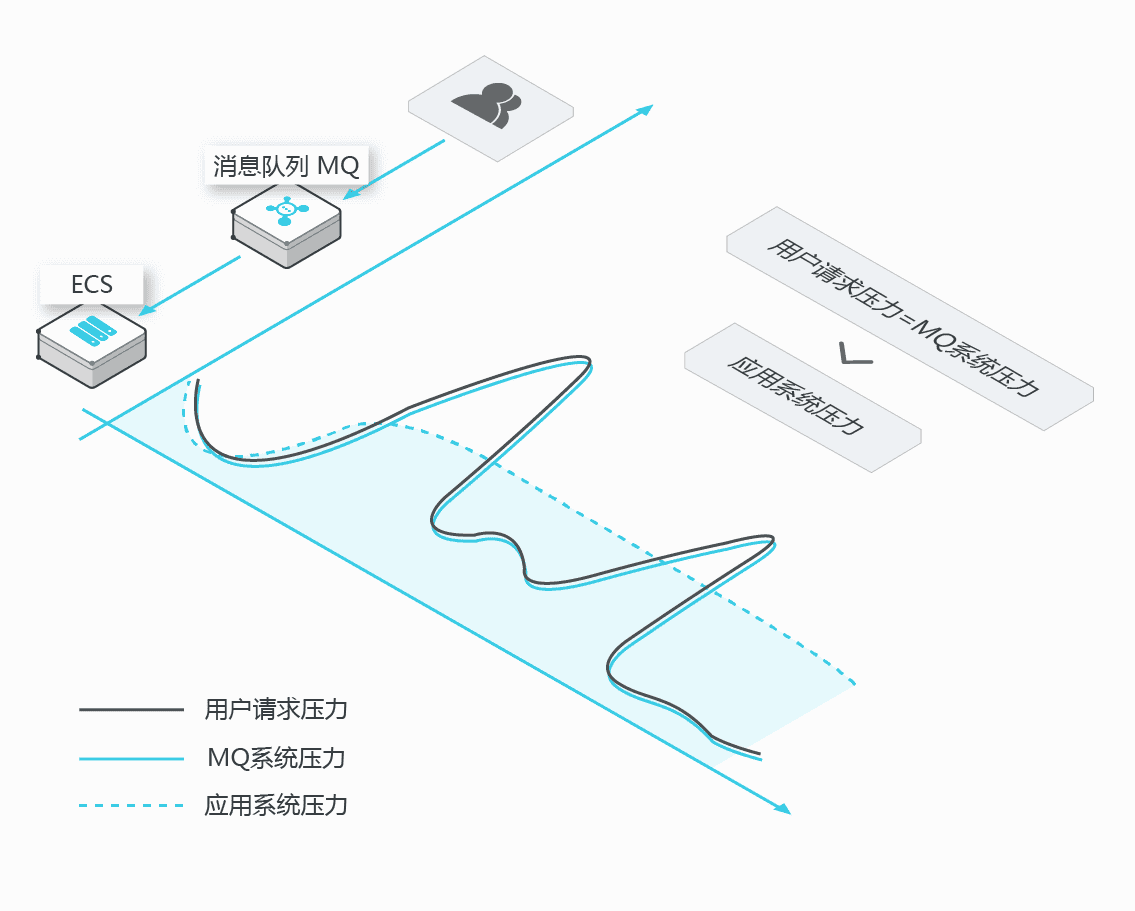
- 削峰填谷(主要解决诸如秒杀、抢红包、企业开门红等大型活动时皆会带来较高的流量脉冲,或因没做相应的保护而导致系统超负荷甚至崩溃,或因限制太过导致请求大量失败而影响用户体验,海量消息堆积能力强)

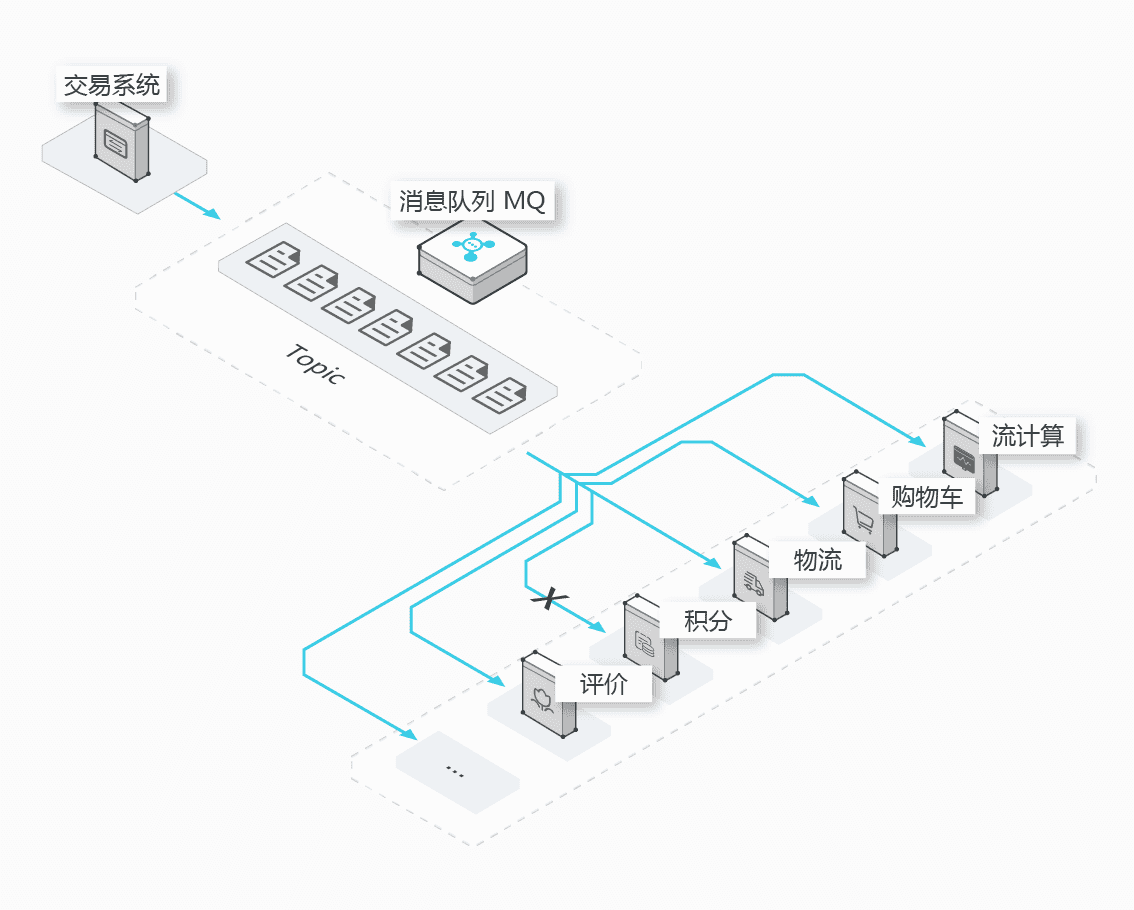
- 异步解耦(高可用松耦合架构设计,对高依赖的项目之间进行解耦,当下游系统出现宕机,不会影响上游系统的正常运行,或者雪崩)

- 顺序消息(顺序消息即保证消息的先进先出,比如证券交易过程时间优先原则,交易系统中的订单创建、支付、退款等流程,航班中的旅客登机消息处理等)

分布式事务消息(确保数据的最终一致性,大量引入 MQ 的分布式事务,既可以实现系统之间的解耦,又可以保证最终的数据一致性,减少系统间的交互)

三.SpringBoot 整合RocketMQ(商业云端版)
- 首先去阿里云控制台创建所需消息队列资源,包括消息队列 RocketMQ 的实例、Topic、Group ID (GID),以及鉴权需要的 AccessKey(AK)。
- 在springboot项目pom.xml添加需要的依赖 ons-client v1.8.0.Final
<!-- RocketMQ -->

 <dependency>

    <groupId>com.aliyun.openservices</groupId>

    <artifactId>ons-client</artifactId>

    <version>1.8.0.Final</version>

 </dependency>
- 在对应环境的application-xx.properties文件配置参数
##-------鉴权需要的 AccessKey(AK)(实际项目,这里填写阿里云自己的账号信息)---

rocketmq.accessKey=xxAxxxxxxxxxx

rocketmq.secretKey=xxxxxxxxxiHxxxxxxxxxxxxxx
## 实例TCP 协议公网接入地址(实际项目,填写自己阿里云MQ的公网地址)

rocketmq.nameSrvAddr=http://MQ_INST_***********85_BbM********************yuncs.com:80

#普通消息topic (实际项目,填写自己阿里云MQ中的topic名称和groupid)

rocketmq.topic=common

rocketmq.groupId=GID-message

rocketmq.tag=*

#定时/延时消息

rocketmq.timeTopic=time-lapse

rocketmq.timeGroupId=GID-message

rocketmq.timeTag=*
- 封装MQ配置类:MqConfig
/**

 * MQ配置加载

 * @author laifuwei

 */

@Configuration

@ConfigurationProperties(prefix = "rocketmq")

public class MqConfig {

    private String accessKey;

    private String secretKey;

    private String nameSrvAddr;

    private String topic;

    private String groupId;

    private String tag;

    private String timeTopic;

    private String timeGroupId;

    private String timeTag;

    public Properties getMqPropertie() {

        Properties properties = new Properties();

        properties.setProperty(PropertyKeyConst.AccessKey, this.accessKey);

        properties.setProperty(PropertyKeyConst.SecretKey, this.secretKey);

        properties.setProperty(PropertyKeyConst.NAMESRV_ADDR, this.nameSrvAddr);

        //设置发送超时时间,单位毫秒

        properties.setProperty(PropertyKeyConst.SendMsgTimeoutMillis, "4000");

        return properties;

    }

    public String getAccessKey() {

        return accessKey;

    }

    public void setAccessKey(String accessKey) {

        this.accessKey = accessKey;

    }

    public String getSecretKey() {

        return secretKey;

    }

    public void setSecretKey(String secretKey) {

        this.secretKey = secretKey;

    }

    public String getNameSrvAddr() {

        return nameSrvAddr;

    }

    public void setNameSrvAddr(String nameSrvAddr) {

        this.nameSrvAddr = nameSrvAddr;

    }

    public String getTopic() {

        return topic;

    }

    public void setTopic(String topic) {

        this.topic = topic;

    }

    public String getGroupId() {

        return groupId;

    }

    public void setGroupId(String groupId) {

        this.groupId = groupId;

    }

    public String getTag() {

        return tag;

    }

    public void setTag(String tag) {

        this.tag = tag;

    }

    public String getTimeTopic() {

        return timeTopic;

    }

    public void setTimeTopic(String timeTopic) {

        this.timeTopic = timeTopic;

    }

    public String getTimeGroupId() {

        return timeGroupId;

    }

    public void setTimeGroupId(String timeGroupId) {

        this.timeGroupId = timeGroupId;

    }

    public String getTimeTag() {

        return timeTag;

    }

    public void setTimeTag(String timeTag) {

        this.timeTag = timeTag;

    }

}
- 给消息生产者注入配置信息,
ProducerBean用于将Producer集成至Spring Bean中/**
* MQ配置注入生成消息实例
*/
@Configuration
public class ProducerClient { @Autowired
private MqConfig mqConfig; @Bean(initMethod = "start", destroyMethod = "shutdown")
public ProducerBean buildProducer() {
//ProducerBean用于将Producer集成至Spring Bean中
ProducerBean producer = new ProducerBean();
producer.setProperties(mqConfig.getMqPropertie());
return producer;
}
}
- 为了方便使用,我封装了一个发送消息的类,消息的Message参数和配置,看代码注释,很容易理解
/**

 * MQ发送消息助手

 * @author laifuwei

 */

@Component

public class ProducerUtil {

    private Logger logger = LoggerFactory.getLogger(ProducerUtil.class);

    @Autowired

    private MqConfig config;

    @Autowired

    private ProducerBean producer;

    /**

     * 同步发送消息

     * @param msgTag 标签,可用于消息小分类标注

     * @param messageBody 消息body内容,生产者自定义内容

     * @param msgKey 消息key值,建议设置全局唯一,可不传,不影响消息投递

     * @return success:SendResult or error:null

     */

    public SendResult sendMsg(String msgTag,byte[] messageBody,String msgKey) {

        Message msg = new Message(config.getTopic(),msgTag,msgKey,messageBody);

        return this.send(msg,Boolean.FALSE);

    }

    /**

     * 同步发送定时/延时消息

     * @param msgTag 标签,可用于消息小分类标注,对消息进行再归类

     * @param messageBody 消息body内容,生产者自定义内容,二进制形式的数据

     * @param msgKey 消息key值,建议设置全局唯一值,可不设置,不影响消息收发

     * @param delayTime 服务端发送消息时间,立即发送输入0或比更早的时间

     * @return success:SendResult or error:null

     */

    public SendResult sendTimeMsg(String msgTag,byte[] messageBody,String msgKey,long delayTime) {

        Message msg = new Message(config.getTimeTopic(),msgTag,msgKey,messageBody);

        msg.setStartDeliverTime(delayTime);

        return this.send(msg,Boolean.FALSE);

    }

    /**

     * 发送单向消息

     */

    public void sendOneWayMsg(String msgTag,byte[] messageBody,String msgKey) {

        Message msg = new Message(config.getTopic(),msgTag,msgKey,messageBody);

        this.send(msg,Boolean.TRUE);

    }

    /**

     * 普通消息发送发放

     * @param msg 消息

     * @param isOneWay 是否单向发送

     */

    private SendResult send(Message msg,Boolean isOneWay) {

        try {

            if(isOneWay) {

                //由于在 oneway 方式发送消息时没有请求应答处理,一旦出现消息发送失败,则会因为没有重试而导致数据丢失。

                //若数据不可丢,建议选用同步或异步发送方式。

                producer.sendOneway(msg);

                success(msg, "单向消息MsgId不返回");

                return null;

            }else {

                //可靠同步发送

                SendResult sendResult = producer.send(msg);

                   //获取发送结果,不抛异常即发送成功

                if (sendResult != null) {

                   success(msg, sendResult.getMessageId());

                   return sendResult;

                }else {

                   error(msg,null);

                   return null;

                }

            }

        } catch (Exception e) {

            error(msg,e);

            return null;

        }

    }

    //对于使用异步接口,可设置单独的回调处理线程池,拥有更灵活的配置和监控能力。

    //根据项目需要,服务器配置合理设置线程数,线程太多有OOM 风险,

    private ExecutorService threads = Executors.newFixedThreadPool(3);

    //仅建议执行轻量级的Callback任务,避免阻塞公共线程池 引起其它链路超时。

    /**

     * 异步发送普通消息

     * @param msgTag

     * @param messageBody

     * @param msgKey

     */

    public void sendAsyncMsg(String msgTag,byte[] messageBody,String msgKey) {

        producer.setCallbackExecutor(threads);

        Message msg = new Message(config.getTopic(),msgTag,msgKey,messageBody);

         try {

             producer.sendAsync(msg, new SendCallback() {

                 @Override

                 public void onSuccess(final SendResult sendResult) {

                     assert sendResult != null;

                     success(msg, sendResult.getMessageId());

                 }

                 @Override

                 public void onException(final OnExceptionContext context) {

                     //出现异常意味着发送失败,为了避免消息丢失,建议缓存该消息然后进行重试。

                     error(msg,context.getException());

                 }

             });

         } catch (ONSClientException e) {

             error(msg,e);

         }

    }

    //--------------日志打印----------

    private void error(Message msg,Exception e) {

        logger.error("发送MQ消息失败-- Topic:{}, Key:{}, tag:{}, body:{}"

                 ,msg.getTopic(),msg.getKey(),msg.getTag(),new String(msg.getBody()));

        logger.error("errorMsg --- {}",e.getMessage());

    }

    private void success(Message msg,String messageId) {

        logger.info("发送MQ消息成功 -- Topic:{} ,msgId:{} , Key:{}, tag:{}, body:{}"

                ,msg.getTopic(),messageId,msg.getKey(),msg.getTag(),new String(msg.getBody()));

    }

}
- 前面已经配置好了将Producer集成至Spring Bean中,直接注入Producer,在业务系统需要的地方调用来发送消息即可
//普通消息的Producer 已经注册到了spring容器中,后面需要使用时可以 直接注入到其它类中

    @Autowired

    private ProducerBean producer;

   /**

     * 演示方法,可在自己的业务系统方法中进行发送消息

     */

    public String mqTest() {

        /*  使用前面封装的方法,传入对应的参数即可发送消息

         *  msgTag 标签,可用于消息小分类标注

         *  messageBody 消息body内容,生产者自定义内容,任何二进制数据,生产者和消费者协定数据的序列化和反序列化

         *  msgKey 消息key值,建议设置全局唯一,比如订单号,用户id这种,可不传,不影响消息投递

         */

        //body内容自定义

        JSONObject body = new JSONObject();

        body.put("userId", "this is userId");

        body.put("notice", "同步消息");

        //同步发送消息

        producer.sendMsg("userMessage", body.toJSONString().getBytes(), "messageId");

        //单向消息

        producer.sendOneWayMsg("userMessage", "单向消息".getBytes(), "messageId");

        //异步消息

        producer.sendAsyncMsg("userMessage", "异步消息".getBytes(), "messageId");

        //定时/延时消息,当前时间的30秒后推送。时间自己定义

        producer.sendTimeMsg("userMessage", "延时消息".getBytes(), "messageId", System.currentTimeMillis()+30000);

        //顺序消息(全局顺序 / 分区顺序)、分布式事务消息 目前没用到,可看官网说明操作

        return "ok";

    }
- 接下来是消息消费者的配置和接收消息(一般在下游系统或者相关联的系统),接收消息的项目照旧,添加依赖jar包 ons-client v1.8.0.Final 、配置mq参数链接(mq的配置文件参数要和生产者项目配置的一样)、添加MqConfig类(上面有写)
- 注入配置、订阅消息、添加消息处理的方法
@Configuration
public class ConsumerClient { @Autowired
private MqConfig mqConfig; //普通消息监听器,Consumer注册消息监听器来订阅消息.
@Autowired
private MqMessageListener messageListener; //定时消息监听器,Consumer注册消息监听器来订阅消息.
@Autowired
private MqTimeMessageListener timeMessageListener; @Bean(initMethod = "start", destroyMethod = "shutdown")
public ConsumerBean buildConsumer() {
ConsumerBean consumerBean = new ConsumerBean();
//配置文件
Properties properties = mqConfig.getMqPropertie();
properties.setProperty(PropertyKeyConst.GROUP_ID, mqConfig.getGroupId());
//将消费者线程数固定为20个 20为默认值
properties.setProperty(PropertyKeyConst.ConsumeThreadNums, "20");
consumerBean.setProperties(properties);
//订阅消息
Map<Subscription, MessageListener> subscriptionTable = new HashMap<Subscription, MessageListener>();
//订阅普通消息
Subscription subscription = new Subscription();
subscription.setTopic(mqConfig.getTopic());
subscription.setExpression(mqConfig.getTag());
subscriptionTable.put(subscription, messageListener);
//订阅定时/延时消息
Subscription subscriptionTime = new Subscription();
subscriptionTime.setTopic(mqConfig.getTimeTopic());
subscriptionTime.setExpression(mqConfig.getTimeTag());
subscriptionTable.put(subscriptionTime, timeMessageListener); consumerBean.setSubscriptionTable(subscriptionTable);
return consumerBean;
} } - 对定时/延时消息监听类进行实现,处理接收到的消息
/**

 * 定时/延时MQ消息监听消费

 * @author laifuwei

 */

@Component

public class MqTimeMessageListener extends AutowiredService implements MessageListener {

    private Logger logger = LoggerFactory.getLogger(this.getClass());

    //实现MessageListtener监听器的消费方法

    @Override

    public Action consume(Message message, ConsumeContext context) {
logger.info("接收到MQ消息 -- Topic:{}, tag:{},msgId:{} , Key:{}, body:{}",
message.getTopic(),message.getTag(),message.getMsgID(),message.getKey(),new String(message.getBody()));try {
String msgTag = message.getTag();//消息类型
String msgKey = message.getKey();//业务唯一id
switch (msgTag) {
//----通过生产者传的tag标签进行消息分类和过滤处理
case "userMessage":
//通过唯一key的,比如前面key传的值是订单号或者用户id这种唯一值,来进行数据的查询或处理
//由于RocketMQ能重复推送消息,处理消息的时候做好数据的幂等,防止重复处理
if(//如订单系统需要判断订单是否被处理过等,通过传的msgKey即订单号去查询数据库进行判断) {
break;
}
//验证通过,处理业务
//do something
break;
}
//消费成功,继续消费下一条消息
return Action.CommitMessage;
} catch (Exception e) {
logger.error("消费MQ消息失败! msgId:" + message.getMsgID()+"----ExceptionMsg:"+e.getMessage());
//消费失败,告知服务器稍后再投递这条消息,继续消费其他消息
return Action.ReconsumeLater;
}
} } - 对普通消息进行监听,消费消息
/**

 * 普通(默认同步)MQ消息监听消费

 * @author laifuwei

 */

@Component

public class MqMessageListener extends AutowiredService implements MessageListener {

    private Logger logger = LoggerFactory.getLogger(this.getClass());

    @Override

    public Action consume(Message message, ConsumeContext context) {

        logger.info("接收到MQ消息. Topic :" + message.getTopic() + ", tag :" + message.getTag()+ " msgId : " + message.getMsgID()+", Key :" + message.getKey()+", body:" + new String(message.getBody()));

        try {

            String msgTag = message.getTag();//消息类型

            String msgKey = message.getKey();//唯一key

            switch (msgTag) {

            //--------普通通知

            case "userMessage":

                break;

            }

            return Action.CommitMessage;

        } catch (Exception e) {

            logger.error("消费MQ消息失败! msgId:" + message.getMsgID()+"----ExceptionMsg:"+e.getMessage());

            return Action.ReconsumeLater;

        }

    }

}
四.最后运行消费者项目和生产者项目,调用生产者项目发送消息验证效果:
- 生产者发送消息结果日志:消息发送正常
2019-08-17 15:11:06.837 INFO 9996 --- [nio-8080-exec-9] com.dyj.shop.mq.ProducerUtil : 发送MQ消息成功 -- Topic:common ,msgId:C0A86532270C2A139A5555A7E5DD0000 , Key:messageId, tag:userMessage, body:{"userId":"this is userId","notice":"同步消息"}

2019-08-17 15:11:06.841 INFO 9996 --- [nio-8080-exec-9] com.dyj.shop.mq.ProducerUtil : 发送MQ消息成功 -- Topic:common ,msgId:单向消息MsgId不返回 , Key:messageId, tag:userMessage, body:单向消息

2019-08-17 15:11:06.901 INFO 9996 --- [pool-6-thread-1] com.dyj.shop.mq.ProducerUtil : 发送MQ消息成功 -- Topic:common ,msgId:C0A86532270C2A139A5555A7E6630004 , Key:messageId, tag:userMessage, body:异步消息

2019-08-17 15:11:07.060 INFO 9996 --- [nio-8080-exec-9] com.dyj.shop.mq.ProducerUtil : 发送MQ消息成功 -- Topic:time-lapse ,msgId:C0A86532270C2A139A5555A7E69F0006 , Key:messageId, tag:userMessage, body:定时/延时消息
- 消费者接收到消息,可以看到普通消息的发送时间和接收到消息的时间,就相差几毫秒,值得注意的是:延时消息按照生产者定义的30秒后消费者才收到。这就是延时消息的好玩之处
2019-08-17 15:11:06.881 INFO 10942 --- [MessageThread_7] com.dyj.timer.mq.MqMessageListener : 接收到MQ消息. Topic :common, tag :userMessage msgId : C0A86532270C2A139A5555A7E5DD0000, Key :messageId, body:{"userId":"this is userId","notice":"同步消息"}

2019-08-17 15:11:06.934 INFO 10942 --- [MessageThread_8] com.dyj.timer.mq.MqMessageListener : 接收到MQ消息. Topic :common, tag :userMessage msgId : C0A86532270C2A139A5555A7E6550002, Key :messageId, body:单向消息

2019-08-17 15:11:06.947 INFO 10942 --- [MessageThread_9] com.dyj.timer.mq.MqMessageListener : 接收到MQ消息. Topic :common, tag :userMessage msgId : C0A86532270C2A139A5555A7E6630004, Key :messageId, body:异步消息

2019-08-17 15:11:36.996 INFO 10942 --- [essageThread_10] com.dyj.timer.mq.MqTimeMessageListener : 接收到MQ消息. Topic :time-lapse, tag :userMessage msgId : cd900e16f7cba68369ec498ae2f9dd6c, Key :messageId, body:定时/延时消
写在最后:有不妥或有兴趣的可以下方留言,多谢指教(#^-^#)
Spring boot实战项目整合阿里云RocketMQ (非开源版)消息队列实现发送普通消息,延时消息 --附代码的更多相关文章
- [Java] Spring boot 的maven设置阿里云仓库
Spring boot 的maven设置阿里云仓库 打开根目录下的 pom.xml 文件,在对应为止出加入如下 红色 代码: <build> <plugins> <plu ...
- spring boot 的maven设置阿里云仓库
<build> <plugins> <plugin> <groupId>org.springframework.boot</groupId> ...
- Spring Boot Web项目整合jsp页面访问
这个内容就是实操过程中各种访问不了jsp页面,各种尝试后的解决方案吧.可能不是最优的,但是目前能解决项目中的一些问题.之前觉得没有什么问题直接可以操作的,没想到在这部分还是耗时了. 开发工具idea2 ...
- 最近做的一个Spring Boot小项目,欢迎大家访问 http://39.97.115.152/
最近做的一个Spring Boot小项目,欢迎大家访问 http://39.97.115.152/,帮忙找找bug,网站里有源码地址 网站说明 甲壳虫社区(Beetle Community) 一个开源 ...
- RabbitMQ与Spring的框架整合之Spring Boot实战
1.RabbitMQ与Spring的框架整合之Spring Boot实战. 首先创建maven项目的RabbitMQ的消息生产者rabbitmq-springboot-provider项目,配置pom ...
- spring boot实战(第十二篇)整合RabbitMQ
前言 最近几篇文章将围绕消息中间件RabbitMQ展开,对于RabbitMQ基本概念这里不阐述,主要讲解RabbitMQ的基本用法.Java客户端API介绍.spring Boot与RabbitMQ整 ...
- 整合阿里云OSS
整合阿里云OSS 一.对象存储OSS 为了解决海量数据存储与弹性扩容,采用云存储的解决方案- 阿里云OSS. 1.开通"对象存储OSS"服务 (1)申请阿里云账号 (2)实名认证 ...
- SpringBoot整合阿里云OSS文件上传、下载、查看、删除
1. 开发前准备 1.1 前置知识 java基础以及SpringBoot简单基础知识即可. 1.2 环境参数 开发工具:IDEA 基础环境:Maven+JDK8 所用技术:SpringBoot.lom ...
- spring boot 2.0 整合 elasticsearch6.5.3,spring boot 2.0 整合 elasticsearch NoNodeAvailableException
原文地址:spring boot 2.0 整合 elasticsearch NoNodeAvailableException 原文说的有点问题,下面贴出我的配置: 原码云项目地址:https://gi ...
随机推荐
- Tomcat CGIServlet enableCmdLineArguments远程代码执行_CVE-2019-0232漏洞复现
Tomcat CGIServlet enableCmdLineArguments远程代码执行_CVE-2019-0232漏洞复现 一.漏洞描述 该漏洞是由于tomcat CGI将命令行参数传递给Win ...
- ps aux | grep "svnserve" | cut -c 9-15 | xargs kill -9
ps aux | grep "svnserve" | cut -c 9-15 | xargs kill -9
- weblogic10.3.6重置/修改控制台账号密码
weblogic部署服务后由于交接过程中文档不完整导致有一个域的控制台账号密码遗失, 在此整理记录一下重置控制台账号密码的过程: 注:%DOMAIN_HOME%:指WebLogic Server 域( ...
- E11000 duplicate key error index
E11000 duplicate key error index mongodb插入报错,重复主键问题,有唯一键值重复 一般使用collection.insertOne(doc);插入一条已存在主键的 ...
- SublimeText3 汉化
Sublime Text3 汉化 Sublime Text 作为一款方便的代码编辑软件广受大家喜爱,所以在自己在汉化成功后记录该方法,方便大家使用. 安装 一个插件 package control 即 ...
- Java EE.JSP.内置对象
JSP根据Servlet API 规范提供了某些内置对象,开发者不用事先声明就可以使用标准的变量来访问这些对象.JSP提供了九中内置对象:request.response.out.session.ap ...
- JAVA项目从运维部署到项目开发(六. Jenkins之静态页面)
用Git托管静态页面代码,通过Jenkins部署静态页面,是再方便不过的了.本文将介绍如何通过Jenkins部署最新的静态页面代码. 一.Jenkins的配置 1.设置项目名称.参数(环境.分支)等 ...
- MyBatis Generator Example.Criteria 查询条件复制
背景: 我们在开发中使用MyBatis Generator生成的 XxxExample查询时,咋添加 or 查询时候,可能两个 Example.Criteria 对象的条件存在交集,即多个查询条件是相 ...
- perspective transform透视矩阵快速求法+矩形矫正
算了半天一直在思考如何快速把矩阵算出来,网上基本都是在说边长为1的正方形的变换方式=.= 不怎么用得上…… 公式推导推半天,计算还麻烦.... ++++++++++++++++++++++++++ ...
- Django websocket之web端实时查看日志实践案例
这是Django Channels系列文章的第二篇,以web端实现tailf的案例讲解Channels的具体使用以及跟Celery的结合 通过上一篇<Django使用Channels实现WebS ...
