【Java】GUI编程
GUI编程
前言
某koukou老师的任务罢了,好在狂神老师居然有GUI的课,只能说是有救星了。
最好笑的是,老师要求掌握的居然是14年的知识,就连狂神在上这门课的时候都在吐槽:你们在网络上几乎看不到这样的教学资源,因为已经很少很少了(被淘汰了)
主要是这个学期的短学期实践十有八九是koukou老师,非得是用java设计图形化可视化,所以学还是得学,不该挂的课就是不能挂!
1、了解GUI
组建:
- 窗口
- 弹窗
- 面板
- 文本框
- 列表框
- 按钮
- 图片
- 监听事件
- 鼠标
- 键盘事件
- (狂神老师提到逆向破解游戏基本使用java来写
2、简介
GUI的核心:
Swing AWT
为什么javaGUI不流行?
- 界面丑
- 需要jre环境
那么为什么要学?
- 自制工具(确实,ctf许多工具都是用javaGUI写成打包的jar
- 极小概率在工作中维护Swing界面(大概我这辈子见不到了吧
- 重点是学习监听事件,可以由此了解MVC架构
3、AWT
3.1 AWT介绍
用于GUI编程,AWT就是抽象窗口工具
(Eclipse和IDEA就是用java Swing写出来的)
- 包含了很多类和接口
- 包含了很多元素:窗口、按钮、文本框
- 在java.awt包中
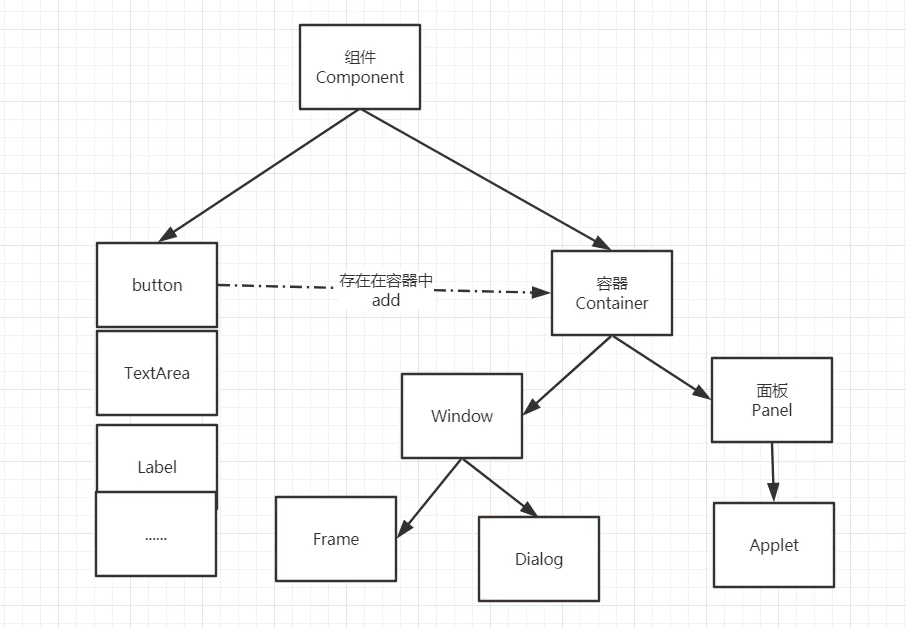
3.2 组件和容器
1、Frame
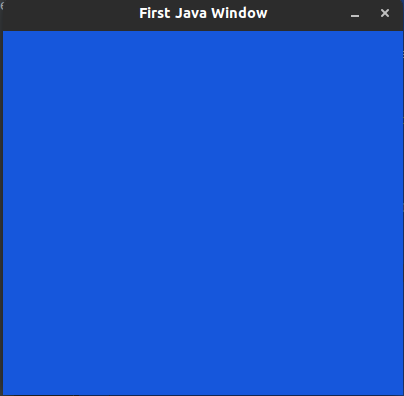
我们现来看看第一个frame
package top.woodwhale.study;import java.awt.*;// GUI的第一个界面public class TestFrame {public static void main(String[] args) {// FrameFrame frame = new Frame("First Java Window");// 需要设置可见性,长度、宽度frame.setVisible(true);frame.setSize(400,400);// 设置背景颜色 Colorframe.setBackground(new Color(22, 87, 220));// 弹出的初始位置frame.setLocation(200,200);// 设置大小固定frame.setResizable(false);}}
效果就是一个蓝色的、不可拉伸、不可关闭的窗口
思考:
- 为什么无法关闭?
- 如何让窗口关闭?只能靠关闭程序吗?
如果我们需要同时开启多个窗口,有没有什么好的方法呢?
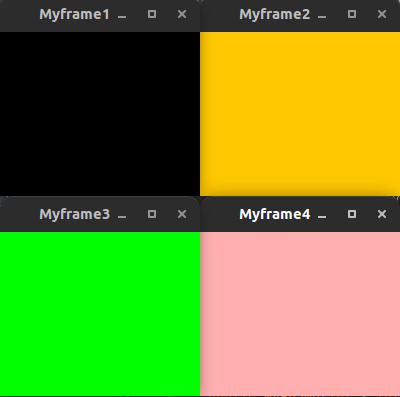
- 可以写一个自类,继承自Frame,然后实现我们需要的功能
package top.woodwhale.study;import java.awt.*;public class TestFrame2 {public static void main(String[] args) {// 展示多个窗口MyFrame mf1 = new MyFrame(100,100,200,200,Color.black);MyFrame mf2 = new MyFrame(300,100,200,200,Color.orange);MyFrame mf3 = new MyFrame(100,300,200,200,Color.green);MyFrame mf4 = new MyFrame(300,300,200,200,Color.pink);}}class MyFrame extends Frame{static int id = 0; // 可能存在多个窗口,需要一个计数器public MyFrame(int x,int y,int w,int h,Color color) {super("Myframe"+ (++id));setBackground(color);setBounds(x,y,w,h);setVisible(true);}}
效果如下:(有点好看
2、Panel
面板Panel可以看成是一个空间,但是不能单独存在,可以存在与一个框架中。类似于前段的div(大概
以下的例子通过适配器模式来监听窗口关闭事件
package top.woodwhale.study;import java.awt.*;import java.awt.event.WindowAdapter;import java.awt.event.WindowEvent;public class TestPanel {public static void main(String[] args) {// 先创建一个框架Frame frame = new Frame();// 设置一个面板Panel panel = new Panel();// 设置布局frame.setLayout(null);// 框架的坐标frame.setBounds(300,300,500,500);// 框架的背景frame.setBackground(new Color(40,161,35));// 面板设置坐标,相对于framepanel.setBounds(50,50,400,400);panel.setBackground(new Color(190,15,60));// frame.add()frame.add(panel);// 将面板设置为可见frame.setVisible(true);// 监听窗口关闭事件// 适配器模式:frame.addWindowListener(new WindowAdapter() {// 窗口点击关闭的时候需要做的事情@Overridepublic void windowClosing(WindowEvent e) {System.exit(0);}});}}
效果如下:(我们点击关闭按钮可以结束进程,也就是退出

3、布局管理
流式布局

这个按钮的年代感直接出来了,有种wine打开exe的味道了
package top.woodwhale.study;import java.awt.*;public class TestFlowLayout {public static void main(String[] args) {Frame frame = new Frame("114514");// 组件-按钮Button button1 = new Button("button1");Button button2 = new Button("button2");Button button3 = new Button("button3");// 设置为流式布局 默认是居中frame.setLayout(new FlowLayout());// frame.setLayout(new FlowLayout(FlowLayout.RIGHT));frame.setSize(200,200);// 把按钮添加上去frame.add(button1);frame.add(button2);frame.add(button3);frame.setVisible(true);}}
东西南北中
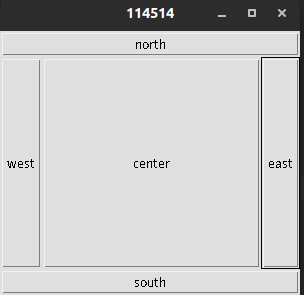
狂神老师说这是视频软件的布局,为什么我第一反应是,上下左右都是广告,中间是小视频(bushi
package top.woodwhale.study;import java.awt.*;public class TestBorderLayout {public static void main(String[] args) {Frame frame = new Frame("114514");Button east = new Button("east");Button west = new Button("west");Button south = new Button("south");Button north = new Button("north");Button center = new Button("center");frame.add(east,BorderLayout.EAST);frame.add(west,BorderLayout.WEST);frame.add(south,BorderLayout.SOUTH);frame.add(north,BorderLayout.NORTH);frame.add(center,BorderLayout.CENTER);frame.setSize(300,300);frame.setVisible(true);}}
表格布局
就是类似表格的形式,这里使用了pack()方法来使大小、内容自动填充
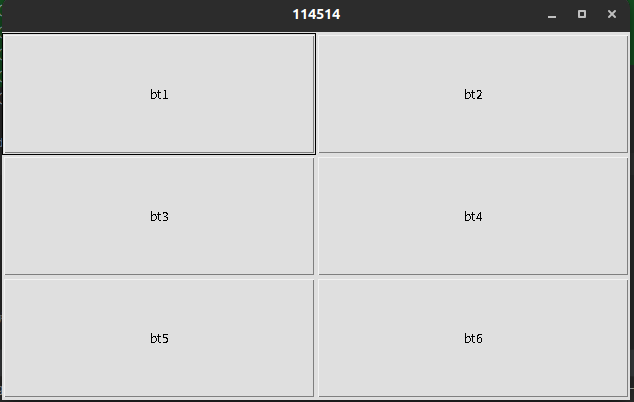
package top.woodwhale.study;import java.awt.*;public class TestGridLayout {public static void main(String[] args) {Frame frame = new Frame("114514");Button bt1 = new Button("bt1");Button bt2 = new Button("bt2");Button bt3 = new Button("bt3");Button bt4 = new Button("bt4");Button bt5 = new Button("bt5");Button bt6 = new Button("bt6");frame.setLayout(new GridLayout(3,2));frame.add(bt1);frame.add(bt2);frame.add(bt3);frame.add(bt4);frame.add(bt5);frame.add(bt6);frame.pack(); // java方法,用来自动填充frame.setVisible(true);}}
4、狂神老师的作业time
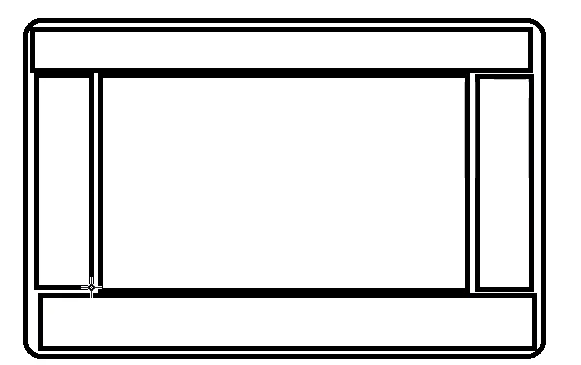
如何完成下图的格式布局?

直接动手
动手之前先进行构思,一个好的项目,构思占据80%,代码只有20%!!!
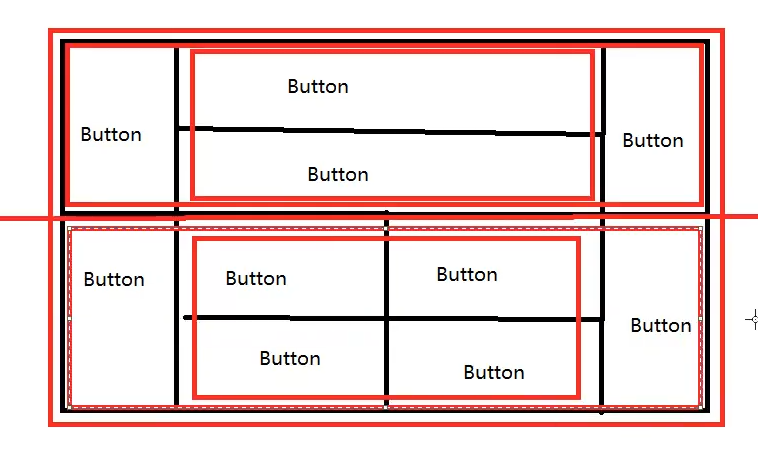
我们现构建一个两行一列的frame,然后在中间部分上下各设置一个面板,frame的上半部分和下半部分都使用东西南北中的布局管理,再在两个面板中设置东西南北中格式,其中上面的嵌套一个两行一列的面板,下面的嵌套一个两行两列的面板
最终效果:
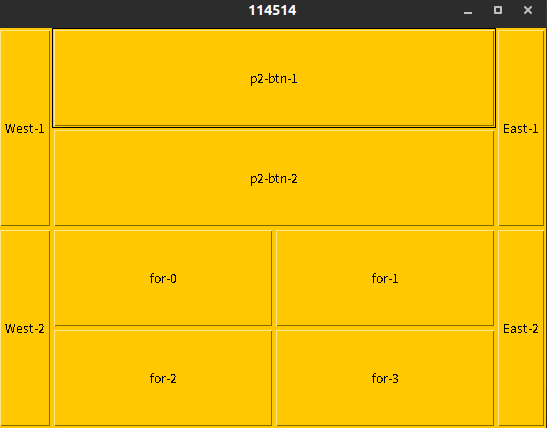
代码:
package top.woodwhale.study;import java.awt.*;import java.awt.image.ImageObserver;public class MyLayout {public static void main(String[] args) {Frame frame = new Frame("114514");frame.setSize(400,300);frame.setLocation(300,300);frame.setBackground(Color.orange);frame.setVisible(true);// 两行一列frame.setLayout(new GridLayout(2,1));// 4个面板Panel panel1 = new Panel(new BorderLayout());Panel panel2 = new Panel(new GridLayout(2,1));Panel panel3 = new Panel(new BorderLayout());Panel panel4 = new Panel(new GridLayout(2,2));panel1.add(new Button("East-1"),BorderLayout.EAST);panel1.add(new Button("West-1"),BorderLayout.WEST);panel2.add(new Button("p2-btn-1"));panel2.add(new Button("p2-btn-2"));panel1.add(panel2,BorderLayout.CENTER);panel3.add(new Button("East-2"),BorderLayout.EAST);panel3.add(new Button("West-2"),BorderLayout.WEST);for (int i = 0; i < 4; i++) {panel4.add(new Button("for-"+i));}panel3.add(panel4,BorderLayout.CENTER);frame.add(panel1);frame.add(panel3);}}
5、总结
- Frame是一个顶级窗口
- Panel无法单独显示,得放入Frame(容器)中
- 布局管理:
- 流式
- 东西南北中
- 表格
- 设置大小、定位、背景、监听
- 设计模式不要直接写,先去构想!
3.3 监听事件
1、监听测试
监听就是,当发生某事件后,我们监听到了这个动态,应该有某种反馈
先来点效果图:
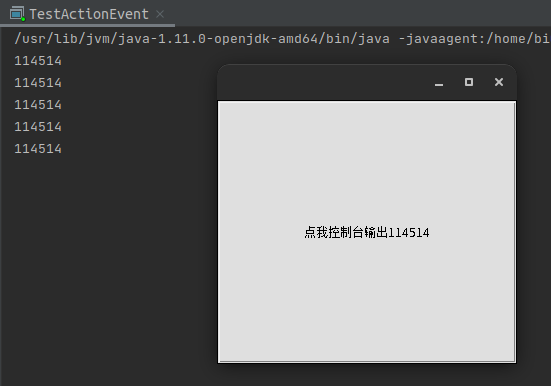
可以观察到,我们第一次这个巨大按钮,就会在控制台输出一次114514,这是为啥呢?
package top.woodwhale.study2;import java.awt.*;import java.awt.event.ActionEvent;import java.awt.event.ActionListener;import java.awt.event.WindowAdapter;import java.awt.event.WindowEvent;public class TestActionEvent {public static void main(String[] args) {Frame frame = new Frame();// 按下按钮的时候,触发一些事件Button button = new Button("点我控制台输出114514");// 因为addActionListener需要一个ActionListener,所以我们字节写一个MyActionListener类MyActionListener myActionListener = new MyActionListener();button.addActionListener(myActionListener);frame.add(button);frame.setSize(300,300);frame.setVisible(true);windowClose(frame);}// 关闭窗口事件private static void windowClose(Frame frame) {frame.addWindowListener(new WindowAdapter() {@Overridepublic void windowClosing(WindowEvent e) {System.exit(0);}});}}class MyActionListener implements ActionListener{@Overridepublic void actionPerformed(ActionEvent actionEvent) {System.out.println("114514");}}
其实是因为,我们设置了一个按钮的监听器,我们自己写了一个MyActionListener类,是ActionListener的一个接口,我们重写的方法就是只要有这个事件产生,就输出114514。
而我们在button中使用了addActionListener方法,将我们重写的监听器赋予给了这个按钮,所以我们按下这个按钮的时候就能在控制台看到输出的114514。
并且,我们通过在主类中写了一个windowClose的static方法,这样,我们通过方法的封装直接实现了点击关闭按钮关闭窗口的监听事件。
2、单监听器监听多个事件
如果我们想实现多个按钮同时监听一个事件呢?我们可以只写一个监听类,通过更改setActionCommand达到不同的监听效果。
如下图所示,我们点击start按钮可以在控制台输出“开始”
如果我们点击Stop按钮,会输出“哼哼”
这种效果其实就是一个监听器监听了多个事件

package top.woodwhale.study2;import java.awt.*;import java.awt.event.ActionEvent;import java.awt.event.ActionListener;public class TestActionEvent2 {public static void main(String[] args) {// 两个按钮,实现同一个监听// 开始按钮和停止按钮Frame frame = new Frame("Start ~ Stop");Button button = new Button("Start");Button button1 = new Button("Stop");// 可以显示的定义触发会返回的命令,如果不显示定义,则会走默认的值// 这样我们可以多个按钮,但是只需要一个监听类,只需要更改setActionCommandbutton1.setActionCommand("Stop");MyMonitor myMonitor = new MyMonitor();button.addActionListener(myMonitor);button1.addActionListener(myMonitor);frame.add(button,BorderLayout.NORTH);frame.add(button1,BorderLayout.SOUTH);frame.setSize(300,300);frame.setVisible(true);}}class MyMonitor implements ActionListener {@Overridepublic void actionPerformed(ActionEvent actionEvent) {// actionEvent.getActionCommand()获得按钮的信息'String command = actionEvent.getActionCommand();if (command.equals("Stop")) {System.out.println("想要Stop?哼哼哼哼哼哼哼哼哼哼哼哼哈哈哈哈哈哈哈哈哈~");} else if (command.equals("Start")) {System.out.println("开始");}}}
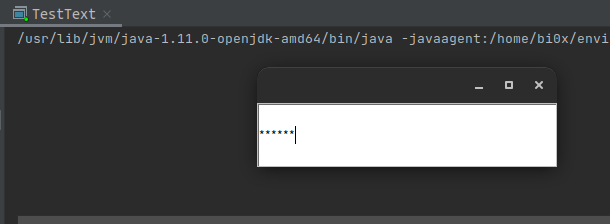
3、输入框TextField监听
我们用TextField类可以创造出输入框的对象,输入框在很多地方都很常见,比如密码输入
这里我们用密码输入来当引子
我们应该实现什么功能?
- 首先考虑输入单行密码,密码只能显示*号
- 其次就是输入按下回车我们可以得到密码
- 最后就是按下回车我们此前输入的密码会清空
如何实现?
- 第2和第3点可以通过设置监听事件完成
- 第1点可以通过textField.setEchoChar('*'); 替换编码的方法来实现
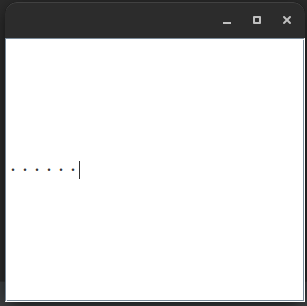
效果如下:
按下回车之前:
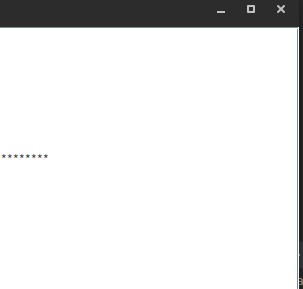
按下回车之后:

代码实现:
package top.woodwhale.study2;import java.awt.*;import java.awt.event.ActionEvent;import java.awt.event.ActionListener;import java.awt.event.WindowAdapter;import java.awt.event.WindowEvent;public class TestText {public static void main(String[] args) {// 启动new MyFrame();}}class MyFrame extends Frame {public MyFrame() {// 写单行文本TextField textField = new TextField();// 因为MyFrame继承了Frame,可以直接使用add方法add(textField);// 监听这个文本框输入的文字,按下enter控制台就会输出我们输入的内容,并且清空文本MyAL myAL = new MyAL();textField.addActionListener(myAL);// 替换编码textField.setEchoChar('*');setVisible(true);setSize(300,100);// 设置点击关闭监听事件addWindowListener(new WindowAdapter() {@Overridepublic void windowClosing(WindowEvent e) {System.exit(0);}});}}class MyAL implements ActionListener {@Overridepublic void actionPerformed(ActionEvent actionEvent) {// 获取一些资源,返回了一个对象TextField field = (TextField) actionEvent.getSource();// 获得输入框的文字System.out.println(field.getText());field.setText("");}}
3.4 实现简易计算器
1、前言
在这章之前,狂神老师说了一点比较重要的——oop原则:组合大于继承
其实这是装饰器模式的一个体现:
比如我们如果在A类中要实现B的部分功能,一般都是将A继承B的功能。
但是因为Java不能多继承,所以组合就出现了
// 继承public class A extends B {}// 组合public class A {public B b;}
此外,阿里巴巴手册中提出,少用多态、少用继承!(虽然多态和继承是面向对象的三大特性之二)
2、构思
在开始写代码之前,我们需要先构思。
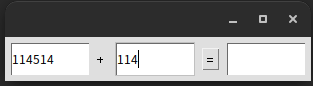
GUI界面如下:

界面其实就是三个输入框,一个“=”按钮,一个“+”标签,然后按照流式模型就可以构造出来了
重点来了:
如何完成监听前两个输入框的值,并且将第三个输入框写入计算后的结果?
3、setter方式
我们在面向对象的学习中,都了解到了构造器,那么我们是不是可以吧三个输入框通过构造器来获取呢?
我们在监听器类中创建三个私有的三个输入框类,通过new对象的时候将传入的三个输入框setter完成。
这样,我们在监听器类中就获取了三个输入框的对象!接下来的操作就不用多所了,代码注释中写有。
代码:
package top.woodwhale.study2;import java.awt.*;import java.awt.event.ActionEvent;import java.awt.event.ActionListener;public class TestCalc {public static void main(String[] args) {new Calculator();}}// 计算器类class Calculator extends Frame {public Calculator() {// 3个文本框TextField num1 = new TextField(10);TextField num2 = new TextField(10);TextField num3 = new TextField(10);// 1个按钮Button button = new Button("=");button.addActionListener(new MyCalcListener(num1, num2, num3));// 1个标签Label label = new Label("+");setLayout(new FlowLayout());add(num1);add(label);add(num2);add(button);add(num3);pack();setVisible(true);}}// 监听器类class MyCalcListener implements ActionListener {private TextField num1, num2, num3;// 获取三个变量public MyCalcListener(TextField num1, TextField num2, TextField num3) {this.num1 = num1;this.num2 = num2;this.num3 = num3;}@Overridepublic void actionPerformed(ActionEvent actionEvent) {// 1.获得加数和被加数int n1 = Integer.parseInt(num1.getText());int n2 = Integer.parseInt(num2.getText());// 2.将这个值进行加法运算后,防到第三个框num3.setText(n1+n2+"");// 3.清除前两个框num1.setText("");num2.setText("");}}
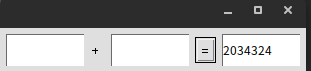
运行截图:
按下按钮前:

按下按钮后:
4、组合方式
我们在前言部分就提到了,组合是远远好于继承的,那么如何使用组合的方式来获取三个对话框中的输入输出呢?
我们之前使用的setter方式相当于传数据,而面向对象的组合方式,就是相当于传对象了。
- 如何实现?
- 在计算器类中写一个loadFrame方法,在这个方法中实现外部大Frame的构造
- 再自己写一个监听类,其中的构造器是直接获取计算器这个对象,而这个计算器对象包含了num1,num2,num3的属性,我们通过更改这些属性的状态来完成计算器的实现!
完整代码:
package top.woodwhale.study2;import java.awt.*;import java.awt.event.ActionEvent;import java.awt.event.ActionListener;public class TestCalc2 {public static void main(String[] args) {new Calculator2().loadFrame();}}// 计算器类class Calculator2 extends Frame {// 属性TextField num1, num2, num3;// 方法public void loadFrame() {num1 = new TextField(10);num2 = new TextField(10);num3 = new TextField(10);Button button = new Button("=");button.addActionListener(new MyCalcListener2(this)); // 将自己这个Calculator对象给监听器类Label label = new Label("+");setLayout(new FlowLayout());add(num1);add(label);add(num2);add(button);add(num3);pack();setVisible(true);}}// 监听器类class MyCalcListener2 implements ActionListener {// 获取计算器这个对象,在一个类中组合另一个类private Calculator2 calculator = null;// 获取三个变量public MyCalcListener2(Calculator2 calculator) {this.calculator = calculator;}@Overridepublic void actionPerformed(ActionEvent actionEvent) {int n1 = Integer.parseInt(calculator.num1.getText());int n2 = Integer.parseInt(calculator.num2.getText());calculator.num3.setText(n1+n2+"");calculator.num1.setText("");calculator.num2.setText("");}}
效果图:
按下按钮前:
按下按钮后:

5、内部类方式
面向对象的更高级形式——内部类方法实现
- 更好的包装
- 更简洁的代码
- 更易懂的对象
如何实现?
- 我们只需要将刚刚写的监听器类写入计算器类的内部类就可以了,这样这个监听器就算计算器专门的监听器,并且计算器这个类中有着完整的——属性、方法、内部类。完美的面向对象的体现!
- 内部类的最大好处就是——随意访问外部类的属性和方法
package top.woodwhale.study2;import java.awt.*;import java.awt.event.ActionEvent;import java.awt.event.ActionListener;public class TestCalc2 {public static void main(String[] args) {new Calculator2().loadFrame();}}// 计算器类class Calculator2 extends Frame {// 属性TextField num1, num2, num3;// 方法public void loadFrame() {num1 = new TextField(10);num2 = new TextField(10);num3 = new TextField(10);Button button = new Button("=");button.addActionListener(new MyCalcListener2()); // 将自己这个Calculator对象给监听器类Label label = new Label("+");setLayout(new FlowLayout());add(num1);add(label);add(num2);add(button);add(num3);pack();setVisible(true);}// 监听器类class MyCalcListener2 implements ActionListener {@Overridepublic void actionPerformed(ActionEvent actionEvent) {int n1 = Integer.parseInt(num1.getText());int n2 = Integer.parseInt(num2.getText());num3.setText(n1+n2+"");num1.setText("");num2.setText("");}}}
3.5 Paint画笔
现了解这个paint方法,是Frame中的一个方法,我们自己构造一个MyPaint类,继承Frame,然后重写paint方法,这样在我们的Frame中就可以画出我们想要的东西了!
效果图:
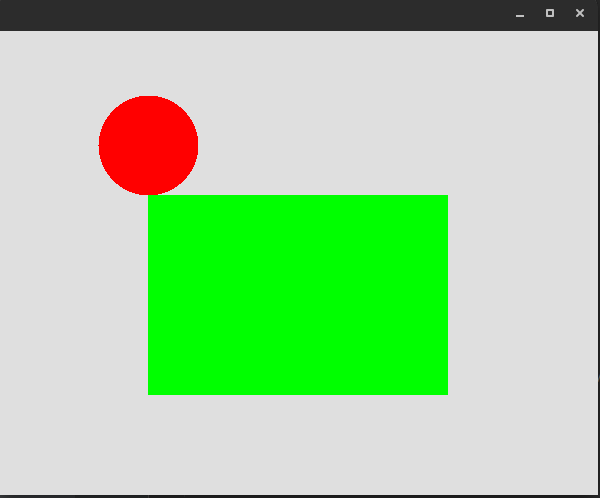
实现代码:
package top.woodwhale.study3;import java.awt.*;public class TestPaint {public static void main(String[] args) {new MyPaint().loadFrame();}}class MyPaint extends Frame {public void loadFrame() {setBounds(200,200,600,500);setVisible(true);}// 画笔@Overridepublic void paint(Graphics g) {// 画笔需要有颜色,可以画画g.setColor(Color.red);g.fillOval(100,100,100,100); // 实心的圆g.setColor(Color.green);g.fillRect(150,200,300,200);// 养成习惯,画笔用完,将他还原到最初的颜色}}
3.6 鼠标监听
目的:想要实现鼠标画画!
如何实现?

有了方法之后,我们开始构建
代码如下:
package top.woodwhale.study3;import java.awt.*;import java.awt.event.MouseAdapter;import java.awt.event.MouseEvent;import java.util.ArrayList;public class TestMouseListener {public static void main(String[] args) {new MyFrame("画画");}}class MyFrame extends Frame {// 画画需要画笔,需要监听鼠标当前的位置,需要集合来存储这个点ArrayList points;public MyFrame(String title) {super(title);setVisible(true);// 存储鼠标点击的坐标points = new ArrayList<>();setBounds(200,200,400,300);// 鼠标监听器,相对于这个窗口this.addMouseListener(new MyMouseListener());}@Overridepublic void paint(Graphics g) {// 画画,监听鼠标的事件for (Object o : points) {Point point = (Point) o;g.setColor(Color.blue);g.fillOval(point.x, point.y, 10, 10);}}// 参加一个点到界面上public void addPaint(Point point) {points.add(point);}// 适配器模式private static class MyMouseListener extends MouseAdapter {// 鼠标有,按下,弹起,按住不放// 添加@Overridepublic void mousePressed(MouseEvent e) {MyFrame myframe = (MyFrame) e.getSource();// 我们点击的时候,就会在界面上产生一个点(坐标形式)// 这个点就是鼠标点击的坐标myframe.addPaint(new Point(e.getX(),e.getY()));// 每次点击鼠标都需要重新画一遍myframe.repaint(); // 刷新}}}
效果如图:

3.7 窗口监听
窗口监听其实在之前点击关闭退出那里已经讲了很多了,这里再补充一点
- 尽量将内部类实现为匿名内部类,这样看起来更美观
- 常用的就是关闭和聚焦
package top.woodwhale.study3;import java.awt.*;import java.awt.event.WindowAdapter;import java.awt.event.WindowEvent;public class TestWindow {public static void main(String[] args) {new WindowFrame();}}class WindowFrame extends Frame {public WindowFrame() {setBackground(Color.blue);setBounds(100,100,200,200);setVisible(true);// 使用内部类// addWindowListener(new MyWindowListener());// 使用匿名内部类this.addWindowListener(new WindowAdapter() {// 关闭窗口@Overridepublic void windowClosing(WindowEvent e) {System.exit(0);}// 激活窗口@Overridepublic void windowActivated(WindowEvent e) {WindowFrame source = (WindowFrame) e.getSource();source.setTitle("被激活啦!");}});}// class MyWindowListener extends WindowAdapter{// @Override// public void windowClosing(WindowEvent e) {// System.exit(0); // 正常退出// }// }}
3.8 键盘监听
键盘监听,顾名思义,就是监听键盘的状态,用的多的就是判断键盘按下了什么键
- 思考:
- 如何判断按下了什么键?
- 如何对按下了键盘之后进行操作?
- 下面这段代码就是判断键盘是否按下了 up这个键,如果按下了就在控制台输出一个“upupup!~"
package top.woodwhale.study3;import java.awt.*;import java.awt.event.KeyAdapter;import java.awt.event.KeyEvent;import java.awt.event.WindowAdapter;import java.awt.event.WindowEvent;public class TestKeyListener {public static void main(String[] args) {new KeyFrame();}}class KeyFrame extends Frame {public KeyFrame() {setBounds(1,2,300,300);setVisible(true);// 匿名内部类实现监听器this.addKeyListener(new KeyAdapter() {// 键盘按下@Overridepublic void keyPressed(KeyEvent e) {// 获得键盘下的键是哪一个int keyCode = e.getKeyCode();// System.out.println(keyCode);// 不需要记录KeyCode的值,直接判断if (keyCode == KeyEvent.VK_UP) {System.out.println("upupup!~");}}});// 匿名内部类实现关闭this.addWindowListener(new WindowAdapter() {@Overridepublic void windowClosing(WindowEvent e) {System.out.println("See you next time!");System.exit(0);}});}}
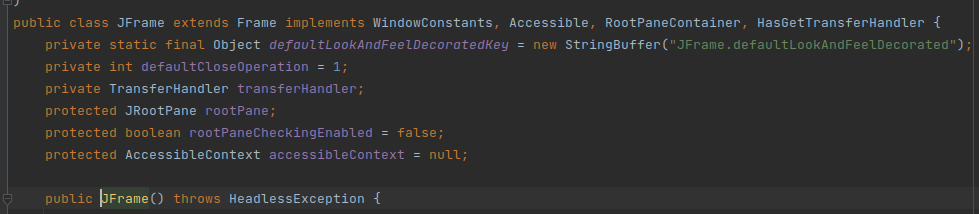
4、Swing
AWT是Swing的基础,Swing从AWT进化而来
随便调用个一个JFrame类,进入源码看一下,直接看到extends Frame
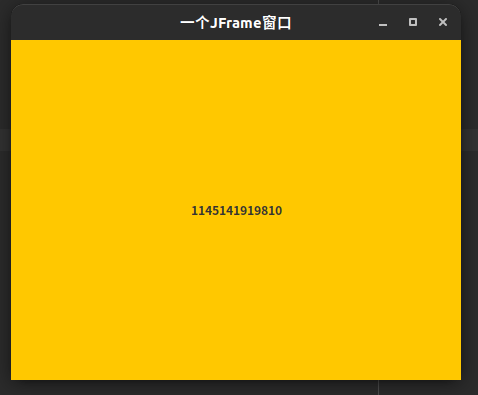
4.1 窗口与面板
JFrame其实和Frame类似,只不过涉及到了容器这个概念,每一个窗口都有容器,而容器需要实例化
举例代码:
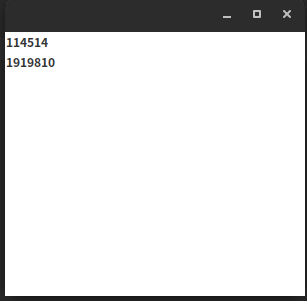
package top.woodwhale.study4;import javax.swing.*;import java.awt.*;public class JFrameDemo {// init() 初始化方法public void init() {// 顶级窗口JFrame jFrame = new JFrame("一个JFrame窗口");jFrame.setVisible(true);jFrame.setBounds(100,100,200,200);// 设置文字 JLabelJLabel jLabel = new JLabel("1145141919810");// 让文本居中jLabel.setHorizontalAlignment(SwingConstants.CENTER);jFrame.add(jLabel);// jf有容器,容器需要实例化Container container = jFrame.getContentPane();container.setBackground(Color.orange);// JFrame自带的设置关闭操作方法jFrame.setDefaultCloseOperation(WindowConstants.EXIT_ON_CLOSE);}public static void main(String[] args) {// 建立一个窗口new JFrameDemo().init();}}
效果如下:
4.2 弹窗
JDialog是一个弹窗的窗口类,我们用一个继承JDialog的类来写一个弹窗事件
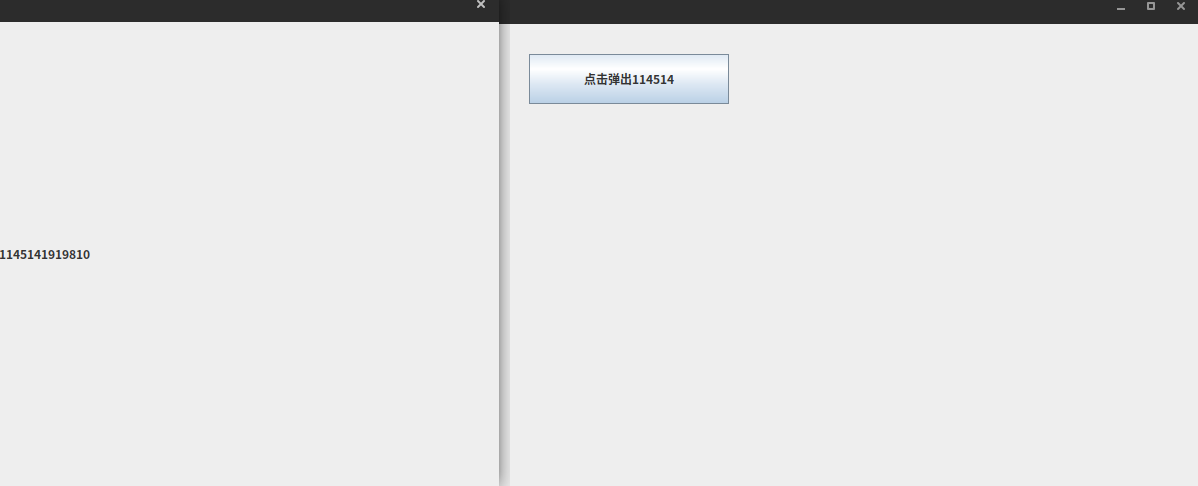
package top.woodwhale.study4;import javax.swing.*;import javax.swing.text.LabelView;import java.awt.*;import java.awt.event.ActionEvent;import java.awt.event.ActionListener;// 主窗口public class DialogDemo extends JFrame {public DialogDemo() {this.setVisible(true);this.setSize(700,500);this.setDefaultCloseOperation(WindowConstants.EXIT_ON_CLOSE);// JFrame 放东西,放入容器中Container container = this.getContentPane();// 绝对布局container.setLayout(null);// 按钮JButton jButton = new JButton("点击弹出114514"); // 创建jButton.setBounds(30,30,200,50);// 点击这个按钮,弹出一个弹窗,需要一个监听事件jButton.addActionListener(new ActionListener() { // 监听器@Overridepublic void actionPerformed(ActionEvent actionEvent) {// 弹窗new MyDialogDemo();}});container.add(jButton);}public static void main(String[] args) {new DialogDemo();}}// 弹窗的窗口,默认就有点击关闭事件class MyDialogDemo extends JDialog{public MyDialogDemo() {this.setVisible(true);this.setBounds(100,100,500,500);Container contentPane = this.getContentPane();// contentPane.setLayout(null);contentPane.add(new JLabel("1145141919810"));}}
来点效果图:
- 点击前:
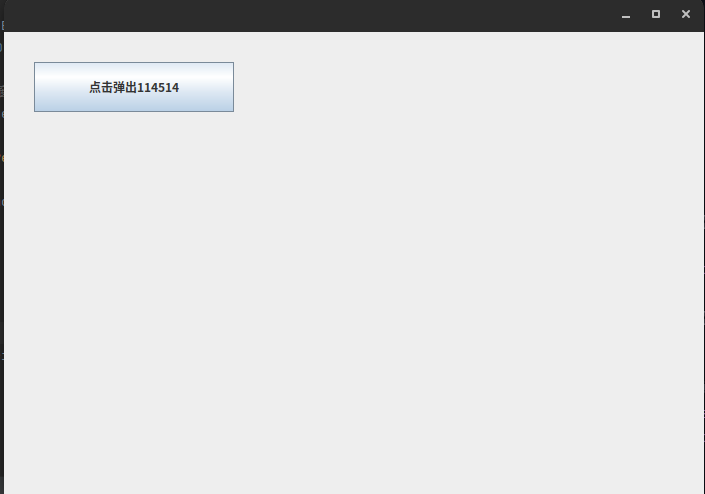
- 点击后:
4.3 标签
label就是标签
new JLabel("114514");
图标、图片是icon
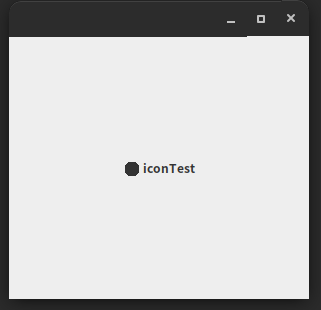
显示一个自己画的图标:
package top.woodwhale.study4;import javax.swing.*;import java.awt.*;// 图标是一个接口,需要实现类,JFrame继承public class IconDemo extends JFrame implements Icon {private int width;private int height;public IconDemo() throws HeadlessException {}public IconDemo(int width, int height) throws HeadlessException {this.width = width;this.height = height;}public static void main(String[] args) {new IconDemo().init();}public void init() {IconDemo iconDemo = new IconDemo(15,15);JLabel jLabel = new JLabel("iconTest", iconDemo, SwingConstants.CENTER);Container container = getContentPane();container.add(jLabel);this.setVisible(true);this.setSize(300,300);this.setDefaultCloseOperation(WindowConstants.EXIT_ON_CLOSE);}@Overridepublic void paintIcon(Component component, Graphics graphics, int i, int i1) {graphics.fillOval(i,i1,this.width,this.height);}@Overridepublic int getIconWidth() {return this.width;}@Overridepublic int getIconHeight() {return this.height;}}
效果如下:
那么如何来设置自定义图片icon呢?
效果如下的这种:
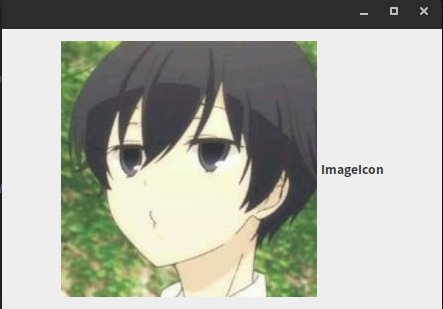
也很简单:
package top.woodwhale.study4;import javax.swing.*;import java.awt.*;import java.net.URL;public class ImageIconDemo extends JFrame {public static void main(String[] args) {new ImageIconDemo();}public ImageIconDemo() throws HeadlessException {// 获取图片的地质JLabel jLabel = new JLabel("ImageIcon");URL url = ImageIconDemo.class.getResource("woodwhale.jpg");assert url != null;ImageIcon imageIcon = new ImageIcon(url);jLabel.setIcon(imageIcon);jLabel.setHorizontalAlignment(SwingConstants.CENTER);Container container = getContentPane();container.add(jLabel);setVisible(true);setSize(300,300);setDefaultCloseOperation(WindowConstants.EXIT_ON_CLOSE);}}
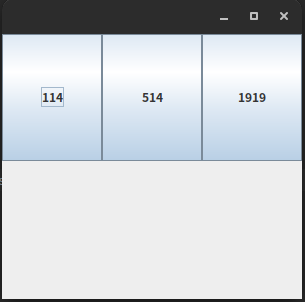
4.4 面板
JPanel
和之前学的Panel一样,就是多了容器操作
package top.woodwhale.study5;import javax.swing.*;import java.awt.*;public class JPanelDemo extends JFrame {public JPanelDemo() {Container container = this.getContentPane();container.setLayout(new GridLayout(2,1,10,10)); // 后面的参数表示间距JPanel jPanel = new JPanel(new GridLayout(1,3));jPanel.add(new JButton("114"));jPanel.add(new JButton("514"));jPanel.add(new JButton("1919"));container.add(jPanel);this.setVisible(true);this.setSize(300,300);this.setDefaultCloseOperation(WindowConstants.EXIT_ON_CLOSE);}public static void main(String[] args) {new JPanelDemo();}}
效果如下:
那么如何来点滚动条呢?
使用JScroll即可

代码:
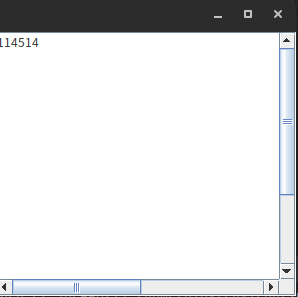
package top.woodwhale.study5;import javax.swing.*;import java.awt.*;public class JScrollDemo extends JFrame {public JScrollDemo() {// 容器Container container = this.getContentPane();// 文本JTextArea textArea = new JTextArea(20,50);textArea.setText("114514");// 滚动条JScrollPane scrollPane = new JScrollPane(textArea);container.add(scrollPane);this.setVisible(true);this.setBounds(300,300,300,300);this.setDefaultCloseOperation(WindowConstants.EXIT_ON_CLOSE);}public static void main(String[] args) {new JScrollDemo();}}
4.5 按钮
其实Swing中的按钮和html中的选择框很像,也是需要设置选择域进行分组,许多单选框如果在一个组就只能选一个,多选就没这么限制了
Swing中的按钮分为下面三类:
图片按钮 (JButton中的setIcon实现)
效果图:

代码:
package top.woodwhale.study5;import javax.swing.*;import java.awt.*;import java.net.URL;public class JButtonDemo1 extends JFrame {public JButtonDemo1 (){Container container = this.getContentPane();URL rs = JButtonDemo1.class.getResource("woodwhale.jpg");assert rs != null;Icon icon = new ImageIcon(rs);// 把这个图标放在按钮上JButton jButton = new JButton();jButton.setIcon(icon);jButton.setToolTipText("114514");container.add(jButton);this.setVisible(true);this.setSize(300,300);this.setDefaultCloseOperation(WindowConstants.EXIT_ON_CLOSE);}public static void main(String[] args) {new JButtonDemo1();}}
单选按钮 (JRadioButton和ButtonGroup)
效果如下:
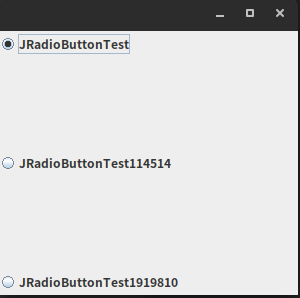
代码:
package top.woodwhale.study5;import javax.swing.*;import java.awt.*;public class JButtonDemo2 extends JFrame {public JButtonDemo2() {Container container = this.getContentPane();// 单选框JRadioButton radioButton = new JRadioButton("JRadioButtonTest");JRadioButton radioButton1 = new JRadioButton("JRadioButtonTest114514");JRadioButton radioButton2 = new JRadioButton("JRadioButtonTest1919810");// 由于单选框只能选择一个,所以需要分组ButtonGroup buttonGroup = new ButtonGroup();buttonGroup.add(radioButton);buttonGroup.add(radioButton1);buttonGroup.add(radioButton2);container.add(radioButton1,BorderLayout.CENTER);container.add(radioButton,BorderLayout.NORTH);container.add(radioButton2,BorderLayout.SOUTH);this.setVisible(true);this.setSize(300,300);this.setDefaultCloseOperation(WindowConstants.EXIT_ON_CLOSE);}public static void main(String[] args) {new JButtonDemo2();}}
复选按钮 ( JCheckBox)
效果图:
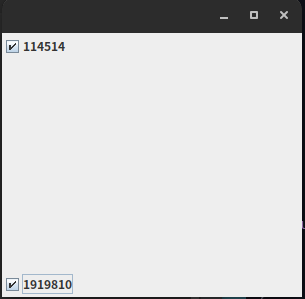
代码:
package top.woodwhale.study5;import javax.swing.*;import java.awt.*;public class JButtonDemo3 extends JFrame {public JButtonDemo3() {Container container = this.getContentPane();// 多选框JCheckBox ch1 = new JCheckBox("114514");JCheckBox ch2 = new JCheckBox("1919810");container.add(ch1,BorderLayout.NORTH);container.add(ch2,BorderLayout.SOUTH);this.setVisible(true);this.setSize(300,300);this.setDefaultCloseOperation(WindowConstants.EXIT_ON_CLOSE);}public static void main(String[] args) {new JButtonDemo3();}}
4.6 列表
下拉框
效果如下:
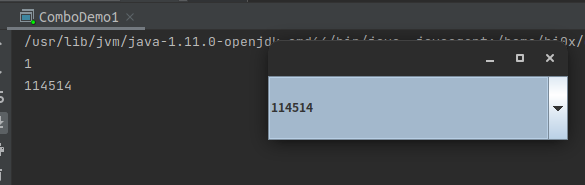
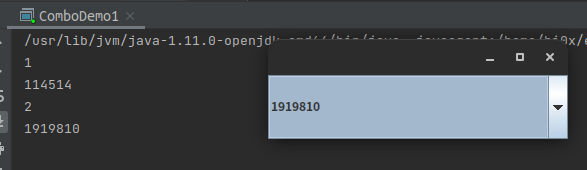
代码:
package top.woodwhale.study6;import javax.swing.*;import java.awt.*;import java.awt.event.ActionEvent;import java.awt.event.ActionListener;public class ComboDemo1 extends JFrame {public ComboDemo1() {Container contentPane = this.getContentPane();JComboBox comboBox = new JComboBox();comboBox.addItem(null);comboBox.addItem("114514");comboBox.addItem("1919810");// 监听选择comboBox.addActionListener(new ActionListener() {@Overridepublic void actionPerformed(ActionEvent actionEvent) {System.out.println(comboBox.getSelectedIndex());System.out.println(comboBox.getSelectedItem());}});contentPane.add(comboBox);this.setVisible(true);this.setSize(300,100);this.setDefaultCloseOperation(WindowConstants.EXIT_ON_CLOSE);}public static void main(String[] args) {new ComboDemo1();}}
列表框
效果如下:
代码:
package top.woodwhale.study6;import javax.swing.*;import java.awt.*;import java.util.LinkedList;import java.util.Vector;public class ComboDemo2 extends JFrame {public ComboDemo2() {Container container = this.getContentPane();// 生成Vector内容Vector contents = new Vector();JList jList = new JList(contents);// 动态添加contents.add("114514");contents.add("1919810");container.add(jList);this.setVisible(true);this.setSize(300,300);this.setDefaultCloseOperation(WindowConstants.EXIT_ON_CLOSE);}public static void main(String[] args) {new ComboDemo2();}}
应用场景:
- 选择地区、班级、学院之类的多选择器
- 展示一些列表信息,一般使用动态扩容
4.7 文本框
文本框
效果如下:

代码:
package top.woodwhale.study6;import javax.swing.*;import java.awt.*;public class TextDemo1 extends JFrame {public TextDemo1() {Container container = this.getContentPane();JTextField t1 = new JTextField("hello");JTextField t2 = new JTextField("word",20);container.add(t1,BorderLayout.NORTH);container.add(t2,BorderLayout.SOUTH);this.setVisible(true);this.setSize(300,300);this.setDefaultCloseOperation(WindowConstants.EXIT_ON_CLOSE);}public static void main(String[] args) {new TextDemo1();}}
密码框
默认效果图:
但是我们可以通过setEchoChar的方法来更改显示
代码:
package top.woodwhale.study6;import javax.swing.*;import java.awt.*;public class TestDemo2 extends JFrame {public TestDemo2() {Container container = this.getContentPane();JPasswordField passwordField = new JPasswordField();passwordField.setEchoChar('*');container.add(passwordField);this.setVisible(true);this.setBounds(300,300,300,300);this.setDefaultCloseOperation(WindowConstants.EXIT_ON_CLOSE);}public static void main(String[] args) {new TestDemo2();}}
文本域
JTextArea可以配合面板使用
效果图(上面在面板中使用的例子):
代码:
package top.woodwhale.study5;import javax.swing.*;import java.awt.*;public class JScrollDemo extends JFrame {public JScrollDemo() {// 容器Container container = this.getContentPane();// 文本(20行,50列)JTextArea textArea = new JTextArea(20,50);textArea.setText("114514");// 滚动条JScrollPane scrollPane = new JScrollPane(textArea);container.add(scrollPane);this.setVisible(true);this.setBounds(300,300,300,300);this.setDefaultCloseOperation(WindowConstants.EXIT_ON_CLOSE);}public static void main(String[] args) {new JScrollDemo();}}
【Java】GUI编程的更多相关文章
- JAVA GUI编程学习笔记目录
2014年暑假JAVA GUI编程学习笔记目录 1.JAVA之GUI编程概述 2.JAVA之GUI编程布局 3.JAVA之GUI编程Frame窗口 4.JAVA之GUI编程事件监听机制 5.JAVA之 ...
- Java GUI编程中AWT/swing/SWT的优缺点
http://www.cnblogs.com/dugang/archive/2010/10/22/1858478.html AWT AWT是Abstract Window Toolkit(抽象窗口工具 ...
- Java GUI编程4---标签组件JLabel
Java GUI编程4---标签组件JLabel 2018年06月11日 22:06:58 蓝蓝223 阅读数 12103更多 个人分类: Java书籍摘抄 所属专栏: Java Swing图形界面 ...
- java Gui编程 事件监听机制
1. GUI编程引言 以前的学习当中,我们都使用的是命令交互方式: 例如:在DOS命令行中通过javac java命令启动程序. 软件的交互的方式: 1. 命令交互方式 图书管理系统 ...
- java GUI编程二
java基础学习总结--GUI编程(二) 一.事件监听 测试代码一: 1 package cn.javastudy.summary; 2 3 import java.awt.*; 4 import j ...
- Java GUI编程
----基础 // 创建一个窗体对象 JFrame frame = new JFrame(); // 设置窗口大小 frame.setSize(300, 20 ...
- Java GUI编程-(项目代码_扫雷_弹钢琴)
--扫雷 package com;import java.awt.*;import java.awt.event.ActionEvent;import java.awt.event.ActionLis ...
- [Java] GUI编程基础 绘图
库 swing awt 过程 创建窗口JFrame JFrame-->MenuBar-->Container 屏幕坐标系:左上角为原点 Graphics2D Main.java 1 imp ...
- Java GUI编程SwingUtilities.invokeLater作用
1 http://blog.micxp.com/index.php/archives/109/ 2
- 实验十五 GUI编程练习与应用程序部署
实验十五 GUI编程练习与应用程序部署 实验时间 2018-12-6 一:理论部分 1.Java 程序的打包:编译完成后,程序员将.class 文件压缩打包为 .jar 文件后,GUI 界面序就可以 ...
随机推荐
- Windows服务(.net Core 3.1-Topshelf-log4net-quartz)
https://github.com/yezei/Topshelf-log4net-quartz.git
- 前端实现list排序
需求 针对list中某个字段,实现list的升序和降序 效果图 代码 我是用在angular1.X中项目的,根据list中的sort字段进行排序. # sort.html <style> ...
- 【LeetCode】339. Nested List Weight Sum 解题报告(C++)
作者: 负雪明烛 id: fuxuemingzhu 个人博客:http://fuxuemingzhu.cn/ 目录 题目描述 题目大意 解题方法 dfs 日期 题目地址:https://leetcod ...
- 【九度OJ】题目1441:人见人爱 A ^ B 解题报告
[九度OJ]题目1441:人见人爱 A ^ B 解题报告 标签(空格分隔): 九度OJ 原题地址:http://ac.jobdu.com/problem.php?pid=1441 题目描述: 求A^B ...
- 【LeetCode】210. Course Schedule II 解题报告(Python)
作者: 负雪明烛 id: fuxuemingzhu 个人博客: http://fuxuemingzhu.cn/ 目录 题目描述 题目大意 解题方法 拓扑排序,BFS 拓扑排序,DFS 参考资料 日期 ...
- 【LeetCode】771. Jewels and Stones 解题报告
作者: 负雪明烛 id: fuxuemingzhu 个人博客: http://fuxuemingzhu.cn/ 目录 题目描述: 题目大意 解题方法 数组count 字典Counter 日期 题目地址 ...
- Problem 2221 RunningMan(fuzoj)
Problem 2221 RunningMan Accept: 130 Submit: 404Time Limit: 1000 mSec Memory Limit : 32768 KB ...
- codeforc 603-A. Alternative Thinking(规律)
A. Alternative Thinking time limit per test 2 seconds memory limit per test 256 megabytes Kevin ha ...
- [opencv]计算多边形逼近曲线的长度
//利用曲线逼近,计算逼近曲线的长度 //首先创建一个逼近曲线 vector<Point2f> approx; approxPolyDP(contours[i], approx, 2, t ...
- <数据结构>XDOJ334.分组统计
问题与解答 问题描述 先输入一组数,然后输入其分组,按照分组统计出现次数并输出,参见样例. 输入格式 输入第一行表示样例数m,对于每个样例,第一行为数的个数n,接下来两行分别有n个数,第一行有n个数, ...