深入刨析tomcat 之---第14篇 对应19章,使用manager管理 web应用
writedby 张艳涛
第19章讲的是管理程序,当一个tomcat启动的时候,能通过远程浏览器能访问tomcat,启动web应用,关闭web应用,查看web应用
怎么实现的呢?
在webapp 文件夹下有一个manager.xml,这是一个web应用 对应的应用路径在 :: tomcat安装目录\server\webapps\manager
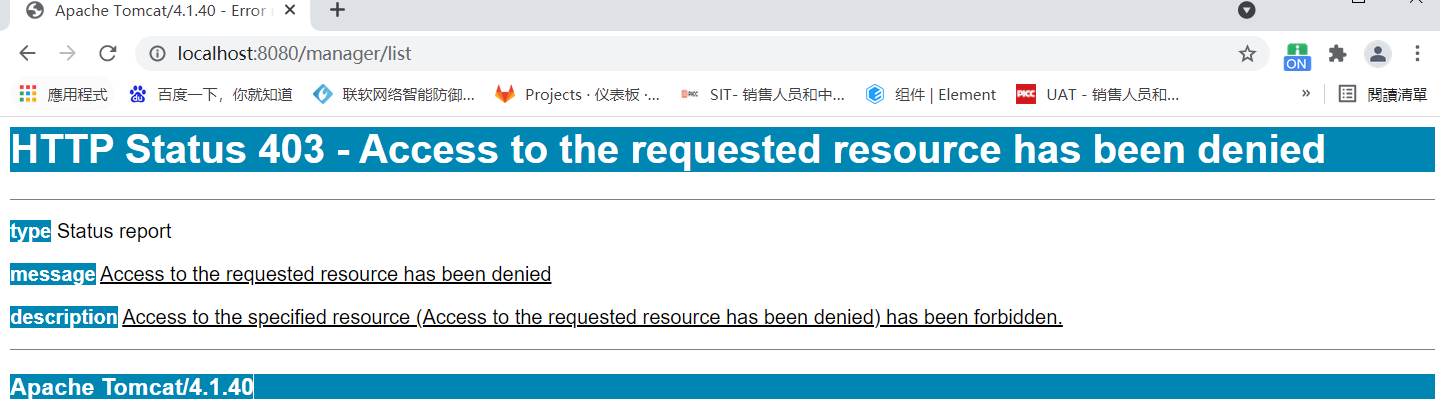
那么当启动tomcat 的时候,输入路径 http://localhost:8080/manager/list 会让你填写账号密码,这个值在../conf/comcat-user.xml文件下
<?xml version='1.0' encoding='utf-8'?>

<tomcat-users>

  <role rolename="tomcat"/>

  <role rolename="role1"/>

  <role rolename="manager"/>

  <role rolename="admin"/>

  <user username="tomcat" password="tomcat" roles="tomcat"/>

  <user username="role1" password="tomcat" roles="role1"/>

  <user username="both" password="tomcat" roles="tomcat,role1"/>

  <user username="admin" password="password" roles="admin,manager"/>

</tomcat-users>
上文是tomcat那本书上的,可以看到manger 有对应的密码账号,比如 填入最后一个就行
但是直接下载的tomcat就没有配置
<?xml version='1.0' encoding='utf-8'?>

<tomcat-users>

  <role rolename="role1"/>

  <role rolename="tomcat"/>

  <user username="role1" password="tomcat" roles="role1"/>

  <user username="tomcat" password="tomcat" roles="tomcat"/>

  <user username="both" password="tomcat" roles="tomcat,role1"/>

</tomcat-users>
会提示正
那么输入 http://localhost:8080/manager/list 会出现
OK - Listed applications for virtual host localhost

/:running:0:D:\wksp_study\designbook\webapps\ROOT

/tomcat-docs:running:0:D:\wksp_study\designbook\webapps\tomcat-docs

/webdav:running:0:D:\wksp_study\designbook\webapps\webdav

/admin:running:0:../server/webapps/admin

/app1:running:0:D:\wksp_study\designbook\webapps\app1

/manager:running:0:../server/webapps/manager
说明一个应用的状态,默认都启动了那么可以关闭一个应用
输入
http://localhost:8080/manager/stop?path=/admin
会有回复
OK - Stopped application at context path /admin
启动一个应用
http://localhost:8080/manager/start?path=/admin
回复
OK - Started application at context path /admin
顺便说下BASIC认证,我们
一. BASIC认证概述
在HTTP协议进行通信的过程中,HTTP协议定义了基本认证过程以允许HTTP服务器对WEB浏览器进行用户身份证的方法,当一个客户端向HTTP服务 器进行数据请求时,如果客户端未被认证,则HTTP服务器将通过基本认证过程对客户端的用户名及密码进行验证,以决定用户是否合法。客户端在接收到HTTP服务器的身份认证要求后,会提示用户输入用户名及密码,然后将用户名及密码以BASE64加密,加密后的密文将附加于请求信息中, 如当用户名为anjuta,密码为:123456时,客户端将用户名和密码用“:”合并,并将合并后的字符串用BASE64加密为密文,并于每次请求数据 时,将密文附加于请求头(Request Header)中。HTTP服务器在每次收到请求包后,根据协议取得客户端附加的用户信息(BASE64加密的用户名和密码),解开请求包,对用户名及密码进行验证,如果用 户名及密码正确,则根据客户端请求,返回客户端所需要的数据;否则,返回错误代码或重新要求客户端提供用户名及密码。
二. BASIC认证的过程
1. 客户端向服务器请求数据,请求的内容可能是一个网页或者是一个其它的MIME类型,此时,假设客户端尚未被验证,则客户端提供如下请求至服务器:
Get /index.html HTTP/1.0
Host:www.google.com
2. 服务器向客户端发送验证请求代码401,服务器返回的数据大抵如下:
HTTP/1.0 401 Unauthorised
Server: SokEvo/1.0
WWW-Authenticate: Basic realm=“google.com”
Content-Type: text/html
Content-Length: xxx
3. 当符合http1.0或1.1规范的客户端(如IE,FIREFOX)收到401返回值时,将自动弹出一个登录窗口,要求用户输入用户名和密码。
4. 用户输入用户名和密码后,将用户名及密码以BASE64加密方式加密,并将密文放入前一条请求信息中,则客户端发送的第一条请求信息则变成如下内容:
Get /index.html HTTP/1.0
Host:www.google.com
Authorization: Basic xxxxxxxxxxxxxxxxxxxxxxxxxxxx
注:xxxx…表示加密后的用户名及密码。
5. 服务器收到上述请求信息后,将Authorization字段后的用户信息取出、解密,将解密后的用户名及密码与用户数据库进行比较验证,如用户名及密码正确,服务器则根据请求,将所请求资源发送给客户端:
三. BASIC认证的缺点
HTTP基本认证的目标是提供简单的用户验证功能,其认证过程简单明了,适合于对安全性要求不高的系统或设备中,如大家所用路由器的配置页面的认证,几乎 都采取了这种方式。其缺点是没有灵活可靠的认证策略,如无法提供域(domain或realm)认证功能,另外,BASE64的加密强度非常低,
tomcat是怎么实现basic认证的呢?
  <!-- Define a Security Constraint on this Application -->

  <security-constraint>

    <web-resource-collection>

      <web-resource-name>HTMLManger and Manager command</web-resource-name>

      <url-pattern>/html/*</url-pattern>

      <url-pattern>/list</url-pattern>

      <url-pattern>/sessions</url-pattern>

      <url-pattern>/start</url-pattern>

      <url-pattern>/stop</url-pattern>

      <url-pattern>/install</url-pattern>

      <url-pattern>/remove</url-pattern>

      <url-pattern>/deploy</url-pattern>

      <url-pattern>/undeploy</url-pattern>

      <url-pattern>/reload</url-pattern>

      <url-pattern>/serverinfo</url-pattern>

      <url-pattern>/roles</url-pattern>

      <url-pattern>/resources</url-pattern>

    </web-resource-collection>

    <auth-constraint>

       <!-- NOTE:  This role is not present in the default users file -->

       <role-name>manager</role-name>

    </auth-constraint>

  </security-constraint>

  <!-- Define the Login Configuration for this Application -->

  <login-config>

    <auth-method>BASIC</auth-method>

    <realm-name>Tomcat Manager Application</realm-name>

  </login-config>

  <!-- Security roles referenced by this web application -->

  <security-role>

    <description>

      The role that is required to log in to the Manager Application

    </description>

    <role-name>manager</role-name>

  </security-role>
这个basic认证发类为AuthenticatorBase extends ValveBase
其中实现的invoke方法为
    public void invoke(Request request, Response response,

                       ValveContext context)

        throws IOException, ServletException {

        // If this is not an HTTP request, do nothing

        if (!(request instanceof HttpRequest) ||

            !(response instanceof HttpResponse)) {

            context.invokeNext(request, response);

            return;

        }

        if (!(request.getRequest() instanceof HttpServletRequest) ||

            !(response.getResponse() instanceof HttpServletResponse)) {

            context.invokeNext(request, response);

            return;

        }

        HttpRequest hrequest = (HttpRequest) request;

        HttpResponse hresponse = (HttpResponse) response;

        if (debug >= 1)

            log("Security checking request " +

                ((HttpServletRequest) request.getRequest()).getMethod() + " " +

                ((HttpServletRequest) request.getRequest()).getRequestURI());

        LoginConfig config = this.context.getLoginConfig();

        // Have we got a cached authenticated Principal to record?

        if (cache) {

            Principal principal =

                ((HttpServletRequest) request.getRequest()).getUserPrincipal();

            if (principal == null) {

                Session session = getSession(hrequest);

                if (session != null) {

                    principal = session.getPrincipal();

                    if (principal != null) {

                        if (debug >= 1)

                            log("We have cached auth type " +

                                session.getAuthType() +

                                " for principal " +

                                session.getPrincipal());

                        hrequest.setAuthType(session.getAuthType());

                        hrequest.setUserPrincipal(principal);

                    }

                }

            }

        }

        // Special handling for form-based logins to deal with the case

        // where the login form (and therefore the "j_security_check" URI

        // to which it submits) might be outside the secured area

        String contextPath = this.context.getPath();

        String requestURI = hrequest.getDecodedRequestURI();

        if (requestURI.startsWith(contextPath) &&

            requestURI.endsWith(Constants.FORM_ACTION)) {

            if (!authenticate(hrequest, hresponse, config)) {

                if (debug >= 1)

                    log(" Failed authenticate() test");

                return;

            }

        }

        // Is this request URI subject to a security constraint?

        SecurityConstraint constraint = findConstraint(hrequest);

        if ((constraint == null) /* &&

            (!Constants.FORM_METHOD.equals(config.getAuthMethod())) */ ) {

            if (debug >= 1)

                log(" Not subject to any constraint");

            context.invokeNext(request, response);

            return;

        }

        if ((debug >= 1) && (constraint != null))

            log(" Subject to constraint " + constraint);

        // Make sure that constrained resources are not cached by web proxies

        // or browsers as caching can provide a security hole

        if (!(((HttpServletRequest) hrequest.getRequest()).isSecure())) {

            HttpServletResponse sresponse =

                (HttpServletResponse) response.getResponse();

            sresponse.setHeader("Pragma", "No-cache");

            sresponse.setHeader("Cache-Control", "no-cache");

            sresponse.setDateHeader("Expires", 1);

        }

        // Enforce any user data constraint for this security constraint

        if (debug >= 1)

            log(" Calling checkUserData()");

        if (!checkUserData(hrequest, hresponse, constraint)) {

            if (debug >= 1)

                log(" Failed checkUserData() test");

            // ASSERT: Authenticator already set the appropriate

            // HTTP status code, so we do not have to do anything special

            return;

        }

        // Authenticate based upon the specified login configuration

        if (constraint.getAuthConstraint()) {

            if (debug >= 1)

                log(" Calling authenticate()");

            if (!authenticate(hrequest, hresponse, config)) {

                if (debug >= 1)

                    log(" Failed authenticate() test");

                // ASSERT: Authenticator already set the appropriate

                // HTTP status code, so we do not have to do anything special

                return;

            }

        }

        // Perform access control based on the specified role(s)

        if (constraint.getAuthConstraint()) {

            if (debug >= 1)

                log(" Calling accessControl()");

            if (!accessControl(hrequest, hresponse, constraint)) {

                if (debug >= 1)

                    log(" Failed accessControl() test");

                // ASSERT: AccessControl method has already set the appropriate

                // HTTP status code, so we do not have to do anything special

                return;

            }

        }

        // Any and all specified constraints have been satisfied

        if (debug >= 1)

            log(" Successfully passed all security constraints");

        context.invokeNext(request, response);

    }
注意这个阀门的特殊性,别的阀门都是在调用basic 阀门之后才调用 附加阀门,而认证阀门如果不满足条件,直接返回不会调用后续的阀门,也不会调用的基本阀门来调用servlet方法
深入刨析tomcat 之---第14篇 对应19章,使用manager管理 web应用的更多相关文章
- 深入刨析tomcat 之---第15篇 对应20章, myAdmin案例代码
writedby 张艳涛 有没有和我一样做到第20章的?今天基本结束了本书的阅读.最后一个案例没有demo,那我写了一回,如果有需要的可以在本地试试 路径 D:\wksp_study\designbo ...
- 深入刨析tomcat 之---第8篇 how tomcat works 第11章 11.9应用程序,自定义Filter,及注册
writed by 张艳涛, 标签:全网独一份, 自定义一个Filter 起因:在学习深入刨析tomcat的学习中,第11章,说了调用过滤链的原理,但没有给出实例来,自己经过分析,给出来了一个Filt ...
- 深入刨析tomcat 之---第2篇,解决第3章bug 页面不显示内容http://localhost:8080/servlet/ModernServlet?userName=zhangyantao&password=1234
writedby 张艳涛7月2日, 在学习第4张的过程中,发现了前一篇文章写的是关于1,2张的bug不用设置response响应头,需要在servlet的service()方法里面写是错误想 serv ...
- 深入刨析tomcat 之---第11篇 how tomcat works( 第15章 ) 如何解析web.xml 文件
writedby 张艳涛 记得当年是学习jsp的时候,写过web.xml中的标签.在之后的springmvc中也是有关于配置mvc 过滤器 和dispatchServlet的标签,之前是看不懂呢!看到 ...
- 深入刨析tomcat 之---第12篇 how tomcat works( 第17章 ) 解析catalina.bat 梳理启动流程
我们如何启动tomcat呢? 答案是双击startup.bat文件,这个文件在bin目录下 @echo off 不显示批处理命令 rem Licensed to the Apache Softw ...
- 深入刨析tomcat 之---第23篇 聊一下web容器的filter配置和defaultservet
writedby 张艳涛,在一个webapp应用程序内如何配置filter? <?xml version="1.0" encoding="ISO-8859-1&qu ...
- 深入刨析tomcat 之---第21篇 tomcat 对jsp页面支持的实现原理
writedby 张艳涛 web技术,以前的动态网页技术多是jsp页面,比如点击一个菜单目录,直接访问了一个LRJSDetailInput.jsp页面,这个页面 有<html><bo ...
- 深入刨析tomcat 之---第13篇 tomcat的三种部署方法
writedby 张艳涛 一般我们都知道将web 应用打成war包,放到tomcat的webapp目录下,就是部署了,这是部署方法1 第2种部署方法我们也知道,就是讲web应用的文件夹拷贝到webap ...
- 深入刨析tomcat 之---第10篇 how tomcat works 第13章,Response 发送错误信息 sendError
writedby 张艳涛 在浏览器中发送一个错误应用url 那么tomcat是如何发送错误的呢? 基本上是发送http 的response协议,分为两部分一部分是response设置头信息, 那么先分 ...
随机推荐
- 【VBA】列号与字母(列名)的相互转换 (自定义函数)
1. '列号转字母(列名) Function Num2Name(ByVal ColumnNum As Long) As String On Error Resume Next Num2Name = & ...
- 13:Linux虚拟机网络连接异常
这两个服务需要启动
- Eclipse安装PyDev失败的解决办法
在Eclipse上安装Pydev,首先尝试了三种方法,均失败. Eclipse版本号如下: 尝试的方法 第一种: 菜单栏Help>Install New Software,输入网址, http: ...
- C# 设置Word文本框中的文字旋转方向
在Word中可插入文本框,默认情况下插入的文本框中的文字方向为横向排列,对于一些特殊文档的设计要求,需要改变文字方向,如本次测试中的文档排版为考生试卷类型,考生信息栏的内容为下图中的这种, 本文将以C ...
- IDEA拷贝类路径
1.方法一 1.1.鼠标右击需要复制的类 1.2.点击 Copy Reference 2.方法二 快捷键:Ctrl + Alt + Shift + C
- 重新整理 .net core 实践篇————polly失败重试[三十四]
前言 简单整理一下polly 重试. 正文 在开发程序中一般都有一个重试帮助类,那么polly同样有这个功能. polly 组件包: polly 功能包 polly.Extensions.Http 专 ...
- 全新安装Windows版 Atlassian Confluence 7.3.1 + MySQL 8.0,迁移数据,并设置服务自启
Confluence是一个专业的企业知识管理与协同软件,也可以用于构建企业wiki.使用简单,但它强大的编辑和站点管理特征能够帮助团队成员之间共享信息.文档协作.集体讨论,信息推送. 安装Conflu ...
- React中使用react-file-viewer,实现预览office文件(pdf,word,xlsx等文件)前端实现
最近做一个项目要求在前端浏览器可以直接打开office文件(pdf,doc,xlsx等文件).pdf浏览器可以直接打开(可以直接用a标签href="文件地址"或者iframe标签s ...
- python之tuple元组,基础篇
元组:它是一个序列,跟列表一样,里面存放多个元素 特点:1.有序的2.每个元素不可以被更改,不可以增加,不可以删除3.元组每个元素可以是任何数据类型1,定义一个非空元组 name_tuple = (& ...
- SQL Server数据库阻塞,死锁查询
sql 查询卡顿数据库 SELECT SPID=p.spid, DBName = convert(CHAR(20),d.name), ProgramName = program_name, Login ...