centos 6.5安装zabbix 4.4
一、安装环境
本环境,使用单机部署。
操作系统:centos 7.5 x64
zabbix-server,Mysql,php,nginx都在同一台服务器。都是使用Yum安装的!
官方安装文档:
https://www.zabbix.com/download?zabbix=4.4&os_distribution=centos&os_version=7&db=mysql
这里,主要使用Nginx来发布前端页面
二、安装Mysql
安装并且启动mysql5.6及初始化数据库信息
# rpm -ivh http://repo.mysql.com/yum/mysql-5.6-community/el/6/x86_64/mysql-community-release-el6-5.noarch.rpm

# yum install -y mysql-community-server

# systemctl start mysqld

# /sbin/chkconfig mysqld on #开机启动

# service mysqld start  # 启动数据库
初始化数据库信息
# mysql_secure_installation #初始化数据库信息
输出:
NOTE: RUNNING ALL PARTS OF THIS SCRIPT IS RECOMMENDED FOR ALL MySQL

      SERVERS IN PRODUCTION USE!  PLEASE READ EACH STEP CAREFULLY!

In order to log into MySQL to secure it, we'll need the current

password for the root user.  If you've just installed MySQL, and

you haven't set the root password yet, the password will be blank,

so you should just press enter here.

Enter current password for root (enter for none): #初次运行直接回车

OK, successfully used password, moving on...

Setting the root password ensures that nobody can log into the MySQL

root user without the proper authorisation.

Set root password? [Y/n] #是否设置root用户密码,输入y并回车或直接回车

New password: #设置root用户的密码

Re-enter new password: #再输入一次你设置的密码

Password updated successfully!

Reloading privilege tables..

 ... Success!

By default, a MySQL installation has an anonymous user, allowing anyone

to log into MySQL without having to have a user account created for

them.  This is intended only for testing, and to make the installation

go a bit smoother.  You should remove them before moving into a

production environment.

Remove anonymous users? [Y/n] #是否删除匿名用户,生产环境建议删除,所以直接回车

 ... Success!

Normally, root should only be allowed to connect from 'localhost'.  This

ensures that someone cannot guess at the root password from the network.

Disallow root login remotely? [Y/n] #是否禁止root远程登录,根据自己的需求选择Y/n并回车,建议禁止

 ... Success!

By default, MySQL comes with a database named 'test' that anyone can

access.  This is also intended only for testing, and should be removed

before moving into a production environment.

Remove test database and access to it? [Y/n] #是否删除test数据库,直接回车

 - Dropping test database...

ERROR  (HY000) at line : Can't drop database 'test'; database doesn't exist

 ... Failed!  Not critical, keep moving...

 - Removing privileges on test database...

 ... Success!

Reloading the privilege tables will ensure that all changes made so far

will take effect immediately.

Reload privilege tables now? [Y/n] #是否重新加载权限表,直接回车

 ... Success!

All done!  If you've completed all of the above steps, your MySQL

installation should now be secure.

Thanks for using MySQL!
三、安装和配置zabbix服务器
安装Zabbix存储库
# rpm -Uvh https://repo.zabbix.com/zabbix/4.4/rhel/7/x86_64/zabbix-release-4.4-1.el7.noarch.rpm

# yum clean all
安装Zabbix服务器,前端,代理
# yum -y install epel-release

# yum -y install zabbix-server-mysql zabbix-web-mysql zabbix-agent zabbix-nginx-conf

# yum clean all
创建初始数据库
# mysql -uroot -p

password

mysql> create database zabbix character set utf8 collate utf8_bin;

mysql> grant all privileges on zabbix.* to zabbix@localhost identified by 'password';

mysql> quit;
注意:这里指定的zabbix用户密码为password,请根据实际情况修改。
导入初始架构和数据。系统将提示您输入新创建的密码。
# zcat /usr/share/doc/zabbix-server-mysql*/create.sql.gz | mysql -uzabbix -p zabbix
配置数据库
编辑文件 /etc/zabbix/zabbix_server.conf
DBPassword=password
配置php
编辑文件/etc/php.ini
date.timezone = Asia/Shanghai
配置nginx
编辑配置文件 /etc/nginx/nginx.conf
注释掉默认的配置
    #server {

    #    listen        default_server;

    #    listen       [::]: default_server;

    #    server_name  _;

    #    root         /usr/share/nginx/html;

    #    # Load configuration files for the default server block.

    #    include /etc/nginx/default.d/*.conf;

    #    location / {

    #    }

    #    error_page 404 /404.html;

    #        location = /40x.html {

    #    }

    #    error_page 500 502 503 504 /50x.html;

    #        location = /50x.html {

    #    }

    #}
启动zabbix服务器和代理进程
启动zabbix服务器和代理进程,并使其在系统启动时启动:
# systemctl restart zabbix-server zabbix-agent nginx php-fpm

# systemctl enable zabbix-server zabbix-agent nginx php-fpm
现在您的zabbix服务器已经启动并运行了!
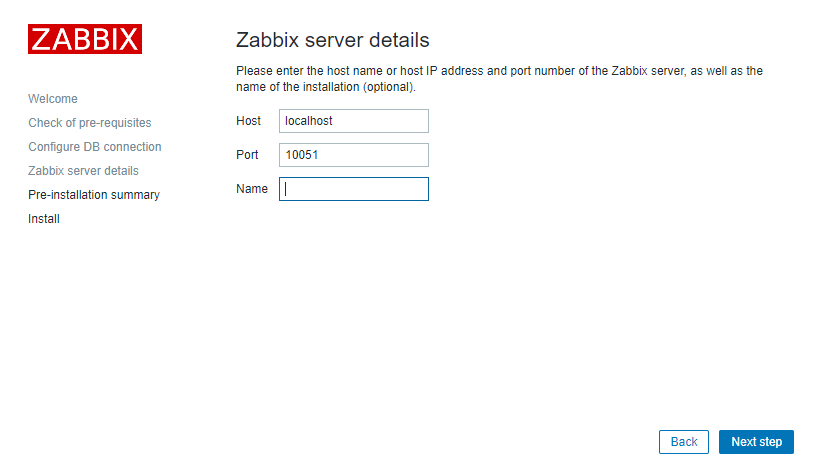
四、配置Zabbix前端
连接到新安装的zabbix前端:http://server ip
遵循zabbix文档中描述的步骤:安装前端

确保配置都通过了

输入zabbix用户的数据库密码

保持默认
五、开始使用zabbix
默认的用户名:Admin,密码:zabbix
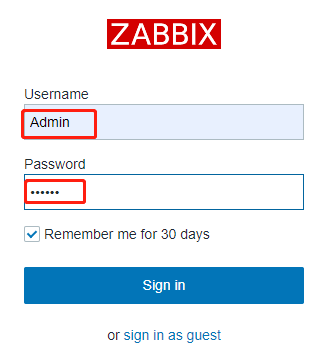
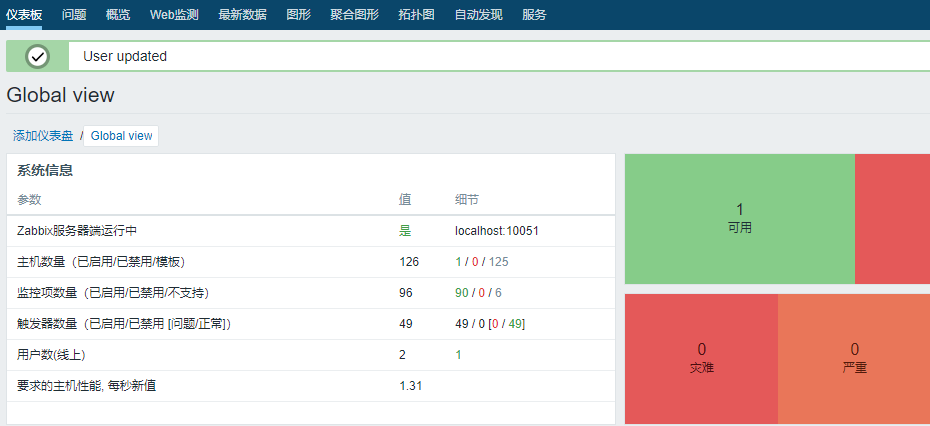
登录之后,效果如下:
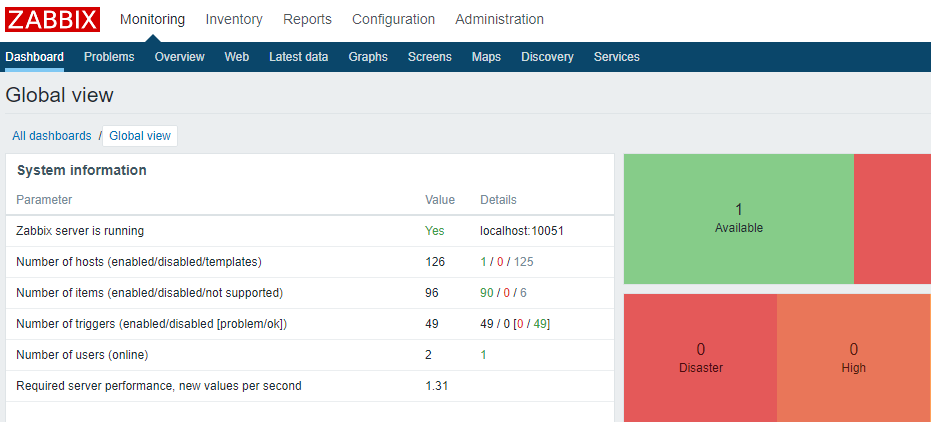
点击右侧的小人图标,设置语言为中文
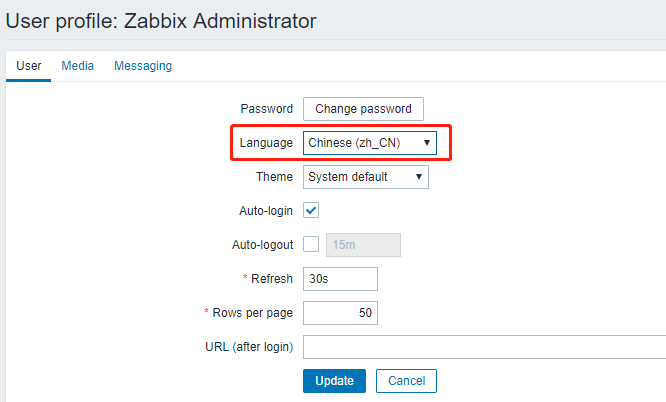
效果如下:
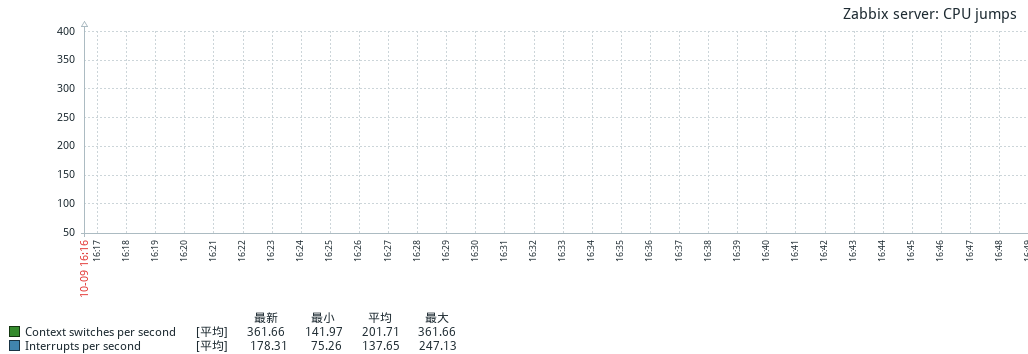
六、监控图表中文乱码的解决办法
# yum -y install wqy-microhei-fonts

# \cp /usr/share/fonts/wqy-microhei/wqy-microhei.ttc /usr/share/fonts/dejavu/DejaVuSans.ttf
重启zabbix-server和nginx
# systemctl restart zabbix-server

# systemctl restart nginx
查看图表,中文是否正常
本文参考链接:
https://www.zabbix.com/download?zabbix=4.4&os_distribution=centos&os_version=7&db=mysql
https://blog.csdn.net/qq_32786873/article/details/78846008
https://blog.csdn.net/solaraceboy/article/details/84974363
centos 6.5安装zabbix 4.4的更多相关文章
- CentOS 7.2安装Zabbix 3.2全攻略
放在最前面:鉴于网上爬虫猖獗,博客被盗时有发生,这里需要来个链接,大家请认准来自博客园的Scoter:http://www.cnblogs.com/scoter2008 1.安装环境:VMware虚拟 ...
- CentOS 7 yum安装Zabbix
一.Zabbix简介 zabbix是一个基于WEB界面的提供分布式系统监视以及网络监视功能的企业级的开源解决方案.zabbix能监视各种网络参数,保证服务器系统的安全运营:并提供灵活的通知机制以让系统 ...
- CentOS 7.2安装zabbix 3.0 LTS
1.zabbix简介 zabbix(音同 zæbix)是一个基于WEB界面的提供分布式系统监视以及网络监视功能的企业级的开源解决方案. zabbix能监视各种网络参数,保证服务器系统的安全运营:并提供 ...
- Centos 源码安装zabbix 2.4.5
Zabbix简介 Zabbix是一个基于WEB界面的提供分布式系统监视以及网络监视功能的企业级的开源解决方案.zabbix能监视各种网络参数,保证服务器系统 的安全运营:并提供柔软的通知机制以让系统管 ...
- centos 6.9安装zabbix 3.0
Linux下常用的系统监控软件有Nagios.Cacti.Zabbix.Monit等,这些开源的软件,可以帮助我们更好的管理机器,在第一时间内发现,并警告系统维护人员. 今天开始研究下Zabbix,使 ...
- centos 7.4安装zabbix 3
1.安装前准备 1)关闭防火墙 systemctl status firewalld #查看防火墙状态 systemctl stop firewalld.service #停止firewall sys ...
- CentOS 7 yum安装zabbix 设置中文界面
1. 配置安装前环境 2. 安装zabbix 3. 设置中文环境 准备搭建环境 : 系统:CentOS7.5 首先关闭SElinux 和防火墙 安装MariaDB数据库 [root@DaMoWa ...
- CentOS 7上安装Zabbix(高速安装监控工具Zabbix)
前提要求(optional) 安装Zabbix监控工具前,先安装必要的执行工具包 yum install gcc gcc-c++ make openssl-devel curl wget net-sn ...
- CentOS 7.2 安装zabbix 3.4
一.zabbix版本选择及部署环境说明 1.zabbix版本选择 zabbix官网地址:www.zabbix.com zabbix每半年发布一个长期支持版,目前长期支持版有2.0.3.0等,所以选择z ...
随机推荐
- 【CSP-S膜你考】最近公共祖先 (数学)
Problem A. 最近公共祖先 (commonants.c/cpp/pas) 注意 Input file: commonants.in Output file: commonants.out Ti ...
- STL中find和sort的用法总结
STL算法 STL 提供能在各种容器中通用的算法(大约有70种),如插入.删除.查找.排序等. 许多算法操作的是容器上的一个区间(也可以是整个容器),因此需要两个参数,一个是区间起点元素的迭代器,另一 ...
- nginx之rewrite及防盗链
rewrite示例-自动跳转https 示例1:自动把首页的http转化成https location / { root /data/nginx/pc/html; index index.html; ...
- 05-树8 File Transfer (25 分)
We have a network of computers and a list of bi-directional connections. Each of these connections a ...
- rtsp 客户端请求视频的时候支持输入用户名和密码的格式
rtsp://[<username>[:<password>]@]<server-address-or-name>[:<port>][/<path ...
- linux 下nc 命令的使用
linux 下nc 命令的使用 https://blog.51cto.com/samyubw/555247
- ([Ljava/lang/String;)V的含义
https://blog.csdn.net/longaiyunlay/article/details/80049440 “([Ljava/lang/String;)V” 它是一种对函数返回值和参数的编 ...
- vue-devtools 获取到 vuex store 和 Vue 实例的?
vue-devtools 获取到 vuex store 和 Vue 实例的? https://github.com/vuejs/vue-devtools 安装了 vue-devTools ...
- regexp_replace
pandas和SQL数据分析实战 https://study.163.com/course/courseMain.htm?courseId=1006383008&share=2&sha ...
- linux查看占用内存前10的命令