Nginx - 安装并启动Nginx
1 - 安装Nginx
官网步骤:http://nginx.org/en/linux_packages.html#RHEL-CentOS
[Anliven@h202 ~]$ sudo vim /etc/yum.repos.d/nginx.repo

[Anliven@h202 ~]$

[Anliven@h202 ~]$ cat /etc/yum.repos.d/nginx.repo

[nginx-stable]

name=nginx stable repo

baseurl=http://nginx.org/packages/centos/$releasever/$basearch/

gpgcheck=1

enabled=1

gpgkey=https://nginx.org/keys/nginx_signing.key

module_hotfixes=true

[nginx-mainline]

name=nginx mainline repo

baseurl=http://nginx.org/packages/mainline/centos/$releasever/$basearch/

gpgcheck=1

enabled=0

gpgkey=https://nginx.org/keys/nginx_signing.key

module_hotfixes=true

[Anliven@h202 ~]$

[Anliven@h202 ~]$ sudo yum -y install nginx

Loaded plugins: fastestmirror, langpacks

Determining fastest mirrors

 * base: mirrors.aliyun.com

 * extras: mirrors.163.com

 * updates: mirror.bit.edu.cn

......

......

......

  Verifying  : 1:nginx-1.16.1-1.el7.ngx.x86_64                                           1/1

Installed:

  nginx.x86_64 1:1.16.1-1.el7.ngx

Complete!

[Anliven@h202 ~]$
2 - 配置Nginx
2.1 修改默认配置
配置文件: /etc/nginx/conf.d/default.conf
[Anliven@h202 ~]$ cd /etc/nginx/conf.d/

[Anliven@h202 conf.d]$ pwd

/etc/nginx/conf.d

[Anliven@h202 conf.d]$ ll

total 4

-rw-r--r-- 1 root root 1093 Aug 13 23:02 default.conf

[Anliven@h202 conf.d]$

[Anliven@h202 conf.d]$ sudo vim default.conf

[Anliven@h202 conf.d]$ cat default.conf |grep -v "#" |grep -Ev "^$"

server {

    listen       80;

    server_name  192.168.16.202;

    location / {

        root   /usr/share/nginx/html;

        index  index.html index.htm;

    }

    location = /favicon.ico {

        log_not_found off;

        access_log off;

    }

    error_page   500 502 503 504  /50x.html;

    location = /50x.html {

        root   /usr/share/nginx/html;

    }

}

[Anliven@h202 conf.d]$
2.2 修改Nginx配置文件
/etc/nginx/nginx.conf中user参数,修改为root
[Anliven@h202 ~]$ sudo vim /etc/nginx/nginx.conf

[Anliven@h202 ~]$

[Anliven@h202 ~]$ cat /etc/nginx/nginx.conf  |grep -v "#" |grep -Ev "^$"

user  root;

worker_processes  1;

error_log  /var/log/nginx/error.log warn;

pid        /var/run/nginx.pid;

events {

    worker_connections  1024;

}

http {

    include       /etc/nginx/mime.types;

    default_type  application/octet-stream;

    log_format  main  '$remote_addr - $remote_user [$time_local] "$request" '

                      '$status $body_bytes_sent "$http_referer" '

                      '"$http_user_agent" "$http_x_forwarded_for"';

    access_log  /var/log/nginx/access.log  main;

    sendfile        on;

    keepalive_timeout  65;

    include /etc/nginx/conf.d/*.conf;

}

[Anliven@h202 ~]$
2.3 确认防火墙状态并重启服务
[Anliven@h202 ~]$ sudo firewall-cmd --zone=public --permanent --add-port=80/tcp

success

[Anliven@h202 ~]$ sudo firewall-cmd --reload

success

[Anliven@h202 ~]$ sudo firewall-cmd --list-all

public (active)

  target: default

  icmp-block-inversion: no

  interfaces: enp0s3 enp0s8

  sources:

  services: ssh dhcpv6-client

  ports: 80/tcp

  protocols:

  masquerade: no

  forward-ports:

  source-ports:

  icmp-blocks:

  rich rules:

[Anliven@h202 ~]$

[Anliven@h202 ~]$ cat /etc/selinux/config |grep "SELINUX=" |grep -v "#"

SELINUX=disabled

[Anliven@h202 ~]$

[Anliven@h202 ~]$ sudo service nginx restart

Redirecting to /bin/systemctl restart nginx.service

[Anliven@h202 ~]$
3 - 访问页面
在/usr/share/nginx/目录下的index.html文件,就是关于nginx介绍的页面
3.1 访问Nginx介绍页面

3.2 修改Nginx介绍页面
[Anliven@h202 html]$ pwd

/usr/share/nginx/html

[Anliven@h202 html]$

[Anliven@h202 html]$ sudo vim index.html

[Anliven@h202 html]$ cat index.html

<!DOCTYPE html>

<html>

<head>

<title>This is a test!</title>

<style>

    body {

        width: 35em;

        margin: 0 auto;

        font-family: Tahoma, Verdana, Arial, sans-serif;

    }

</style>

</head>

<body>

<h1>Welcome to MyNginx!</h1>

<p>Action is the antidote to despair!</p>

<p>For online documentation and support please refer to

<a href="http://nginx.org/">nginx.org</a>.<br/>

Commercial support is available at

<a href="http://nginx.com/">nginx.com</a>.</p>

<p><em>Thank you for using nginx.</em></p>

</body>

</html>

[Anliven@h202 html]$
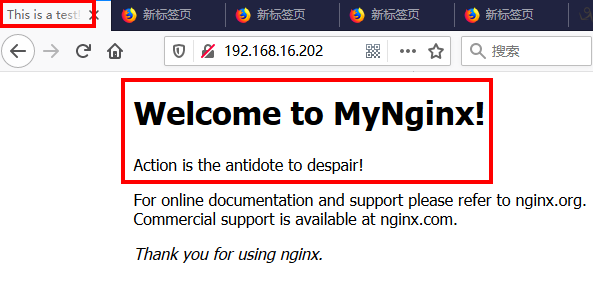
刷新浏览器页面
Nginx - 安装并启动Nginx的更多相关文章
- linux系统下nginx安装目录和nginx.conf配置文件目录
linux系统下nginx安装目录和nginx.conf配置文件目录 1.查看nginx安装目录 输入命令 # ps -ef | grep nginx 返回结果包含安装目录 root 26 ...
- linux 安装与启动nginx
linux系统为Centos 64位 一.去http://nginx.org/download/上下载相应的版本下载nginx-1.8.0.tar.gz(注:还有更高版本的). 二.解压 tar -z ...
- linux centos-7.2-64bit 安装配置启动nginx
1.安装依赖包yum -y install openssl openssl-develyum install pcre*yum install openssl*yum install zlib yum ...
- nginx 安装、启动、重启、关闭 (linux系统命令行)
前言: 最近在部署我的hexo静态博客到腾讯云服务器上,用到了很多nginx的知识,在此做下总结: 刚接触的linux服务器上,nginx配置乱的有点令人发指,就把老的卸载了重新装一下. 1.卸载 y ...
- Nginx 安装与启动
安装 第一种安装方式:CentOS 7下配置 yum 安装 Nginx. 按照官方的安装实例:https://www.nginx.com/resources/admin-guide/ 第一步,在/et ...
- mac系统下安装和启动nginx
1.在线安装 localhost:nginx-1.17.1 mhx$ sudo brew install nginx 2.查看是否安装成功 localhost:nginx-1.17.1 mhx$ ng ...
- 002.Nginx安装及启动
一 Nginx yum安装 1.1 前置准备 1 [root@nginx01 ~]# systemctl status firewalld.service #检查防火墙 2 [root@nginx01 ...
- Nginx安装及配置文件nginx.conf详解
1.安装Nginx 在安装Nginx之前,需确保系统已经安装了gcc. openssl-devel. pcre-devel和zlib-devel软件库. 下面是Nginx安装过程: wget http ...
- Nginx安装与配置文件nginx.conf详解
引用“http://ixdba.blog.51cto.com/2895551/790611” 1.安装Nginx在安装Nginx之前,需确保系统已经安装了gcc. openssl-devel. pcr ...
随机推荐
- 关于background-image设置背景图片
每天进步一小步,一年进步一大步. 本篇主要介绍背景图片设置,平铺,x y方向上的平铺,是否重复显示no repeat 显示的初始位置 background-image:url(images/inde ...
- 【Java】SpringBoot-Ajax-Json:Content type 'application/x-www-form-urlencoded;charset=UTF-8' not supported for @RequestBody XXX
1.重新组装数据 var params=JSON.stringify({"userword":XXXXX,"password":"XXXXX" ...
- wordpress不同分类调用不同的模板
今天网友问ytkah:wordpress不同分类如何调用不同的模板.我们知道in_category() 函数可以通过分类别名或ID判断当前文章所属的分类,而且可以直接在循环(Loop)内部和外部使用. ...
- URI和URL的区别(转)
1说明: 这段时间写android的时候用到了URL和URI,有点分不清楚,于是做了一个系统性的学习.在这里将自己的学习笔记粘贴出来,希望对大家有帮助. 1)Java类库里有两个对应的类java.ne ...
- 实时查看mysql当前连接数
如何实时查看mysql当前连接数? 1.查看当前所有连接的详细资料:./mysqladmin -uadmin -p -h10.140.1.1 processlist 2.只查看当前连接数(Thread ...
- iOS 应用逆向工程分析流程图
http://bbs.iosre.com/t/ios/12432
- 几种开放源码的TCP/IP协议栈比较
http://blog.chinaunix.net/uid-28785506-id-3828286.html 原文地址:几种开放源码的TCP/IP协议栈比较 作者:三点水兽 1.BSD TCP/IP协 ...
- 51 Nod 1135 原根
基准时间限制:1 秒 空间限制:131072 KB 分值: 0 难度:基础题 设m是正整数,a是整数,若a模m的阶等于φ(m),则称a为模m的一个原根.(其中φ(m)表示m的欧拉函数) 给出1个质数P ...
- HDU图论题单
=============================以下是最小生成树+并查集====================================== [HDU] 1213 How Many ...
- FCN内容通读
本文完全为个人心得体会,只做记录用,欢迎交流 替换全连接层为卷积层 以alexnet为例,替换了最后三层fc为卷积层,得到的是通道数很大(4096)而长宽很小的输出,其实我不太能理解这里的创新点,或许 ...