Nginx+Tomcat在Windows下做负载均衡
一、 为什么需要对Tomcat服务器做负载均衡
Tomcat服务器作为一个Web服务器,其并发数在300-500之间,如果有超过500的并发数便会出现Tomcat不能响应新的请求的情况,严重影响网站的运行。另外,在访问量大的情况下,Tomcat的线程数会不断增加。由于Tomcat自身对内存的占用有控制,当对内存的占用达到最大值时便会出现内存溢出,对网站的访问严重超时等现象,这时便需要重新启动Tomcat以释放占用的内存,这样做便会阻断网站运行。
所以对Tomcat做负载均衡便很有必要。目前可以和Tomcat做负载均衡的主流服务器是Apache,但是Nginx由于功能多、配置简单等优点逐渐成为很多负载均衡服务器的首选。Nginx的并发数可达到50000,所以理论上可以和Tomcat以1:100的比例来配置,这样便可以很好的解决网站并发瓶颈问题。
二、 Nginx+Tomcat在Windows下负载均衡配置方法
Nginx+Tomcat在Windows下做负载均衡相对在Linux下简单不少,因为不论是Nginx还是Tomcat只需要下载Windows下的安装包解压到某个目录下,然后就可以做配置了。
我选择的Nginx是nginx-0.8.49这个版本,Tomcat选择的是apache-tomcat-6.0.26。
下面就是配置过程:
1.将nginx-0.8.49.rar压缩包直接解压到某个目录下(如D:/负载均衡/nginx)。
2.将apache-tomcat-6.0.26.rar压缩包解压,因为是做负载均衡,所以至少要解压两个。(如分别解压到D:/负载均衡/tomcat_1和D:/负载均衡/tomcat_2下面)。
3.将要发布的项目发布到两个Tomcat根目录下的webapps下,保证两个Tomcat下面的项目名称相同。
4.修改其中一个Tomcat的配置文件,该配置文件位于Tomcat目录下的/conf/下,文件名为server.xml,修改其中的<Server port="8005" shutdown="SHUTDOWN">为<Server port="8006" shutdown="SHUTDOWN">,修改其中的
<Connector port="8080" protocol="HTTP/1.1"

               connectionTimeout="20000"

               redirectPort="8443" />
为
<Connector port="8088" protocol="HTTP/1.1"

               connectionTimeout="20000"

               redirectPort="8443" />
修改后的文件如下:
 <?xml version='1.0' encoding='utf-8'?>

 <!--

   Licensed to the Apache Software Foundation (ASF) under one or more

   contributor license agreements.  See the NOTICE file distributed with

   this work for additional information regarding copyright ownership.

   The ASF licenses this file to You under the Apache License, Version 2.0

   (the "License"); you may not use this file except in compliance with

   the License.  You may obtain a copy of the License at

       http://www.apache.org/licenses/LICENSE-2.0

   Unless required by applicable law or agreed to in writing, software

   distributed under the License is distributed on an "AS IS" BASIS,

   WITHOUT WARRANTIES OR CONDITIONS OF ANY KIND, either express or implied.

   See the License for the specific language governing permissions and

   limitations under the License.

 -->

 <!-- Note:  A "Server" is not itself a "Container", so you may not

      define subcomponents such as "Valves" at this level.

      Documentation at /docs/config/server.html

 -->

 <Server port="8006" shutdown="SHUTDOWN">

   <!--APR library loader. Documentation at /docs/apr.html -->

   <Listener className="org.apache.catalina.core.AprLifecycleListener" SSLEngine="on" />

   <!--Initialize Jasper prior to webapps are loaded. Documentation at /docs/jasper-howto.html -->

   <Listener className="org.apache.catalina.core.JasperListener" />

   <!-- Prevent memory leaks due to use of particular java/javax APIs-->

   <Listener className="org.apache.catalina.core.JreMemoryLeakPreventionListener" />

   <!-- JMX Support for the Tomcat server. Documentation at /docs/non-existent.html -->

   <Listener className="org.apache.catalina.mbeans.ServerLifecycleListener" />

   <Listener className="org.apache.catalina.mbeans.GlobalResourcesLifecycleListener" />

   <!-- Global JNDI resources

        Documentation at /docs/jndi-resources-howto.html

   -->

   <GlobalNamingResources>

     <!-- Editable user database that can also be used by

          UserDatabaseRealm to authenticate users

     -->

     <Resource name="UserDatabase" auth="Container"

               type="org.apache.catalina.UserDatabase"

               description="User database that can be updated and saved"

               factory="org.apache.catalina.users.MemoryUserDatabaseFactory"

               pathname="conf/tomcat-users.xml" />

   </GlobalNamingResources>

   <!-- A "Service" is a collection of one or more "Connectors" that share

        a single "Container" Note:  A "Service" is not itself a "Container",

        so you may not define subcomponents such as "Valves" at this level.

        Documentation at /docs/config/service.html

    -->

   <Service name="Catalina">

     <!--The connectors can use a shared executor, you can define one or more named thread pools-->

     <!--

     <Executor name="tomcatThreadPool" namePrefix="catalina-exec-"

         maxThreads="150" minSpareThreads="4"/>

     -->

     <!-- A "Connector" represents an endpoint by which requests are received

          and responses are returned. Documentation at :

          Java HTTP Connector: /docs/config/http.html (blocking & non-blocking)

          Java AJP  Connector: /docs/config/ajp.html

          APR (HTTP/AJP) Connector: /docs/apr.html

          Define a non-SSL HTTP/1.1 Connector on port 8080

     -->

     <Connector port="8088" protocol="HTTP/1.1"

                connectionTimeout="20000"

                redirectPort="8443" />

     <!-- A "Connector" using the shared thread pool-->

     <!--

     <Connector executor="tomcatThreadPool"

                port="8080" protocol="HTTP/1.1"

                connectionTimeout="20000"

                redirectPort="8443" />

     -->

     <!-- Define a SSL HTTP/1.1 Connector on port 8443

          This connector uses the JSSE configuration, when using APR, the

          connector should be using the OpenSSL style configuration

          described in the APR documentation -->

     <!--

     <Connector port="8443" protocol="HTTP/1.1" SSLEnabled="true"

                maxThreads="150" scheme="https" secure="true"

                clientAuth="false" sslProtocol="TLS" />

     -->

     <!-- Define an AJP 1.3 Connector on port 8009 -->

     <Connector port="8009" protocol="AJP/1.3" redirectPort="8443" />

     <!-- An Engine represents the entry point (within Catalina) that processes

          every request.  The Engine implementation for Tomcat stand alone

          analyzes the HTTP headers included with the request, and passes them

          on to the appropriate Host (virtual host).

          Documentation at /docs/config/engine.html -->

     <!-- You should set jvmRoute to support load-balancing via AJP ie :

     <Engine name="Catalina" defaultHost="localhost" jvmRoute="jvm1">

     -->

     <Engine name="Catalina" defaultHost="localhost">

       <!--For clustering, please take a look at documentation at:

           /docs/cluster-howto.html  (simple how to)

           /docs/config/cluster.html (reference documentation) -->

       <!--

       <Cluster className="org.apache.catalina.ha.tcp.SimpleTcpCluster"/>

       -->

       <!-- The request dumper valve dumps useful debugging information about

            the request and response data received and sent by Tomcat.

            Documentation at: /docs/config/valve.html -->

       <!--

       <Valve className="org.apache.catalina.valves.RequestDumperValve"/>

       -->

       <!-- This Realm uses the UserDatabase configured in the global JNDI

            resources under the key "UserDatabase".  Any edits

            that are performed against this UserDatabase are immediately

            available for use by the Realm.  -->

       <Realm className="org.apache.catalina.realm.UserDatabaseRealm"

              resourceName="UserDatabase"/>

       <!-- Define the default virtual host

            Note: XML Schema validation will not work with Xerces 2.2.

        -->

       <Host name="localhost"  appBase="webapps"

             unpackWARs="true" autoDeploy="true"

             xmlValidation="false" xmlNamespaceAware="false">

         <!-- SingleSignOn valve, share authentication between web applications

              Documentation at: /docs/config/valve.html -->

         <!--

         <Valve className="org.apache.catalina.authenticator.SingleSignOn" />

         -->

         <!-- Access log processes all example.

              Documentation at: /docs/config/valve.html -->

         <!--

         <Valve className="org.apache.catalina.valves.AccessLogValve" directory="logs"

                prefix="localhost_access_log." suffix=".txt" pattern="common" resolveHosts="false"/>

         -->

       </Host>

     </Engine>

   </Service>

 </Server>
5.修改Nginx配置文件nginx.conf,该文件位于Nginx根目录下的/conf下面。
① 在#gzip on;后面加入下面配置:
upstream backend {

server localhost:8080;

server localhost:8088;

ip_hash;

}
其中server localhost:8080为第一个Tomcat的启动地址,server localhost:8088为第二个Tomcat的启动地址,ip_hash用于做session同步。
② 修改第一个server{}配置中的listen 80;改为新的端口号,因为我的本机80端口被IIS占用,因此将此处改为listen 800;。并将
location / {

            root   html;

            index  index.html index.htm;

        }

改为:

location / {

            root   html;

            index  index.html index.htm;

proxy_pass                  http://backend;

           proxy_redirect              off;

           proxy_set_header            Host $host;

           proxy_set_header            X-Real-IP $remote_addr;

           proxy_set_header            X-Forwarded-For $proxy_add_x_forwarded_for;

           client_max_body_size        10m;

           client_body_buffer_size     128k;

           proxy_connect_timeout       90;

           proxy_send_timeout          90;

           proxy_read_timeout          90;

           proxy_buffer_size           4k;

           proxy_buffers               4 32k;

           proxy_busy_buffers_size     64k;

           proxy_temp_file_write_size  64k;

        }
其中proxy_pass参数和upstream backend{}对应。
经过上面这些步骤,负载均衡配置就完成,下面前分别启动两台tomcat,然后双击nginx根目录下的nginx.exe文件或者用start nginx启动nginx,打开浏览器,输入地址:http://localhost:800便可看到下面画面:
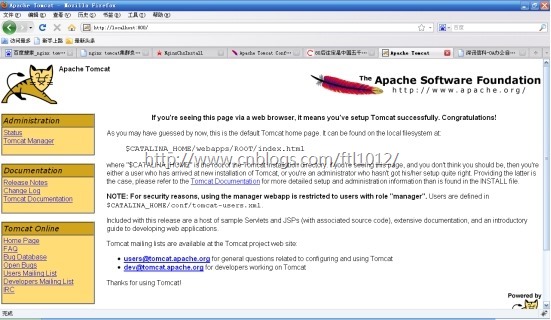
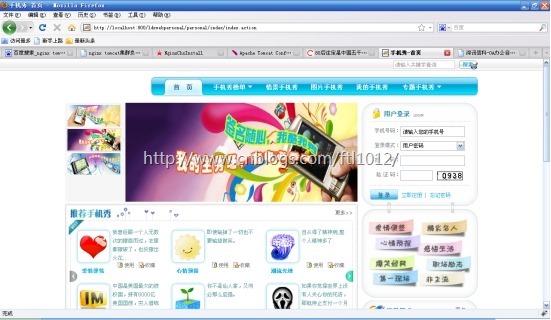
这说明已经成功跳转到Tomcat上面。下面以来电秀具体项目为例,输入地址:http://localhost:800/ldxwebpersonal/personal/index/index.action便可看到下面来电秀首页画面:
我们再看看两个Tomcat下面的日志显示:
端口号为8080的显示:

端口号为8088的显示:
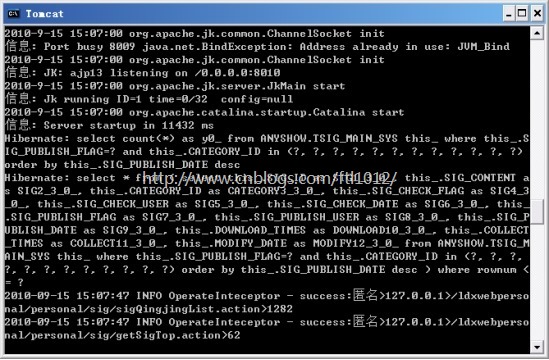
这说明两个tomcat已经实现负载均衡。
Nginx+Tomcat在Windows下做负载均衡的更多相关文章
- Nginx + Tomcat Windows下的负载均衡配置
Nginx + Tomcat Windows下的负载均衡配置 一.为什么需要对Tomcat服务器做负载均衡? Tomcat服务器作为一个Web服务器,其并发数在300-500之间,如果超过50 ...
- 001/Nginx高可用模式下的负载均衡与动静分离(笔记)
Nginx高可用模式下的负载均衡与动静分离 Nginx(engine x)是一个高性能的HTTP和反向代理服务器,具有内存少,并发能力强特点. 1.处理静态文件.索引文件以及自动索引:打开文件描述符缓 ...
- 在Linux上使用Nginx为Solr集群做负载均衡
在Linux上使用Nginx为Solr集群做负载均衡 在Linux上搭建solr集群时需要用到负载均衡,但测试环境下没有F5 Big-IP负载均衡交换机可以用,于是先后试了weblogic的proxy ...
- Nginx+Tomcat 实现动态分离,负载均衡
什么是动静分离 为了提高网站的响应速度,减轻程序服务器(Tomcat,Jboss等)的负载,对于静态资源比如图片,js,css等文件,我们可以在反向代理服务器中进行缓存,这样浏览器在请求一个静态资源时 ...
- tomcat 7 用mod_jk做 负载均衡
在Win7中使用apache为tomcat做负载均衡,各组件及版本如下: 两个tomcat v 7.0.57 一个apache v 2.2.14 一个mod_jk v 1.2.33(for windo ...
- LVS + keepalived + nginx + tomcat 实现主从热备 + 负载均衡
前言 首先声明下,由于这两天找资料,看了不少博客 ,但是出于不细心,参考者的博客地址没有记录下来,所有文中要是出现了与大家博客相同的地方,那么请大家在评论区说明并附上博客地址,我好引用进来:这里表示抱 ...
- Windows下nginx配置多台服务器做负载均衡
Nginx (engine x) 是一个高性能的HTTP和反向代理服务,也是一个IMAP/POP3/SMTP服务. Nginx是一款轻量级的Web 服务器/反向代理服务器及电子邮件(IMAP/POP3 ...
- 注意这几点,轻轻松松配置 Nginx + Tomcat 的集群和负载均衡
Tomcat 集群是当单台服务器达到性能瓶颈,通过横向扩展的方式提高整体系统性能的有效手段.Nginx 是一个高性能的 HTTP 和反向代理 web 服务器,可以通过简单的配置实现 Tomcat 集群 ...
- Nginx+Tomcat实现动静分离和负载均衡
一.什么是动静分离? Nginx动静分离简单来说就是把动态和静态请求分开,不能理解成只是单纯的把动态页面和静态页面物理分离.严格意义上说应该是将动态请求和静态请求分开,可以理解成使用Nginx处理静态 ...
随机推荐
- SCU - 4439 最小点覆盖
题意:求最小的染色顶点数满足所有的边至少有个一端点被染色 2015四川省赛,过题数17/120+,还以为是什么难题,这不就是裸的二分图最小点覆盖吗.. 掏出了尘封一年的破板子 #include< ...
- Apache Shiro(二)-登录认证和权限管理数据库操作
数据库支持 在上一篇中使用ini 配置文件进行了相关权限数据的配置. 但是实际工作中,我们都会把权限相关的内容放在数据库里. 所以本知识点讲解如何放在数据库里来撸. RBAC 概念 RBAC 是当下权 ...
- Oracle utl_file_dir参数详解
1 UTL_FILE_DIR参数定义 UTL_FILE_DIR是Oracle中的一个"静态参数",可以设置一个或多个路径.用于在PL/SQL中进行文件I/O操作(可以用utl_fi ...
- vue之element-ui文件上传
vue之element-ui文件上传 文件上传需求 对于文件上传,实际项目中我们的需求一般分两种: 对于单个的文件上传,比如拖动上传个图片之类的,或者是文件. 和表单一起实现上传(这种情况一般都是 ...
- pandas.read_csv()函数读取文件时,关于“header=None”影响读取列数区间的右闭合总结
对于一个没有字段名标题的数据,如data.csv 1.获取数据内容.pandas.read_csv("data.csv")默认情况下,会把数据内容的第一行默认为字段名标题. imp ...
- Nginx设置日志分割方法
目标:nginx cronolog日志分割配置文档,每分钟分割一次NGINX访问日志. 大体步骤如下: 1.nginx日志配置 access_log /var/log/nginx/access.log ...
- IDEA 导入cordova3.5工程目录注意事项
IDEA 导入cordova3.5工程目录注意事项 1 eclipse很不稳定,有很多小问题.平时我自己用idea,但是当用cordova3.5创建好工程目录是,用eclipse导入时没有问题的.但是 ...
- Ubuntu 14.04 下安装搜狗输入法,不要删除ibus
今天安装了 sougou输入法.在ubuntu下面,然后网上一般的帖子都是要求你先删除 ibus 但是你删除了ibus之后,就会导系统设置被删除很多设置项,甚至无法打开, 所有你设置ubuntu输入法 ...
- Python 进阶
高阶函数 定义 函数接受的参数是一个函数 函数的返回值为一个函数 满足以上2点中其中一个就是高阶函数 函数嵌套 定义 函数中def定义一个函数 嵌套会存在闭包, 其他情况不会有闭包(闭包闭的是变量) ...
- LaTex 2
LaTex 入门 此时是否安装成功 如果安装成功了LaTeX, 那么在计算机上会多出来LaTeX的编译器, LaTex Live 安装包在计算机上安装了多个不同的编译器, 有latex, xelate ...