第五周作业-N67044-张铭扬
1. 搭建chrony服务完成多个主机的时间同步。
[root@centos8 ~]# yum -y install chrony

[root@centos8 ~]# vim /etc/chrony.conf

[root@centos8 ~]# cat /etc/chrony.conf

server ntp.aliyun.com iburst

server ntp1.aliyun.com iburst

server ntp2.aliyun.com iburst

driftfile /var/lib/chrony/drift

makestep 1.0 3

rtcsync

allow 0.0.0.0/0

local stratum 10

keyfile /etc/chrony.keys.

leapsectz right/UTC

logdir /var/log/chrony
[root@centos8 ~]# systemctl restart chronyd
[root@centos8 ~]# ss -ntlu
Netid State Recv-Q Send-Q Local Address:Port Peer Address:Port Process
udp UNCONN 0 0 0.0.0.0:123 0.0.0.0:*
udp UNCONN 0 0 127.0.0.1:323 0.0.0.0:*
udp UNCONN 0 0 [::1]:323 [::]:*
tcp LISTEN 0 128 0.0.0.0:22 0.0.0.0:*
tcp LISTEN 0 100 127.0.0.1:25 0.0.0.0:*
tcp LISTEN 0 128 [::]:22 [::]:*
tcp LISTEN 0 100 [::1]:25 [::]:*
[root@centos7 ~]#vim /etc/chrony.conf

server 10.0.0.152 iburst

[root@centos7 ~]#systemctl restart chronyd.service

[root@centos7 ~]#chronyc sources -v

210 Number of sources = 1

 .-- Source mode  '^' = server, '=' = peer, '#' = local clock.

 / .- Source state '*' = current synced, '+' = combined , '-' = not combined,

| /   '?' = unreachable, 'x' = time may be in error, '~' = time too variable.

||                                                 .- xxxx [ yyyy ] +/- zzzz

||     Reachability register (octal) -.           | xxxx = adjusted offset,

||     Log2(Polling interval) --.     |         | yyyy = measured offset,

||                               \     |         | zzzz = estimated error.

||                                 |   |           \

MS Name/IP address         Stratum Poll Reach LastRx Last sample

===============================================================================

^* 10.0.0.152                      3   6    77    29   -229us[-1154us] +/-   17m
2. 自制光盘,PXE, Cobbler完成自动安装系统。
自制光盘方式
1)制作光盘
[root@centos8 ~]# mkdir -pv /data/myiso

mkdir: created directory '/data/myiso'

[root@centos8 ~]# mount /dev/cdrom /mnt

[root@centos8 mnt]# cp -r /mnt/isolinux /data/myiso/

[root@centos8 mnt]# tree /data/myiso

/data/myiso

└── isolinux

    ├── boot.cat

    ├── boot.msg

    ├── grub.conf

    ├── initrd.img

    ├── isolinux.bin

    ├── isolinux.cfg

    ├── ldlinux.c32

    ├── libcom32.c32

    ├── libutil.c32

    ├── memtest

    ├── splash.png

    ├── TRANS.TBL

    ├── vesamenu.c32

    └── vmlinuz
1 directory, 14 files
[root@centos8 mnt]# vim /data/myiso/isolinux/isolinux.cfg
label linux
menu label ^Install CentOS Linux 8
kernel vmlinuz
append initrd=initrd.img text ks=cdrom:/myks.cfg
2)应答文件
[root@centos8 ks]# cat myks.cfg

ignoredisk --only-use=nvme0n1

zerombr

text

reboot

clearpart --all --initlabel

selinux --disabled

firewall --disabled

url --url=http://10.0.0.152/centos/

keyboard --vckeymap=us --xlayouts='us'

lang en_US.UTF-8

bootloader --append="net.ifnames=0" --location=mbr --boot-drive=sda

network  --bootproto=dhcp --device=eth0 --ipv6=auto --activate

network  --hostname=centos8.magedu.org

rootpw --iscrypted $6$j9YhzDUnQVnxaAk8$qv7rkMcPAEbV5yvwsP666DXWYadd3jYjkA9fpxAo9qYotjGGBUclCGoP1TRvgHBpqgc5n0RypMsPTQnVDcpO01

firstboot --enable

skipx

services --disabled="chronyd"

timezone Asia/Shanghai --isUtc --nontp

user --name=wang --password=6oUfb/02CWfLb5l8f$sgEZeR7c7DpqfpmFDH6huSmDbW1XQNR4qKl2EPns.gOXqlnAIgv9pTogtFVaDtEpMOC.SWXKYqxfVtd9MCwxb1 --iscrypted --gecos="wang"

#autopart --type=lvm

#part / --fstype xfs --size 1 --grow --ondisk sda

part / --fstype="xfs" --ondisk=nvme0n1 --size=102400

part /data --fstype="xfs" --ondisk=nvme0n1 --size=51200

part swap --fstype="swap" --ondisk=nvme0n1 --size=2048

part /boot --fstype="ext4" --ondisk=nvme0n1 --size=1024

%packages

@^minimal-environment

kexec-tools

%end

%addon com_redhat_kdump --enable --reserve-mb='auto'

%end

%anaconda

pwpolicy root --minlen=6 --minquality=1 --notstrict --nochanges --notempty

pwpolicy user --minlen=6 --minquality=1 --notstrict --nochanges --emptyok

pwpolicy luks --minlen=6 --minquality=1 --notstrict --nochanges --notempty

%end

%post

useradd mage

echo magedu | passwd --stdin mage &> /dev/null

%end
3)启动httpd
[root@centos8 ~]#dnf -y install httpd

[root@centos8 ~]#systemctl enable --now httpd

[root@centos8 ~]#mkdir /var/www/html/centos/8/ -p

[root@centos8 ~]#mount /dev/sr0 /var/www/html/centos/8/

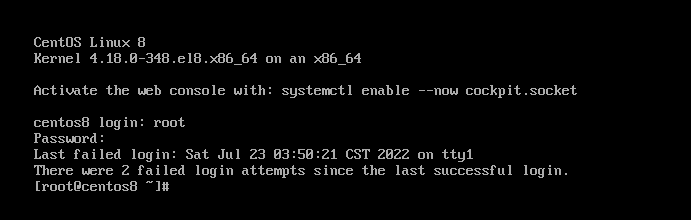
4)开始安装
PXE方式
1)安装相关文件
[root@centos8 ~]#dnf -y install dhcp-server tftp-server httpd syslinuxnonlinux(或者syslinux-tftpboot)

[root@centos8 ~]#systemctl enable --now httpd tftp dhcpd
2)配置DHCP服务
(1)关闭VW DHCP服务
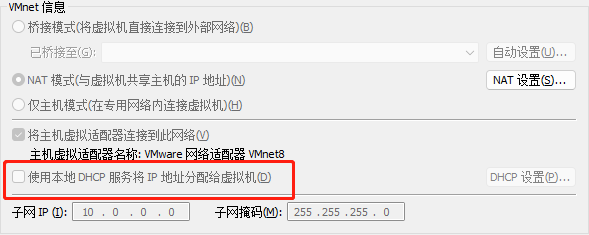
(2)修改配置文件
[root@centos8 ~]# cp /usr/share/doc/dhcp-server/dhcpd.conf.example  /etc/dhcp/dhcpd.conf

cp: overwrite '/etc/dhcp/dhcpd.conf'? y

[root@centos8 ~]# vim /etc/dhcp/dhcpd.conf

[root@centos8 ~]# cat /etc/dhcp/dhcpd.conf

option domain-name "example.org";

option domain-name-servers 180.76.76.76, 223.5.5.5;

default-lease-time 86400;

max-lease-time 106400;

subnet 10.0.0.0 netmask 255.255.255.0 {

    range 10.0.0.160 10.0.0.180;

    option routers 10.0.0.2;

    next-server 10.0.0.152;

    filename "pxelinux.0";

}
[root@centos8 ~]# systemctl restart dhcpd
[root@centos8 ~]# systemctl status dhcpd
● dhcpd.service - DHCPv4 Server Daemon
Loaded: loaded (/usr/lib/systemd/system/dhcpd.service; enabled; vendor preset: disabled)
Active: active (running) since Sat 2022-07-23 01:45:02 CST; 10s ago
Docs: man:dhcpd(8)
man:dhcpd.conf(5)
Main PID: 1455 (dhcpd)
Status: "Dispatching packets..."
Tasks: 1 (limit: 12254)
Memory: 5.4M
CGroup: /system.slice/dhcpd.service
└─1455 /usr/sbin/dhcpd -f -cf /etc/dhcp/dhcpd.conf -user dhcpd -group dhcpd --no-pid
Jul 23 01:45:02 centos8.linux.org dhcpd[1455]: Source compiled to use binary-leases
Jul 23 01:45:02 centos8.linux.org dhcpd[1455]: Wrote 0 class decls to leases file.
Jul 23 01:45:02 centos8.linux.org dhcpd[1455]: Wrote 0 deleted host decls to leases file.
Jul 23 01:45:02 centos8.linux.org dhcpd[1455]: Wrote 0 new dynamic host decls to leases file.
Jul 23 01:45:02 centos8.linux.org dhcpd[1455]: Wrote 1 leases to leases file.
Jul 23 01:45:02 centos8.linux.org dhcpd[1455]: Listening on LPF/ens160/00:0c:29:d6:88:e0/10.0.0.0/24
Jul 23 01:45:02 centos8.linux.org dhcpd[1455]: Sending on LPF/ens160/00:0c:29:d6:88:e0/10.0.0.0/24
Jul 23 01:45:02 centos8.linux.org dhcpd[1455]: Sending on Socket/fallback/fallback-net
Jul 23 01:45:02 centos8.linux.org dhcpd[1455]: Server starting service.
Jul 23 01:45:02 centos8.linux.org systemd[1]: Started DHCPv4 Server Daemon.
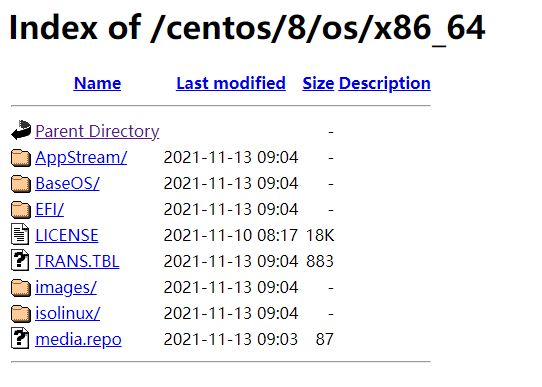
(3)配置httpd服务
[root@centos8 ~]#mkdir -pv /var/www/html/centos/8/os/x86_64/

[root@centos8~]#mount /dev/sr0 /var/www/html/centos/6/os/x86_64/

[root@centos8 ~]# df

Filesystem     1K-blocks     Used Available Use% Mounted on

devtmpfs          980372        0    980372   0% /dev

tmpfs             998404        0    998404   0% /dev/shm

tmpfs             998404     8896    989508   1% /run

tmpfs             998404        0    998404   0% /sys/fs/cgroup

/dev/nvme0n1p1 104806400  2496056 102310344   3% /

/dev/nvme0n1p2  52403200   398400  52004800   1% /data

/dev/nvme0n1p5    999320   144280    786228  16% /boot

tmpfs             199680        0    199680   0% /run/user/0

/dev/sr0        10540998 10540998         0 100% /var/www/html/centos/8/os/x86_64
(4)配置应答文件
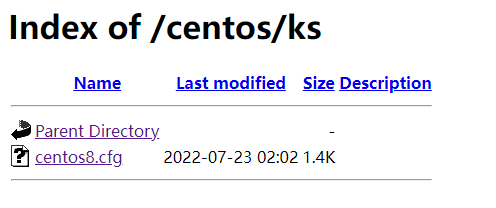
[root@centos8 ~]# mkdir /var/www/html/centos/ks

[root@centos8 ~]# vim  /var/www/html/centos/ks/centos8.cfg

[root@centos8 ~]# cat /var/www/html/centos/ks/centos8.cfg

ignoredisk --only-use=nvme0n1

zerombr

text

reboot

clearpart --all --initlabel

selinux --disabled

firewall --disabled

url --url=http://10.0.0.100/centos/8/os/x86_64/

keyboard --vckeymap=us --xlayouts='us'

lang en_US.UTF-8

network --bootproto=dhcp --device=eth0 --ipv6=auto --activate

bootloader --append="net.ifnames=0" --location=mbr --boot-drive=nvme0n1

network --hostname=centos8.magedu.org

rootpw --iscrypted $6$j9YhzDUnQVnxaAk8$qv7rkMcPAEbV5yvwsP666DXWYadd3jYjkA9fpxAo9qYotjGGBUclCGoP1TRvgHBpqgc5n0RypMsPTQnVDcpO01

firstboot --enable

skipx

services --disabled="chronyd"

timezone Asia/Shanghai --isUtc --nontp

user --name=wang --password=6oUfb/02CWfLb5l8f$sgEZeR7c7DpqfpmFDH6huSmDbW1XQNR4qKl2EPns.gOXqlnAIgv9pTogtFVaDtEpMOC.SWXKYqxfVtd9MCwxb1 --iscrypted --gecos="wang"

#autopart --type=lvm

#part / --fstype xfs --size 1 --grow --ondisk nvme0n1

part / --fstype="xfs" --ondisk=nvme0n1 --size=102400

part /data --fstype="xfs" --ondisk=nvme0n1 --size=51200

part swap --fstype="swap" --ondisk=nvme0n1 --size=2048

part /boot --fstype="ext4" --ondisk=nvme0n1 --size=1024

%packages

@^minimal-environment

kexec-tools

%end

%addon com_redhat_kdump --enable --reserve-mb='auto'

%end

%anaconda

pwpolicy root --minlen=6 --minquality=1 --notstrict --nochanges --notempty

pwpolicy user --minlen=6 --minquality=1 --notstrict --nochanges --emptyok

pwpolicy luks --minlen=6 --minquality=1 --notstrict --nochanges --notempty

%end
(5)配置PXE启动相关文件
root@centos8 ~]# mkdir /var/lib/tftpboot/centos8

[root@centos8 ~]# cp /var/www/html/centos/8/os/x86_64/isolinux/{vmlinuz,initrd.img} /var/lib/tftpboot/centos8

[root@centos8 ~]# cp /usr/share/syslinux/{pxelinux.0,menu.c32} /var/lib/tftpboot/

[root@centos8 ~]# cp /var/www/html/centos/8/os/x86_64/isolinux/{ldlinux.c32,libcom32.c32,libutil.c32} /var/lib/tftpboot/

[root@centos8 ~]# mkdir /var/lib/tftpboot/pxelinux.cfg/

[root@centos8 ~]# cp /var/www/html/centos/8/os/x86_64/isolinux/isolinux.cfg /var/lib/tftpboot/pxelinux.cfg/default

[root@centos8 ~]# cp /var/www/html/centos/8/os/x86_64/isolinux/isolinux.cfg /var/lib/tftpboot/pxelinux.cfg/default

[root@centos8 ~]# tree /var/lib/tftpboot/

/var/lib/tftpboot/

├── centos8

│   ├── initrd.img

│   └── vmlinuz

├── ldlinux.c32

├── libcom32.c32

├── libutil.c32

├── menu.c32

├── pxelinux.0

└── pxelinux.cfg

    └── default

2 directories, 8 files
(6)准备启动菜单
[root@centos8 centos]# vim /var/lib/tftpboot/pxelinux.cfg/default
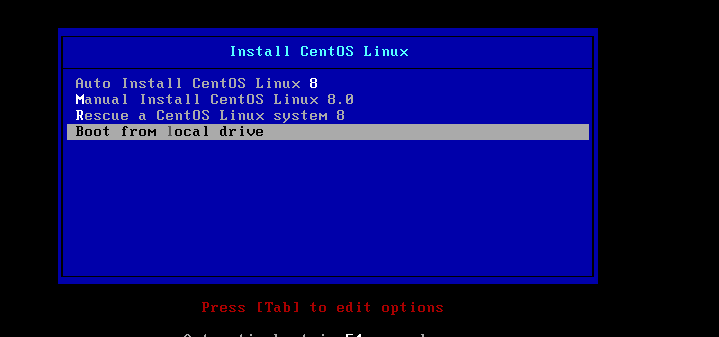
[root@centos8 centos]# cat /var/lib/tftpboot/pxelinux.cfg/default
default menu.c32
timeout 600
menu title Install CentOS Linux
label linux8
menu label Auto Install CentOS Linux ^8
kernel centos8/vmlinuz
append initrd=centos8/initrd.img ks=http://10.0.0.152/centos/ks/centos8.cfg label manual
menu label ^Manual Install CentOS Linux 8.0
kernel centos8/vmlinuz
append initrd=centos8/initrd.img
inst.repo=http://10.0.0.152/centos/8/os/x86_64/ label rescue
menu label ^Rescue a CentOS Linux system 8
kernel centos8/vmlinuz
append initrd=centos8/initrd.img
inst.repo=http://10.0.0.152/centos/8/os/x86_64/ rescue label local
menu default
menu label Boot from ^local drive
localboot 0xffff
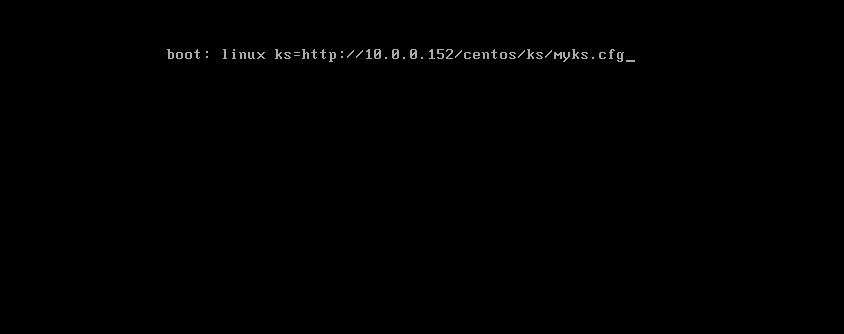
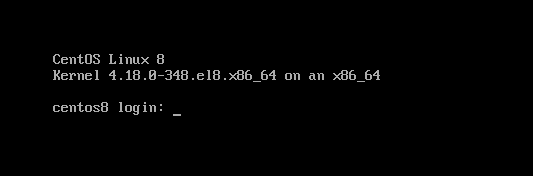
(7)开始安装
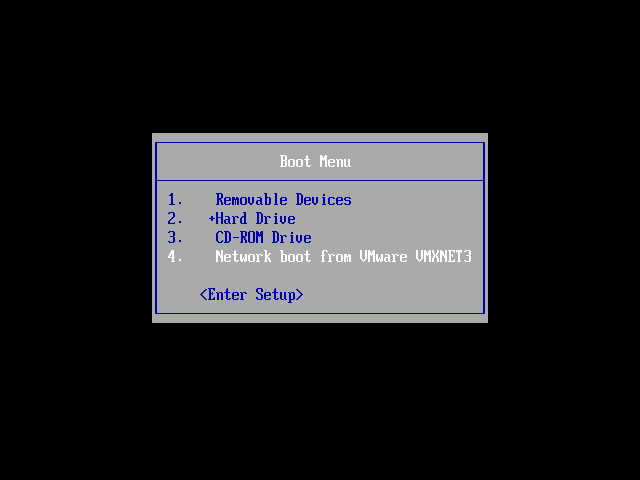
注意:安装前内存要调大,不然会出现failed to start switch root;/dev/root does not exits的报错!
Cobbler自动化安装
1)安装相关包,启动服务
[root@centos7 ~]#yum install cobbler dhcp -y

[root@centos7 ~]#systemctl enable --now cobblerd httpd tftp dhcpd
2)修改cobbler配置
[root@centos7 ~]#cobbler check

The following are potential configuration items that you may want to fix:

1 : The 'server' field in /etc/cobbler/settings must be set to something other

than localhost, or kickstarting features will not work. This should be a

resolvable hostname or IP for the boot server as reachable by all machines that

will use it.

2 : For PXE to be functional, the 'next_server' field in /etc/cobbler/settings

must be set to something other than 127.0.0.1, and should match the IP of the

boot server on the PXE network.

3 : change 'disable' to 'no' in /etc/xinetd.d/tftp4 : Some network boot-loaders are missing from /var/lib/cobbler/loaders, you may

run 'cobbler get-loaders' to download them, or, if you only want to handle

x86/x86_64 netbooting, you may ensure that you have installed a *recent* version

of the syslinux package installed and can ignore this message entirely. Files

in this directory, should you want to support all architectures, should include

pxelinux.0, menu.c32, elilo.efi, and yaboot. The 'cobbler get-loaders' command is

the easiest way to resolve these requirements.

5 : enable and start rsyncd.service with systemctl

6 : debmirror package is not installed, it will be required to manage debian

deployments and repositories

7 : ksvalidator was not found, install pykickstart

8 : The default password used by the sample templates for newly installed

machines (default_password_crypted in /etc/cobbler/settings) is still set to

'cobbler' and should be changed, try: "openssl passwd -1 -salt 'random-phrasehere' 'your-password-here'" to generate new one

9 : fencing tools were not found, and are required to use the (optional) power

management features. install cman or fence-agents to use them

[root@centos7 ~]#openssl passwd -1 'magedu'

$1$1spuisnh$j34LNmyTQWs3l6xKxCZY60

[root@centos7 ~]#vim /etc/cobbler/settings

default_password_crypted: "$1$1spuisnh$j34LNmyTQWs3l6xKxCZY60"

next_server:< tftp服务器的 IP 地址>

server:<cobbler服务器的 IP 地址>

manage_dhcp:1

pxe_just_once: 1

[root@centos7 ~]#systemctl restart cobblerd
3)DHCP服务
[root@centos7 ~]#vim /etc/cobbler/dhcp.template

subnet 192.168.100.0 netmask 255.255.255.0 {

     option routers             192.168.100.1;

     option domain-name-servers 180.76.76.76,223.6.6.6;

     option subnet-mask         255.255.255.0;

     range dynamic-bootp       192.168.100.1 192.168.100.200;

[root@centos7 ~]#cobbler sync
4)导入文件
root@centos7 ~]#cobbler import --name=centos-8.1-x86_64 --path=/misc/cd --

arch=x86_64

[root@centos7 ~]#mount /dev/sr1 /mnt

mount: /dev/sr1 is write-protected, mounting read-only

[root@centos7 ~]#cobbler import --name=centos-7.7-x86_64 --path=/mnt --

arch=x86_64 --kickstart=/var/lib/cobbler/kickstarts/centos7.cfg

[root@centos7 ~]#du -sh /var/www/cobbler/ks_mirror/*

11G /var/www/cobbler/ks_mirror/centos-7.7-x86_64

7.2G /var/www/cobbler/ks_mirror/centos-8.1-x86_64

12K /var/www/cobbler/ks_mirror/config


[root@centos7 ~]#cobbler distro list

   centos-7.7-x86_64

[root@centos7 ~]#cobbler profile list

   centos-7.7-x86_64
3. 搭建配置主从DNS服务器,实现区域传送,并实现智能DNS。
DNS主服务端:192.168.150.128

DNS从服务端:192.168.150.129

web服务器:192.168.150.139

DNS客户端:192.168.150.130

主服务器:

[root@OS ~]#yum install bind -y

[root@OS ~]#vim /etc/named.conf

#注释掉下面两行

// listen-on port 53 { 127.0.0.1; };

// allow-query     { localhost; };

#只允许从服务器进行区域传输,为了数据安全

allow-transfer { 192.168.150.129;};

[root@OS ~]#vim /etc/named.rfc1912.zones

zone "zhang.com" IN {

   type master;

   file "zhang.com.zone";

};

[root@OS ~]#cp -ap /var/named/named.localhost /var/named/magedu.org.zone

[root@OS ~]#vim /var/named/zhang.com.zone

$TTL 1D

@       IN SOA  master  admin.zhang.com.  (

                                        1       ; serial

                                        1D      ; refresh

                                        1H      ; retry

                                        1W      ; expire

                                        3H )    ; minimum

        NS      master

        NS      slave

master  A       192.168.150.128

slave   A       192.168.150.129

www     A       192.168.150.139

[root@OS ~]#systemctl start named          #第一次启动服务

[root@OS ~]#rndc reload                    #不是第一次启动服务

[root@OS ~]#named-checkconf                #语法检查

从服务器:

[root@os7 ~]#

vim /etc/named.conf

#注释掉下面两行

// listen-on port 53 { 127.0.0.1; };

// allow-query     { localhost; };

#不允许其它主机进行区域传输,为了数据安全必须操作

   allow-transfer { none;};

[root@os7 ~]# vim /etc/named.rfc1912.zones

zone "zhang.com" IN {

   type slave;

   masters { 192.168.150.128;};

   file "slaves/zg.com.slave";

};

[root@os7 ~]# ls /var/named/slaves/magedu.org.slave #查看区域数据库文件是否生成

systemctl start named          #第一次启动服务

rndc reload                    #不是第一次启动服务

web服务器:

[root@os7 ~]#yum  -y install httpd

[root@os7 ~]#echo www.zhang.com > /var/www/html/index.html

[root@os7 ~]#systemctl  start httpd

客户端:

[root@OS ~]# yum -y install bind bind-utils

[root@OS ~]# systemctl start named

[root@OS ~]# vim /etc/sysconfig/network-scripts/ifcfg-eth0

DEVICE=eth0

NAME=eth0

BOOTPROTO=static

IPADDR=192.168.150.130

PREFIX=24

DNS1=192.168.150.128

DNS2=192.168.150.129

ONBOOT=yes

#验证从DNS服务器是否可以查询

[root@OS ~]# curl www.zhang.com

www.zhang.com

[root@OS ~]# dig www.zhang.com

; <<>> DiG 9.11.36-RedHat-9.11.36-3.el8 <<>> www.zhang.com

;; global options: +cmd

;; Got answer:

;; ->>HEADER<<- opcode: QUERY, status: NOERROR, id: 56249

;; flags: qr aa rd ra; QUERY: 1, ANSWER: 1, AUTHORITY: 2, ADDITIONAL: 3

;; OPT PSEUDOSECTION:

; EDNS: version: 0, flags:; udp: 1232

; COOKIE: c822e0403af8d0438ff2fc5562c84aef88531745f920cb3c (good)

;; QUESTION SECTION:

;www.zhang.com.            IN    A

;; ANSWER SECTION:

www.zhang.com.        86400    IN    A    192.168.150.139

;; AUTHORITY SECTION:

zhang.com.            86400    IN    NS    master.zhang.com.

zhang.com.            86400    IN    NS    slave.zhang.com.

;; ADDITIONAL SECTION:

master.zhang.com.        86400    IN    A    192.168.150.128

slave.zhang.com.        86400    IN    A    192.168.150.129

;; Query time: 0 msec

;; SERVER: 192.168.150.128#53(192.168.150.128)

;; WHEN: Fri Jul 08 23:19:12 CST 2022

;; MSG SIZE  rcvd: 156
4. 配置iptables 打开常用端口加固linux。使用iptables DNAT完成暴露内网端口,使用SNAT,让内网可以上网。并抓包分析过程。 可以尝试firewalld实现iptables的结果。
外界机器:192.168.159.130 gateway:192.168.159.2 仅主机模式
防火墙:192.168.159.2 192.168.150.2 仅主机和nat模式(双网卡)
内部服务器:192.168.150.128 192.168.150.129 nat模式 防火墙机器增添:ip——forward功能
[root@centos8 ~]#vim /etc/sysctl.conf
net.ipv4.ip_forward=1 内部服务器:安装http服务,
192.168.150.129: echo 192.168.150.129 > /var/www/html/index.html
192.168.150.128: echo 192.168.150.128 > /var/www/html/index.html
此时就可以互相ping通和访问了:
[root@OS ~]# curl 192.168.150.128
192.168.150.128
[root@OS ~]# curl 192.168.150.129
192.168.150.129 当在防火墙加一条iptables规则时: 禁止192.168.150网段的机器访问
[root@OS ~]# iptables -A FORWARD ! -s 192.168.150.0/24 -m state --state NEW -j REJECT
[root@OS ~]# ping 192.168.150.128
PING 192.168.150.128 (192.168.150.128) 56(84) bytes of data.
From 192.168.159.2 icmp_seq=1 Destination Port Unreachable
From 192.168.159.2 icmp_seq=2 Destination Port Unreachable
From 192.168.159.2 icmp_seq=3 Destination Port Unreachable
From 192.168.159.2 icmp_seq=4 Destination Port Unreachable
From 192.168.159.2 icmp_seq=5 Destination Port Unreachable [root@OS ~]# curl 192.168.150.128
curl: (7) Failed to connect to 192.168.150.128 port 80: Connection refused
[root@OS ~]# curl 192.168.150.129
curl: (7) Failed to connect to 192.168.150.129 port 80: Connection refused <!-- wp:code -->
<pre class="wp-block-code"><code>外界机器:192.168.159.130 gateway:192.168.159.2 仅主机模式
防火墙:192.168.159.2 192.168.150.2 仅主机和nat模式(双网卡)
内部服务器:192.168.150.128 192.168.150.129 nat模式 防火墙机器增添:ip——forward功能
[root@centos8 ~]#vim /etc/sysctl.conf
net.ipv4.ip_forward=1 内部服务器:安装http服务,
192.168.150.129: echo 192.168.150.129 > /var/www/html/index.html
192.168.150.128: echo 192.168.150.128 > /var/www/html/index.html
此时就可以互相ping通和访问了:
[root@OS ~]# curl 192.168.150.128
192.168.150.128
[root@OS ~]# curl 192.168.150.129
192.168.150.129 当在防火墙加一条iptables规则时: 禁止192.168.150网段的机器访问
[root@OS ~]# iptables -A FORWARD ! -s 192.168.150.0/24 -m state --state NEW -j REJECT
[root@OS ~]# ping 192.168.150.128
PING 192.168.150.128 (192.168.150.128) 56(84) bytes of data.
From 192.168.159.2 icmp_seq=1 Destination Port Unreachable
From 192.168.159.2 icmp_seq=2 Destination Port Unreachable
From 192.168.159.2 icmp_seq=3 Destination Port Unreachable
From 192.168.159.2 icmp_seq=4 Destination Port Unreachable
From 192.168.159.2 icmp_seq=5 Destination Port Unreachable [root@OS ~]# curl 192.168.150.128
curl: (7) Failed to connect to 192.168.150.128 port 80: Connection refused
[root@OS ~]# curl 192.168.150.129
curl: (7) Failed to connect to 192.168.150.129 port 80: Connection refused [root@OS ~]# iptables -I FORWARD ! -s 192.168.150.0/24 -d 192.168.150.129 -m state NEW -p tcp --dport 80 -j ACCEPT 当在前一条iptables插入允许访问129的80端口时:
[root@centos7_6 ~]# iptables -I FORWARD ! -s 192.168.150.0/24 -d 192.168.150.129 -m state --state NEW -p tcp --dport 80 -j ACCEPT
[root@centos7_6 ~]# iptables -vnL
Chain INPUT (policy ACCEPT 29 packets, 1700 bytes)
pkts bytes target prot opt in out source destination Chain FORWARD (policy ACCEPT 0 packets, 0 bytes)
pkts bytes target prot opt in out source destination
0 0 ACCEPT tcp -- * * !192.168.150.0/24 192.168.150.129 state NEW tcp dpt:80
464 38928 REJECT all -- * * !192.168.150.0/24 0.0.0.0/0 state NEW reject-with icmp-port-unreachable Chain OUTPUT (policy ACCEPT 17 packets, 1260 bytes)
pkts bytes target prot opt in out source destination [root@OS ~]# curl 192.168.150.129
192.168.150.129 NAT的实现分为下面类型:
SNAT:source NAT ,支持POSTROUTING, INPUT,让本地网络中的主机通过某一特定地址访问
外部网络,实现地址伪装,请求报文:修改源IP
DNAT:destination NAT 支持PREROUTING , OUTPUT,把本地网络中的主机上的某服务开放给外
部网络访问(发布服务和端口映射),但隐藏真实IP,请求报文:修改目标IP
PNAT: port nat,端口和IP都进行修改
网络最终实现———— NAT+PAT 不仅仅ip地址进行了转换,port端口也进行了转换。
结合上面实验,实现SNAT DNAT(删除客户端的网关)!!!
SNAT
[root@centos7_6 ~]# iptables -F #清空上面的iptables规则
[root@centos7_6 ~]# iptables -t nat -A POSTROUTING -s 192.168.150.0/24 ! -d 192.168.150.0/24 -j MASQUERADE
#只要是192.168.150.0/24网段的机器访问其它网段,都做地址转换。
[root@OS ~]# ping 192.168.159.130
PING 192.168.159.130 (192.168.159.130) 56(84) bytes of data.
64 bytes from 192.168.159.130: icmp_seq=1 ttl=128 time=0.784 ms
64 bytes from 192.168.159.130: icmp_seq=2 ttl=128 time=0.694 ms
64 bytes from 192.168.159.130: icmp_seq=3 ttl=128 time=1.50 ms
64 bytes from 192.168.159.130: icmp_seq=4 ttl=128 time=1.28 ms
64 bytes from 192.168.159.130: icmp_seq=5 ttl=128 time=0.546 ms
64 bytes from 192.168.159.130: icmp_seq=6 ttl=128 time=0.767 ms [root@OS ~]# tcpdump -i eth0 -nn icmp #在外部机器上抓包发现ip地址不显示内部访问地址
dropped privs to tcpdump
tcpdump: verbose output suppressed, use -v or -vv for full protocol decode
listening on eth0, link-type EN10MB (Ethernet), capture size 262144 bytes
20:57:24.466670 IP 192.168.159.1 > 192.168.159.130: ICMP echo request, id 5, seq 1, length 64
20:57:24.466703 IP 192.168.159.130 > 192.168.159.1: ICMP echo reply, id 5, seq 1, length 64
20:57:25.476241 IP 192.168.159.1 > 192.168.159.130: ICMP echo request, id 5, seq 2, length 64
20:57:25.476271 IP 192.168.159.130 > 192.168.159.1: ICMP echo reply, id 5, seq 2, length 64
20:57:26.501190 IP 192.168.159.1 > 192.168.159.130: ICMP echo request, id 5, seq 3, length 64
20:57:26.501222 IP 192.168.159.130 > 192.168.159.1: ICMP echo reply, id 5, seq 3, length 64 DNAT #访问192.168.159.2时,转发给192.168.120.129
[root@centos7_6 ~]# iptables -t nat -A PREROUTING -d 192.168.159.2 -p tcp --dport 80 -j DNAT --to-destination 192.168.150.129:80
[root@OS ~]# curl 192.168.159.2
192.168.150.129
5. 脚本实现openvpn的一键安装,日常管理:加用户,吊销用户等。
[root@OS ~]#vim  install_openvpn.sh

#!/bin/bash

openvpn脚本

#需要保证有网络

yum -y install openssl openssl-devel easy-rsa openvpn

#判断是否安装成功

if [ $? -eq 0 ];then

    echo "安装成功!"

else

    echo "未能安装成功!请检查网络环境或yum源配置情况"

fi

#准备配置文件

cp /usr/share/doc/openvpn/sample/sample-config-files/server.conf  /etc/openvpn/

cp -r /usr/share/easy-rsa/  /etc/openvpn/easy-rsa-server

cp /usr/share/doc/easy-rsa/vars.example  /etc/openvpn/easy-rsa-server/3/vars

#初始化PKI生成PKI相关目录和文件

cd /etc/openvpn/easy-rsa-server/3/

./easyrsa init-pki

./easyrsa build-ca nopass

echo "请输入证书名称"

./easyrsa gen-req server nopass

./easyrsa sign server server

echo "是否同意颁发证书,同意请输入yes"

#生成算法

./easyrsa gen-dh

echo "请稍候"

mkdir /etc/openvpn/certs

cp /etc/openvpn/easy-rsa-server/3/pki/ca.crt      /etc/openvpn/certs/

cp /etc/openvpn/easy-rsa-server/3/pki/issued/server.crt   /etc/openvpn/certs/

cp /etc/openvpn/easy-rsa-server/3/pki/private/server.key    /etc/openvpn/certs/

cp /etc/openvpn/easy-rsa-server/3/pki/dh.pem       /etc/openvpn/certs/

echo "**将****CA****和服务器证书相关文件已复制到服务器相应的目录"

rm  -rf   /etc/openvpn/server.conf

touch /etc/openvpn/server.conf

cat >  /etc/openvpn/server.conf <<eof

yum -y install epel-release

port 1194

proto tcp

dev tun

ca /etc/openvpn/certs/ca.crt

cert /etc/openvpn/certs/server.crt

key /etc/openvpn/certs/server.key

dh /etc/openvpn/certs/dh.pem

server  内网地址  255.255.255.0

push "route  公网地址  255.255.0.0 "

keepalive 10 120

cipher AES-256-CBC

compress lz4-v2

push "compress lz4-v2"

max-clients 2048

user openvpn

group openvpn

status /var/log/openvpn/openvpn-status.log

log-append /var/log/openvpn/openvpn.log

verb 3

mute 20

#tls-auth /etc/openvpn/certs/ta.key 0           #ka秘钥生成后

crl-verify /etc/openvpn/easy-rsa-server/3/pki/crl.pem  #吊销证书的存放地址

eof

mkdir /var/log/openvpn

chown openvpn.openvpn /var/log/openvpn

echo net.ipv4.ip_forward = 1 >> /etc/sysctl.conf

sysctl -p

echo 'iptables -t nat -A POSTROUTING -s 内网网段/24 -j MASQUERADE' >> /etc/rc.d/rc.local

if [ ! -d "/usr/lib/systemd/system/openvpn@.service" ];then

    mkdir -p /usr/lib/systemd/system/openvpn@.service

    echo "openvpn@.service创建成功"

cat > /usr/lib/systemd/system/openvpn@.service<<eof

[Unit]

Description=OpenVPN Robust And Highly Flexible Tunneling Application On %I

After=network.target

[Service]

Type=notify

PrivateTmp=true

ExecStart=/usr/sbin/openvpn --cd /etc/openvpn/ --config %i.conf

[Install]

WantedBy=multi-user.target

eof

[root@OS ~]# vim  openvpn-create-newuser-crt.sh

. /etc/init.d/functions

OPENVPN_SERVER=公网ip

PASS=123456

remove_cert () {

    rm -rf /etc/openvpn/client/${NAME}

    find /etc/openvpn/ -name "$NAME.*" -delete

}

create_cert () {

    cd /etc/openvpn/easy-rsa-client/3

    ./easyrsa  gen-req ${NAME} nopass <<EOF

EOF

    cd /etc/openvpn/easy-rsa-server/3

    ./easyrsa import-req /etc/openvpn/easy-rsa-client/3/pki/reqs/${NAME}.req ${NAME}

    ./easyrsa sign client ${NAME} <<EOF

yes

EOF

    mkdir  /etc/openvpn/client/${NAME}

    cp /etc/openvpn/easy-rsa-server/3/pki/issued/${NAME}.crt /etc/openvpn/client/${NAME}

    cp /etc/openvpn/easy-rsa-client/3/pki/private/${NAME}.key  /etc/openvpn/client/${NAME}

    cp /etc/openvpn/certs/{ca.crt,dh.pem,ta.key} /etc/openvpn/client/${NAME}

  ./easyrsa sign client ${NAME} <<EOF

yes

EOF

    mkdir  /etc/openvpn/client/${NAME}

    cp /etc/openvpn/easy-rsa-server/3/pki/issued/${NAME}.crt /etc/openvpn/client/${NAME}

    cp /etc/openvpn/easy-rsa-client/3/pki/private/${NAME}.key  /etc/openvpn/client/${NAME}

    cp /etc/openvpn/certs/{ca.crt,dh.pem,ta.key} /etc/openvpn/client/${NAME}

    cat >  /etc/openvpn/client/${NAME}/client.ovpn <<EOF

client

dev tun

proto tcp

remote $OPENVPN_SERVER 1194

resolv-retry infinite

nobind

#persist-key

#persist-tun

ca ca.crt

cert $NAME.crt

key $NAME.key

remote-cert-tls server

tls-auth ta.key 1

cipher AES-256-CBC

verb 3

compress lz4-v2

EOF

    echo "证书存放路径:/etc/openvpn/client/${NAME},证书文件如下:"

    echo -e "\E[1;32m******************************************************************\E[0m"

    ls -l /etc/openvpn/client/${NAME}

    echo -e "\E[1;32m******************************************************************\E[0m"

    cd /etc/openvpn/client/${NAME}

    zip -qP "$PASS" /root/${NAME}.zip *

    action  "证书的打包文件已生成: /root/${NAME}.zip"

}

read -p "请输入用户(如:zhang): " NAME

remove_cert

create_cert
7. 总结数据库原理。
数据的分类:
结构化的数据:即有固定格式和有限长度的数据。例如填的表格就是结构化的数据,国籍:中华人 民共和国,民族:汉,性别:男,这都叫结构化数据
非结构化的数据:非结构化的数据越来越多,就是不定长、无固定格式的数据,例如: 网页,图片文 件,有时候非常大,有时候很小;例如语音,视频都是非结构化的数据
半结构化数据:比如:XML或者HTML的格式的数据
数据库系统发展阶段
萌芽阶段:文件系统 使用磁盘文件来存储数据
初级阶段:第一代数据库 出现了网状模型、层次模型的数据库
中级阶段:第二代数据库 关系型数据库和结构化查询语言
高级阶段:新一代数据库 "关系-对象"型数据库
DBMS 数据库管理系统
Database:数据库是数据的汇集,它以一定的组织形式存于存储介质上
DBMS:Database Management System, 是管理数据库的系统软件,它实现数据库系统的各种功 能。是数据库系统的核心
DBA:Database Administrator, 负责数据库的规划、设计、协调、维护和管理等工作
Application:应用程序,指以数据库为基础的应用程序
数据库管理系统的优点
程序与数据相互独立
保证数据的安全、可靠
最大限度地保证数据的正确性
数据可以并发使用并能同时保证一致性
相互关联的数据的集合
较少的数据冗余
数据库管理系统的基本功能
数据定义
数据处理
数据安全
数据备份
数据库系统的架构
单机架构
大型主机/终端架构
主从式架构(C/S)
分布式架构
第五周作业-N67044-张铭扬的更多相关文章
- 2018-2019-1 20189221《Linux内核原理与分析》第五周作业
2018-2019-1 20189221<Linux内核原理与分析>第五周作业 实验四 实验过程 当用户态进程调用一个系统调用时,cpu切换到内核态并开始执行一个内核函数. 在Linux中 ...
- 2017-2018-1 JaWorld 第四、五周作业
2017-2018-1 JaWorld 第四.五周作业 两周工作内容 小组讨论并确定最终的app雏形 合作完成需求说明书 工作分工 成员 分工 比例 陈是奇 1.引言 8% 马平川 2.1-2.5 产 ...
- 2017-2018-1 JAVA实验站 第四、五周作业
2017-2018-1 JAVA实验站 第四.五周作业 JAVA实验站小组成员 学号 名字 职务 20162318 张泰毓 组长 20162303 石亚鑫 组员 20162304 张浩林 组员 201 ...
- 2017-2018-1 20179205《Linux内核原理与设计》第五周作业
<Linux内核原理与设计>第五周作业 视频学习及操作分析 一.用户态.内核态和中断 内核态在CPU执行中对应高执行级别,执行级别为0级,具有特权指令,可以访问任意物理地址:用户态执行级别 ...
- 第五周作业:markdown语法小总结
第五周作业 markdown语法总结 早就想写这么一个文章了,关于markdown的语法,因为最近使用的比较多,所以特地总结一下 一,标题 首先要介绍的就是标题, 标题一共有六级 # h1 ## h2 ...
- 2019-2020-1 20199329《Linux内核原理与分析》第五周作业
<Linux内核原理与分析>第五周作业 一.上周问题总结: 虚拟机将c文件汇编成汇编文件时忘记添加include<stdio.h> gdb跟踪汇编过程不熟练 二.本周学习内容: ...
- 2019春第五周作业Compile Summarize
这个作业属于哪个课程 C语言程序设计II 这个作业要求在哪里 在这里 我在这个课程的目标是 能够精通关于数组内部运作原理 这个作业在哪个具体方面帮助我实现目标 如何输出一行的连续字符 参考文献与网址 ...
- 第四周预习作业and第五周作业
第四周预习作业 统计一行文本的单词个数 本题目要求编写程序统计一行字符中单词的个数.所谓"单词"是指连续不含空格的字符串,各单词之间用空格分隔,空格数可以是多个. 输入格式: 输入 ...
- 20162327WJH第五周作业
学号 20162327 <程序设计与数据结构>第5周学习总结 教材学习内容总结 1.java是一种面向对象的语言.面向对象是一种编程方法.更是一种思维方式. 2.面向对象编程的终极目标是消 ...
- 第五周作业总结(内含用Junit测试ArrayStack和LinkedStack课堂练习报告)
---恢复内容开始--- 学号 20162310<程序设计与数据结构>第五周学习总结 教材学习内容总结 集合分为线性集合(集合中的元素排成一行)和非线性集合(按不同于一行的方式来组织元素, ...
随机推荐
- 基于.NetCore开发博客项目 StarBlog - (22) 开发博客文章相关接口
前言 本文介绍博客文章相关接口的开发,作为接口开发介绍的第一篇,会写得比较详细,以抛砖引玉,后面的其他接口就粗略带过了,着重于WebApi开发的周边设施. 涉及到的接口:文章CRUD.置顶文章.推荐文 ...
- 大数据 - DWM层 业务实现
DWM 建表,需要看 DWS 需求. DWS 来自维度(访客.商品.地区.关键词),为了出最终的指标 ADS 需求指标 DWT 为什么实时数仓没有DWT,因为它是历史的聚集,累积结果,实时数仓中不需要 ...
- 字符编码:Unicode & UTF-16 & UTF-8
ASCII码 使用一个字节(8位),对128个字符进行编码: 最高位始终为0: 码数范围为0000_0000(0x00)到0111_1111(0x7F): Unicode 开始的编码设计 使用两个字节 ...
- [深度学习] CCPD车牌数据集介绍
CCPD是一个大型的.多样化的.经过仔细标注的中国城市车牌开源数据集.CCPD数据集主要分为CCPD2019数据集和CCPD2020(CCPD-Green)数据集.CCPD2019数据集车牌类型仅有普 ...
- 软件安装——idea的安装和使用
Idea的安装和使用 一.下载和安装 下载步骤 官网下载地址:Download IntelliJ IDEA: The Capable & Ergonomic Java IDE by JetBr ...
- 聊聊web漏洞挖掘第一期
之前写2022年度总结的时候,有提到要给大家分享漏洞挖掘技巧.这里简单分享一些思路,更多的内容需要大家举一反三. 文章准备昨晚写的,昨天晚上出去唱歌,回来太晚了,耽搁了.昨天是我工作的last day ...
- element上传图片组件使用方法|图片回显|格式转换base64
upload上传组件的使用方法 上传图片后自动上传(也可以手动上传),图片上传成功后由后端返回特定图片地址,在表单提交后将表单数据同图片地址一并返回即可完成图片上传功能. 组件HTML <!-- ...
- ajax补充知识点、多对多外键的三种创建方式、django内置序列化组件、批量操作数据、分页器推导思路与自定义分页器的使用、form组件
今日内容 ajax补充说明 主要是针对回调函数args接收到的响应数据 1.后端request.is_ajax() 用于判断当前请求是否由ajax发出 2.后端返回的三板斧都会被args接收不在影响整 ...
- 使用json数据动态创建表格2(多次绘制第一次简化 var tr=tbody.insertRow();)
<!DOCTYPE HTML> <html> <head> <title>动态创建表格</title> <meta charset=& ...
- ArrayList使用步骤-常用方法和遍历
ArrayList使用步骤 查看类 java.util.ArrayList :该类需要 import导入使后使用. 表示一种指定的数据类型,叫做泛型. E ,取自Element(元素)的首字母.在出现 ...