2022IDEA配置启动lilishop的swagger展示
一、概述
编写目的
这个项目基本把电商的业务和平台都完整的展示出来了,很多项目只是展示一个后台管理,但是,那并不是完整的企业级项目,而这个lilishop却是一个完整的项目,并且进行了开源代码,在这里要对其做出的贡献表示感谢.
由于本系统的文档不够完善,缺少简单的部署流程,使得很多新人,或没有接触这个系统的人,很难简单快捷的实现,快速部署这个系统,同时,能够快速搭建,学习起来的状况,这也是目前国内开源的一大弊病,明明做的项目不差,但是由于文档缺乏,配置繁琐,导致很难快速上手,快速开发,快速学习,快速使用,所以,特此撰写此文章,此文章为原创设计,拒绝抄袭,如有转载,请注明出处.
服务器部署
由于笔者是一个开发人员,所以部署主要以开发的部署到本地的情况为主,文章这是范例,实际的问题,还需要自身学习百度功能,和自身对于一门技术的理解,希望大家努力学习,争取自己领悟部署的方法,本文部署主要选取常用的windows系统作为主要的部署环境,希望大家提高自身的部署能力.
二、基本构建
构建工具(参考文献,其他版本安装流程基本一样)
| 软件名称 | 版本 | 描述 |
|---|---|---|
| IntelliJ IDEA | 尽量使用比较新的版本 | https://www.jetbrains.com/idea/ |
| JDK | 1.8 | https://www.cnblogs.com/liuyangfirst/p/14334385.html |
| Maven | 3.6.0 | https://www.cnblogs.com/liuyangfirst/p/15981202.html |
| MySQL | 官网使用5.7版本,本文采用最新的8.0版 | https://www.cnblogs.com/liuyangfirst/p/15997667.html |
| DBeaver | 7.3.0 | https://www.cnblogs.com/liuyangfirst/p/15997753.html |
| Redis | 5.0.10 | https://www.cnblogs.com/liuyangfirst/p/15998117.html |
| RedisDesktopManager | 0.9.3.817 | https://www.cnblogs.com/liuyangfirst/p/15998132.html |
| Mongodb | 4.2.5 | https://www.cnblogs.com/liuyangfirst/p/16011402.html |
| Robo3T | 1.4.2 | https://www.cnblogs.com/liuyangfirst/p/16014144.html |
| Elasticsearch | 7.6.2 | https://www.cnblogs.com/liuyangfirst/p/16004977.html |
| Kibana | 7.6.2 | https://www.cnblogs.com/liuyangfirst/p/16006164.html |
| Logstash | 7.6.2 | https://www.cnblogs.com/liuyangfirst/p/16008094.html |
| Git | 13.5.0 | https://www.cnblogs.com/liuyangfirst/p/15996063.html |
| NodeJS | 16.0.0 | https://www.cnblogs.com/liuyangfirst/p/15998172.html |
| RockeMQ | 16.0.0 | 暂无 |
三、Git 导入编译器
四、模块描述浅析
- 文件路径: lilishop/pom.ml
| 序号 | 模块名称 | 描述 |
|---|---|---|
| 1 | admin | 监控模块,用于监控整个系统的服务状况 |
| 2 | buyer-api | 买家接口模块(就是你在商城想购物,你就是这个买家) |
| 3 | common-api | 公共代码模块,list转set什么的一般放这里,自己不要瞎写方法,公共的都放这里 |
| 4 | config | 公共配置文档的模块.用于全局配置文件的修改,一般全局修改改这里 |
| 5 | consumer | 消费者模块,消费服务,定时任务延时任务 |
| 6 | DB | 数据脚本存放位置,本地部署前要跑一下数据库的脚本 |
| 7 | framework | 核心代码(重点可以被学习的地方) |
| 8 | lilishop-ui | 前段界面代码模块(三方的前台代码都在这里) |
| 9 | manager-api | 运营管理模块,就是运营小姐姐给你处理订单异常,售后,退款,这类问题的平台 |
| 10 | seller-api | 商家模块(店铺),你买的所有东西都是商家提供的,你看看淘宝每个商品点击可以看到商铺,这里就是商铺模块,供应商提供货源,平台提供销路 |
| 11 | xxl-job | 定时任务管理模块,跑一些定时或自动的业务 |
五、配置文档
| 序号 | 名称 | 位置 | 文件名称 |
|---|---|---|---|
| 1 | admin | src/main/resources | application.yml |
| 2 | buyer-api | src/main/resources | application.yml |
| 3 | common-api | src/main/resources | application.yml |
| 4 | config | src/main/resources | application.yml |
| 5 | consumer | src/main/resources | application.yml |
| 6 | manager-api | src/main/resources | application.yml |
| 7 | seller-api | src/main/resources | application.yml |
- 本文暂时以商城主页的项目为主教程,其他的模块一样,待自行举一反三.
1.注释配置文件
| 序号 | 名称 | 位置 | 文件名称 |
|---|---|---|---|
| 1 | buyer-api | src/main/resources | application.yml |
| 2 | common-api | src/main/resources | application.yml |
| 3 | config | src/main/resources | application.yml |
- 注释以上三个模块的如下代码,这里的代码含义就是忽略这些接口的访问,不注释的话,以下接口无法访问.启动包含swagger的访问.
# 忽略鉴权url

#ignored:

#  urls:

#    - /editor-app/**

#    - /actuator**

#    - /actuator/**

#    - /MP_verify_qSyvBPhDsPdxvOhC.txt

#    - /weixin/**

#    - /source/**

#    - /buyer/mini-program/**

#    - /buyer/cashier/**

#    - /buyer/pageData/**

#    - /buyer/article/**

#    - /buyer/goods/**

#    - /buyer/category/**

#    - /buyer/shop/**

#    - /buyer/connect/**

#    - /buyer/members/smsLogin

#    - /buyer/members/refresh/*

#    - /buyer/members/refresh**

#    - /buyer/promotion/pintuan

#    - /buyer/promotion/seckill

#    - /buyer/memberEvaluation/**/goodsEvaluation

#    - /buyer/memberEvaluation/**/evaluationNumber

#    - /store/login/**

#    - /manager/user/login

#    - /manager/user/refresh/**

#    - /druid/**

#    - /swagger-ui.html

#    - /doc.html

#    - /swagger-resources/**

#    - /swagger/**

#    - /webjars/**

#    - /v2/api-docs

#    - /configuration/ui

#    - /boot-admin

#    - /**/*.js

#    - /**/*.css

#    - /**/*.png

#    - /**/*.ico
2.添加配置
- 由于本项目采用的是比较新的技术,叫做knife4j,所以配置要偏向于knife4j和swagger的配置,引入包位置
| 序号 | 名称 | 位置 | 文件名称 |
|---|---|---|---|
| 1 | framework | framework/ | pom.yml |
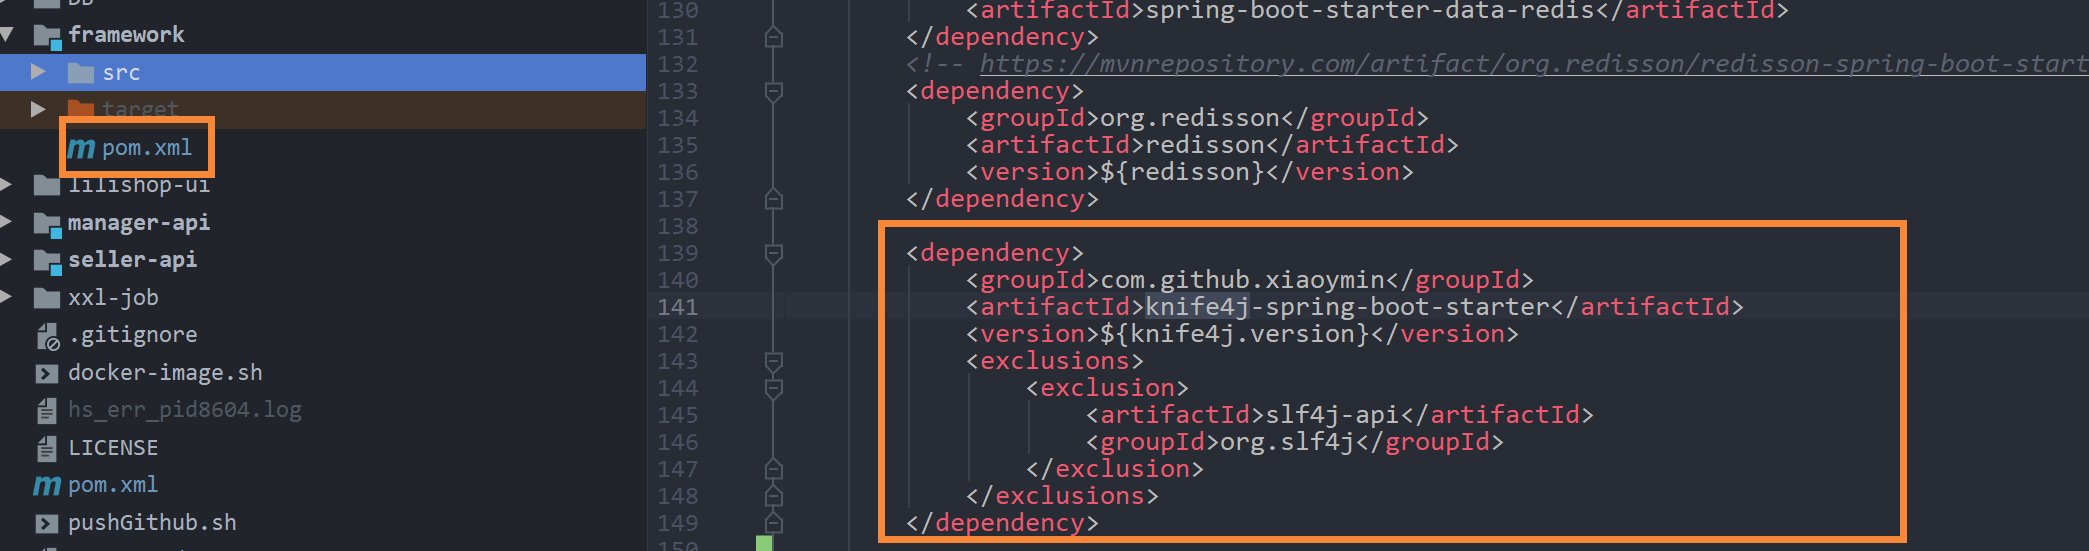
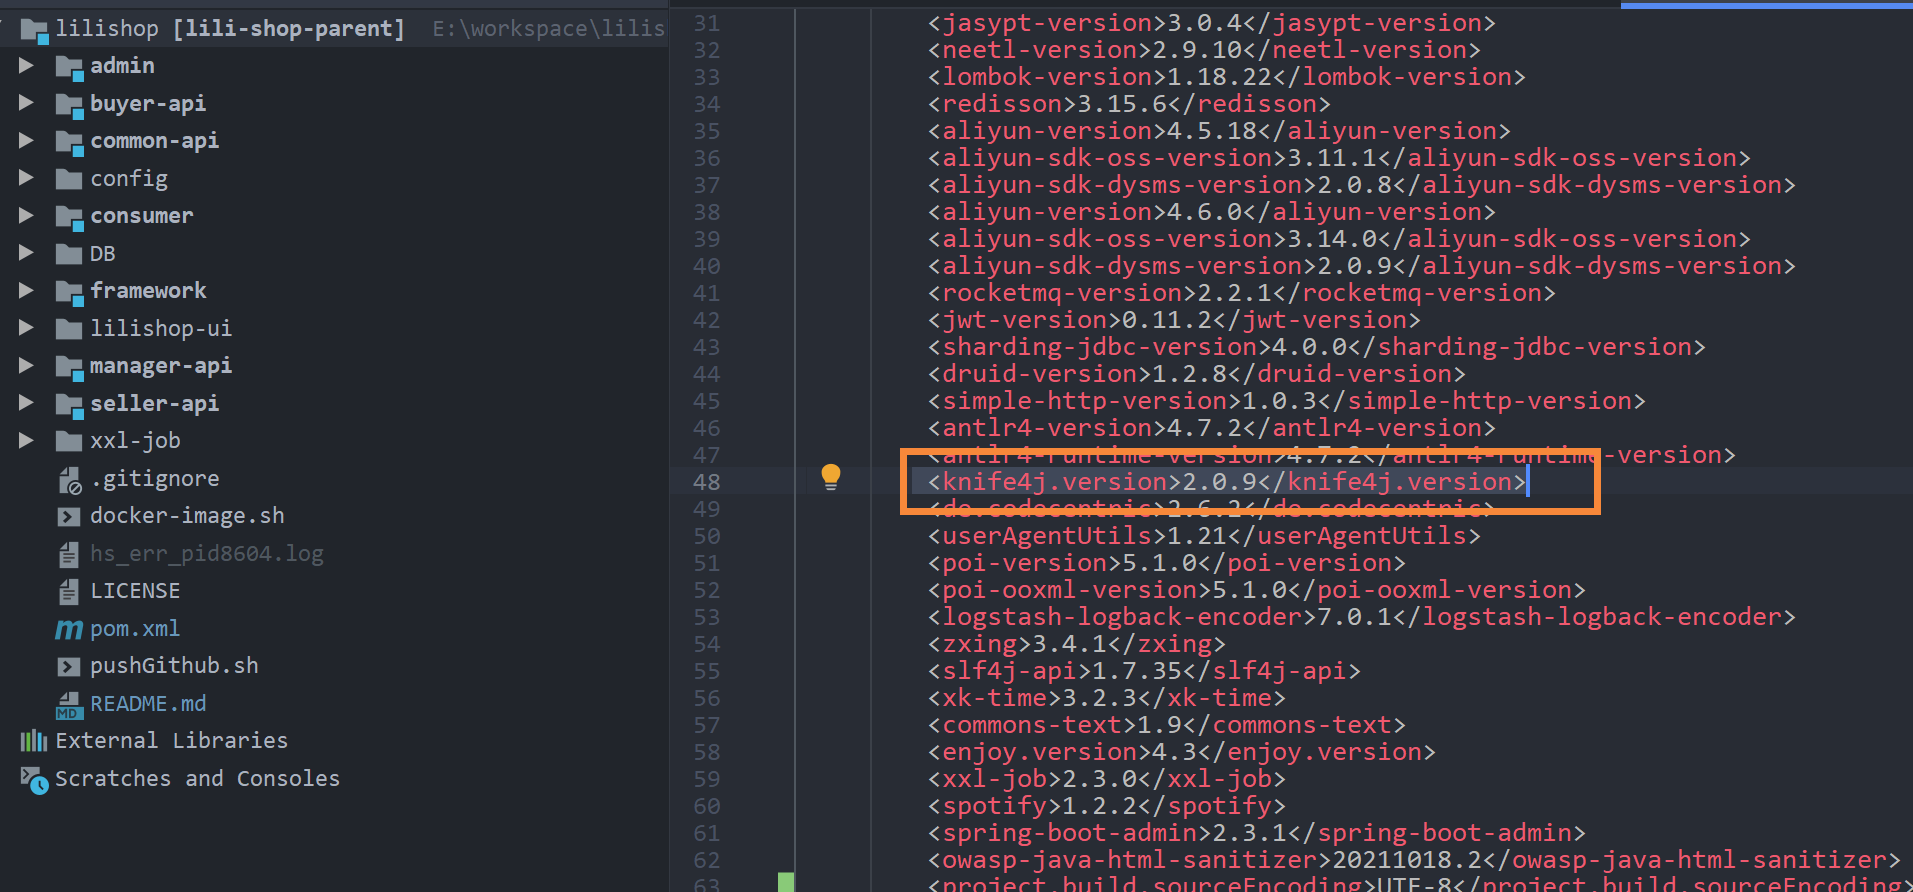
- 版本修改位置
| 序号 | 名称 | 位置 | 文件名称 |
|---|---|---|---|
| 1 | lilishop | lilishop/ | pom.yml |
- 在需要修改的模块,添加代码
| 序号 | 名称 | 位置 | 文件名称 |
|---|---|---|---|
| 1 | buyer-api | src/main/resources | application.yml |
| 2 | common-api | src/main/resources | application.yml |
| 3 | config | src/main/resources | application.yml |

spring:

    mvc:

      view:

        prefix: /

        suffix: .html

      freemarker:

        check-template-location: false

      thymeleaf:

        check-template-location: false
3.暂时关闭权限
- 由于除了忽略以外,本项目还开起了security的权限,如果不关闭这个权限,那么还是无法访问项目的swagger.
| 序号 | 名称 | 位置 | 文件名称 |
|---|---|---|---|
| 1 | buyer-api | src/main/java/security | BuyerAuthenticationFilter BuyerSecurityConfig |
- 由于项目比较复杂,为了达到简单高效的目的,第一步注释代码BuyerAuthenticationFilter,(不注释就算解开了权限,最后,还需要账户密码登陆,暂时没找到这个的登陆账号密码)
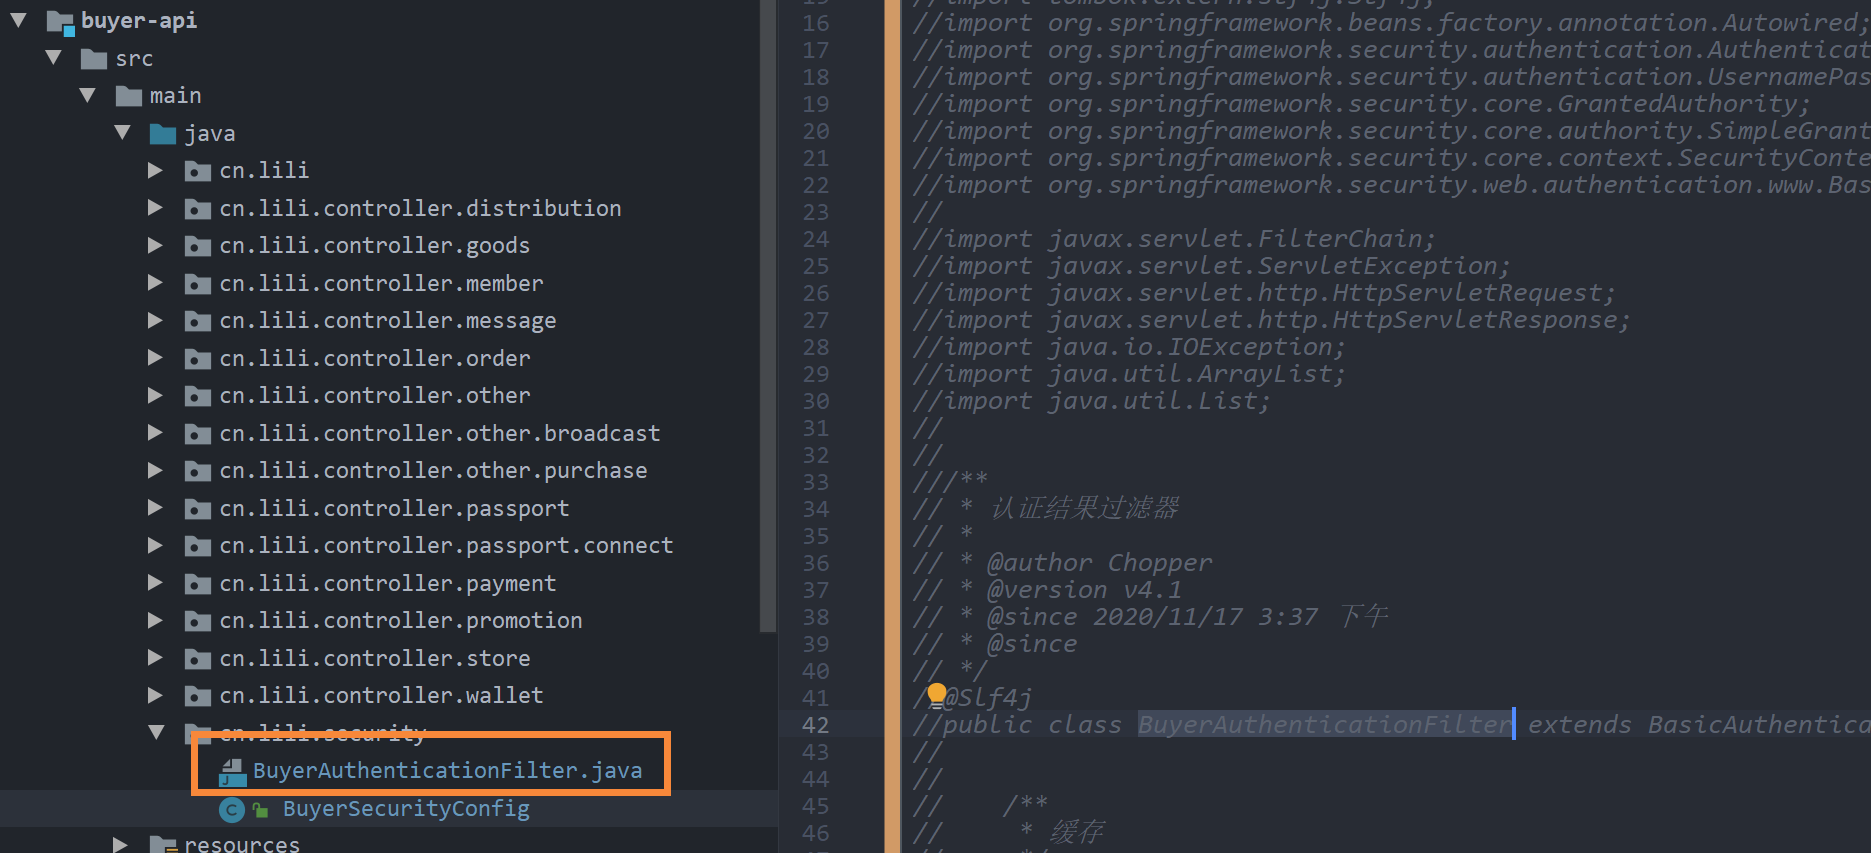
- 修改代码BuyerSecurityConfig,使其跟common-api下的权限一致.

package cn.lili.security;

import cn.lili.cache.Cache;

import cn.lili.common.security.CustomAccessDeniedHandler;

import cn.lili.common.utils.SpringContextUtil;

import cn.lili.common.properties.IgnoredUrlsProperties;

import lombok.extern.slf4j.Slf4j;

import org.springframework.beans.factory.annotation.Autowired;

import org.springframework.context.annotation.Configuration;

import org.springframework.security.config.annotation.method.configuration.EnableGlobalMethodSecurity;

import org.springframework.security.config.annotation.web.builders.HttpSecurity;

import org.springframework.security.config.annotation.web.configuration.WebSecurityConfigurerAdapter;

import org.springframework.security.config.annotation.web.configurers.ExpressionUrlAuthorizationConfigurer;

import org.springframework.security.config.http.SessionCreationPolicy;

import org.springframework.web.cors.CorsConfigurationSource;

/**

 * spring Security 核心配置类 Buyer安全配置中心

 *

 * @author Chopper

 * @version v4.0

 * @since 2020/11/14 16:20

 */

@Slf4j

@Configuration

@EnableGlobalMethodSecurity(prePostEnabled = true)

public class BuyerSecurityConfig extends WebSecurityConfigurerAdapter {

    /**

     * 忽略验权配置

     */

    @Autowired

    private IgnoredUrlsProperties ignoredUrlsProperties;

    /**

     * spring security -》 权限不足处理

     */

    @Autowired

    private CustomAccessDeniedHandler accessDeniedHandler;

    @Autowired

    private Cache<String> cache;

    @Autowired

    private CorsConfigurationSource corsConfigurationSource;

    @Override

    protected void configure(HttpSecurity http) throws Exception {

  // 注释这里的过滤权限代码

//        ExpressionUrlAuthorizationConfigurer<HttpSecurity>.ExpressionInterceptUrlRegistry registry = http

//                .authorizeRequests();

//        //配置的url 不需要授权

//        for (String url : ignoredUrlsProperties.getUrls()) {

//            registry.antMatchers(url).permitAll();

//        }

//        registry

//                .and()

//                //禁止网页iframe

//                .headers().frameOptions().disable()

//                .and()

//                .logout()

//                .permitAll()

//                .and()

//                .authorizeRequests()

//                //任何请求

//                .anyRequest()

//                //需要身份认证

//                .authenticated()

//                .and()

//                //允许跨域

//                .cors().configurationSource((CorsConfigurationSource) SpringContextUtil.getBean("corsConfigurationSource")).and()

//                //关闭跨站请求防护

//                .csrf().disable()

//                //前后端分离采用JWT 不需要session

//                .sessionManagement().sessionCreationPolicy(SessionCreationPolicy.STATELESS)

//                .and()

//                //自定义权限拒绝处理类

//                .exceptionHandling().accessDeniedHandler(accessDeniedHandler)

//                .and()

//                //添加JWT认证过滤器

//                .addFilter(new BuyerAuthenticationFilter(authenticationManager(), cache));

        // 粘贴这里的不需要权限访问代码

        ExpressionUrlAuthorizationConfigurer<HttpSecurity>.ExpressionInterceptUrlRegistry registry = http

                .authorizeRequests();

        registry

                .and()

                //禁止网页iframe

                .headers().frameOptions().disable()

                .and()

                .authorizeRequests()

                //任何请求

                .anyRequest()

                //需要身份认证

                .permitAll()

                .and()

                //允许跨域

                .cors().configurationSource(corsConfigurationSource).and()

                //关闭跨站请求防护

                .csrf().disable();

    }

}
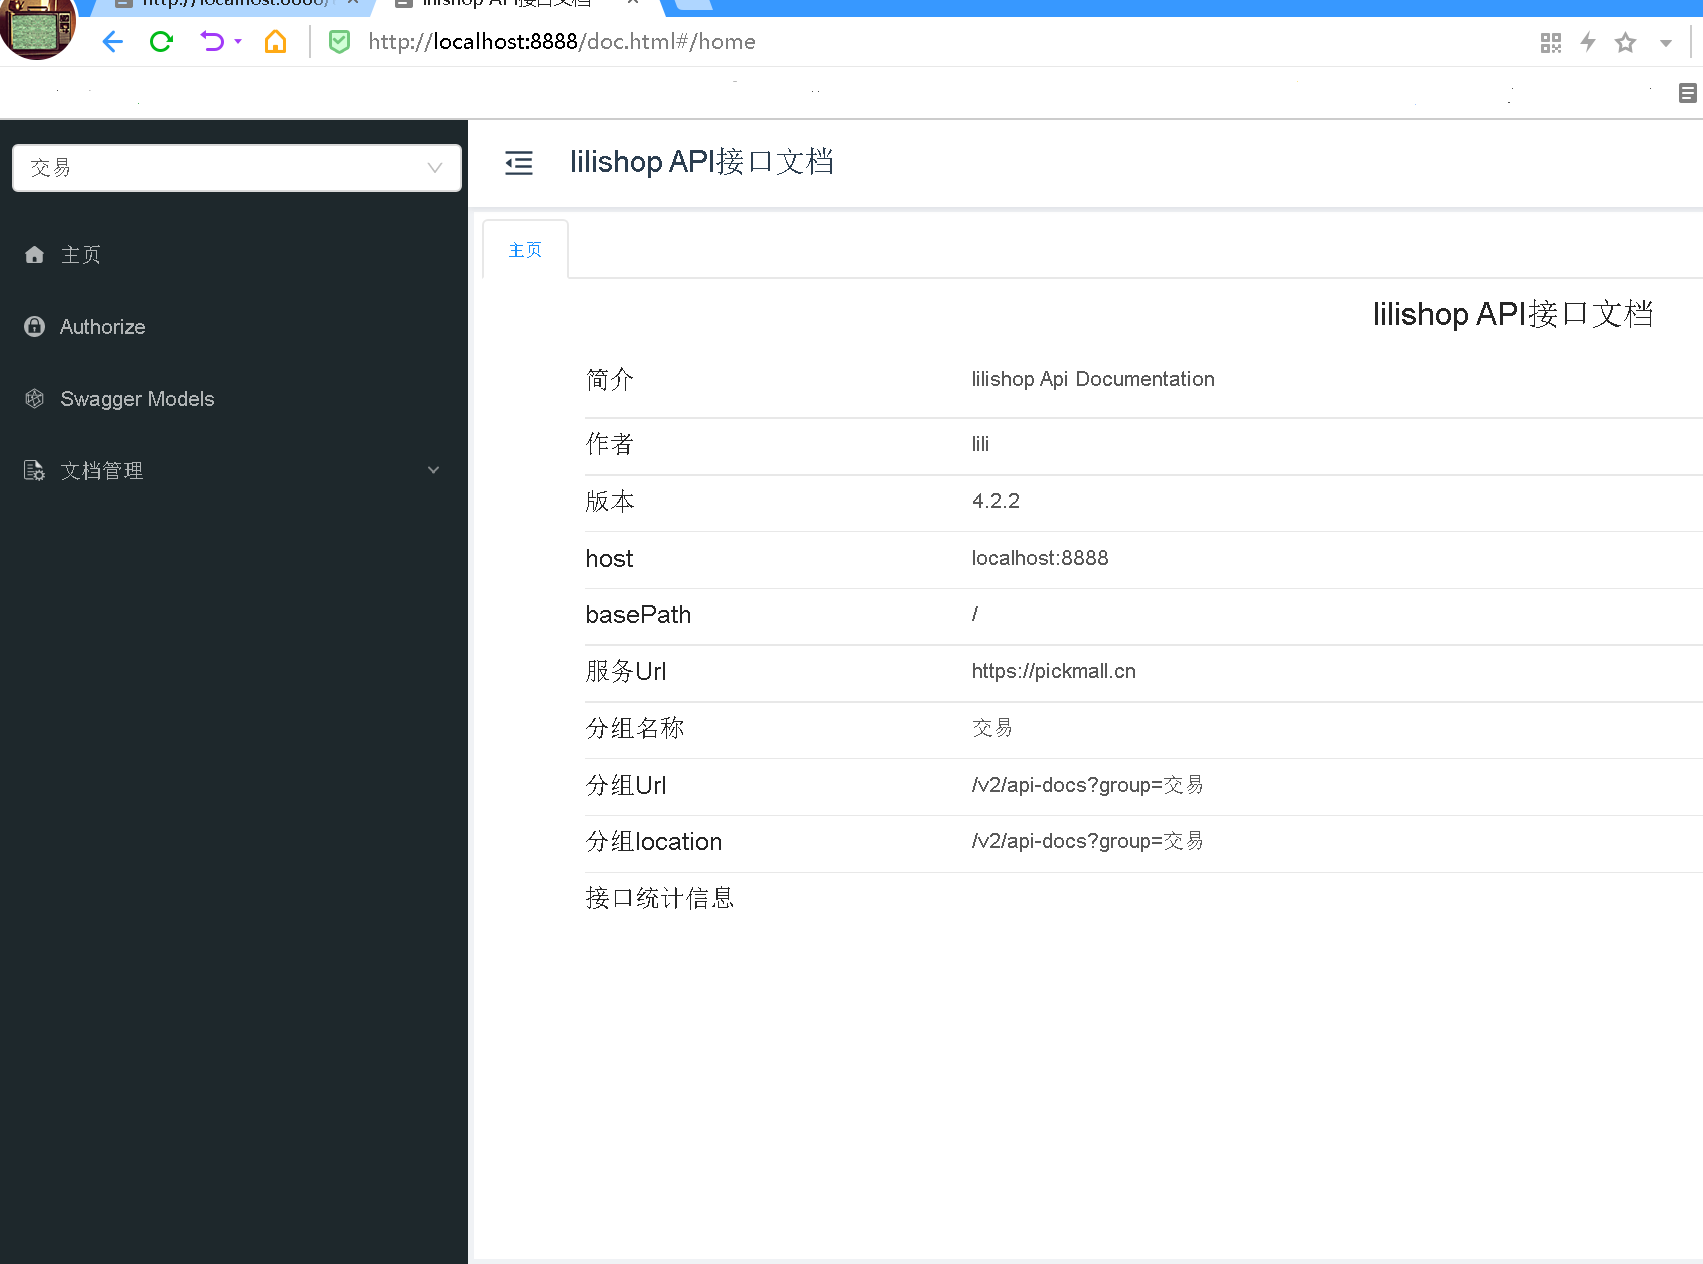
4.浏览器测试访问
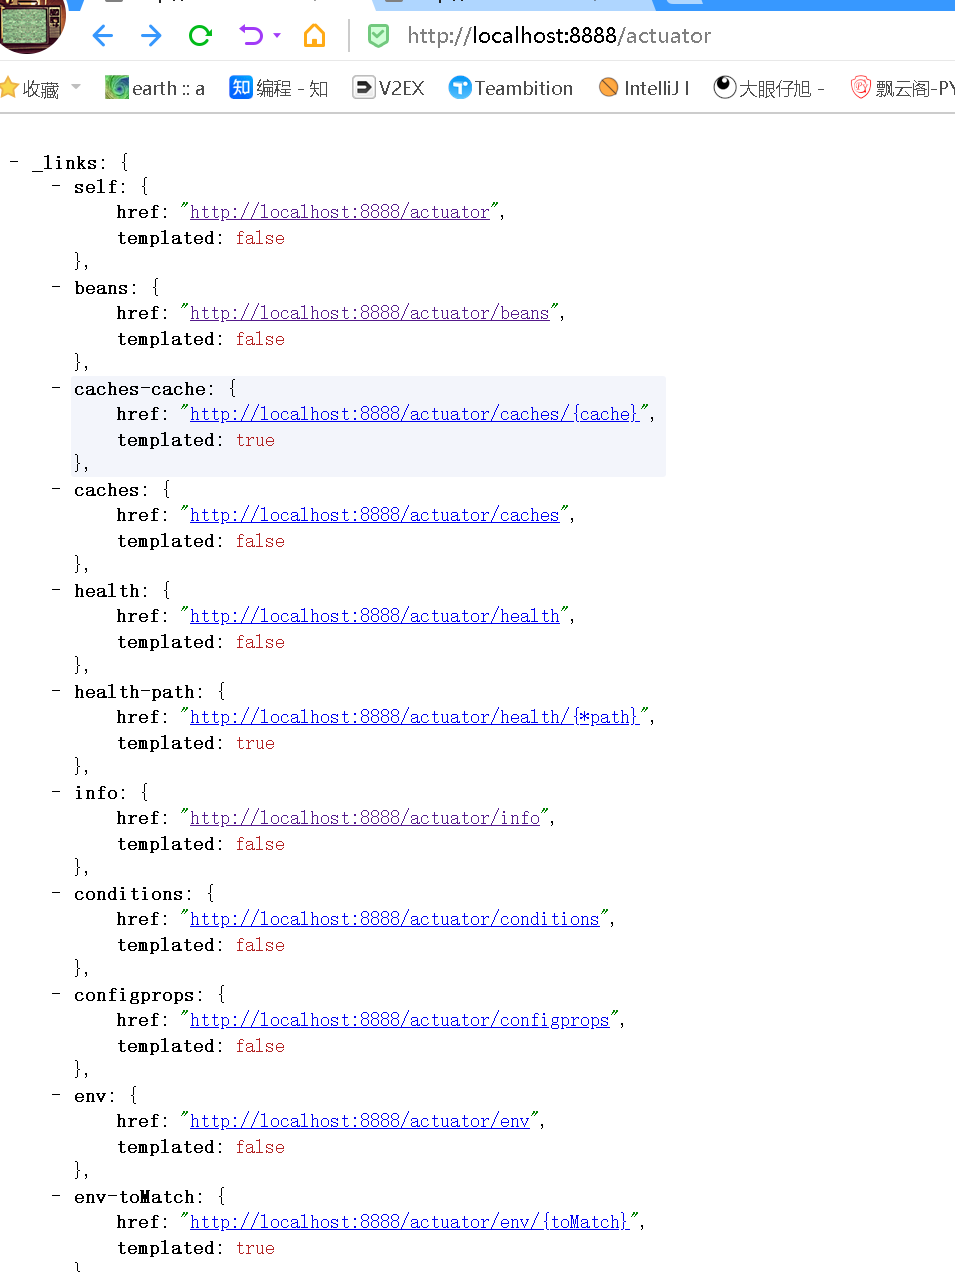

- http://localhost:8888/doc.html,这是knife4j特有的访问方式,这里没有配置文档和接口文档,所以,你也无法用这个进行测试,需要进行测试就要自己添加注释,详细的knife4j问题请看相关推荐.
5.其他需要修改模块
- 步骤与上述一样,本博主相信你可以自行修改成功,加油,看好你!
| 序号 | 名称 | 位置 | 文件名称 |
|---|---|---|---|
| 1 | admin | src/main/resources | application.yml |
| 2 | consumer | src/main/resources | application.yml |
| 3 | manager-api | src/main/resources | application.yml |
| 4 | seller-api | src/main/resources | application.yml |
六、参考文献
结语
呕心沥血,爆肝一个星期(需要写配置环境的文档,还要反复测试,以便为各位看官老爷提供最好的精品文章),希望点赞,收藏,评论,转发,您的支持就是本博主前进的动力,后期将推出完整部署文档,未完待续 .....
2022IDEA配置启动lilishop的swagger展示的更多相关文章
- windows下配置启动多个mysql服务
查找配置做下记录 先安装mysql5.6,安装不在介绍 接下来配置启动另一个mysql服务, 1:先到服务里停止在运行的mysql服务 2:到mysql的安装目录下(默认安装目录在c:\Program ...
- ibatis动态sql配置启动时提示:The content of elements must consist of well-formed character data...
ibatis动态sql配置启动时提示:The content of elements must consist of well-formed character data... 2012-07-18 ...
- 5.4.2 使用配置启动firefox
1.使用firefox的本地配置加载浏览器 使用本地配置加载浏览器,代码如下. 这样运行后,可以看到firebug等插件都已启动. 练习:假设做性能测试时,需要获取某个状况下的页面网络运行参数.要求完 ...
- spring boot之使用springfox swagger展示restful的api doc
摘要 springfox swagger展示restful的api doc, swagger is A POWERFUL INTERFACE TO YOUR API. 新增文件: import org ...
- HBase配置&启动脚本分析
本文档基于hbase-0.96.1.1-cdh5.0.2,对HBase配置&启动脚本进行分析 date:2016/8/4 author:wangxl HBase配置&启动脚本分析 剔除 ...
- Spark配置&启动脚本分析
本文档基于Spark2.0,对spark启动脚本进行分析. date:2016/8/3 author:wangxl Spark配置&启动脚本分析 我们主要关注3类文件,配置文件,启动脚本文件以 ...
- Windows 用bat脚本带配置启动redis,并用vb脚本使其在后台运行。
最近,在Windows上用开发PHP程序,需要用到Redis,每天要打开一个运行redis-server.exe的窗口这样比较烦,因为窗口就一直打开着,不能关闭. 所以就想着通过写脚本的方式,让他在后 ...
- Hadoop 历史服务配置启动查看
历史服务配置启动查看 1)配置mapred-site.xml <property> <name>mapreduce.jobhistory.address</name> ...
- 马士兵hadoop第四课:Yarn和Map/Reduce配置启动和原理讲解
马士兵hadoop第一课:虚拟机搭建和安装hadoop及启动 马士兵hadoop第二课:hdfs集群集中管理和hadoop文件操作 马士兵hadoop第三课:java开发hdfs 马士兵hadoop第 ...
随机推荐
- Solution -「Gym 102759I」Query On A Tree 17
\(\mathcal{Description}\) Link. 给定一棵含 \(n\) 个结点的树,结点 \(1\) 为根,点 \(u\) 初始有点权 \(a_u=0\),维护 \(q\) 次 ...
- NTFS格式下的Alternate Data Streams
今天我写点NTFS的交换数据流以及其带来的安全问题(Alternate Data Stream/ADS) =============================================== ...
- Linux CentOS 搭建SVN并用钩子自动实现同步到Web目录
linux安装配置SVN并设置钩子 安装说明 系统环境:CentOS-6.3安装方式:yum install (源码安装容易产生版本兼容的问题)安装软件:系统自动下载SVN软件 检查已安装版本 # ...
- JMM之synchronized关键字
对于通讯,涉及两个关键字volatile和synchronized: Java支持多个线程同时访问一个对象或者对象的成员变量,由于每个线程可以拥有这个变量的拷贝(虽然对象及其成员变量分配的内存实在共享 ...
- [LeetCode]1431. 拥有最多糖果的孩子
给你一个数组 candies 和一个整数 extraCandies ,其中 candies[i] 代表第 i 个孩子拥有的糖果数目. 对每一个孩子,检查是否存在一种方案,将额外的 extraCandi ...
- pycharm创建模板
用pycharm构造作者模板 模板,就是创建一个文件时自动生成模板内容. 这里用pycharm创建作者模板,步骤如下: File-->Settings Editor-->File and ...
- 【C#表达式树 开篇】 Expression Tree - 动态语言
.NET 3.5中新增的表达式树(Expression Tree)特性,第一次在.NET平台中引入了"逻辑即数据"的概念.也就是说,我们可以在代码里使用高级语言的形式编写一段逻辑, ...
- C语言do-while语句
"直到"型 (do-while) 语句的特点: 先执行循环,然后判断条件是否成立.
- 「BUAA OO Unit 1 HW1」面向测试小白的简易评测机
「BUAA OO Unit 1 HW1」面向测试小白的简易评测机 声明:本评测机所使用数据生成来自郭鸿宇同学,这对本评测机非常重要 目录 「BUAA OO Unit 1 HW1」面向测试小白的简易评测 ...
- QT:MYSQL driver not loaded解决方法
0.参考(按对本人帮助从高到低排列) Qt5.14.1 如何编译和使用mysql和mariadb数据库驱动 (15条消息) QMYSQL driver not loaded 的原理和解决办法_m158 ...