第六章:声明式服务调用:Spring Cloud Feign
Spring Cloud Feign 是基于 Netflix Feign 实现的,整合了 Spring Cloud Ribbon 和 Spring Cloud Hystrix,除了提供这两者的强大功能之外,还提供了一种声明式的 Web 服务客户端定义方式。
快速入门
- 首先,创建一个 Spring Boot 基础工程,取名为 feign-consumer,并在 pom.xml 中引入 spring-cloud-starter-eureka 和 spring-cloud-starter-feign 依赖。具体内容如下:
<?xml version="1.0" encoding="UTF-8"?>

<project xmlns="http://maven.apache.org/POM/4.0.0" xmlns:xsi="http://www.w3.org/2001/XMLSchema-instance"

    xsi:schemaLocation="http://maven.apache.org/POM/4.0.0 http://maven.apache.org/xsd/maven-4.0.0.xsd">

    <modelVersion>4.0.0</modelVersion>

    <groupId>com.example</groupId>

    <artifactId>feign-consumer</artifactId>

    <version>0.0.1-SNAPSHOT</version>

    <packaging>jar</packaging>

    <name>feign-consumer</name>

    <description>Demo project for Spring Boot</description>

    <parent>

        <groupId>org.springframework.boot</groupId>

        <artifactId>spring-boot-starter-parent</artifactId>

        <version>1.5.6.RELEASE</version>

        <relativePath/> <!-- lookup parent from repository -->

    </parent>

    <properties>

        <project.build.sourceEncoding>UTF-8</project.build.sourceEncoding>

        <project.reporting.outputEncoding>UTF-8</project.reporting.outputEncoding>

        <java.version>1.8</java.version>

        <spring-cloud.version>Dalston.SR2</spring-cloud.version>

    </properties>

    <dependencies>

        <dependency>

            <groupId>org.springframework.boot</groupId>

            <artifactId>spring-boot-starter-web</artifactId>

        </dependency>

        <dependency>

            <groupId>org.springframework.cloud</groupId>

            <artifactId>spring-cloud-starter-eureka</artifactId>

        </dependency>

        <dependency>

            <groupId>org.springframework.cloud</groupId>

            <artifactId>spring-cloud-starter-feign</artifactId>

        </dependency>

        <dependency>

            <groupId>org.springframework.boot</groupId>

            <artifactId>spring-boot-starter-test</artifactId>

            <scope>test</scope>

        </dependency>

    </dependencies>

    <dependencyManagement>

        <dependencies>

            <dependency>

                <groupId>org.springframework.cloud</groupId>

                <artifactId>spring-cloud-dependencies</artifactId>

                <version>${spring-cloud.version}</version>

                <type>pom</type>

                <scope>import</scope>

            </dependency>

        </dependencies>

    </dependencyManagement>

    <build>

        <plugins>

            <plugin>

                <groupId>org.springframework.boot</groupId>

                <artifactId>spring-boot-maven-plugin</artifactId>

            </plugin>

        </plugins>

    </build>

</project>
- 在主类上通过 @EnableFeignClients 注解开启 Spring Cloud Feign 的支持功能。
package com.example.demo;

import org.springframework.boot.SpringApplication;

import org.springframework.boot.autoconfigure.SpringBootApplication;

import org.springframework.cloud.client.discovery.EnableDiscoveryClient;

import org.springframework.cloud.netflix.feign.EnableFeignClients;

@SpringBootApplication

@EnableDiscoveryClient

@EnableFeignClients

public class FeignConsumerApplication {

    public static void main(String[] args) {

        SpringApplication.run(FeignConsumerApplication.class, args);

    }

}
- 定义 HelloService 接口,通过 @FeignClient 注解指定服务名来绑定服务,然后再使用 Spring MVC 的注解来绑定具体该服务提供的 REST 接口。
@FeignClient(value = "hello-service")

public interface HelloService {

    @RequestMapping(value = "/index")

    String hello();

}
注意:此处服务名不区分大小写,hello-service 和 HELLO-SERVICE 都可以使用。
- 接着,创建一个 ConsumerController 来实现对 Feign 客户端的调用。使用 @Autowired 直接注入上面定义的 HelloService 实例,并在 helloConsumer 函数中调用这个绑定了 hello-service 服务接口的客户端来向该服务发起 /index 接口的调用。
package com.example.demo.controller;

import com.example.demo.service.HelloService;

import org.springframework.beans.factory.annotation.Autowired;

import org.springframework.web.bind.annotation.RequestMapping;

import org.springframework.web.bind.annotation.RequestMethod;

import org.springframework.web.bind.annotation.RestController;

/**

 * @author lxx

 * @version V1.0.0

 * @date 2017-8-16

 */

@RestController

public class ConsumerController {

    @Autowired

    HelloService helloService;

    @RequestMapping(value = "feign-consumer", method = RequestMethod.GET)

    public String helloConsumer(){

        return helloService.hello();

    }

}
- 最后,同Ribbon实现的服务消费者一样,需要在 application.properties 中指定注册中心,并定义自身的服务名为 feign-consumer,为了方便本地调试与之前的 Ribbon 消费者的区分,端口使用 9991.
spring.application.name=feign-consumer

server.port=9991

eureka.client.service-url.defaultZone=http://localhost:8082/eureka/
测试验证
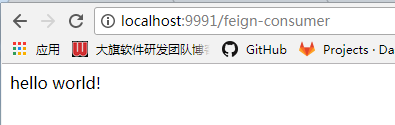
和Ribbon实现时一样,启动 eureka-server 和 两个hello-service,然后启动 feign-consumer,发送请求到 http://localhost:9991/feign-consumer,正确返回。与 Ribbon 不同的是,通过 Feign 我们只需定义服务绑定接口,以声明式的方法,优雅而简单地实现了服务调用。
参数绑定
上面介绍了一个不带参数的 REST 服务绑定。然而实际系统中的各种业务接口要复杂的多,我们会在 HTTP 的各个位置传入不同类型的参数,并且在返回请求响应的时候也可能是一个复杂的对象结构。
在开始介绍 Spring Cloud Feign 的参数绑定之前,先扩展一下服务提供方 hello-service 。增加下面这些接口定义,其中包含带有 Request 参数的请求、带有 Header 信息的请求、带有 RequestBody 的请求以及请求响应体中是一个对象的请求。
package com.example.demo.web;

import org.apache.log4j.Logger;

import org.springframework.beans.factory.annotation.Autowired;

import org.springframework.cloud.client.ServiceInstance;

import org.springframework.cloud.client.discovery.DiscoveryClient;

import org.springframework.web.bind.annotation.*;

import java.util.Random;

/**

 * @author lxx

 * @version V1.0.0

 * @date 2017-8-9

 */

@RestController

public class HelloController {

    private final Logger logger = Logger.getLogger(getClass());

    @Autowired

    private DiscoveryClient client;

    @RequestMapping(value = "/index")

    public String index(){

        ServiceInstance instance = client.getLocalServiceInstance();

        // 让处理线程等待几秒钟

        int sleepTime = new Random().nextInt(3000);

        logger.info("sleepTime:"+sleepTime);

        try {

            Thread.sleep(sleepTime);

        } catch (InterruptedException e) {

            e.printStackTrace();

        }

        logger.info("/hello:host:"+instance.getHost()+" port:"+instance.getPort()

                +" service_id:"+instance.getServiceId());

        return "hello world!";

    }

    @RequestMapping(value = "/hello1", method = RequestMethod.GET)

    public String hello1(@RequestParam String name){

        return "HELLO " + name;

    }

    @RequestMapping(value = "/hello2", method = RequestMethod.GET)

    public User hello2(@RequestHeader String name, @RequestHeader Integer age){

        return new User(name, age);

    }

    @RequestMapping(value = "/hello3", method = RequestMethod.POST)

    public String hello3(@RequestBody User user){

        return "HELLO," + user.getName()+","+user.getAge();

    }

}
User 对象的定义如下,需要注意,这里必须要有User 的默认构造函数。不然,Spring Cloud Feign 根据 JSON 字符串转换 User 对象会抛出异常。
package com.example.demo.web;

/**

 * @author lxx

 * @version V1.0.0

 * @date 2017-8-16

 */

public class User {

    private String name;

    private Integer age;

    public User() {

    }

    public User(String name, Integer age) {

        this.name = name;

        this.age = age;

    }

    public String getName() {

        return name;

    }

    public void setName(String name) {

        this.name = name;

    }

    public Integer getAge() {

        return age;

    }

    public void setAge(Integer age) {

        this.age = age;

    }

    @Override

    public String toString() {

        return "User{" +

                "name='" + name + '\'' +

                ", age=" + age +

                '}';

    }

}
完成对 hello-service 的改造之后,在 feign-consumer 应用中实现这些新增的请求的绑定。
- 首先,在 feign-consumer 中创建与上面一样的 User 类。
- 然后,在 HelloService 接口中增加对上述三个新增接口的绑定声明,修改后,完成的HelloService 接口如下所示:
package com.example.demo.service;

import com.example.demo.entity.User;

import org.springframework.cloud.netflix.feign.FeignClient;

import org.springframework.web.bind.annotation.*;

/**

 * @author lxx

 * @version V1.0.0

 * @date 2017-8-16

 */

@FeignClient(value = "hello-service")

public interface HelloService {

    @RequestMapping(value = "/index")

    String hello();

    @RequestMapping(value = "/hello1", method = RequestMethod.GET)

    String hello1(@RequestParam(value = "name") String name);

    @RequestMapping(value = "/hello2", method = RequestMethod.GET)

    User hello2(@RequestParam(value = "name") String name, @RequestHeader(value = "age") Integer age);

    @RequestMapping(value = "/hello3", method = RequestMethod.POST)

    String hello3(@RequestBody User user);

}
注意:在参数绑定时,@RequestParam、@RequestHeader等可以指定参数名称的注解,他们的 value 不能少。在 Spring MVC 中,这些注解会根据参数名来作为默认值,但是在 Feign 中绑定参数必须通过 value 属性来指明具体的参数名,不然会抛出异常 IllegalStateException ,value 属性不能为空。
- 最后,在 ConsumerController 中新增一个 /feign-consumer2 接口,来对本节新增的声明接口进行调用,修改后的完整代码如下所示:
package com.example.demo.controller;

import com.example.demo.entity.User;

import com.example.demo.service.HelloService;

import org.springframework.beans.factory.annotation.Autowired;

import org.springframework.web.bind.annotation.RequestMapping;

import org.springframework.web.bind.annotation.RequestMethod;

import org.springframework.web.bind.annotation.RestController;

/**

 * @author lxx

 * @version V1.0.0

 * @date 2017-8-16

 */

@RestController

public class ConsumerController {

    @Autowired

    HelloService helloService;

    @RequestMapping(value = "feign-consumer", method = RequestMethod.GET)

    public String helloConsumer(){

        return helloService.hello();

    }

    @RequestMapping(value = "/feign-consumer2", method = RequestMethod.GET)

    public String helloConsumer2(){

        StringBuilder sb = new StringBuilder();

        sb.append(helloService.hello1("didi")).append("\n");

        sb.append(helloService.hello2("didi", 18)).append("\n");

        sb.append(helloService.hello3(new User("didi", 20))).append("\n");

        return sb.toString();

    }

}
测试验证
改造之后,启动服务注册中心、两个hello-service服务以及改造之后的 feign-consumer。通过发送请求到 http://localhost:9991/feign-consumer2 ,触发 HelloService 对新增接口的调用,获取如下输出:

继承特性
通过上述的实践可以发现,当使用 Spring MVC 的注解绑定服务接口时,几乎可以从服务提供方的 Controller 中依靠复制操作,构建出相应的服务客户端绑定接口。既然存在那么多复制操作,自然需要考虑这部分内容是否可以得到进一步的抽象。在 Spring Cloud Feign 中,针对该问题提供了继承特性来帮助我们解决这些复制操作,以进一步减少编码量。下面,详细看看如何通过 Spring Cloud Feign 的继承特性来实现 REST 接口定义的复用。
- 为了能够复用 DTO 与接口定义,我们先创建一个基础的 Maven 工程,命名为 hello-service-api。
- 由于在 hello-service-api 中需要定义可同时复用于服务端与客户端的接口,我们要使用到 Spring MVC 的注解,所以在 pom.xml 中引入 spring-boot-starter-web 依赖,具体内容如下所示:
<?xml version="1.0" encoding="UTF-8"?>

<project xmlns="http://maven.apache.org/POM/4.0.0" xmlns:xsi="http://www.w3.org/2001/XMLSchema-instance"

    xsi:schemaLocation="http://maven.apache.org/POM/4.0.0 http://maven.apache.org/xsd/maven-4.0.0.xsd">

    <modelVersion>4.0.0</modelVersion>

    <groupId>com.example</groupId>

    <artifactId>hello-service-api</artifactId>

    <version>0.0.1-SNAPSHOT</version>

    <packaging>jar</packaging>

    <name>hello-service-api</name>

    <description>Demo project for Spring Boot</description>

    <parent>

        <groupId>org.springframework.boot</groupId>

        <artifactId>spring-boot-starter-parent</artifactId>

        <version>1.5.6.RELEASE</version>

        <relativePath/> <!-- lookup parent from repository -->

    </parent>

    <properties>

        <project.build.sourceEncoding>UTF-8</project.build.sourceEncoding>

        <project.reporting.outputEncoding>UTF-8</project.reporting.outputEncoding>

        <java.version>1.8</java.version>

    </properties>

    <dependencies>

        <dependency>

            <groupId>org.springframework.boot</groupId>

            <artifactId>spring-boot-starter-web</artifactId>

        </dependency>

        <dependency>

            <groupId>org.springframework.boot</groupId>

            <artifactId>spring-boot-starter-test</artifactId>

            <scope>test</scope>

        </dependency>

    </dependencies>

    <build>

        <plugins>

            <plugin>

                <groupId>org.springframework.boot</groupId>

                <artifactId>spring-boot-maven-plugin</artifactId>

            </plugin>

        </plugins>

    </build>

</project>
- 将上一节中实现的 User 对象复制到 hello-service-api 工程中。
- 在 hello-service-api 工程中创建 HelloService 接口,内容如下,该接口中的 User 对象为本项目中添加的 User。
package com.example.demo.service;

import com.example.demo.entity.User;

import org.springframework.web.bind.annotation.*;

/**

 * @author lxx

 * @version V1.0.0

 * @date 2017-8-16

 */

@RequestMapping(value = "/refactor")

public interface HelloService {

    @RequestMapping(value = "/hello4", method = RequestMethod.GET)

    String hello4(@RequestParam(value = "name") String name);

    @RequestMapping(value = "/hello5", method = RequestMethod.GET)

    User hello5(@RequestHeader(value = "name") String name, @RequestHeader(value = "age") Integer age);

    @RequestMapping(value = "/hello6", method = RequestMethod.POST)

    String hello6(@RequestBody User user);

}
因为后续还会通过之前的hello-service 和 feign-consumer 来重构,为了避免接口混淆,在这里定义 HelloService 时,除了头部定义了 /refactor 前缀之外,同时将提供服务的三个接口更名为 hello4、hello5、hello6.
以上操作完成后,执行命令 mvn install 将该模块构建到本地仓库。
- 下面对 hello-service 进行重构,在 pom.xml 的 dependency 节点中,新增对 hello-service-api 的依赖。
<dependency>

    <groupId>com.example</groupId>

    <artifactId>hello-service-api</artifactId>

    <version>0.0.1-SNAPSHOT</version>

</dependency>
- 创建 RefactorHelloController 类实现 hello-service-api 中定义的 HelloService 接口,并参考之前的 HelloController 来实现这三个接口,具体内容如下:
package com.example.demo.web;

import entity.*;

import entity.User;

import org.springframework.web.bind.annotation.RequestBody;

import org.springframework.web.bind.annotation.RequestHeader;

import org.springframework.web.bind.annotation.RequestParam;

import org.springframework.web.bind.annotation.RestController;

import service.HelloService;

/**

 * @author lxx

 * @version V1.0.0

 * @date 2017-8-16

 */

@RestController

public class RefactorHelloController implements HelloService {

    @Override

    public String hello4(@RequestParam(value = "name") String name) {

        return "HELLO " + name;

    }

    @Override

    public User hello5(@RequestHeader(value = "name") String name, @RequestHeader(value = "age") Integer age) {

        return new User(name, age);

    }

    @Override

    public String hello6(@RequestBody User user) {

        return "HELLO," + user.getName()+","+user.getAge();

    }

}
- 完成了服务提供者的重构,接下来在服务消费者 feign-consumer 的 pom.xml 文件中,如在服务提供者一样,新增对 hello-service-api 的依赖。
- 创建 RefactorHelloService 接口,并继承 hello-service-api 包中的 HelloService 接口,然后添加 @FeignClient 注解来绑定服务。(不能正常引用,先跳过)
第六章:声明式服务调用:Spring Cloud Feign的更多相关文章
- 第六章 声明式服务调用: Spring Cloud Feign
我们在使用 Spring Cloud Ribbon 时, 通常都会利用它对 RestTemplate 的请求拦截来实现对依赖服务的接口调用, 而 RestTemplate 已经实现了对 HTTP 请求 ...
- SpringCloud---声明式服务调用---Spring Cloud Feign
1.概述 1.1 Spring Cloud Ribbon.Spring Cloud Hystrix的使用几乎是同时出现的,Spring Cloud提供了一个更高层次的封装这2个工具类框架:Spring ...
- spring cloud 系列第4篇 —— feign 声明式服务调用 (F版本)
源码Gitub地址:https://github.com/heibaiying/spring-samples-for-all 一.feign 简介 在上一个用例中,我们使用ribbon+restTem ...
- Spring Cloud Feign声明式服务调用(转载)+遇到的问题
转载:原文 总结: 1.pom添加依赖 2.application中填写正确的eureka配置 3.启动项中增加注解 @EnableFeignClients 4.填写正确的调用接口 通过原文使用Fei ...
- Spring Cloud 2-Feign 声明式服务调用(三)
Spring Cloud Feign 1. pom.xml 2. application.yml 3. Application.java 4. Client.java 简化RestTemplate调 ...
- Spring Cloud Feign 声明式服务调用
目录 一.Feign是什么? 二.Feign的快速搭建 三.Feign的几种姿态 参数绑定 继承特性 四.其他配置 Ribbon 配置 Hystrix 配置 一.Feign是什么? 通过对前面Sp ...
- Spring Cloud Eureka 分布式开发之服务注册中心、负载均衡、声明式服务调用实现
介绍 本示例主要介绍 Spring Cloud 系列中的 Eureka,使你能快速上手负载均衡.声明式服务.服务注册中心等 Eureka Server Eureka 是 Netflix 的子模块,它是 ...
- 声明式服务调用:Spring Cloud Feign
最近在学习Spring Cloud的知识,现将声明式服务调用:Spring Cloud Feign 的相关知识笔记整理如下.[采用 oneNote格式排版]
- SpringCloud系列-利用Feign实现声明式服务调用
上一篇文章<手把手带你利用Ribbon实现客户端的负载均衡>介绍了消费者通过Ribbon调用服务实现负载均衡的过程,里面所需要的参数需要在请求的URL中进行拼接,但是参数太多会导致拼接字符 ...
- SpringCloud 源码系列(6)—— 声明式服务调用 Feign
SpringCloud 源码系列(1)-- 注册中心 Eureka(上) SpringCloud 源码系列(2)-- 注册中心 Eureka(中) SpringCloud 源码系列(3)-- 注册中心 ...
随机推荐
- 【收藏】UICrawler
基于 Appium 的 App UI 遍历 & Monkey 工具 (支持操作步骤回放) UICrawler https://github.com/lgxqf/UICrawler 基于Appi ...
- 微擎开发------day02
基本要素: 微擎系统数据库操作使用PDO兼容方式,参数绑定进行查询操作 (1) 数据表加上表前缀 $sql = "select * from ".tablename('users ...
- node.js中 express + multer 处理文件上传
multer中间件,可以很方便的结合express处理用户表单上传的文件. 一.安装multer npm install multer 二.处理单个文件上传 const express = requi ...
- $.fn.extend() 问:我来这个世上到底是干嘛的?
好好好 乖 本宝宝来告诉你 你来是干嘛的啊~ 话不多说 直接上码 当然如下代码是在jquery环境下运行的 HTML JS 完事~~~ 当你点击div元素的时候 你会发现弹出来“我被单击了”这句 ...
- linearlayout 中ImageView 居中等问题
linearlayout 下的子控件使用android:layout_gravity=”center” 控件居左,没有达到居中的效果, 父窗体只能指定一种控件摆放方向 横向还是竖向 下面我弄了三个 ...
- 6C - 开门人和关门人
每天第一个到机房的人要把门打开,最后一个离开的人要把门关好.现有一堆杂乱的机房签 到.签离记录,请根据记录找出当天开门和关门的人. Input 测试输入的第一行给出记录的总天数N ( > 0 ...
- spring深入学习(五)-----spring dao、事务管理
访问数据库基本是所有java web项目必备的,不论是oracle.mysql,或者是nosql,肯定需要和数据库打交道.一开始学java的时候,肯定是以jdbc为基础,如下: private sta ...
- CSS Grid
效果图如上所示 <!DOCTYPE html> <html> <head> <title>练习</title> </head> ...
- C++基础笔记(string截取)
#include <iostream> #include <string> using namespace std; int main(int argc, char* argv ...
- tab下图片要求
下面是每个tab的属性: 属性 类型 必填 说明 pagePath String 是 页面路径,必须在pages中先定义 text String 是 tab上按钮文字 iconPath String ...