kickstart ---无人值守安装
kickstart 实战
http://man.linuxde.net/download/CentOS_6_9镜像
安装:
关闭防火墙
且在编辑虚拟网络的vnet8中要取消使用本地dhcp项
1.yum -y install dhcp
[root@centos6 ~ ]#vim /etc/dhcp/dhcpd.conf
#
# DHCP Server Configuration file.
# see /usr/share/doc/dhcp*/dhcpd.conf.sample
# see 'man 5 dhcpd.conf'
#
subnet 192.168.5.0 netmask 255.255.255.0 {
range 192.168.5.100 192.168.5.120;
option routers 192.168.5.1;
option subnet-mask 255.255.255.0;
default-lease-time 21600;
max-lease-time 43200;
next-server 192.168.5.103;
filename "/pxelinux.0";
}
[root@centos6 ~ ]#vim /etc/sysconfig/dhcpd
# Command line options here
DHCPDARGS=eth0
[root@centos6 ~ ]#/etc/init.d/dhcpd start
2.[root@centos6 ~ ]#yum -y install tftp-server
[root@centos6 ~ ]#cat -n /etc/xinetd.d/tftp
14 disable = yes
只改第14行的yes为no
[root@centos6 ~ ]#sed -i '14s%yes%no%' /etc/xinetd.d/tftp
[root@centos6 ~ ]#/etc/init.d/xinetd restart
Stopping xinetd: [FAILED]
Starting xinetd: [ OK
3.[root@centos6 ~ ]#yum install httpd -y
[root@centos6 ~ ]#grep -n ServerName /etc/httpd/conf/httpd.conf
265:# ServerName gives the name and port that the server uses to identify itself.
276:#ServerName www.example.com:80
283:# ServerName directive.
1006:# ServerName dummy-host.example.com
在277行插入一条如下
[root@centos6 ~ ]#sed -i "277i ServerName 127.0.0.1:80" /etc/httpd/conf/httpd.conf
[root@centos6 ~ ]#/etc/init.d/httpd start
[root@centos6 ~ ]#netstat -tunlp|grep 80
tcp 0 0 :::80 :::* LISTEN 9474/nginx
看上面是80端口的里程起不来,那看一下进程号,原来是被nginx占用了,直接杀掉该进程号
[root@centos6 ~ ]#kill 9474
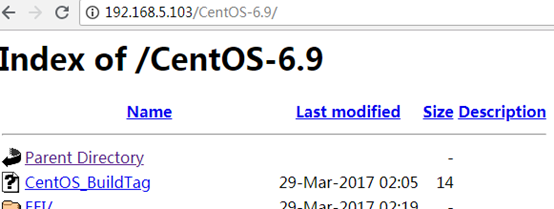
[root@centos6 ~ ]#mkdir /var/www/html/CentOS-6.9
[root@centos6 ~ ]#mount /dev/cdrom /var/www/html/CentOS-6.9
在浏览器输入ip/并刚才挂载的目录名,效果如下图
4.安装启动引导程序/及pxe引导配置
[root@centos6 ~ ]#yum -y install syslinux
[root@centos6 ~ ]#cp /usr/share/syslinux/pxelinux.0 /var/lib/tftpboot/(tftp根目
把菜单(启动相关的程序)复制过去
[root@centos6 ~ ]#cp -a /var/www/html/CentOS-6.9/isolinux/* /var/lib/tftpboot/
新建pxelinux.cfg目录,存放客户端配置文件
[root@centos6 ~ ]#mkdir -p /var/lib/tftpboot/pxelinux.cfg
[root@centos6 ~ ]#cp /var/www/html/CentOS-6.9/isolinux/isolinux.cfg /var/lib/tftpboot/pxelinux.cfg/default
如果你想用网络安装方式,那么此时就可以安装了(不要挂载镜像)
5.pxe配置文件default解析
6.创建自动应答文件ks.cfg
[root@centos6 ~ ]# grub-crypt
Password:181818
Retype password:181818
$6$X20eRtuZhkHznTb4$dK0BJByOSAWSDD8jccLVFz0CscijS9ldMWwpoCw/ZEjYw2BTQYGWlgKsn945fFTjRC658UXjuocwJbAjVI5D6/
[root@centos6 ~ ]#mkdir /var/www/html/ks_config
# Kickstart Configurator for CentOS 6.7 by yao zhang
[root@centos6 ~ ]#vim /var/www/html/ks_config/CentOS-6.9-ks.cfg
install
url --url="http://192.168.5.103/CentOS-6.9/"
text
lang en_US.UTF-8
keyboard us
zerombr
bootloader --location=mbr --driveorder=sda --append="crashkernel=auto rhgb qui
et"
network --bootproto=dhcp --device=eth0 --onboot=yes --noipv6 --hostname=CentOS
6
timezone --utc Asia/Shanghai
authconfig --enableshadow --passalgo=sha512
rootpw --iscrypted $6$X20eRtuZhkHznTb4$dK0BJByOSAWSDD8jccLVFz0CscijS9ldMWwpoC
w/ZEjYw2BTQYGWlgKsn945fFTjRC658UXjuocwJbAjVI5D6/
clearpart --all --initlabel
part /boot --fstype=ext4 --asprimary --size=200
part swap --size=1024
part / --fstype=ext4 --grow --asprimary --size=200
firstboot --disable
selinux --disabled
firewall --disabled
logging --level=info
reboot
%packages
@base
@compat-libraries
@debugging
@development
tree
nmap
sysstat
lrzsz
dos2unix
telnet
%post
wget -O /tmp/optimization.sh http://192.168.5.103/ks_config/optimization.sh &>
/dev/null
/bin/sh /tmp/optimization.sh
%end
7.开机优化脚本
[root@centos6 ~ ]#vim /var/www/html/ks_config/optimization.sh
#!/bin/bash
##############################################################
# File Name: /var/www/html/ks_config/optimization.sh
# Version: V1.0
# Author: yao zhang
# Organization: www.zyops.com
# Created Time : 2015-12-03 15:23:08
# Description: Linux system initialization
##############################################################
./etc/init.d/functions
Ip=192.168.5.103
Port=80
ConfigDir=ks_config
# Judge Http server is ok?
# Defined result function
function Msg(){
if [ $? -eq 0 ];then
action "$1" /bin/true
else
action "$1" /bin/false
fi
}
# Defined IP function
function ConfigIP(){
Suffix=`ifconfig eth0 |awk -F"[ .]+" 'NR==2 {print $6}'`
cat >/etc/sysconfig/network-scripts/ifcfg-eth0 <<-END
DEVICE=eth0
TYPE=Ethernet
ONBOOT=yes
NM_CONTROLLED=yes
BOOTPROTO=none
IPADDR=10.0.0.$Suffix
PREFIX=24
GATEWAY=10.0.0.2
DNS1=10.0.0.2
DEFROUTE=yes
IPV4_FAILURE_FATAL=yes
IPV6INIT=no
NAME="System eth0"
END
Msg "config eth0"
}
# Defined Yum source Functions
Msg "YUM source"
#Defined add Ordinary users Functions
function AddUser(){
useradd hua &> /dev/null &&\
echo "181818"|passwd --stdin hua &> /dev/null &&\
sed -i '98a hua ALL=(ALL) NOPASSWD:all' /etc/sudoers &&\
visudo -c &> /dev/null
Msg "AddUser hua"
}
[ -f "/etc/issue" ] && >/etc/issue
Msg "Hide issue"
[ -f "/etc/issue.net" ] && > /etc/issue.net
Msg "Hide issue.net"
}
# Defined OPEN FILES Functions
function openfiles(){
[ -f "/etc/security/limits.conf" ] && {
echo '* - nofile 65535' >> /etc/security/limits.conf
Msg "open files"
}
}
# Defined Kernel parameters Functions
function kernel(){
KernelDir=/etc
[ -f "$KernelDir/sysctl.conf" ] && /bin/mv $KernelDir/sysctl.conf{,.or
i}
wget -O $KernelDir/sysctl.conf http://$Ip:$Port/$ConfigDir/sysctl.conf
&>/dev/null
Msg "Kernel config"
}
# Defined System Startup Services Functions
function boot(){
for oldboy in `chkconfig --list|grep "3:on"|awk '{print $1}'|grep -vE
"crond|network|rsyslog|sshd|sysstat"`
do
chkconfig $oldboy off
done
Msg "BOOT config"
}
# Defined Time Synchronization Functions
function Time(){
echo "#time sync by zhangyao at $(date +%F)" >>/var/spool/cron/root
echo '*/5 * * * * /usr/sbin/ntpdate time.nist.gov &>/dev/null' >>/var/
spool/cron/root
Msg "Time Synchronization"
}
# Defined main Functions
function main(){
ConfigIP
yum
HideVersion
openfiles
kernel
boot
Time
}
main
8.整合编辑default配置文件
[root@centos6 ~ ]#vim /var/lib/tftpboot/pxelinux.cfg/default
default ks
prompt 0
label ks
kernel vmlinuz
append initrd=initrd.img ks=http://192.168.5.103/ks_config/CentOS-6.9-ks.cfg
ksdevice=eth0
[root@centos6 ~ ]#curl http://192.168.5.103/ks_config/CentOS-6.9-ks.cfg 测试下刚才文件有没有对,如果出来的结果是/var/www/html/ks_config/CentOS-6.9-ks.cfg 的内容说明ok
至此一切准备工作就做完了
[root@centos6 ~ ]#netstat -ntulp|egrep '80|67|69'
确认有没有80端口,67,69端口
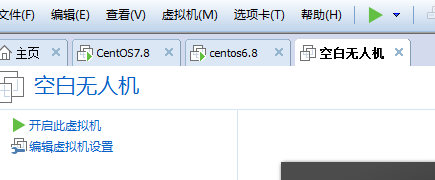
9 无人值守自动安装
此时启动空白的无人机就行了
[root@centos6 ~ ]#tailf /var/log/messages 可以观看日志过程
kickstart ---无人值守安装的更多相关文章
- KickStart 无人值守安装系统
一.简介 1.1 什么是PXE PXE(Pre-boot Execution Environment,预启动执行环境)是由Intel公司开发的最新技术,工作于Client/Server的网络模式,支持 ...
- [转]CentOS 6.4下PXE+Kickstart无人值守安装操作系统
一.简介 1.1 什么是PXE PXE(Pre-boot Execution Environment,预启动执行环境)是由Intel公司开发的最新技术,工作于Client/Server的网络模式,支持 ...
- 烂泥:kickstart无人值守安装CentOS6.5
本文由秀依林枫提供友情赞助,首发于烂泥行天下. 在本次实验进行之前,首先我们要把公司的网络环境进行介绍. 注意这个网络拓扑图,也是生产环境的一个实例.同时服务器192.168.1.214已关闭ipta ...
- CentOS6 PXE+Kickstart无人值守安装
一.简介 1.1 什么是PXE PXE(Pre-boot Execution Environment,预启动执行环境)是由Intel公司开发的最新技术,工作于Client/Server的网络模式,支持 ...
- CentOS 6.4下PXE+Kickstart无人值守安装操作系统 转
一.简介 1.1 什么是PXE PXE(Pre-boot Execution Environment,预启动执行环境)是由Intel公司开发的最新技术,工作于Client/Server的网络模式,支持 ...
- RHEL7下PXE+NFS+Kickstart无人值守安装操作系统
RHEL7下PXE+NFS+Kickstart无人值守安装操作系统 1.配置yum源 vim /etc/yum.repos.d/development.repo [development] name= ...
- RHEL7下PXE+Apache+Kickstart无人值守安装操作系统
RHEL7下PXE+Apache+Kickstart无人值守安装操作系统 1.配置yum源 vim /etc/yum.repos.d/development.repo [development] na ...
- CentOS 6.6下PXE+Kickstart无人值守安装操作系统
一.简介 1.1 什么是PXE PXE(Pre-boot Execution Environment,预启动执行环境)是由Intel公司开发的最新技术,工作于Client/Server的网络模式,支持 ...
- 【转载】CentOS 6.4下PXE+Kickstart无人值守安装操作系统
[转载]CentOS 6.4下PXE+Kickstart无人值守安装操作系统 转自:CentOS 6.4下PXE+Kickstart无人值守安装操作系统 - David_Tang - 博客园 http ...
- Centos下PXE+Kickstart无人值守安装操作系统
一.简介 1.1 什么是PXE PXE(Pre-boot Execution Environment,预启动执行环境)是由Intel公司开发的最新技术,工作于Client/Server的网络模式,支持 ...
随机推荐
- invalid active developer path (/Library/Developer/CommandLineTools), missing xcrun at: /Library/Developer/CommandLineTools/usr/bin/xcrun
Mac系统升级git会找不到并且报错:xcrun: error: invalid active developer path (/Library/Developer/CommandLineTools) ...
- 【原创 Hadoop&Spark 动手实践 5】Spark 基础入门,集群搭建以及Spark Shell
Spark 基础入门,集群搭建以及Spark Shell 主要借助Spark基础的PPT,再加上实际的动手操作来加强概念的理解和实践. Spark 安装部署 理论已经了解的差不多了,接下来是实际动手实 ...
- Excel公式与函数——每天学一个
说明(2018-5-29 20:35:53): 1. 根据刘伟的视频讲解进行总结,网上讲Excel公式与函数的貌似就他讲的还不错.在他的微博里看到现在的照片胖了不少,不过还挺帅的,不再是以前那个小屌丝 ...
- 【C#】读取Excel中嵌套的Json对象,Json带斜杠的问题(其二)
上一篇说到的嵌套Json带有斜杠的问题,如下图: 上一篇中用反射C#类的方法,在序列化Json阶段实现了去掉斜杠,现在还有一种相对更简单的方法,就是在反序列化阶段,读取Json时通过字符串的操作,把这 ...
- (转)x264的一些参数设置对编码效率的影响
转自:http://www.cnblogs.com/wainiwann/p/5647521.html i_luma_deadzone[0]和i_luma_deadzone[1]分别对应inter和in ...
- Mock an function to modify partial return value by special arguments on Python
Mock an function to modify partial return value by special arguments on Python python mock一个带参数的方法,修 ...
- jquery Ajax请求示例,jquery Ajax基本请求方法示例
jquery Ajax请求示例,jquery Ajax基本请求方法示例 ================================ ©Copyright 蕃薯耀 2018年5月7日 https: ...
- PHP 数组转XML 格式
function buildXml( $data, $wrap= 'xml' ){ $str = "<{$wrap}>"; if( is_array( $data ) ...
- greenplum 安装笔记
折腾两天了,终于把greenplum装成功了.记录下遇到的问题. 环境变量一点要配置准确. greenplum安装,按照这里一步步走: http://www.cnblogs.com/liuyungao ...
- web.py框架之基本应用
一.基本应用 1.1 Hello World! # coding:utf-8 import web urls = ( "/.*", "Tk_online" ) ...