springboot+mybatis+springmvc整合实例
以往的ssm框架整合通常有两种形式,一种是xml形式,一种是注解形式,不管是xml还是注解,基本都会有一大堆xml标签配置,其中有很多重复性的。springboot带给我们的恰恰是“零配置”,"零配置"不等于什么也不配置,只是说相对于传统的ssm框架的xml配置或是注解配置,要少的多。作为常规的来说,一个ssm框架整合,拿maven来说,首先在src/main/resource下加入jdbc.properties,spring-mvc.xml,spring-mybatis.xml等,还有要再web.xml配置监听类和前端控制器,同时还要配置对应的加载spring-mvc和spring-mybatis的路径。
而springboot的话,则不需要,只需在一个叫application.properties或者是叫application.yml配置数据源和解析jsp的即可。
上述网址有许多参考文档可参考
参考网址:https://projects.spring.io/spring-boot/ 该网址为springboot官网,官网虽然是英文的,但是可以通过第三方翻译过来,不过最好的话还是懂点英文。建议学习一门新技术,最好还是参考其官方网址和文档,那里是最详细的,其他什么博客之类的,可以作为参考学习过程中解决问题的利器。学习过程中是不可能不遇到问题的。
最好还是那句话,在不懂该技术之前,可以通过百度百科了解,或者其他博客写个入门实例,不过最好在此以后参考官网
就我个人的看法,必须和最好掌握spring+mybatis+springmvc等相关知识,同时也接触过ssm框架的xml配置和ssm框架的注解配置。这样方便比较学习,同时也有利于深入学习等。
不多说了,下面开始整合实例教程
一、准备环境
window10 jdk8 eclipe maven
二、pom文件
<project xmlns="http://maven.apache.org/POM/4.0.0" xmlns:xsi="http://www.w3.org/2001/XMLSchema-instance" xsi:schemaLocation="http://maven.apache.org/POM/4.0.0 http://maven.apache.org/xsd/maven-4.0.0.xsd">

  <modelVersion>4.0.0</modelVersion>

  <groupId>cn.springboot</groupId>

  <artifactId>springboot</artifactId>

  <version>0.0.1-SNAPSHOT</version>

  <packaging>war</packaging>

 	<parent>

		<groupId>org.springframework.boot</groupId>

		<artifactId>spring-boot-starter-parent</artifactId>

		<version>1.2.5.RELEASE</version>

	</parent>

	<properties>

		<project.build.sourceEncoding>UTF-8</project.build.sourceEncoding>

		<java.version>1.8</java.version>

	</properties>

	<dependencies>

		<!--Spring Boot -->

		<!--支持 Web 应用开发,包含 Tomcat 和 spring-mvc。 -->

		<dependency>

			<groupId>org.springframework.boot</groupId>

			<artifactId>spring-boot-starter-web</artifactId>

		</dependency>

		<!--支持使用 JDBC 访问数据库 -->

		<dependency>

			<groupId>org.springframework.boot</groupId>

			<artifactId>spring-boot-starter-jdbc</artifactId>

		</dependency>

		<!--添加适用于生产环境的功能,如性能指标和监测等功能。 -->

		<dependency>

			<groupId>org.springframework.boot</groupId>

			<artifactId>spring-boot-starter-actuator</artifactId>

		</dependency>

		<!--Mybatis -->

		<dependency>

			<groupId>org.mybatis</groupId>

			<artifactId>mybatis-spring</artifactId>

			<version>1.2.2</version>

		</dependency>

		<dependency>

			<groupId>org.mybatis</groupId>

			<artifactId>mybatis</artifactId>

			<version>3.2.8</version>

		</dependency>

		<!--Mysql / DataSource -->

		<dependency>

			<groupId>org.apache.tomcat</groupId>

			<artifactId>tomcat-jdbc</artifactId>

		</dependency>

		<dependency>

			<groupId>mysql</groupId>

			<artifactId>mysql-connector-java</artifactId>

		</dependency>

		<!--Json Support -->

		<dependency>

			<groupId>com.alibaba</groupId>

			<artifactId>fastjson</artifactId>

			<version>1.1.43</version>

		</dependency>

		<!--Swagger support -->

		<dependency>

			<groupId>com.mangofactory</groupId>

			<artifactId>swagger-springmvc</artifactId>

			<version>0.9.5</version>

		</dependency>

		<!-- 支持jsp start -->

		<dependency>

            <groupId>javax.servlet</groupId>

            <artifactId>jstl</artifactId>

        </dependency>

		<dependency>

			<groupId>org.springframework.boot</groupId>

			<artifactId>spring-boot-starter-tomcat</artifactId>

			<scope>provided</scope>

		</dependency>

		<dependency>

			<groupId>org.apache.tomcat.embed</groupId>

			<artifactId>tomcat-embed-jasper</artifactId>

			<scope>provided</scope>

		</dependency>

		<!-- end -->

	</dependencies>

	<build>

		<plugins>

			<plugin>

				<groupId>org.springframework.boot</groupId>

				<artifactId>spring-boot-maven-plugin</artifactId>

			</plugin>

			<plugin>

				<groupId>org.apache.maven.plugins</groupId>

				<artifactId>maven-compiler-plugin</artifactId>

				<configuration>

					<source>1.8</source>

					<target>1.8</target>

				</configuration>

			</plugin>

		</plugins>

	</build>

	<repositories>

		<repository>

			<id>spring-milestone</id>

			<url>https://repo.spring.io/libs-release</url>

		</repository>

	</repositories>

	<pluginRepositories>

		<pluginRepository>

			<id>spring-milestone</id>

			<url>https://repo.spring.io/libs-release</url>

		</pluginRepository>

</pluginRepositories>

 </project>
三、准备数据库和表
库名为 springboot

    CREATE TABLE `t_user` (

      `id` INT(11) NOT NULL,

      `username` VARCHAR(255) DEFAULT NULL,

      `password` VARCHAR(255) DEFAULT NULL,

      `email` VARCHAR(255) DEFAULT NULL,

      `useable` INT(20) DEFAULT NULL,

      `addtime` DATETIME DEFAULT NULL,

      `logintime` DATETIME DEFAULT NULL,

      `loginip` VARCHAR(255) DEFAULT NULL,

      PRIMARY KEY  (`id`)

    ) ENGINE=INNODB DEFAULT CHARSET=utf8;
四、在src/main/resource下新建application.properties文件
spring.datasource.url=jdbc:mysql://localhost:3306/springboot?useUnicode=true&characterEncoding=utf-8&zeroDateTimeBehavior=convertToNull

spring.datasource.username=root

spring.datasource.password=1234

spring.datasource.driver-class-name=com.mysql.jdbc.Driver

spring.view.prefix=/WEB-INF/templates/

spring.view.suffix=.jsp
五、建立实体类和对应的mapper接口相关
1.建立实体
    package com.sam.project.mvc.model;

    /**

     * @ClassName: User

     * @Description: 实体模型

     */

    public class User {

        private Integer id;

        private String username;

        private String password;

        private String email;

        /**

         * 是否可用(0禁用,1可用)

         */

        private Integer useable;

        /**

         * 创建时间

         */

        private String addtime;

        /**

         * 登陆时间

         */

        private String logintime;

        /**

         * 登陆IP

         */

        private String loginip;

        /**

         * @return id

         */

        public Integer getId() {

            return id;

        }

        /**

         * @param id

         */

        public void setId(Integer id) {

            this.id = id;

        }

        /**

         * @return username

         */

        public String getUsername() {

            return username;

        }

        /**

         * @param username

         */

        public void setUsername(String username) {

            this.username = username;

        }

        /**

         * @return password

         */

        public String getPassword() {

            return password;

        }

        /**

         * @param password

         */

        public void setPassword(String password) {

            this.password = password;

        }

        /**

         * @return email

         */

        public String getEmail() {

            return email;

        }

        /**

         * @param email

         */

        public void setEmail(String email) {

            this.email = email;

        }

        /**

         * 获取是否可用(0禁用,1可用)

         *

         * @return useable - 是否可用(0禁用,1可用)

         */

        public Integer getUseable() {

            return useable;

        }

        /**

         * 设置是否可用(0禁用,1可用)

         *

         * @param useable

         *            是否可用(0禁用,1可用)

         */

        public void setUseable(Integer useable) {

            this.useable = useable;

        }

        /**

         * 获取创建时间

         *

         * @return addtime - 创建时间

         */

        public String getAddtime() {

            return addtime;

        }

        /**

         * 设置创建时间

         *

         * @param addtime

         *            创建时间

         */

        public void setAddtime(String addtime) {

            this.addtime = addtime;

        }

        /**

         * 获取登陆时间

         *

         * @return logintime - 登陆时间

         */

        public String getLogintime() {

            return logintime;

        }

        /**

         * 设置登陆时间

         *

         * @param logintime

         *            登陆时间

         */

        public void setLogintime(String logintime) {

            this.logintime = logintime;

        }

        /**

         * 获取登陆IP

         *

         * @return loginip - 登陆IP

         */

        public String getLoginip() {

            return loginip;

        }

        /**

         * 设置登陆IP

         *

         * @param loginip

         *            登陆IP

         */

        public void setLoginip(String loginip) {

            this.loginip = loginip;

        }

    }
2.建立对应的mapper接口
package com.sam.project.mvc.mapper;

import java.util.List;

import com.sam.project.mvc.model.User;

/**

 * @ClassName: UserMapper

 * @Description: mybites数据查询接口

 */

public interface UserMapper {

    List<User> queryList();

    void save(User user);

    void batchDelete(Integer[] ids);

    void update(User user);

}
3.建立mapper对应的xml文件
在src/main/resource下新建mapper文件夹
在该文件下下新建UserMapper.xml
<?xml version="1.0" encoding="UTF-8"?>

<!DOCTYPE mapper PUBLIC "-//mybatis.org//DTD Mapper 3.0//EN"

        "http://mybatis.org/dtd/mybatis-3-mapper.dtd">

    <mapper namespace="com.sam.project.mvc.mapper.UserMapper">

        <select id="queryList" resultType="com.sam.project.mvc.model.User">

            SELECT u.id, u.username, u.password, u.email, u.useable, u.addtime, u.logintime, u.loginip FROM t_user u

        </select>

        <select id="queryById" resultType="com.sam.project.mvc.model.User">

            SELECT u.id, u.username, u.password, u.email, u.useable, u.addtime, u.logintime, u.loginip FROM t_user u where u.id = #{id}

        </select>

        <insert id="save">

            insert into t_user(username, password, email, useable, addtime)

            values(#{username}, #{password}, #{email}, #{useable}, now())

        </insert>

        <update id="update">

            update t_user set password = #{password}, email = #{email}, useable = #{useable} where id = #{id}

        </update>

        <delete id="batchDelete">

            delete from t_user where id in

            <foreach collection="array" item="item" open="(" separator="," close=")">

                #{item}

            </foreach>

        </delete>

        <!-- <delete id="delUsers">

            delete from t_user where id in

            <foreach collection="list" item="item" open="(" separator="," close=")">

                #{item}

            </foreach>

        </delete> -->

    </mapper>
六、建立业务接口和对应的Controller及其相关返回json数据工具类
1.UserService业务接口
package com.sam.project.mvc.service;

    import java.util.List;

import org.springframework.beans.factory.annotation.Autowired;

import org.springframework.stereotype.Service;

import com.sam.project.mvc.common.AjaxResult;

import com.sam.project.mvc.mapper.UserMapper;

import com.sam.project.mvc.model.User;

    @Service

    public class UserService {

        @Autowired

        private UserMapper userMapper;

        public AjaxResult queryList() {

            List<User> list = userMapper.queryList();

            return new AjaxResult(list);

        }

        public AjaxResult save(User user) {

            user.setUsername("user" + System.currentTimeMillis());

            user.setPassword("123456");

            user.setEmail("user" + System.currentTimeMillis());

            user.setUseable(1);

            userMapper.save(user);

            return new AjaxResult();

        }

        public AjaxResult batchDelete(Integer[] ids) {

            userMapper.batchDelete(ids);

            return new AjaxResult();

        }

        public AjaxResult update(User user) {

            userMapper.update(user);

            return new AjaxResult();

        }

    }
2.controller
    package com.sam.project.mvc.controller;

    import org.springframework.beans.factory.annotation.Autowired;

import org.springframework.stereotype.Controller;

import org.springframework.ui.ModelMap;

import org.springframework.web.bind.annotation.RequestMapping;

import org.springframework.web.bind.annotation.ResponseBody;

import com.sam.project.mvc.common.AjaxResult;

import com.sam.project.mvc.model.User;

import com.sam.project.mvc.service.UserService;

    /**

     * @ClassName: UserController

     * @Description: 用户Controller

     */

    @Controller

    public class UserController {

        @Autowired

        private UserService userService;

        @ResponseBody

        @RequestMapping("/queryList")

        public AjaxResult queryList(){

            return userService.queryList();

        }

        @ResponseBody

        @RequestMapping("/addUser")

        public AjaxResult addUser(User user){

            return userService.save(user);

        }

        @ResponseBody

        @RequestMapping("/delUser")

        public AjaxResult delUser(Integer[] ids){

            return userService.batchDelete(ids);

        }

        @ResponseBody

        @RequestMapping("/updateUser")

        public AjaxResult updateUser(User user){

            return userService.update(user);

        }

        @RequestMapping("/hello")

        public String hello(ModelMap map) {

            map.put("title", "你好");

            return "index";

        }

    }
3.工具类
    package com.sam.project.mvc.common;

    /**

     * @ClassName: AjaxResult

     * @Description: 封装返回数据

     */

    public class AjaxResult {

        private int retcode = 1;

        private String retmsg = "操作成功";

        private Object data;

        public AjaxResult(int retcode, String retmsg, Object data){

            this.retcode = retcode;

            this.retmsg = retmsg;

            this.data = data;

        }

        public AjaxResult(int retcode, String retmsg){

            this.retcode = retcode;

            this.retmsg = retmsg;

        }

        public AjaxResult(Object data){

            this.retmsg = "查询成功";

            this.data = data;

        }

        public AjaxResult(int retcode){

            this.retcode = retcode;

            this.retmsg = "操作失败";

        }

        public AjaxResult(String retmsg){

            this.retcode = 0;

            this.retmsg = retmsg;

        }

        public AjaxResult(){

        }

        public int getRetcode() {

            return retcode;

        }

        public void setRetcode(int retcode) {

            this.retcode = retcode;

        }

        public String getRetmsg() {

            return retmsg;

        }

        public void setRetmsg(String retmsg) {

            this.retmsg = retmsg;

        }

        public Object getData() {

            return data;

        }

        public void setData(Object data) {

            this.data = data;

        }

        @Override

        public String toString() {

            return "AjaxResult [retcode=" + retcode + ", retmsg=" + retmsg + ", data=" + data + "]";

        }

    }
七、springboot启动类
package com.sam.project.mvc;

import javax.sql.DataSource;

import org.apache.ibatis.session.SqlSessionFactory;

import org.apache.log4j.Logger;

import org.mybatis.spring.SqlSessionFactoryBean;

import org.mybatis.spring.annotation.MapperScan;

import org.springframework.boot.SpringApplication;

import org.springframework.boot.autoconfigure.EnableAutoConfiguration;

import org.springframework.boot.autoconfigure.SpringBootApplication;

import org.springframework.boot.builder.SpringApplicationBuilder;

import org.springframework.boot.context.properties.ConfigurationProperties;

import org.springframework.boot.context.web.SpringBootServletInitializer;

import org.springframework.context.annotation.Bean;

import org.springframework.context.annotation.ComponentScan;

import org.springframework.core.io.support.PathMatchingResourcePatternResolver;

import org.springframework.jdbc.datasource.DataSourceTransactionManager;

import org.springframework.transaction.PlatformTransactionManager;

@EnableAutoConfiguration

@SpringBootApplication

@ComponentScan

@MapperScan("com.sam.project.mvc.mapper")

public class Application extends SpringBootServletInitializer {

    private static Logger logger = Logger.getLogger(Application.class);

    //DataSource配置

    @Bean

    @ConfigurationProperties(prefix="spring.datasource")

    public DataSource dataSource() {

        return new org.apache.tomcat.jdbc.pool.DataSource();

    }

    //提供SqlSeesion

    @Bean

    public SqlSessionFactory sqlSessionFactoryBean() throws Exception {

        SqlSessionFactoryBean sqlSessionFactoryBean = new SqlSessionFactoryBean();

        sqlSessionFactoryBean.setDataSource(dataSource());

        PathMatchingResourcePatternResolver resolver = new PathMatchingResourcePatternResolver();

        sqlSessionFactoryBean.setMapperLocations(resolver.getResources("classpath:/mapper/*.xml"));

        return sqlSessionFactoryBean.getObject();

    }

    @Bean

    public PlatformTransactionManager transactionManager() {

        return new DataSourceTransactionManager(dataSource());

    }

    @Override

    protected SpringApplicationBuilder configure(SpringApplicationBuilder application) {

        return application.sources(Application.class);

    }

    /**

     * Main Start

     */

    public static void main(String[] args) {

        SpringApplication.run(Application.class, args);

        logger.info("============= SpringBoot Start Success =============");

    }

}
八、在WEB-INF下新建templates文件夹并在该文件夹下新建index.jsp文件
<%@ page language="java" contentType="text/html; charset=UTF-8"

    pageEncoding="UTF-8"%>

<!DOCTYPE html PUBLIC "-//W3C//DTD HTML 4.01 Transitional//EN" "http://www.w3.org/TR/html4/loose.dtd">

<html>

<head>

<meta http-equiv="Content-Type" content="text/html; charset=UTF-8">

<title>你好</title>

</head>

<body>

${title }

</body>

</html>
九、启动Application类
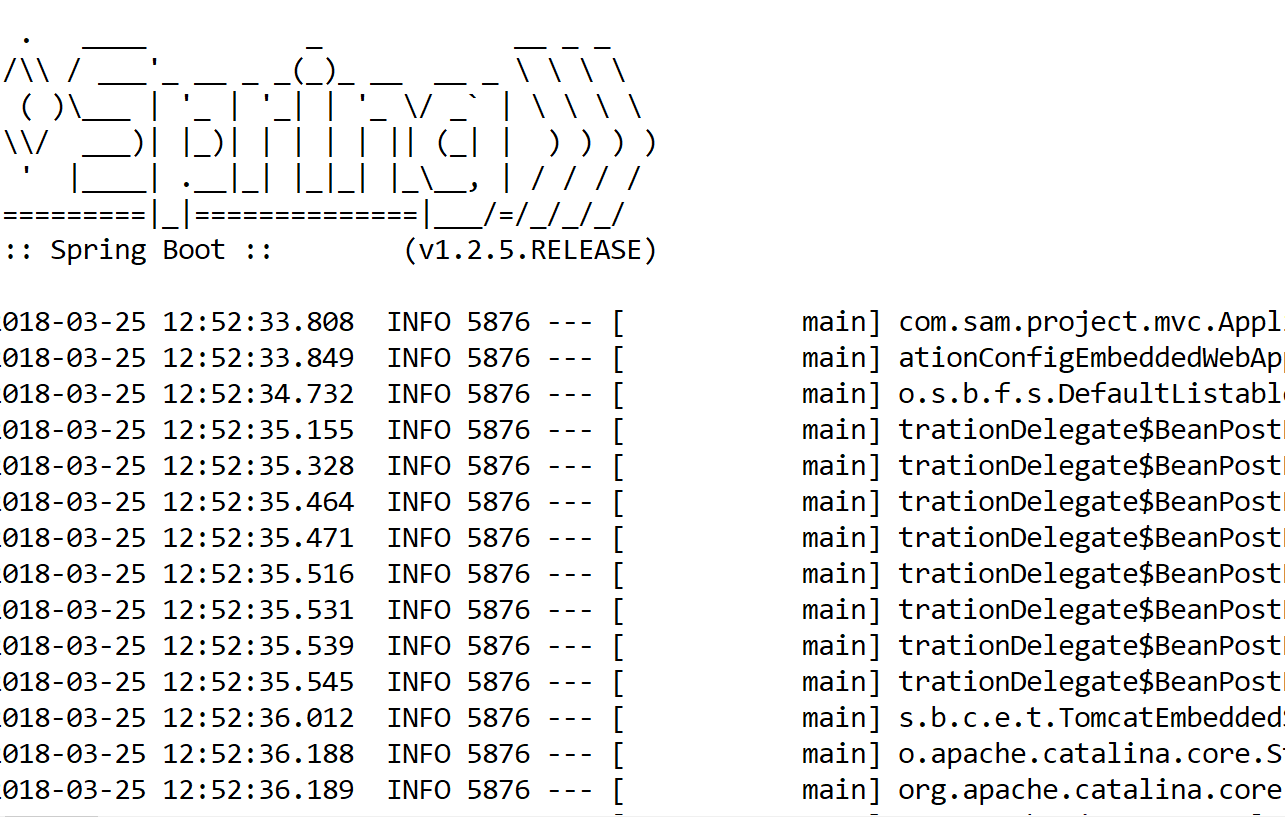
启动成功,控制台会显示如下内容
十、在浏览器输入localhost:8080/hello
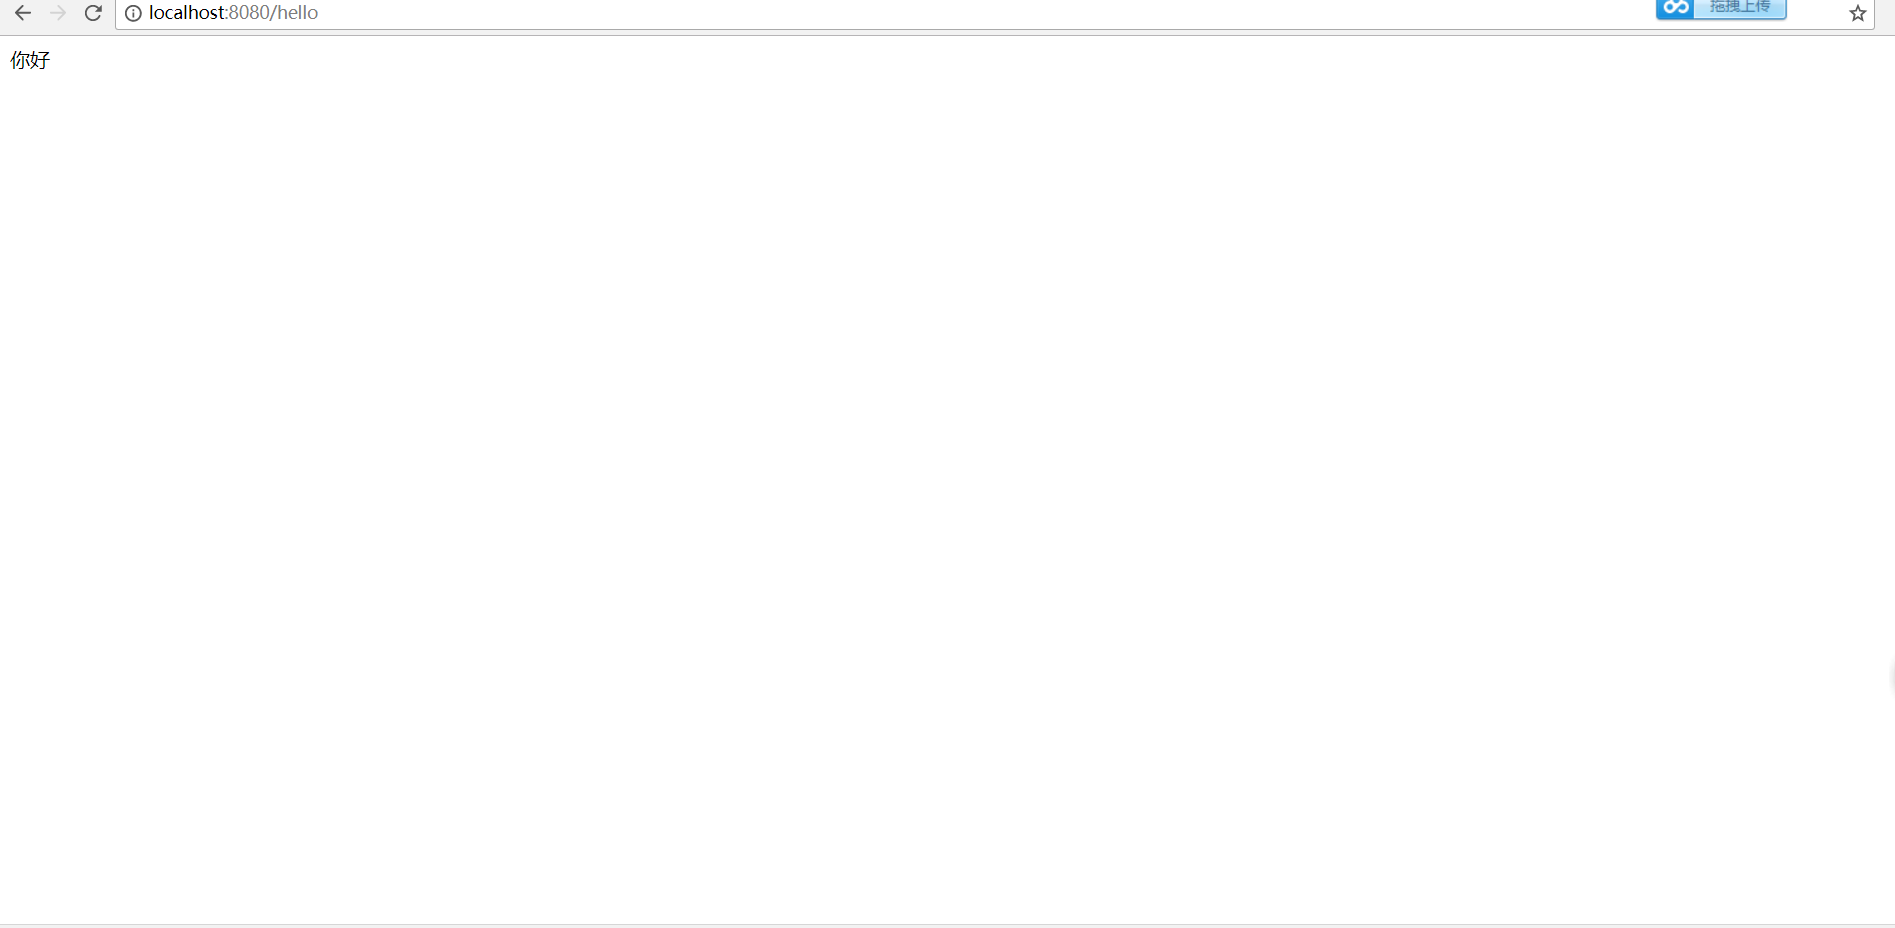
上述就是springboot+springmvc+mybatis整合实例
springboot+mybatis+springmvc整合实例的更多相关文章
- springboot + mybatis + mycat整合
1.mycat服务 搭建mycat服务并启动,windows安装参照. 系列文章: [Mycat 简介] [Mycat 配置文件server.xml] [Mycat 配置文件schema.xml] [ ...
- SpringBoot+Mybatis+MybatisPlus整合实现基本的CRUD操作
SpringBoot+Mybatis+MybatisPlus整合实现基本的CRUD操作 1> 数据准备 -- 创建测试表 CREATE TABLE `tb_user` ( `id` ) NOT ...
- spring mybatis springmvc整合
使用SSM(Spring.SpringMVC和Mybatis)已经有三个多月了,项目在技术上已经没有什么难点了,基于现有的技术就可以实现想要的功能,当然肯定有很多可以改进的地方.之前没有记录SSM整合 ...
- idea+maven+springboot+mybatis+springmvc+shiro
springboot就是把创建项目简单化,省去了以往的配置mybatis.springmvc的繁琐过程. 搭建web应用三个主要功能,请求和响应,数据库交互,权限配置. 一.idea创建项目 (1) ...
- 流程开发Activiti 与SpringMVC整合实例
流程(Activiti) 流程是完成一系列有序动作的概述.每一个节点动作的结果将对后面的具体操作步骤产生影响.信息化系统中流程的功能完全等同于纸上办公的层级审批,尤其在oa系统中各类电子流提现较为明显 ...
- Spring+MyBatis+SpringMvc整合Demo
客户关系管理系统demo 项目分析 该demo使用技术及环境:ssm+maven+bootstrap+jsp+mysql+idea+jdk1.8 需求:客户管理,实现客户列表分页显示如下图 项目开始 ...
- Springboot+mybatis中整合过程访问Mysql数据库时报错
报错原因如下:com.mysql.cj.core.exceptions.InvalidConnectionAttributeException: The server time zone.. 产生这个 ...
- springboot+mybatis+springMVC基础框架搭建
项目结构概览 pom.xml <project xmlns="http://maven.apache.org/POM/4.0.0" xmlns:xsi="http: ...
- springboot + mybatis +easyUI整合案例
概述 springboot推荐使用的是JPA,但是因为JPA比较复杂,如果业务场景复杂,例如企业应用中的统计等需求,使用JPA不如mybatis理想,原始sql调优会比较简单方便,所以我们的项目中还是 ...
随机推荐
- 【Java】模拟Sping,实现其IOC和AOP核心(一)
在这里我要实现的是Spring的IOC和AOP的核心,而且有关IOC的实现,注解+XML能混合使用! 参考资料: IOC:控制反转(Inversion of Control,缩写为IoC),是面向对象 ...
- npm 全局执行 update 、 outdated 出现 npm-debug.log 404 错误的问题
想要执行一次全局更新,发现屡次报错: # npm update -g 提示的错误信息包含如下内容: npm ERR! code E404 npm ERR! 404 Registry returned ...
- 2017-11-26 编程语言试验之Antlr4+Java实现"圈2"
"中文编程"知乎专栏原文 此文涉及的源码版本: program-in-chinese/quan2 声明 代码来源 How to Create Language Using Antl ...
- Echarts简单案例
官网: http://echarts.baidu.com/index.html 文档: http://echarts.baidu.com/echarts2/doc/doc.html <html ...
- Oracle 11g数据库的创建
由于是自己自学Oracle,如果有问题,请大家指出,谢谢! Oracle提供了DBCA来创建数据库,对于初学者来说使用DBCA创建数据库简化了很多工作和设置,直接在交互界面即可实现所有的功能. 然而对 ...
- CRM原型
https://files.cnblogs.com/files/wcLT/CRM.zip
- web service && WCF 学习小结
Web Service和WCF技术都提供了应用程序与应用程序之间的通信.它们都是基于soap消息在客户端和服务端之间进行通信,由于soap消息是一种xml格式,因此传输的数据格式为XML.每次客户端向 ...
- HDU ACM 1224 Free DIY Tour (SPFA)
Free DIY Tour Time Limit: 2000/1000 MS (Java/Others) Memory Limit: 65536/32768 K (Java/Others)Tot ...
- Django学习---py3下的富文本编辑器的使用
背景说明: Ueditor HTML编辑器是百度开源的HTML编辑器,但是在Python3下调用报错,找不到widgets模块,经查发现,DjangoUeditor是基于Python 2.7的,对Py ...
- 32_使用BeanUtils工具包操作JavaBean
由于对属性设置值和得到值的需求很多,使用频率很高,所以有一些开源勇士 不满足于JavaBean API 中IntroSpector来操作bean, 写出来了通用的BeanUtils工具,来进一步简 ...