css简单整理
style1.css
/*统一设置h1、h2、a标签的样式*/

h1,h2,a{

    color: aqua;

    font-size: 50px;

}

/*如果h1、h2没有上面的单独设置样式那么就会继承body所设的样式*/

body{

    color: brown;

}

/*设置列表标签的strong标签的内容*/

/*派生*/

li strong{

    color: blue;

}

/*strong不会夫覆盖li strong的样式*/

strong{

    color: blueviolet;

}

/*通过id改属性前面加#*/

#pid{

    color: cadetblue;

}

/*派生和id的结合更改a标签的内容*/

#pid a{

    font-size: 20px;

    color: darkgoldenrod;

}

/*类选择器和派生结合*/

/*类之前加.*/

.dclass p{

   color: red;

}

/*属性选择器*/

[title]{

    color: chartreuse;

}

[title=b]{

    color: darkgreen;

}

input[type="submit"]{

    width:120px;

    height: 120px;

    margin-left:35px;

}
test1.htm
<!DOCTYPE html>

<html lang="en">

<head>

    <meta charset="UTF-8">

    <title>Title</title>

    <link href="../css/style1.css" rel="stylesheet" type="text/css">

</head>

<body>

<h1>h1的样式</h1>

<h2>h2的样式</h2>

<a>a的样式</a>

<p><strong>p的样式</strong></p>

<ul>

    <li><strong>li的样式</strong></li>

</ul>

<p id="pid">我有id<a href="http://www.baidu.com">百度一下</a></p>

<div class="dclass">

    <p>div中的p标签样式</p>

</div>

<p title="a">我的title是a</p>

<p title="b">我的title是b</p>

<form>

    <input type="submit" value="提交">

</form>

</body>

</html>
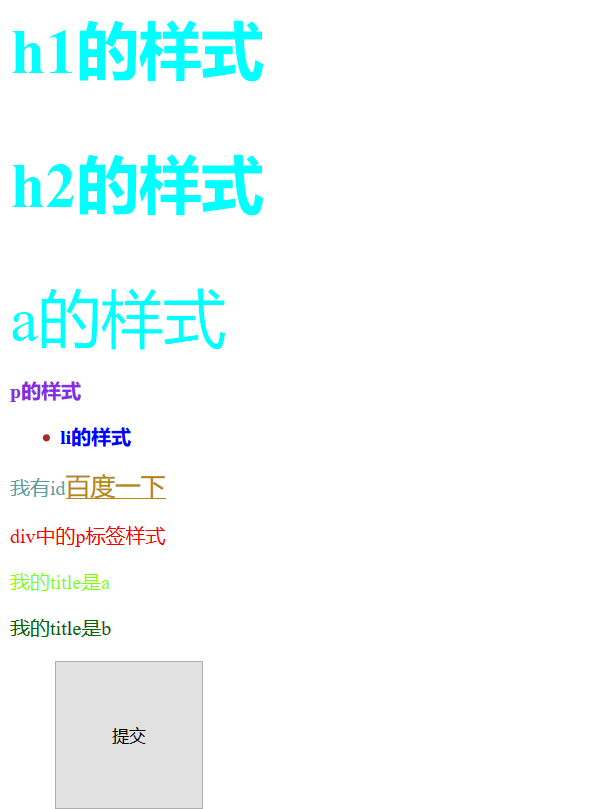
效果:

style2.css
body{

/*background-color: darkgray;*/

background-image: url("../img/13.jpg");

background-repeat: no-repeat;/*设置图片是否允许重复*/

background-position: center top;/*图片位置、从哪里开始显示*/

background-attachment: scroll;/*随着鼠标滑轮滚动图片也滚动*/

/*background-size: 1920px 1080px;!*设置背景图大小*!*/

/*background-position: 0px 0px;!*左上角从(0,0)开始显示*!*/

}

p{

    color: chartreuse;

    background-color: blueviolet;

    width: 160px;

    padding: 10px;/*内边框*/

}
test2.htm
<!DOCTYPE html>

<html lang="en">

<head>

    <meta charset="UTF-8">

    <title>Title</title>

    <link href="../css/style2.css" rel="stylesheet" type="text/css">

</head>

<body>

<p>测试背景是否可被继承(内边框效果)</p>

<p>测试滚动</p><p>测试滚动</p><p>测试滚动</p><p>测试滚动</p><p>测试滚动</p><p>测试滚动</p><p>测试滚动</p><p>测试滚动</p>

<p>测试滚动</p><p>测试滚动</p><p>测试滚动</p><p>测试滚动</p><p>测试滚动</p><p>测试滚动</p><p>测试滚动</p><p>测试滚动</p>

<p>测试滚动</p><p>测试滚动</p><p>测试滚动</p><p>测试滚动</p><p>测试滚动</p><p>测试滚动</p><p>测试滚动</p>

</body>

</html>
style3.css
p{

    text-align: center;/*对齐方式*/

}

h1{

    text-indent: 47.5%;/*缩进*/

}

#pid1{/*首字母大写*/

    text-transform: capitalize;

}

#pid2{/*全大写*/

    text-transform: uppercase;

}

#pid3{/*全变小写*/

    text-transform: lowercase;

}

h4{

    text-shadow: 100px 1px 1px chartreuse;/*距离实体位置:左、上、大小、颜色*/

}

h3{

    width: 300px;

    text-wrap: normal;/*自动换行*/

    font-size: 30px;/*设置字体大小*/

    font-family: "Calibri Light ";/*设置字体样式*/

}

/*@font-face {!*下载字体*!*/

/*    font-family: myfont;*/

/*    src:url("");*/

/*}*/
test3.htm
<!DOCTYPE html>

<html lang="en">

<head>

    <meta charset="UTF-8">

    <title>Title</title>

    <link type="text/css" href="../css/style3.css" rel="stylesheet">

</head>

<body>

<P>对齐测试</P>

<h1>静夜思</h1>

<p>床前明月光</p>

<p>疑是地上霜</p>

<p>举头望明月</p>

<p>低头思故乡</p>

<p id="pid1">Hello1 world</p>

<p id="pid2">Hello2 world</p>

<p id="pid3">Hello3 world</p>

<h4>阴影测试</h4>

<h3>this is my first good this is my first good this is my first good this is my first good this is my first good</h3>

</body>

</html>
结果:

style4.css
a:link{/*未被访问的链接*//*注意清除缓存*/

    color: chartreuse;

    font-size: 30px;

    text-decoration: none;/*去掉超链接文字下方的下划线*/

}

a:visited{/*访问过*/

    color: blue;

    font-size: 30px;

    text-decoration: none;

}

a:hover{/*鼠标位于链接上方*/

    color: blueviolet;

    font-size: 30px;

    text-decoration: none;

}

a:active{/*鼠标点击链接的时候*/

    color: red;

    font-size: 30px;

    text-decoration: none;

}

li{

    /*list-style-type: circle;!*空心圆*!*/

    /*list-style-type: decimal;!*数字*!*/

    list-style-image: url("../img/15.png");

}

ul.ul1{

    list-style-position: outside;

}

ul.ul2{

list-style-position: inside;

}
test4.htm
<!DOCTYPE html>

<html lang="en">

<head>

    <meta charset="UTF-8">

    <title>Title</title>

    <link type="text/css" rel="stylesheet" href="../css/style4.css">

</head>

<body>

<a href="http://www.baidu.com">百度一下</a>

<p>list-style-position: outside</p>

<ul class="ul1">

    <li>apple</li>

    <li>banana</li>

    <li>orange</li>

</ul>

<p>list-style-position: inside</p>

<ul class="ul2">

    <li>apple</li>

    <li>banana</li>

    <li>orange</li>

</ul>

</body>

</html>
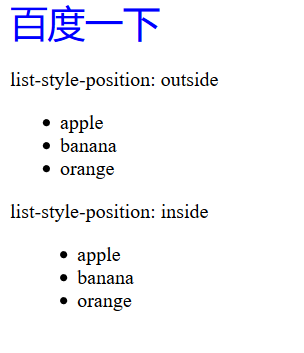
结果:

鼠标放在百度一下:

点击之后是另一种颜色,但是由于会跳转就不截图了
style5.css
#tb,tr,th,td{

    border:3px solid blue;

    text-align: center;

}

#tb{

    width: 400px;

    height: 400px;

    border-collapse: collapse;/*合并双边框*/

    /*background-color: darkgoldenrod;*/

}

#tb tr.tc,th{

    padding: 5px;

    background-color: aquamarine;

}

p{

    outline: blue;

    outline-style: dotted;

    outline-color: aqua;

    outline-width: 5px;

    width: 200px;

}

#did{

    background-color: blue;

    width: 200px;

    height: 200px;

    /*position: relative;!*相对布局*!*/

    position: absolute;/*绝对布局不会覆盖数字*/

    /*position: fixed;!*固定布局,不随滑轮滑动而变化*!*/

    /*position: static;!*静态布局left和top不起作用*!*/

    left: 50px;

    top: 90px;

    z-index:;

}

#di{

    background-color: aqua;

    width: 200px;

    height: 200px;

    position: absolute;

    left: 100px;

    top: 280px;

    z-index:;/*哪个数值大,哪个覆盖,数值小的被覆盖*/

}
test5.htm
<!DOCTYPE html>

<html lang="en">

<head>

    <meta charset="UTF-8">

    <title>Title</title>

    <link href="../css/style5.css" rel="stylesheet" type="text/css">

</head>

<body>

<table id="tb">

    <tr>

        <th>姓名</th>

        <th>年龄</th>

        <th>性别</th>

    </tr>

    <tr >

        <td>Alice</td>

        <td>12</td>

        <td>女</td>

    </tr>

    <tr class="tc">

        <td>Bob</td>

        <td>15</td>

        <td>男</td>

    </tr>

    <tr >

        <td>Alice</td>

        <td>12</td>

        <td>女</td>

    </tr>

    <tr class="tc">

        <td>sary</td>

        <td>12</td>

        <td>女</td>

    </tr>

</table>

<p>轮廓</p>

<div id="did">

</div>

<script>

    for(var i=0;i<100;i++){

        document.write(i+"<br>");

    }

</script>

<div id="di">

</div>

</body>

</html>
结果:

style6.css
#d1{

    background-color: blue;

    width: 100px;

    height: 150px;

    float: left;

}

#d2{

    background-color: red;

    width: 150px;

    height: 100px;

}

#d3{

    background-color: greenyellow;

    width: 100px;

    height: 100px;

}

#d4{

    width: 100px;

    height: 50px;

    background-color: blueviolet;

    /*clear:left;*/

}

#d{

   background-color: aquamarine;

    width: 250px;

    height: 300px;

    float: left;

 }
test6.htm
<!DOCTYPE html>

<html lang="en">

<head>

    <meta charset="UTF-8">

    <title>Title</title>

    <link rel="stylesheet" href="../css/style6.css" type="text/css">

</head>

<body>

<div id="d">

    <div id="d1"></div>

    <div id="d2"></div>

    <div id="d3"></div>

    <div id="d4">hello world</div>

</div>

</body>

</html>
效果:

style7.css
#did{

    width: 100px;

    height: 100px;

    background-color: blueviolet;

}

/*#did{*/

/*    !*transform: translate(100px,100px);!*向右方和下方移动位置*!*!*/

/*    !*-moz-transform: translate(100px,100px);!*火狐浏览器*!*!*/

/*    transform: rotate(200deg);!*旋转200度*!*/

/*    -moz-transform: rotate(200deg);!*火狐浏览器*!*/

/*    transform: scale(1,2);!*长和宽放大倍数*!*/

/*    -moz-transform: scale(1,2);*/

    /*transform: skewX(20deg);!*绕x轴旋转20度*!*/

    /*transform: skewY(20deg);*/

    /*-moz-transform: skewX(20deg);*/

    /*-moz-transform: skewY(20deg);*/

/*}*/

#did{

    width: 100px;

    height: 100px;

    background-color: blueviolet;

    transition: height 2s,width 2s ,transform 2s;

    -moz-transition: width 2s ,height 2s ,-moz-transform 2s;

    /*延时执行*/

    transition-delay: 2s;

    -moz-transition-delay: 2s; /* Firefox 4 */

    -webkit-transition-delay: 2s; /* Safari 和 Chrome */

    -o-transition-delay: 2s; /* Opera */

}

#did:hover{/*鼠标放在上面之后的操作*/

    width: 200px;

    height: 200px;

    transform: rotate(360deg);

    -moz-transform: rotate(360deg);

}
test7.htm
<!DOCTYPE html>

<html lang="en">

<head>

    <meta charset="UTF-8">

    <title>动画</title>

    <link href="../css/style7.css" rel="stylesheet" type="text/css">

</head>

<body>

<div id="did">

</div>

</body>

</html>
效果是个鼠标放在div区域的动画
style8.css
.box_img img{

    width: 250px;

    height: auto;

    margin: 2px 0;

}

body{

     background-color: aquamarine;

 }

/*.box img{*/

/*    width: 250px;*/

/*    margin: 2px 0;*/

/*}*/

#container{

    column-width: 250px;

    -moz-column-width: 250px;

    -moz-column-gap:2px; /* Firefox */

    -webkit-column-gap:2px; /* Safari 和 Chrome */

    column-gap:2px;

}

.box_img{

    padding: 5px;

    border: 1px solid #cccccc;/*边框*/

    box-shadow: 0 0 5px #cccccc;

    border-radius: 5px;

}

*{

    margin: 0px;/*外边距*/

    padding: 0px; /*内边距   */

}
test8.htm
<!DOCTYPE html>
<html lang="en">
<head>
<meta charset="UTF-8">
<title>pool</title>
<link rel="stylesheet" type="text/css" href="../css/style8.css">
<!-- <script src="js/app.js"></script>-->
</head>
<body>
<div id="container">
<div class="box">
<div class="box_img">
<img src="../img/1.jpeg">
</div>
</div>
<div class="box">
<div class="box_img">
<img src="../img/8.jpg">
</div>
</div>
<div class="box">
<div class="box_img">
<img src="../img/3.jpg">
</div>
</div>
<div class="box">
<div class="box_img">
<img src="../img/4.jpg">
</div>
</div>
<div class="box">
<div class="box_img">
<img src="../img/5.jpg">
</div>
</div>
<div class="box">
<div class="box_img">
<img src="../img/6.jpg">
</div>
</div>
<div class="box">
<div class="box_img">
<img src="../img/7.jpg">
</div>
</div>
<div class="box">
<div class="box_img">
<img src="../img/2.jpeg">
</div>
</div>
<div class="box">
<div class="box_img">
<img src="../img/9.jpg">
</div>
</div>
<div class="box">
<div class="box_img">
<img src="../img/10.jpg">
</div>
</div>
<div class="box">
<div class="box_img">
<img src="../img/10.jpg">
</div>
</div>
<div class="box">
<div class="box_img">
<img src="../img/9.jpg">
</div>
</div>
<div class="box">
<div class="box_img">
<img src="../img/10.jpg">
</div>
</div>
<div class="box">
<div class="box_img">
<img src="../img/1.jpeg">
</div>
</div>
<div class="box">
<div class="box_img">
<img src="../img/2.jpeg">
</div>
</div>
<div class="box">
<div class="box_img">
<img src="../img/4.jpg">
</div>
</div>
<div class="box">
<div class="box_img">
<img src="../img/6.jpg">
</div>
</div>
<div class="box">
<div class="box_img">
<img src="../img/3.jpg">
</div>
</div>
<div class="box">
<div class="box_img">
<img src="../img/9.jpg">
</div>
</div>
<div class="box">
<div class="box_img">
<img src="../img/2.jpeg">
</div>
</div>
<div class="box">
<div class="box_img">
<img src="../img/6.jpg">
</div>
</div>
<div class="box">
<div class="box_img">
<img src="../img/3.jpg">
</div>
</div>
<div class="box">
<div class="box_img">
<img src="../img/9.jpg">
</div>
</div>
<div class="box">
<div class="box_img">
<img src="../img/2.jpeg">
</div>
</div>
</div> </body>
</html>
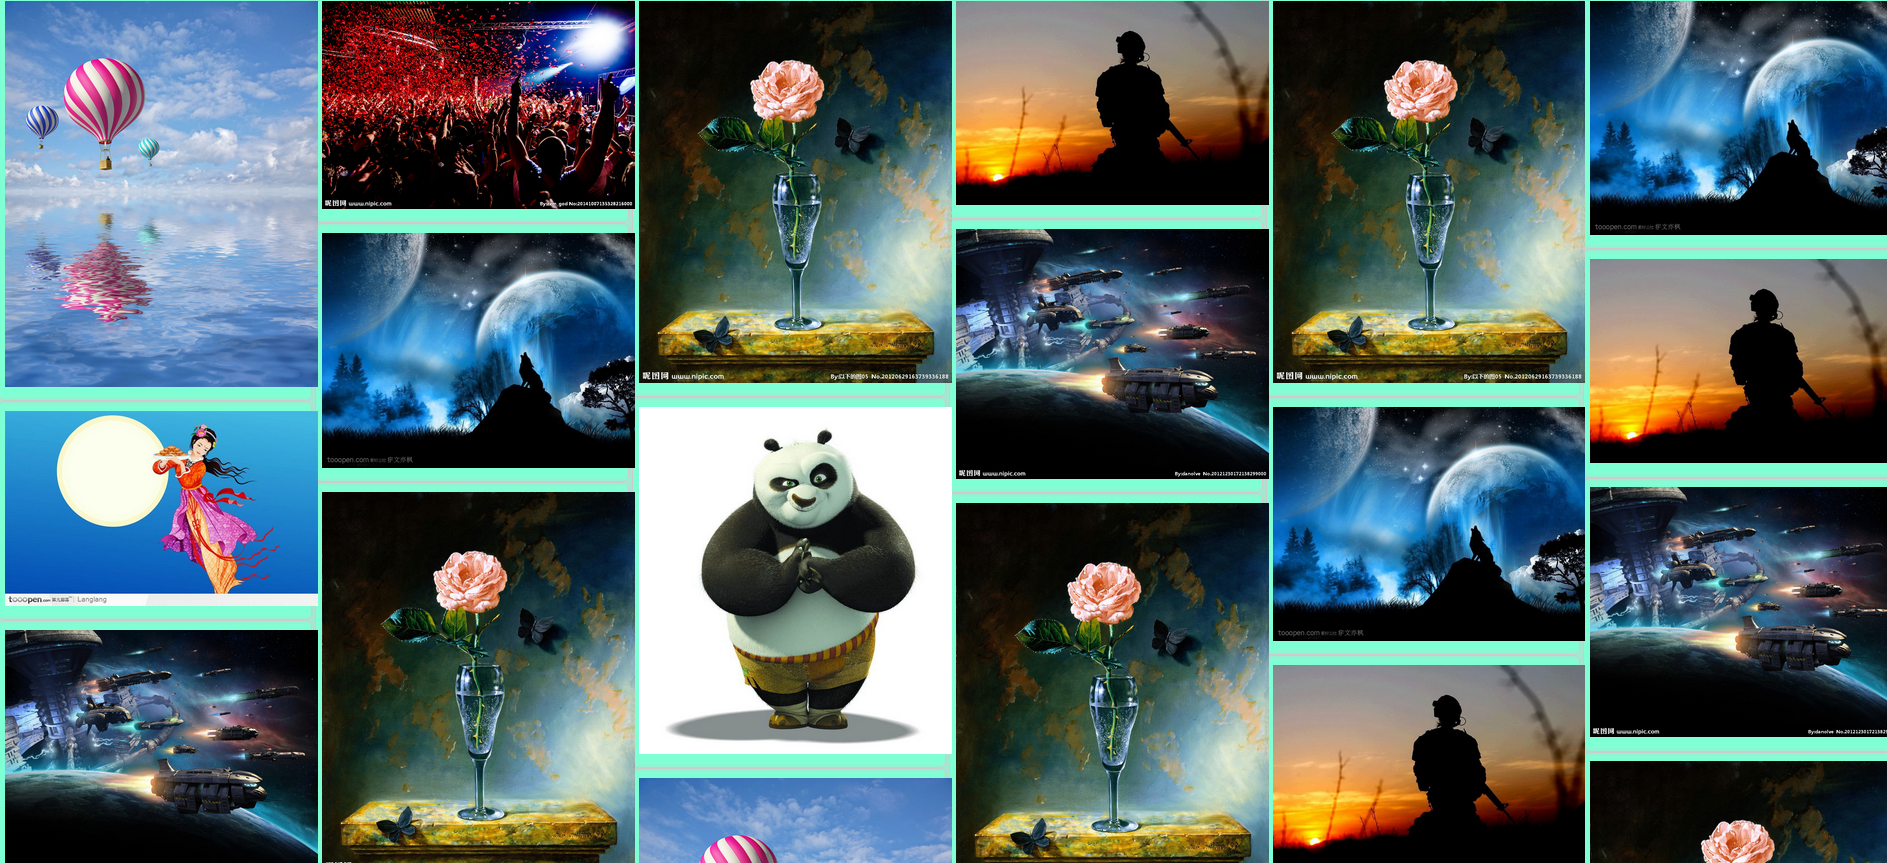
效果:
瀑布流效果

之后的用到在补充吧
css简单整理的更多相关文章
- 哪些CSS是可以被继承的--简单整理
那些CSS是可以被继承的--简单整理1.文本相关属性是继承的:font-size,font-family,line-height,text-index等2.列表相关属性是继承的:list-style- ...
- .NET Web开发技术简单整理
在最初学习一些编程语言.一些编程技术的时候,做的更多的是如何使用该技术,如何更好的使用该技术解决问题,而没有去关注它的相关性.关注它的理论支持,这种学习技术的方式是短平快.其实工作中有时候也是这样,公 ...
- 转载:.NET Web开发技术简单整理
在最初学习一些编程语言.一些编程技术的时候,做的更多的是如何使用该技术,如何更好的使用该技术解决问题,而没有去关注它的相关性.关注它的理论支持,这种学习技术的方式是短平快.其实工作中有时候也是这样,公 ...
- .NET Web开发技术简单整理 转
.NET Web开发技术简单整理 原文:http://www.cnblogs.com/SanMaoSpace/p/3157293.html 在最初学习一些编程语言.一些编程技术的时候,做的更多的是如何 ...
- css hack整理:区别FF,IE8,IE7,IE6,SF,CH浏览器
css hack整理:区别FF,IE8,IE7,IE6,SF,CH浏览器 2013年03月24日 ⁄ CSS ⁄ 共 716字 ⁄ 暂无评论 前端开发最要命的事就是处理浏览器的兼容性问 ...
- css3 calc():css简单的数学运算-加减乘除
css3 calc():css简单的数学运算–加减乘除 多好的东西啊,不用js,一个css就解决了. .box{ border:1px solid #ddd; width:calc(100% - 10 ...
- HTML与CSS简单页面效果实例
本篇博客实现一个HTML与CSS简单页面效果实例 index.html <!DOCTYPE html> <html> <head> <meta charset ...
- MYBATIS 简单整理与回顾
这两天简单整理了一下MyBatis 相关api和jar包这里提供一个下载地址,免得找了 链接:http://pan.baidu.com/s/1jIl1KaE 密码:d2yl A.简单搭建跑项目 2.进 ...
- CSS精心整理的面试题
CSS精心整理的面试题 1.设置边框的样式用border-style实现,设置边框的颜色用border-color实现 2.CSS的语法由选择器.属性.值三部分组成 3.设置一个div的最小宽度为50 ...
随机推荐
- 编程道拓扑bcd.top 0x01/ 开局第一篇: 随便聊聊/ 随笔
0x01 开局 编程道拓扑(bcd.top)是一个前端从业者的思考和总结, 如果你喜欢, 欢迎关注! 作者是一个前端从业者, 本系列会总结作者在工作和学习中的一些思考, 会有具体的技术点, 也会有关于 ...
- vue移动端项目在手机上调试
1.电脑和手机要连同一个wifi 一定是复制无线网的IP,而不是以太网的IP 2.在你的电脑上查找无线网络的ipv4地址: 查找方法:windows+r 然后再输入框里输入cmd 回车 会出现这 ...
- CGMH:Constrained Sentence Generation by Metropolis-Hastings Sampling解读
根据关键字生成句子: 读进关键字,随机选择处理手段(增删改)以及待处理word的位置,然后计算接受/拒绝概率,根据概率生成一个新的序列,再循环这一过程,循环次数是500,每次都将困惑度最低的生成句子放 ...
- Acwing 蛇形矩阵
Acwing 蛇形矩阵 package javaqq; import java.util.Scanner; public class 蛇形 { public static void main(Stri ...
- Codeforces Round #618 (Div. 1)B(几何,观察规律)
观察猜测这个图形是中心对称图形是则YES,否则NO #define HAVE_STRUCT_TIMESPEC #include<bits/stdc++.h> using namespace ...
- h5页面调用相机功能
//accept:表示要打开的文件类型 capture:表示可以捕获到系统默认的设备 <input type="file" accept="image/*" ...
- ajax请求无法下载文件的原因
原因: Ajax下载文件的这种方式本来就是禁止的.出于安全因素的考虑,javascript是不能够保存文件到本地的, 所以ajax考虑到了这点,只是接受json,text,html,xml格式的返回值 ...
- RocketMq-粪发涂墙1.0
角色 说明 Producer 生产者,用于将消息发送到RocketMQ,生产者本身既可以是生成消息,也可以对外提供接口,由外部来调用接口,再由生产者将受到的消息发送给MQ. Consumer 消费者, ...
- opencv python:图像二值化
import cv2 as cv import numpy as np import matplotlib.pyplot as plt # 二值图像就是将灰度图转化成黑白图,没有灰,在一个值之前为黑, ...
- 通过ping和tracert命令来判断网络经过多少个路由。trace和route合作
摘抄自: https://blog.csdn.net/foreverhuylee/article/details/49853075 当我们访问某个网络时,通过tracert命令,就能知道本机与目标主机 ...
