docker安装并修改Nginx镜像
1、安装nginx镜像,命令:docker pull nginx
2、创建nginx容器,并启动,命令:docker run --name webserver -d -p 192.168.51.227:9999:80 nginx
run = create容器+start容器;
--name:指定容器的名字;
-d:后台运行;
-p:使用 -p 参数时,可以指定要映射的端口,并且在一个指定的端口上只可以绑定一个容器。支持的格式有:
- IP:HostPort:ContainerPort
- IP:ContainerPort
- HostPort:ContainerPort
nginx:要创建容器使用的镜像
注:-p参数端口映射,不指定IP可能远程无法访问。
3、查看启动中的容器的信息,命令:docker ps
[root@localhost nginx]# docker ps

CONTAINER ID        IMAGE               COMMAND                  CREATED             STATUS              PORTS                         NAMES

cd6957191c52        nginx               "nginx -g 'daemon ..."    minutes ago       Up  minutes        192.168.51.227:->/tcp   webserver
4、查看容器端口映射相关信息,命令:docker port webserver
[root@localhost nginx]# docker port webserver

/tcp -> 192.168.51.227:
5、查看容器详细信息,命令:docker inspect cd6957191c52
[root@localhost nginx]# docker inspect cd6957191c52

[

    {

        "Id": "cd6957191c52b25d29319b8ad450313931f2a8c730e4f1052704be957f8c573d",

        "Created": "2018-06-01T01:06:34.089549987Z",

        "Path": "nginx",

        "Args": [

            "-g",

            "daemon off;"

        ],

        "State": {

            "Status": "running",

            "Running": true,

            "Paused": false,

            "Restarting": false,

            "OOMKilled": false,

            "Dead": false,

            "Pid": ,

            "ExitCode": ,

            "Error": "",

            "StartedAt": "2018-06-01T01:06:34.307275905Z",

            "FinishedAt": "0001-01-01T00:00:00Z"

        },

        "Image": "sha256:ae513a47849c895a155ddfb868d6ba247f60240ec8495482eca74c4a2c13a881",

        "ResolvConfPath": "/var/lib/docker/containers/cd6957191c52b25d29319b8ad450313931f2a8c730e4f1052704be957f8c573d/resolv.conf",

        "HostnamePath": "/var/lib/docker/containers/cd6957191c52b25d29319b8ad450313931f2a8c730e4f1052704be957f8c573d/hostname",

        "HostsPath": "/var/lib/docker/containers/cd6957191c52b25d29319b8ad450313931f2a8c730e4f1052704be957f8c573d/hosts",

        "LogPath": "",

        "Name": "/webserver",

        "RestartCount": ,

        "Driver": "overlay2",

        "MountLabel": "",

        "ProcessLabel": "",

        "AppArmorProfile": "",

        "ExecIDs": null,

        "HostConfig": {

            "Binds": null,

            "ContainerIDFile": "",

            "LogConfig": {

                "Type": "journald",

                "Config": {}

            },

            "NetworkMode": "default",

            "PortBindings": {

                "80/tcp": [

                    {

                        "HostIp": "192.168.51.227",

                        "HostPort": ""

                    }

                ]

            },

            "RestartPolicy": {

                "Name": "no",

                "MaximumRetryCount":

            },

            "AutoRemove": false,

            "VolumeDriver": "",

            "VolumesFrom": null,

            "CapAdd": null,

            "CapDrop": null,

            "Dns": [],

            "DnsOptions": [],

            "DnsSearch": [],

            "ExtraHosts": null,

            "GroupAdd": null,

            "IpcMode": "",

            "Cgroup": "",

            "Links": null,

            "OomScoreAdj": ,

            "PidMode": "",

            "Privileged": false,

            "PublishAllPorts": false,

            "ReadonlyRootfs": false,

            "SecurityOpt": null,

            "UTSMode": "",

            "UsernsMode": "",

            "ShmSize": ,

            "Runtime": "docker-runc",

            "ConsoleSize": [

                ,

            ],

            "Isolation": "",

            "CpuShares": ,

            "Memory": ,

            "NanoCpus": ,

            "CgroupParent": "",

            "BlkioWeight": ,

            "BlkioWeightDevice": null,

            "BlkioDeviceReadBps": null,

            "BlkioDeviceWriteBps": null,

            "BlkioDeviceReadIOps": null,

            "BlkioDeviceWriteIOps": null,

            "CpuPeriod": ,

            "CpuQuota": ,

            "CpuRealtimePeriod": ,

            "CpuRealtimeRuntime": ,

            "CpusetCpus": "",

            "CpusetMems": "",

            "Devices": [],

            "DiskQuota": ,

            "KernelMemory": ,

            "MemoryReservation": ,

            "MemorySwap": ,

            "MemorySwappiness": -,

            "OomKillDisable": false,

            "PidsLimit": ,

            "Ulimits": null,

            "CpuCount": ,

            "CpuPercent": ,

            "IOMaximumIOps": ,

            "IOMaximumBandwidth":

        },

        "GraphDriver": {

            "Name": "overlay2",

            "Data": {

                "LowerDir": "/var/lib/docker/overlay2/d398ea082f4d98f4c42a66576114d08741846ff5ed42dc7630d28467d0df7e5d-init/diff:/var/lib/docker/overlay2/7b46becc5c07932a491ba03fa4a63cdcfa82c3939565109ec042123212355eb9/diff:/var/lib/docker/overlay2/7f407789f9c68b0b99591d4fdce67e3a13fb8a88d70a5c86aae4ef0ed41ca577/diff:/var/lib/docker/overlay2/3bb3dbd12f24a463d2c800dbba46b1bccee27557b670396426efff1fdec55539/diff",

                "MergedDir": "/var/lib/docker/overlay2/d398ea082f4d98f4c42a66576114d08741846ff5ed42dc7630d28467d0df7e5d/merged",

                "UpperDir": "/var/lib/docker/overlay2/d398ea082f4d98f4c42a66576114d08741846ff5ed42dc7630d28467d0df7e5d/diff",

                "WorkDir": "/var/lib/docker/overlay2/d398ea082f4d98f4c42a66576114d08741846ff5ed42dc7630d28467d0df7e5d/work"

            }

        },

        "Mounts": [],

        "Config": {

            "Hostname": "cd6957191c52",

            "Domainname": "",

            "User": "",

            "AttachStdin": false,

            "AttachStdout": false,

            "AttachStderr": false,

            "ExposedPorts": {

                "80/tcp": {}

            },

            "Tty": false,

            "OpenStdin": false,

            "StdinOnce": false,

            "Env": [

                "PATH=/usr/local/sbin:/usr/local/bin:/usr/sbin:/usr/bin:/sbin:/bin",

                "NGINX_VERSION=1.13.12-1~stretch",

                "NJS_VERSION=1.13.12.0.2.0-1~stretch"

            ],

            "Cmd": [

                "nginx",

                "-g",

                "daemon off;"

            ],

            "ArgsEscaped": true,

            "Image": "nginx",

            "Volumes": null,

            "WorkingDir": "",

            "Entrypoint": null,

            "OnBuild": null,

            "Labels": {

                "maintainer": "NGINX Docker Maintainers <docker-maint@nginx.com>"

            },

            "StopSignal": "SIGTERM"

        },

        "NetworkSettings": {

            "Bridge": "",

            "SandboxID": "c72e2e3656c36f679b1d6db45c36b586b5643acc17f1a429ae7f38525458ae8a",

            "HairpinMode": false,

            "LinkLocalIPv6Address": "",

            "LinkLocalIPv6PrefixLen": ,

            "Ports": {

                "80/tcp": [

                    {

                        "HostIp": "192.168.51.227",

                        "HostPort": ""

                    }

                ]

            },

            "SandboxKey": "/var/run/docker/netns/c72e2e3656c3",

            "SecondaryIPAddresses": null,

            "SecondaryIPv6Addresses": null,

            "EndpointID": "f010ca8232a1a8d1054305ecc49bf0d3ca4666b5a9c6b1a2d5b060a209d963d2",

            "Gateway": "172.17.0.1",

            "GlobalIPv6Address": "",

            "GlobalIPv6PrefixLen": ,

            "IPAddress": "172.17.0.2",

            "IPPrefixLen": ,

            "IPv6Gateway": "",

            "MacAddress": "02:42:ac:11:00:02",

            "Networks": {

                "bridge": {

                    "IPAMConfig": null,

                    "Links": null,

                    "Aliases": null,

                    "NetworkID": "ec84265a9aadee0c581ebeec22571e0f1c151dd96f0f6bbde7abad7148a0e3ce",

                    "EndpointID": "f010ca8232a1a8d1054305ecc49bf0d3ca4666b5a9c6b1a2d5b060a209d963d2",

                    "Gateway": "172.17.0.1",

                    "IPAddress": "172.17.0.2",

                    "IPPrefixLen": ,

                    "IPv6Gateway": "",

                    "GlobalIPv6Address": "",

                    "GlobalIPv6PrefixLen": ,

                    "MacAddress": "02:42:ac:11:00:02"

                }

            }

        }

    }

]
6、获得容器IP,命令:docker inspect cd6957191c52 |grep IPAddress
[root@localhost nginx]# docker inspect cd6957191c52 |grep IPAddress

            "SecondaryIPAddresses": null,

            "IPAddress": "172.17.0.2",

                    "IPAddress": "172.17.0.2",
7、访问nginx:http://192.168.51.227:9999/

8、容器的停止,命令:docker stop cd6957191c52
[root@localhost nginx]# docker ps

CONTAINER ID        IMAGE               COMMAND                  CREATED             STATUS              PORTS                         NAMES

cd6957191c52        nginx               "nginx -g 'daemon ..."    minutes ago      Up  minutes       192.168.51.227:->/tcp   webserver

[root@localhost nginx]# docker stop cd6957191c52

cd6957191c52

[root@localhost nginx]# docker ps

CONTAINER ID        IMAGE               COMMAND             CREATED             STATUS              PORTS               NAMES

[root@localhost nginx]#
9、查看不在运行状态的容器,命令:docker ps -a
[root@localhost nginx]# docker ps -a

CONTAINER ID        IMAGE               COMMAND                  CREATED             STATUS                          PORTS               NAMES

cd6957191c52        nginx               "nginx -g 'daemon ..."    minutes ago      Exited () About a minute ago                       webserver
10、启动容器,命令:docker start cd6957191c52
11、进入已经创建的容器,命令:docker exec -it cd6957191c52 bash
[root@localhost nginx]# docker start cd6957191c52

cd6957191c52

[root@localhost nginx]# docker exec -it cd6957191c52 /bin/bash

root@cd6957191c52:/# ls

bin  boot  dev    etc  home  lib    lib64  media  mnt  opt    proc  root  run  sbin  srv  sys  tmp  usr  var

root@cd6957191c52:/#
12、修改nginx访问页面内容
[root@localhost nginx]# docker exec -it cd6957191c52 bash

root@cd6957191c52:/#

root@cd6957191c52:/#

root@cd6957191c52:/#

root@cd6957191c52:/# echo '<h1>Hello,Docker!</h1>' > /usr/share/nginx/html/index.html

root@cd6957191c52:/# exit

exit
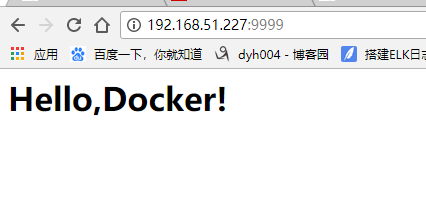
13、刷新页面或者重新访问:http://192.168.51.227:9999/,见下图

14、我们修改了容器的文件,也就是改动了容器的存储层。我们可以通过 docker的diff 命令看到具体的改动,命令如下:docker diff webserver
[root@localhost nginx]# docker diff webserver

C /root

A /root/.bash_history

C /var

C /var/cache

C /var/cache/nginx

A /var/cache/nginx/uwsgi_temp

A /var/cache/nginx/client_temp

A /var/cache/nginx/fastcgi_temp

A /var/cache/nginx/proxy_temp

A /var/cache/nginx/scgi_temp

C /usr

C /usr/share

C /usr/share/nginx

C /usr/share/nginx/html

C /usr/share/nginx/html/index.html

C /run

A /run/nginx.pid

A /run/secrets
15、现在我们定制好了变化,我们希望能将其保存下来形成镜像。要知道,当我们运行一个容器的时候(如果不使用卷的话),我们做的任何文件修改都会被记录于容器存储层里。而 Docker 提供了一个 docker commit 命令,可以将容器的存储层保存下来成为镜像。换句话说,就是在原有镜像的基础上,再叠加上容器的存储层,并构成新的镜像。以后我们运行这个新镜像的时候,就会拥有原有容器最后的文件变化。
docker commit 的语法格式为:
docker commit [选项] <容器ID或容器名> [<仓库名>[:<标签>]]
我们可以用下面的命令将容器保存为镜像:docker commit --author "dyh <dyh@126.com>" --message "修改默认网页" webserver nginx:v2
[root@localhost nginx]# docker commit --author "dyh <dyh@126.com>" --message "修改默认网页" webserver nginx:v2

sha256:1eca2575e4f55cac30e2b7f0dbcb719696a0dd8a68c46181c5c7c91205275f12
16、查看镜像信息,命令:docker images nginx
[root@localhost nginx]# docker images nginx

REPOSITORY          TAG                 IMAGE ID            CREATED              SIZE

nginx               v2                  1eca2575e4f5        About a minute ago    MB

docker.io/nginx     latest              ae513a47849c         weeks ago           MB
17、查看镜像内的历史记录,命令:docker history nginx:v2
[root@localhost nginx]# docker history nginx:v2

IMAGE               CREATED             CREATED BY                                      SIZE                COMMENT

1eca2575e4f5         minutes ago      nginx -g daemon off;                             B               修改默认网页

ae513a47849c         weeks ago         /bin/sh -c #(nop)  CMD ["nginx" "-g" "daem...   0 B

<missing>            weeks ago         /bin/sh -c #(nop)  STOPSIGNAL [SIGTERM]          B

<missing>            weeks ago         /bin/sh -c #(nop)  EXPOSE /tcp                 B

<missing>            weeks ago         /bin/sh -c ln -sf /dev/stdout /var/log/ngi...    B

<missing>            weeks ago         /bin/sh -c set -x  && apt-get update  && a...   53.7 MB

<missing>            weeks ago         /bin/sh -c #(nop)  ENV NJS_VERSION=1.13....    B

<missing>            weeks ago         /bin/sh -c #(nop)  ENV NGINX_VERSION=1.13....    B

<missing>            weeks ago         /bin/sh -c #(nop)  LABEL maintainer=NGINX ...    B

<missing>            weeks ago         /bin/sh -c #(nop)  CMD ["bash"]                  B

<missing>            weeks ago         /bin/sh -c #(nop) ADD file:ec5be7eec56a749...   55.3 MB
18、使用新的镜像创建容器,命令:docker run --name webserver2 -d -p 192.168.51.227:8888:80 nginx:v2
[root@localhost nginx]# docker run --name webserver2 -d -p 192.168.51.227:: nginx:v2

10af87f7973e9c04e352783521eb0f50bdbd6f3e1de85d2517e3c177977f3e5a
19、查看镜像进程
[root@localhost nginx]# docker ps

CONTAINER ID        IMAGE               COMMAND                  CREATED             STATUS              PORTS                         NAMES

10af87f7973e        nginx:v2            "nginx -g 'daemon ..."    seconds ago       Up  seconds        192.168.51.227:->/tcp   webserver2

cd6957191c52        nginx               "nginx -g 'daemon ..."   About an hour ago   Up  minutes       192.168.51.227:->/tcp   webserver
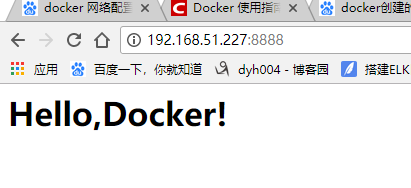
20、访问新容器:http://192.168.51.227:8888/

docker安装并修改Nginx镜像的更多相关文章
- docker实战之通过nginx镜像来部署静态页
本章我们主要讲解如何通过docker构建一个nginx容器,这里我们以部署一个静态html为素材来进行演示. 首先我们通过[docker search nginx]命令来查找Docker Hub上的n ...
- Docker 安装并定制 Nginx 服务器
安装并定制 Nginx 1.查阅对应的官方文档,首先下载镜像文件: [spider@izwz9d74k4cznxtxjeeur9z local]$ sudo docker pull nginx [su ...
- docker学习之路-nginx镜像(翻译)
本篇来自https://hub.docker.com/_/nginx/?tab=description 它是docker hub上nginx的官方网站,上面有关于nginx的使用描述等.从这里你可以找 ...
- docker安装与配置nginx详细过程
注:大鸟飞过,此方式只用于快速搭建使用 第一步 pull nginx 命令:docker pull nginx 第二步 启动nginx 命令:docker run --name nginx -p 80 ...
- Docker安装mysql、nginx、redis、tomcat
拉取mysql 5.7官方镜像 docker pull mysql:5.7 启动容器 docker run --name mysql5.7 -p 3306:3306 -e MYSQL_ROOT_PAS ...
- Docker安装Mysql和Nginx
1. 序言 将应用容器化更方便于管理,昨天辛辛苦苦安装在宿主机上的,今天狠心重置服务器,学下docker练练手. 2. Get start 2.1 安装Docker 公司的云用的是ubuntu,我自己 ...
- docker制作cenos+php56+nginx镜像
首先你环境要安装好docker 1 获取centos镜像. docker search centos 选取第一个官方镜像. docker pull docker.io/centos 新建镜像挂载目录 ...
- Docker for windows修改默认镜像文件位置
docker版本为18.06 windows上安装的docker其实本质上还是借助与windows平台的hyper-v技术来创建一个Linux虚拟机,你执行的所有命令其实都是在这个虚拟机里执行的,所以 ...
- docker安装和配置nginx
配置nginx docker配置nginx 本机ip是192.168.0.200 docker pull nginx 配置nginx主机 vi /root/docker/nginx/nginx01.c ...
随机推荐
- 智能POS相关FAQ
1.安卓智能POS(一体机)的口碑点餐已知问题: 1.由于口碑的组合套餐接口不稳定,强烈建议商户不要使用组合套餐商品.已开通口碑后付的门店,如果有组合套餐商品,暂时不要使用组合套餐商品:有组合套餐需求 ...
- Orchard详解--第九篇 拓展模块及引用的处理
在分析Orchard的模块加载之前,先简要说一下因为Orchard中的模块并不是都被根(启动)项目所引用的,所以当Orchard需要加载一个模块时首先需要保证该模块所依赖的其它程序集能够被找到,那么才 ...
- 如何获取Azure AD tenant的tenant Id?
一般情况下,Azure AD用户知道自己tenant域名,因为域名是账户的后缀,例如:contoso.onMicrosoft.com.如果你还不了解什么是Azure AD tenant,可 ...
- 关于C#List中FindAll用法的一些简单示例
using System; using System.Collections.Generic; public partial class List : System.Web.UI.Page { pro ...
- rabbitMQ模式
1.hello 消息生产者p将消息放入队列 消费者监听队列,如果队列中有消息,就消费掉,消息被拿走后,自动从队列删除(隐患,消息可能没有被消费者正确处理,已经消失了,无法恢复) 应用场景:聊天室 案 ...
- 轻量的web框架Bottle
简洁的web框架Bottle 简介 Bottle是一个非常简洁,轻量web框架,与django形成鲜明的对比,它只由一个单文件组成,文件总共只有3700多行代码,依赖只有python标准库.但是麻雀虽 ...
- 再次理解 C# LINQ
语言集成查询 (LINQ) 是一系列直接将查询功能集成到 C# 语言的技术统称. 查询表达式(生成表达式) 1.IEnumerable<T> 查询编译为委托.如 source.Where( ...
- spring boot metrics信息推送开发
上一篇文章是关于 “spring boot +RabbitMQ +InfluxDB+Grafara监控实践” 主要讲spring boot应用新能监控信息的收集方案实践 实践是hystrix信息推送的 ...
- May 31. 2018 Week 22nd Thursday
The good seaman is known in bad weather. 惊涛骇浪,方显英雄本色. As we all know, the true worth of a person is ...
- 【Java多线程通信】syncrhoized下wait()/notify()与ReentrantLock下condition的用法比较
转载请注明原文地址:http://www.cnblogs.com/ygj0930/p/6556925.html 一:syncrhoized使用同一把锁的多个线程用通信实现执行顺序的调度 我们知道,使 ...
