Django源码分析之权限系统_擒贼先擒王
乍见
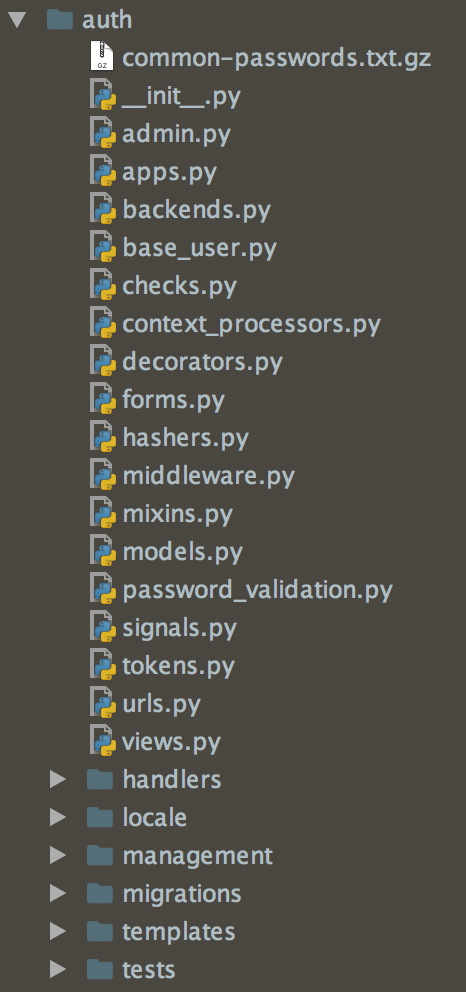
Django内置的权限系统已经很完善了,加上django-guardian提供的功能,基本上能满足大部分的权限需求。暂且不说django-guardian,我们先来看下Django内置的权限系统:django.contrib.auth 包。
相识
一般权限系统分为全局权限和对象权限。Django只提供了一个对象权限的框架,具体实现由第三方库django-gardian完成。我们只看全局权限。
先来看auth包暴露出哪些接口。
django.contrib.auth.__init__.py
def load_backend(path):

    return import_string(path)()

def _get_backends(return_tuples=False):

    backends = []

    for backend_path in settings.AUTHENTICATION_BACKENDS:

        backend = load_backend(backend_path)

        backends.append((backend, backend_path) if return_tuples else backend)

    if not backends:

        raise ImproperlyConfigured(

            'No authentication backends have been defined. Does '

            'AUTHENTICATION_BACKENDS contain anything?'

        )

    return backends

def get_backends():

    return _get_backends(return_tuples=False)
前三个方法都是为了加载backends。一个backend其实就是一个class,必须实现authenticate和get_user两个方法。每当我们这样验证用户时
authenticate(username='username', password='password')
django就会去调用这些backend class,用其提供的方法去验证用户权限。那django是如何知道要调用哪些backend class呢?答案就在settings.py中,默认为
AUTHENTICATION_BACKENDS = ['django.contrib.auth.backends.ModelBackend']
那Django是如何调用这些backend class的呢?
def authenticate(**credentials):

    """

    If the given credentials are valid, return a User object.

    """

    for backend, backend_path in _get_backends(return_tuples=True):

        try:

            inspect.getcallargs(backend.authenticate, **credentials)

        except TypeError:

            # This backend doesn't accept these credentials as arguments. Try the next one.

            continue

        try:

            user = backend.authenticate(**credentials)

        except PermissionDenied:

            # This backend says to stop in our tracks - this user should not be allowed in at all.

            return None

        if user is None:

            continue

        # Annotate the user object with the path of the backend.

        user.backend = backend_path

        return user

    # The credentials supplied are invalid to all backends, fire signal

    user_login_failed.send(sender=__name__,

            credentials=_clean_credentials(credentials))
由此可见,Django会在第一个验证正确的backend class调用完成后停止,或者碰到PermissionDenied异常也会停止,所以backend class的顺序也很重要。可以添加自定义的backend class。
def login(request, user):

    """

    Persist a user id and a backend in the request. This way a user doesn't

    have to reauthenticate on every request. Note that data set during

    the anonymous session is retained when the user logs in.

    """

    session_auth_hash = ''

    if user is None:

        user = request.user

    if hasattr(user, 'get_session_auth_hash'):

        session_auth_hash = user.get_session_auth_hash()

    if SESSION_KEY in request.session:

        if _get_user_session_key(request) != user.pk or (

                session_auth_hash and

                request.session.get(HASH_SESSION_KEY) != session_auth_hash):

            # To avoid reusing another user's session, create a new, empty

            # session if the existing session corresponds to a different

            # authenticated user.

            request.session.flush()

    else:

        request.session.cycle_key()

    request.session[SESSION_KEY] = user._meta.pk.value_to_string(user)

    request.session[BACKEND_SESSION_KEY] = user.backend

    request.session[HASH_SESSION_KEY] = session_auth_hash

    if hasattr(request, 'user'):

        request.user = user

    rotate_token(request)

    user_logged_in.send(sender=user.__class__, request=request, user=user)
login方法,顾名思义,登录用户,同时设置好session,最后发送登入成功通知
def logout(request):

    """

    Removes the authenticated user's ID from the request and flushes their

    session data.

    """

    # Dispatch the signal before the user is logged out so the receivers have a

    # chance to find out *who* logged out.

    user = getattr(request, 'user', None)

    if hasattr(user, 'is_authenticated') and not user.is_authenticated():

        user = None

    user_logged_out.send(sender=user.__class__, request=request, user=user)

    # remember language choice saved to session

    language = request.session.get(LANGUAGE_SESSION_KEY)

    request.session.flush()

    if language is not None:

        request.session[LANGUAGE_SESSION_KEY] = language

    if hasattr(request, 'user'):

        from django.contrib.auth.models import AnonymousUser

        request.user = AnonymousUser()
相对的,logout方法,负责登出用户,清理session,最后设置当前用户为匿名用户
def get_user_model():

    """

    Returns the User model that is active in this project.

    """

    try:

        return django_apps.get_model(settings.AUTH_USER_MODEL)

    except ValueError:

        raise ImproperlyConfigured("AUTH_USER_MODEL must be of the form 'app_label.model_name'")

    except LookupError:

        raise ImproperlyConfigured(

            "AUTH_USER_MODEL refers to model '%s' that has not been installed" % settings.AUTH_USER_MODEL

        )
Django不推荐直接使用User class,而是通知get_user_model方法获取当前的用户class(或者使用settins.AUTH_USER_MODEL)。这是为了防止因为开发者使用了自定义用户class而导致的信息错误。
def update_session_auth_hash(request, user):

    """

    Updating a user's password logs out all sessions for the user if

    django.contrib.auth.middleware.SessionAuthenticationMiddleware is enabled.

    This function takes the current request and the updated user object from

    which the new session hash will be derived and updates the session hash

    appropriately to prevent a password change from logging out the session

    from which the password was changed.

    """

    if hasattr(user, 'get_session_auth_hash') and request.user == user:

        request.session[HASH_SESSION_KEY] = user.get_session_auth_hash()
最后这个方法的使用场景很少。一般我们更新用户密码时,会在session中清除用户登录信息,导致用户需要重新登录。而使用update_session_auth_hash我们就可以在更新用户密码的同时更新用户的session信息,这样,用户就不需要重新登录了。
回想
擒贼先擒王,以上都是django.contrib.auth包中的__init__.py入口文件中的内容,背后还有很多“能工巧匠”,否则怎么支撑起auth整套权限系统?后续文章会一一介绍。
Django源码分析之权限系统_擒贼先擒王的更多相关文章
- Django源码分析之启动wsgi发生的事
前言 好多人对技术的理解都停留在懂得使用即可,因而只会用而不会灵活用,俗话说好奇害死猫,不然我也不会在凌晨1.48的时候决定写这篇博客,好吧不啰嗦了 继续上一篇文章,后我有个问题(上文:&qu ...
- 2、Django源码分析之启动wsgi发生了哪些事
一 前言 Django是如何通过网络socket层接收数据并将请求转发给Django的urls层? 有的人张口就来:就是通过wsgi(Web Server Gateway Interface)啊! D ...
- [Abp vNext 源码分析] - 2. 模块系统的变化
一.简要说明 本篇文章主要分析 Abp vNext 当中的模块系统,从类型构造层面上来看,Abp vNext 当中不再只是单纯的通过 AbpModuleManager 来管理其他的模块,它现在则是 I ...
- django源码分析 python manage.py runserver
django是一个快速开发web应用的框架, 笔者也在django框架上开发不少web应用,闲来无事,就想探究一下django底层到底是如何实现的,本文记录了笔者对django源码的分析过程 I be ...
- [Abp vNext 源码分析] - 7. 权限与验证
一.简要说明 在上篇文章里面,我们在 ApplicationService 当中看到了权限检测代码,通过注入 IAuthorizationService 就可以实现权限检测.不过跳转到源码才发现,这个 ...
- drf源码分析系列---权限
权限的使用 全局使用 from rest_framework.permissions import BasePermission from rest_framework import exceptio ...
- django源码分析——本地runserver分析
本文环境python3.5.2,django1.10.x系列 1.根据上一篇文章分析了,django-admin startproject与startapp的分析流程后,根据django的官方实例此时 ...
- django源码分析
原文网址 https://www.jianshu.com/p/17d78b52c732?utm_campaign=maleskine&utm_content=note&utm_medi ...
- django源码分析——处理请求到wsgi及视图view
本文环境python3.5.2,django1.10.x系列 根据前上一篇runserver的博文,已经分析了本地调试服务器的大致流程,现在我们来分析一下当runserver运行起来后,django框 ...
随机推荐
- 菜鸟笔记 -- Chapter 6.2.5 代码块
6.2.5 代码块 在编程过程中我们通常会遇到如下这种形式的程序: package democlass; public class CodeBlock { { System.out.println( ...
- GNS3的安装和配置
一.为什么安装GNS3 简单说来它是dynamips的一个图形前端,相比直接使用dynamips这样的虚拟软件要更容易上手和更具有可操作性.更重要的一点是很多Cisco实验在cisco packet ...
- JavaScript-语法专题
一.数据类型的转换 概述 JavaScript是一种动态语言,变量没有类型限制,可以随时赋予任意值 强制转换:主要是值Number(),String(),Boolean三个函数 Number函数,可以 ...
- 简单使用PuTTy登录centos虚拟机
博主刚刚开始学习Linux,想通过写博客的方式加深对linux学习的记忆 使用虚拟机安装精简版的linux后发现窗口字体太小,于是就想着通过PuTTy登录的方式解决 简单安装linux后 将linux ...
- JS日期去杠,日期转换String转Date
1.巧妙使用split()和join()替换字符串var str = '2014-05-05';var newstr = str.split('-').join("");split ...
- Linux 新建定时任务
Linux 新建定时任务: 1.查看指定用户列表: crontab -u apache -l 2.切换至对应用户,这里是apache su apache 3.新增定时任务: crontab -e 写入 ...
- 图解HTTP总结(8)——确认访问用户身份的认证
Session 管理及 Cookie 应用 基于表单认证的标准规范尚未有定论,一般会使用Cookie来管理Session(会话). 基于表单认证本身是通过服务器端的Web应用,将客户端发送过来的用户I ...
- ruby 类库组成
一. 核心类库: 二.标准类库: 文本 base64.rb 处理Base64编码的模块 csv.rb CSV(Comma Separated Values)库 ruby 1.8 特性 ...
- Python3 使用基本循环实现多级目录(思路)
一.多级目录设计: 1. 通过循环的方式显示菜单和进入菜单 2. 设置标志位以提供回退上一层菜单 2. 设置标志位以提供退出程序 二.注意要点: 1. 菜单样式,层次关系不要弄混乱 2. 当输入错误时 ...
- ffmpeg安装配置以及库调用
参考https://blog.csdn.net/jayson_jang/article/details/52329508 cd ffmpeg ./configure --enable-shared - ...
