Upload Files In ASP.NET Core 1.0 (Form POST And JQuery Ajax)
Uploading files is a common requirement in web applications. In ASP.NET Core 1.0 uploading files and saving them on the server is quite easy. To that end this article shows how to do just that.
Begin by creating a new ASP.NET Core project. Then add HomeController to the controllers folder. Then add UploadFiles view to Views > Home folder of the application.
HTML form for uploading files
Open the UploadFiles view and add the following HTML markup in it:
<form asp-action="UploadFiles"

      asp-controller="Home"

      method="post"

      enctype="multipart/form-data">

    <input type="file" name="files" multiple />

    <input type="submit" value="Upload Selected Files" />

</form>
The above markup uses form tag helper of ASP.NET Core MVC. The asp-action attribute indicates that the form will be processed by the UploadFiles action upon submission. The asp-controller attribute specifies the name of the controller containing the action method. The form is submitted using POST method. The enctype attribute of the form is set to multipart/form-data indicating that it will be used for file upload operation.
The form contains an input field of type file. The name attribute of the file input field is set to files and the presence of multiple attribute indicates that multiple files can be uploaded at once. The submit button submits the form to the server.
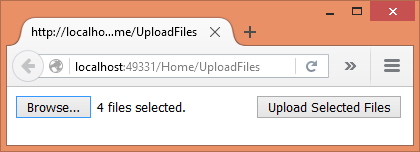
If you run the application at this stage, the UploadFiles view should look like this:
Constructor and UploadFiles() GET action
Now, open the HomeController and add a constructor to it as shown below:
public class HomeController : Controller

{

    private IHostingEnvironment hostingEnv;

    public HomeController(IHostingEnvironment env)

    {

        this.hostingEnv = env;

    }

}
The constructor has a parameter of type IHostingEnvironment (Microsoft.AspNet.Hosting namespace). This parameter will be injected by MVC framework into the constructor. You need this parameter to construct the full path for saving the uploaded files. The IHostingEnvironment object is saved into a local variable for later use.
Then add UploadFiles() action for GET requests as shown below:
public IActionResult UploadFiles()

{

    return View();

}
UploadFiles() POST action
Finally, add UploadFiles() action for handling the POST requests.
[HttpPost]

public IActionResult UploadFiles(IList<IFormFile> files)

{

    long size = 0;

    foreach(var file in files)

    {

        var filename = ContentDispositionHeaderValue

                        .Parse(file.ContentDisposition)

                        .FileName

                        .Trim('"');

        filename = hostingEnv.WebRootPath + $@"\{fileName}";

        size += file.Length;

        using (FileStream fs = System.IO.File.Create(filename))

        {

           file.CopyTo(fs);

           fs.Flush();

        }

    }

    ViewBag.Message = $"{files.Count} file(s) /

                      {size} bytes uploaded successfully!";

    return View();

}
The UploadFiles() action has a parameter - IList<IFormFile> - to receive the uploaded files. The IFormFile object represents a single uploaded file. Inside, a size variable keeps track of how much data is being uploaded. Then a foreach loop iterates through the files collection.
The client side file name of an uploaded file is extracted using the ContentDispositionHeaderValue class (Microsoft.Net.Http.Headers namespace) and the ContentDisposition property of the IFormFile object. Let's assume that you wish to save the uploaded files into the wwwroot folder. So, to arrive at the full path you use the WebRootPath property of IHostingEnvironment and append the filename to it.
Finally, the file is saved by the code inside the using block. That code basically creates a new FileStream and copies the uploaded file into it. This is done using the Create() and the CopyTo() methods. A message is stored in ViewBag to be displayed to the end user.
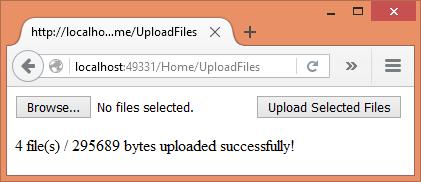
The following figure shows a sample successful run of the application:
Using jQuery Ajax to upload the files
In the preceding example you used form POST to submit the files to the server. What if you wish to send files through Ajax? You can accomplish the task with a little bit of change to the <form> and the action.
Modify the <form> to have a plain push button instead of submit button as shown below:
<form method="post" enctype="multipart/form-data">

    <input type="file" id="files"

           name="files" multiple />

    <input type="button"

           id="upload"

           value="Upload Selected Files" />

</form>
Then add a <script> reference to the jQuery library and write the following code to handle the click event of the upload button:
$(document).ready(function () {

    $("#upload").click(function (evt) {

        var fileUpload = $("#files").get(0);

        var files = fileUpload.files;

        var data = new FormData();

        for (var i = 0; i < files.length ; i++) {

            data.append(files[i].name, files[i]);

        }

        $.ajax({

            type: "POST",

            url: "/home/UploadFilesAjax",

            contentType: false,

            processData: false,

            data: data,

            success: function (message) {

                alert(message);

            },

            error: function () {

                alert("There was error uploading files!");

            }

        });

    });

});
The above code grabs each file from the file field and adds it to a FormData object (HTML5 feature). Then $.ajax() method POSTs the FormData object to the UploadFilesAjax() action of the HomeController. Notice that the contentType and processData properties are set to false since the FormData contains multipart/form-data content. The data property holds the FormData object.
Finally, add UploadFilesAjax() action as follows:
[HttpPost]

public IActionResult UploadFilesAjax()

{

    long size = 0;

    var files = Request.Form.Files;

    foreach (var file in files)

    {

        var filename = ContentDispositionHeaderValue

                        .Parse(file.ContentDisposition)

                        .FileName

                        .Trim('"');

        filename = hostingEnv.WebRootPath + $@"\{filename}";

        size += file.Length;

        using (FileStream fs = System.IO.File.Create(filename))

        {

           file.CopyTo(fs);

           fs.Flush();

        }

    }

    string message = $"{files.Count} file(s) /

                       {size} bytes uploaded successfully!";

    return Json(message);

}
The code inside UploadFilesAjax() is quite similar to UploadFiles() you wrote earlier. The main difference is how the files are received. The UploadFilesAjax() doesn't have IList<IFormFile> parameter. Instead it receives the files through the Request.Form.Files property. Secondly, the UploadFilesAjax() action returns a JSON string message to the caller for the sake of displaying in the browser.
That's it for now! Keep coding!!
Upload Files In ASP.NET Core 1.0 (Form POST And JQuery Ajax)的更多相关文章
- ASP.NET Core 1.0中实现文件上传的两种方式(提交表单和采用AJAX)
Bipin Joshi (http://www.binaryintellect.net/articles/f1cee257-378a-42c1-9f2f-075a3aed1d98.aspx) Uplo ...
- 用VSCode开发一个asp.net core2.0+angular5项目(5): Angular5+asp.net core 2.0 web api文件上传
第一部分: http://www.cnblogs.com/cgzl/p/8478993.html 第二部分: http://www.cnblogs.com/cgzl/p/8481825.html 第三 ...
- [Asp.net core 2.0]Ueditor 图片上传
摘要 在项目中要用到富文本编辑器,包含上传图片,插入视频等功能.但ueditor只有.net版本,没有支持core.那么上传等接口就需要自己实现了. 一个例子 首先去百度ueditor官网下载简化版的 ...
- ASP.NET Core 1.0 入门——了解一个空项目
var appInsights=window.appInsights||function(config){ function r(config){t[config]=function(){var i= ...
- #ASP.NET Core 1.0 Key Features
Cross platform support and flexible runtime engine(跨平台支持和灵活的运行时引擎) ASP.NET Core 1.0 offers support f ...
- 【原生态跨平台:ASP.NET Core 1.0(非Mono)在 Ubuntu 14.04 服务器上一对一的配置实现-篇幅1】
鸡冻人心的2016,微软高产年. build 2016后 各种干货层出不穷. 1 Win10 集成了bash ,实现了纳德拉的成诺,Microsoft Love Linux!!! 2 跨平台 ,收 ...
- Amazing ASP.NET Core 2.0
前言 ASP.NET Core 的变化和发展速度是飞快的,当你发现你还没有掌握 ASP.NET Core 1.0 的时候, 2.0 已经快要发布了,目前 2.0 处于 Preview 1 版本,意味着 ...
- 从头编写 asp.net core 2.0 web api 基础框架 (1)
工具: 1.Visual Studio 2017 V15.3.5+ 2.Postman (Chrome的App) 3.Chrome (最好是) 关于.net core或者.net core 2.0的相 ...
- 【转载】从头编写 asp.net core 2.0 web api 基础框架 (1)
工具: 1.Visual Studio 2017 V15.3.5+ 2.Postman (Chrome的App) 3.Chrome (最好是) 关于.net core或者.net core 2.0的相 ...
随机推荐
- Python爬虫 获得淘宝商品评论
自从写了第一个sina爬虫,便一发不可收拾.进入淘宝评论爬虫正题: 在做这个的时候,也没有深思到底爬取商品评论有什么用,后来,爬下来了数据.觉得这些数据可以用于帮助分析商品的评论,从而为用户选择商品提 ...
- Sqlserver内存管理:限制最大占用内存(转载)
一.Sqlserver对系统内存的管理原则是:按需分配,且贪婪(用完不还).它不会自动释放内存,因此执行结果集大的sql语句时,数据取出后,会一直占用内存,直到占满机器内存(并不会撑满,还是有个最大限 ...
- Java多线程编程核心技术(一)Java多线程技能
1.进程和线程 一个程序就是一个进程,而一个程序中的多个任务则被称为线程. 进程是表示资源分配的基本单位,线程是进程中执行运算的最小单位,亦是调度运行的基本单位. 举个例子: 打开你的计算机上的任务管 ...
- Redis中的数据结构
1. 底层数据结构, 与Redis Value Type之间的关系 对于Redis的使用者来说, Redis作为Key-Value型的内存数据库, 其Value有多种类型. String Hash L ...
- UART、SPI和I2C详解
做单片机开发时UART,SPI和I2C都是我们最经常使用到的硬件接口,我收集了相关的具体材料对这三种接口进行了详细的解释. UART UART是一种通用串行数据总线,用于异步通信.该总线双向通信,可以 ...
- BOM基础 计时器 定时器 DOM 基础
-------------------------------------------滴水穿石,我心永恒. day48 CSSJS 1 ECMA script 2 BOM browser object ...
- elasticsearch简单操作(二)
让我们建立一个员工目录,假设我们刚好在Megacorp工作,这时人力资源部门出于某种目的需要让我们创建一个员工目录,这个目录用于促进人文关怀和用于实时协同工作,所以它有以下不同的需求:1.数据能够包含 ...
- Sql Server中的nvarchar(n)、varchar(n) 和Mysql中的char(n)、varchar(n)
刚才有幸看了下 nvarchar(n)和varchar(n),感觉以前的认知有误. nvarchar(n):n指的是字符个数,范围是1-4000,存储的是可变长度的Unicode字符数据. 按字符存储 ...
- openstack-KVM管理工具
一. virsh 通过libvirt API管理Hpervisor.node.domain,实现多数功能调用. 即统一管理多台计算机上的域. 1.管理其他服务器(node) (1)修改配置文件:vim ...
- 03-命令图片.doc