66、django之模型层(model)--多表相关操作(图书管理小练习)
前面几篇随笔的数据库增删改查操作都是在单表的操作上的,然而现实中不可能都是单表操作,更多的是多表操作,一对一,一对多,多对多的表结构才是我们经常需要处理的,本篇将带我们了解多表操作的一些相关操作。也会带着大家做一个简单的图书管理的小练习。
本篇导航:
一、建表
本篇继续以图书管理的例子。
模型:书籍有书名、作者、出版日期、价格,出版社,一本书可能会有多个作者,一个作者也可以写多本书,所以作者和书籍的关系就是多对多的关联关系(many-to-many);一本书只应该由一个出版商出版,所以出版商和书籍是一对多关联关系(one-to-many)。
1、准备工作
1)创建一个项目
2)提前在mysql数据库里建立一个库
3)修改相关setting配置。(详情可以参考前面63、64、65三篇随笔)
2、建表
你如果在建表时没有添加主键,django会自动给我们的表添加一个主键id,是不是很棒0.0
1)语法
一对一:

models.OneToOneField() ===>models.ForeignKey(,unique="True")

一对多:

models.ForeignKey()

多对多:

models.ManyToManyField()

属性:

related_name=""

可选属性用来给此次关联起名,如果不用此属性django会自动给一个名字后面查询的例子会说明(是关联的名字不是字段名)
2)建表实例
#图书表

class Book(models.Model) :

    title = models.CharField(max_length=32)

    publishDate = models.DateField()

    prince = models.DecimalField(max_digits=5,decimal_places=2)

    publish = models.ForeignKey("Publish")  #一对多

    authorlish = models.ManyToManyField("Author")   #多对多

    def __str__(self) :

        return self.title

#出版社

class Publish(models.Model) :

    name = models.CharField(max_length=32)

    addr = models.CharField(max_length=32)

    def __str__(self) :

        return  self.name

#作者表

class Author(models.Model) :

    name = models.CharField(max_length=32)

    sex = models.CharField(max_length=32)

    age = models.IntegerField()

    tel = models.CharField(max_length=32)

    addr = models.CharField(max_length=32)

    def __str__(self) :

        return  self.name
图书、出版社、作者
这个图书的小练习中的表没有一对一关联用法用其他两个关联基本相同
3、注意
1)主键id 字段是自动添加的
2)对于外键字段,Django 会在字段名上添加"_id" 来创建数据库中的列名
3)外键字段 ForeignKey 有一个 null=True 的设置(它允许外键接受空值 NULL),你可以赋给它空值 None 。
4)在表与表的连接中有related_name属性可以起名用于反向查询,当然不写有默认(表名_set),一对一关联可以直接用表名
二、template模版的设计
此次的小练习template是用Bootstrap框架搭建的,因为我们本篇主讲的django模版层所以会贴出代码逮捕做分析,对前端有问题的可以看以前相关随笔哦。
相关随笔推荐:
Bootstrap使用:http://www.cnblogs.com/liluning/p/7643879.html
静态文件在模版中的使用:http://www.cnblogs.com/liluning/p/7724699.html
Bootstrap官网:http://v3.bootcss.com/
模版使用:http://v3.bootcss.com/examples/dashboard/
三、添加表记录
1、一对多添加语法
方式1:

   publish_obj=Publish.objects.get(nid=1)

   Book.objects.create(title="金瓶眉",publishDate="2012-12-12",publish=publish_obj)

方式2:

   Book.objects.create(title="金瓶眉",publishDate="2012-12-12",publish_id=1)
推荐使用第一种方式 第二种方式在你知道外键publish_id确切的值时可以使用
2、多对多添加语法
book_obj=Book.objects.create(title="追风筝的人",publishDate="2012-11-12",prince=69,publish_id=1)

author_yuan=Author.objects.create(name="yuan",age=23...)

author_egon=Author.objects.create(name="egon",age=32...)

book_obj.authorlish.add(author_egon,author_yuan)    #  将某个特定的 model 对象添加到被关联对象集合中。   =======    book_obj.authors.add(*[])

book_obj.authorlish.create()      #创建并保存一个新对象,然后将这个对象加被关联对象的集合中,然后返回这个新对象。
当然我们绑定的关联也可以解除:
book_obj.authorlish.remove()     # 将某个特定的对象从被关联对象集合中去除。    ======   book_obj.authors.remove(*[])

book_obj.authorlish.clear()       #清空被关联对象集合。
3、一对多添加和多对多添加实例
def addbook(request) :

    # 添加图书页面点击提交

    if request.method == "POST" :

        # 提取添加数据

        title = request.POST.get("title")

        author = request.POST.getlist("author")

        publishDate = request.POST.get("publishDate")

        prince = request.POST.get("prince")

        publish = request.POST.get("publish")

        # 出版社object

        publish_obj = models.Publish.objects.filter(name=publish)[0]

        # 添加数据到数据库

        book_obj = models.Book.objects.create(title=title, publishDate=publishDate, prince=prince ,publish=publish_obj)

        # 多对多添加

        for i in author :

            obj = models.Author.objects.filter(name=i)[0]

            book_obj.authorlish.add(obj)

        return redirect("/index/")

    # 作者与出版社querySet

    authorList = models.Author.objects.all()

    publishList = models.Publish.objects.all()

    return render(request,"addbook.html",{"authorList":authorList,"publishList":publishList})
一对一因为没用用到不做演示 用法与其他两个关联相同
4、相关方法演示(例子选自官网)
1)add
把指定的模型对象添加到关联对象集中。
b = Blog.objects.get(id=1)

e = Entry.objects.get(id=234)

b.entry_set.add(e)
2)create
创建一个新的对象,保存对象,并将它添加到关联对象集之中。返回新创建的对象。
b = Blog.objects.get(id=1)

e = b.entry_set.create(

    headline='Hello',

    body_text='Hi',

    pub_date=datetime.date(2005, 1, 1)

)
3)remove
从关联对象集中移除执行的模型对象
b = Blog.objects.get(id=1)

e = Entry.objects.get(id=234)

b.entry_set.remove(e)
4)clear
从关联对象集中移除一切对象。
b = Blog.objects.get(id=1)

b.entry_set.clear()
四、查询表记录
查询相关API前面的随笔已经写到 单表查询还有双下划线查询0.0
1、双下划线单表查询
models.book.objects.filter(id__lt=10, id__gt=1)   # 获取id大于1 且 小于10的值

models.book.objects.filter(id__in=[11, 22, 33])   # 获取id等于11、22、33的数据

models.book.objects.exclude(id__in=[11, 22, 33])  # not in

models.book.objects.filter(name__contains="ven")  #模糊匹配

models.book.objects.filter(name__icontains="ven") # icontains大小写不敏感

models.book.objects.filter(id__range=[1, 2])      # 范围bettwen and

startswith,istartswith, endswith, iendswith
2、基于对象的跨表查询
1)一对多查询
正向查询
# 查询id=1的书籍的出版社所在的城市

book_obj=Book.objects.get(id=1)

print(book_obj.publish.city)

# book_obj.publish 是id=1的书籍对象关联的出版社对象
反向查询
# 查询 人民出版社出版过的所有书籍

publish=Publish.objects.get(name="人民出版社")

book_list=publish.book_set.all()  # 与人民出版社关联的所有书籍对象集合

for book_obj in book_list:

    print(book_obj.title)
2)多对多查询
正向查询
# 金瓶眉所有作者的名字

book_obj=Book.objects.filter(title="金瓶眉").first()

authors=book_obj.authorlish.all()

for author_obj in authors:

    print(author_obj.name)
反向查询
# 查询egon出过的所有书籍的名字

author_obj=Author.objects.get(name="egon")

book_list=author_obj.book_set.all() #与egon作者相关的所有书籍

for book_obj in book_list:

    print(book_obj.title)
3、查询实例
1)views
def index(request) :

    # 查看主页(图书)

    bookList = models.Book.objects.all()

    return render(request,"index.html",{"bookList":bookList})
2)template——index.html
<div class="table-responsive table-bordered">

    <table class="table table-striped" id="student">

    {% block content %}

        <thead>

        <div class="row">

            {% block th %}

                <tr>

                    <th>编号</th>

                    <th>书名</th>

                    <th>作者</th>

                    <th>出版日期</th>

                    <th>价格</th>

                    <th>出版社</th>

                    <th>操作</th>

                </tr>

            {% endblock th %}

        </div>

        </thead>

        <tbody>

            {% block td %}

                {% for book_obj in bookList %}

                    <tr>

                        <td>{{ forloop.counter}}</td>

                        <td>{{ book_obj.title }}</td>

                        <td>

                            {% for author in book_obj.authorlish.all %}

                                {{ author.name }}

                            {% endfor %}

                        </td>

                        <td>{{ book_obj.publishDate|date:"Y-m-d" }}</td>

                        <td>{{ book_obj.prince }}</td>

                        <td>{{ book_obj.publish.name }}</td>

                        <td>

                           <a href="/editbook/{{ book_obj.id }}"><button class="btn btn-info">编辑</button></a>

                           <a href="/delbook/{{ book_obj.id }}"><button class="btn btn-danger">删除</button></a>

                        </td>

                    </tr>

                {% endfor %}

            {% endblock td %}

        </tbody>

    {% endblock content %}

    </table>

</div>
4、基于双下划线的跨表查询
Django 还提供了一种直观而高效的方式在查询中表示关联关系那就是强大的双划线
# 练习1:  查询人民出版社出版过的所有书籍的名字与价格(一对多)

    # 正向查询 按字段:publish

    queryResult=Book.objects.filter(publish__name="人民出版社").values_list("title","price")

    # 反向查询 按表名:book

    queryResult=Publish.objects.filter(name="人民出版社").values_list("book__title","book__price")

# 练习2: 查询egon出过的所有书籍的名字(多对多)

    # 正向查询 按字段:authors:

    queryResult=Book.objects.filter(authors__name="yuan").values_list("title")

    # 反向查询 按表名:book

    queryResult=Author.objects.filter(name="egon").values_list("book__title","book__price")

# 练习3: 查询人民出版社出版过的所有书籍的名字以及作者的姓名

    # 正向查询

    queryResult=Book.objects.filter(publish__name="人民出版社").values_list("title","authors__name")

    # 反向查询

    queryResult=Publish.objects.filter(name="人民出版社").values_list("book__title","book__authors__age","book__authors__name")

# 练习4: 手机号以151开头的作者出版过的所有书籍名称以及出版社名称

queryResult=Book.objects.filter(authors__authorDetail__telephone__regex="").values_list("title","publish__name")
练习四需要在本建表实例上添加一个authorDetail作者详细信息表将电话号等详细信息放进去与作者表建立一对一关联
5、聚合查询与分组查询
1)聚合:aggregate()
# 计算所有图书的平均价格

from django.db.models import Avg

Book.objects.all().aggregate(Avg('price'))

#{'price__avg': 34.35}
需要使用什么函数都要通过import导入 例如常用函数:Avg,Sum,Count,Max,Min
字典的key默认(字段名__函数名)也可以自己起名字average_price
Book.objects.aggregate(average_price=Avg('price'))
一次也查询多个可以
Book.objects.aggregate(Avg('price'), Max('price'), Min('price'))
2)分组:annotate()
#统计每一本书的作者个数

bookList=Book.objects.annotate(authorsNum=Count('authors'))

for book_obj in bookList:

    print(book_obj.title,book_obj.authorsNum)
annotate的返回值是querySet
3)练习
# 统计每一个出版社的最便宜的书

queryResult=Book.objects.values("publish__name").annotate(MinPrice=Min('price'))

# 统计每一本以py开头的书籍的作者个数

queryResult=Book.objects .filter(title__startswith="Py").annotate(num_authors=Count('authors'))

# 统计不止一个作者的图书

queryResult=Book.objects.annotate(num_authors=Count('authors')).filter(num_authors__gt=1)

# 根据一本图书作者数量的多少对查询集 QuerySet进行排序

Book.objects.annotate(num_authors=Count('authors')).order_by('num_authors')

# 查询各个作者出的书的总价格

# 按author表的所有字段 group by

    queryResult=Author.objects.annotate(SumPrice=Sum("book__price")).values_list("name","SumPrice")

#按authors__name group by

 queryResult2=Book.objects.values("authors__name").annotate(SumPrice=Sum("price")).values_list("authors__name","SumPrice")
五、修改表记录
修改和以前的一样还是update比较简单就不做详细解释了直接上实例
def editbook(request,id) :

    # 点击保存POST提交

    if request.method == "POST" :

        # 提取数据

        id = request.POST.get("id")

        title = request.POST.get("title")

        author_name = request.POST.getlist("author")

        publishDate = request.POST.get("publishDate")

        prince = request.POST.get("prince")

        publish_name = request.POST.get("publish")

        # 出版社object

        publish_obj = models.Publish.objects.get(name=publish_name)

        # 移除旧关联

        book_obj = models.Book.objects.filter(id=id)[0]

        book_obj.authorlish.clear()

        # 更新图书表

        models.Book.objects.filter(id=id).update(title=title, publishDate=publishDate, prince=prince,publish_id=publish_obj)

        book_obj = models.Book.objects.filter(id=id)[0]

        # 添加新关联

        for i in author_name :

            print(i)

            obj = models.Author.objects.filter(name=i)[0]

            book_obj.authorlish.add(obj)

        return redirect("/index/")
虽然修改比较简单就一句update搞定,可是因为现在图书表和作者表是多对多连接所以在更新图书表时需要清楚之前的连键和建立新的连接,语法在之前都有讲解在代码中也都标记出来了。
六、删除表记录
实例:
def delbook(request,id) :

    # 删除图书

    models.Book.objects.filter(id=id).delete()

    return redirect("/index/")
在 Django 删除对象时,会模仿 SQL 约束 ON DELETE CASCADE 的行为,换句话说,删除一个对象时也会删除与它相关联的外键对象。
七、图书管理小练习(只贴上图书的增删改查代码)
1、model 建表
from django.db import models

# Create your models here.

#图书表

class Book(models.Model) :

    title = models.CharField(max_length=32)

    publishDate = models.DateField()

    prince = models.DecimalField(max_digits=5,decimal_places=2)

    publish = models.ForeignKey("Publish")  #一对多

    authorlish = models.ManyToManyField("Author")   #多对多

    def __str__(self) :

        return self.title

#出版社

class Publish(models.Model) :

    name = models.CharField(max_length=32)

    addr = models.CharField(max_length=32)

    def __str__(self) :

        return  self.name

#作者表

class Author(models.Model) :

    name = models.CharField(max_length=32)

    sex = models.CharField(max_length=32)

    age = models.IntegerField()

    tel = models.CharField(max_length=32)

    addr = models.CharField(max_length=32)

    def __str__(self) :

        return  self.name
2、template 模版
<!DOCTYPE html>
<!-- saved from url=(0041)http://v3.bootcss.com/examples/dashboard/ -->
<html lang="zh-CN">
<head>
<meta http-equiv="Content-Type" content="text/html; charset=UTF-8"> <meta http-equiv="X-UA-Compatible" content="IE=edge">
<meta name="viewport" content="width=device-width, initial-scale=1">
<!-- 上述3个meta标签*必须*放在最前面,任何其他内容都*必须*跟随其后! -->
<meta name="description" content="">
<meta name="author" content="">
<link rel="icon" href="http://v3.bootcss.com/favicon.ico"> <title>图书管理系统</title> <!-- Bootstrap core CSS -->
<link href="/static/Dashboard_files/bootstrap.min.css" rel="stylesheet"> <!-- IE10 viewport hack for Surface/desktop Windows 8 bug -->
<link href="/static/Dashboard_files/ie10-viewport-bug-workaround.css" rel="stylesheet"> <!-- Custom styles for this template -->
<link href="/static/Dashboard_files/dashboard.css" rel="stylesheet"> <!-- Just for debugging purposes. Don't actually copy these 2 lines! -->
<!--[if lt IE 9]>
<script src="../../assets/js/ie8-responsive-file-warning.js"></script><![endif]-->
<script src="/static/Dashboard_files/ie-emulation-modes-warning.js"></script> <!-- HTML5 shim and Respond.js for IE8 support of HTML5 elements and media queries -->
<!--[if lt IE 9]>
<script src="https://cdn.bootcss.com/html5shiv/3.7.3/html5shiv.min.js"></script>
<script src="https://cdn.bootcss.com/respond.js/1.4.2/respond.min.js"></script>
<![endif]--> <style>
/*左侧菜单*/
.head {
margin: 1px -20px;
line-height: 40px;
text-align: center;
}
/*添加按钮*/
.search {
padding-bottom: 15px;
}
</style> </head> <body>
<!--导航栏-->
<nav class="navbar navbar-inverse navbar-fixed-top">
<div class="container-fluid">
<div class="navbar-header">
<a class="navbar-brand" href="/index/">图书管理系统</a>
</div>
<div id="navbar" class="navbar-collapse collapse">
<ul class="nav navbar-nav navbar-right">
<li><a href="/index/">登录</a></li>
<li><a href="/index/">注册</a></li>
<li><a href="/index/">帮助</a></li>
<li><a href="/index/">关于</a></li>
</ul>
</div>
</div>
</nav> <!--左侧菜单 和 学生信息-->
<div class="container-fluid">
<div class="row">
<!--左侧菜单-->
<div class="col-sm-3 col-md-2 sidebar"> <div class="menu">
<div class="head bg-primary">图书管理</div>
<ul class="nav nav-sidebar">
<li class=""><a href="/index/">>>>查看图书</a>
</li>
<li><a href="/addbook/">>>>添加图书</a></li>
</ul>
</div>
<div class="menu">
<div class="head bg-primary">作者管理</div>
<ul class="nav nav-sidebar">
<li><a href="/author/">>>>查看作者</a></li>
<li><a href="/addauthor/">>>>添加作者</a></li>
</ul>
</div>
<div class="menu">
<div class="head bg-primary">出版社管理</div>
<ul class="nav nav-sidebar">
<li><a href="/publish/">>>>查看出版社</a></li>
<li><a href="/addpublish/">>>>添加出版社</a></li>
</ul>
</div>
</div>
<!--学生信息(表格)-->
<div class="col-sm-9 col-sm-offset-3 col-md-10 col-md-offset-2 main"> <div class="panel panel-primary">
<div class="panel-heading">{% block info %}图书信息{% endblock info%}</div>
<div class="panel-body">
<!-- 搜索框-->
{% block search %}
<form class="form-inline" action="/searchbook/" method="post">
{% csrf_token %}
<div class="form-group search">
<input type="text" class="form-control" placeholder="书名" name="book">
<button class="btn btn-primary">搜索</button>
</div>
</form>
{% endblock search %} <!--内容-->
<div class="table-responsive table-bordered">
<table class="table table-striped" id="student">
{% block content %}
<thead>
<div class="row">
{% block th %}
<tr>
<th>编号</th>
<th>书名</th>
<th>作者</th>
<th>出版日期</th>
<th>价格</th>
<th>出版社</th>
<th>操作</th>
</tr>
{% endblock th %}
</div>
</thead>
<tbody>
{% block td %}
{% for book_obj in bookList %}
<tr>
<td>{{ forloop.counter}}</td>
<td>{{ book_obj.title }}</td>
<td>
{% for author in book_obj.authorlish.all %}
{{ author.name }}
{% endfor %}
</td>
<td>{{ book_obj.publishDate|date:"Y-m-d" }}</td>
<td>{{ book_obj.prince }}</td>
<td>{{ book_obj.publish.name }}</td>
<td>
<a href="/editbook/{{ book_obj.id }}"><button class="btn btn-info">编辑</button></a>
<a href="/delbook/{{ book_obj.id }}"><button class="btn btn-danger">删除</button></a>
</td>
</tr>
{% endfor %}
{% endblock td %}
</tbody>
{% endblock content %}
</table>
</div>
</div>
</div> </div>
</div>
</div> <!-- Bootstrap core JavaScript
================================================== -->
<!-- Placed at the end of the document so the pages load faster -->
<script src="/static/Dashboard_files/jquery.min.js"></script>
<script>window.jQuery || document.write('<script src="../../assets/js/vendor/jquery.min.js"><\/script>')</script>
<script src="/static/Dashboard_files/bootstrap.min.js"></script>
<!-- Just to make our placeholder images work. Don't actually copy the next line! -->
<script src="/static/Dashboard_files/holder.min.js"></script>
<!-- IE10 viewport hack for Surface/desktop Windows 8 bug -->
<script src="/static/Dashboard_files/ie10-viewport-bug-workaround.js"></script> <script>
// 左侧菜单
$(".head").on("click", function () {
// 把自己 紧挨着的ul标签显示 removeClass("hide")
$(this).next().slideToggle();
// 兄弟标签 紧挨着的ul标签 隐藏 addClass("hide")
$(this).parent().siblings().children("ul").slideUp();
}); </script>
</body>
</html>
index.html
{% extends "index.html" %}

{% block info %}

添加图书

{% endblock info %}

{% block search %}

<div class="row my-table-tool search">

    <div class="col-md-12">

        <a href="/index/"><button class="btn btn-primary">返回</button></a>

    </div>

</div>

{% endblock search %}

{% block th %}

    <tr>

        <th>书名</th>

        <th>作者</th>

        <th>出版日期</th>

        <th>价格</th>

        <th>出版社</th>

        <th>操作</th>

    </tr>

{% endblock th %}

{% block td %}

    <form action="/addbook/" method="post">

    {% csrf_token %}

        <tr>

            <td><input type="text" name="title"></td>

            <td>

                <select name="author" id="" multiple>

                    {% for author in authorList %}

                        <option value="{{ author.name }}">{{ author.name }}</option>

                    {% endfor %}

                </select>

            </td>

            <td><input type="date" name="publishDate"></td>

            <td><input type="text" name="prince"></td>

            <td>

                <select name="publish" id="">

                    {% for publish in publishList %}

                        <option value="{{ publish.name }}">{{ publish.name }}</option>

                    {% endfor %}

                </select>

            </td>

            <td>

                <button class="btn btn-info">提交</button>

            </td>

        </tr>

    </form>

{% endblock td %}
addbook.html
{% extends "index.html" %}

{% block td %}

    {% for edit_obj in bookList %}

        {% if edit_obj.id == id %}

            <form action="/editbook/{{ edit_obj.id }}" method="post">

            {% csrf_token %}

                <tr>

                    <td>{{ forloop.counter}}<input type="hidden" name="id" value="{{ edit_obj.id }}"></td>

                    <td><input type="text" name="title" value="{{ edit_obj.title }}"></td>

                    <td>

                        <select name="author" id="" multiple>

                            {% for author in authorList %}

                                {% if author.name in edit_author %}

                                    <option selected value="{{ author.name }}">{{ author.name }}</option>

                                {% else %}

                                    <option  value="{{ author.name }}">{{ author.name }}</option>

                                {% endif %}

                            {% endfor %}

                        </select>

                    </td>

                    <td><input type="date" name="publishDate" value="{{ edit_obj.publishDate|date:"Y-m-d" }}"></td>

                    <td><input type="text" name="prince" value="{{ edit_obj.prince }}"></td>

                    <td>

                        <select name="publish" id="">

                            {% for publish in publishList %}

                                {% if publish.name == edit_obj.publish.name %}

                                    <option selected value="{{ publish.name }}">{{ publish.name }}</option>

                                {% else %}

                                    <option  value="{{ publish.name }}">{{ publish.name }}</option>

                                {% endif %}

                            {% endfor %}

                        </select>

                    </td>

                    <td>

                        <a href="/delbook/{{ edit_obj.id }}"><input type="button" class="btn btn-danger" value="删除"></a>

                        <button class="btn btn-success">保存</button>

                    </td>

                </tr>

            </form>

        {% else %}

            <tr>

                <td>{{ forloop.counter}}</td>

                <td>{{ edit_obj.title }}</td>

                <td>

                    {% for author in edit_obj.authorlish.all %}

                        {{ author.name }}

                    {% endfor %}

                </td>

                <td>{{ edit_obj.publishDate|date:"Y-m-d" }}</td>

                <td>{{ edit_obj.prince }}</td>

                <td>{{ edit_obj.publish.name }}</td>

                <td>

                   <a href="/editbook/{{ edit_obj.id }}"><button class="btn btn-info">编辑</button></a>

                   <a href="/delbook/{{ edit_obj.id }}"><button class="btn btn-danger">删除</button></a>

                </td>

            </tr>

        {% endif %}

    {% endfor %}

{% endblock td %}
editbook.html
{% extends "index.html" %}

{% block info %}

{{ booklist.first.title }}

{% endblock info %}

{% block search %}

<form class="form-inline" action="/searchbook/" method="post">

{% csrf_token %}

    <div class="form-group search">

        <input type="text" class="form-control" placeholder="书名" name="book">

        <button class="btn btn-primary">搜索</button>

        <a href="/index/"><button class="btn btn-primary">返回</button></a>

    </div>

{#    <div class="row my-table-tool search">#}

{#        <div class="col-md-12">#}

{#            #}

{#        </div>#}

{#    </div>#}

</form>

{% endblock search %}

{% block th %}

    <tr>

        <th>编号</th>

        <th>书名</th>

        <th>作者</th>

        <th>出版日期</th>

        <th>价格</th>

        <th>出版社</th>

        <th>操作</th>

    </tr>

{% endblock th %}

{% block td %}

    {% for book_obj in booklist %}

    <tr>

        <td>{{ forloop.counter}}</td>

        <td>{{ book_obj.title }}</td>

        <td>

            {% for author in book_obj.authorlish.all %}

                {{ author.name }}

            {% endfor %}

        </td>

        <td>{{ book_obj.publishDate|date:"Y-m-d" }}</td>

        <td>{{ book_obj.prince }}</td>

        <td>{{ book_obj.publish.name }}</td>

        <td>

           <a href="/editbook/{{ book_obj.id }}"><button class="btn btn-info">编辑</button></a>

           <a href="/delbook/{{ book_obj.id }}"><button class="btn btn-danger">删除</button></a>

        </td>

    </tr>

    {% endfor %}

{% endblock td %}
searchbook.html
3、url 分发
from django.conf.urls import url

from django.contrib import admin

from app01 import views

urlpatterns = [

    url(r'^admin/', admin.site.urls),

    url(r'^index/', views.index),

    url(r'^delbook/(\d+)', views.delbook),

    url(r'^editbook/(\d+)', views.editbook),

    url(r'^addbook/', views.addbook),

    url(r'^searchbook/', views.searchbook),

    url(r'^author/', views.author),

    url(r'^addauthor/', views.addauthor),

    url(r'^delauthor/(\d+)', views.delauthor),

    url(r'^editauthor/(\d+)', views.editauthor),

    url(r'^publish/', views.publish),

    url(r'^addpublish/', views.addpublish),

    url(r'^delpublish/(\d+)', views.delpublish),

    url(r'^editpublish/(\d+)', views.editpublish),

]
4、views 视图函数
from django.shortcuts import render,redirect,HttpResponse

# Create your views here.

from app01 import models

# 图书相关操作

def index(request) :

    # 查看主页(图书)

    bookList = models.Book.objects.all()

    return render(request,"index.html",{"bookList":bookList})

def delbook(request,id) :

    # 删除图书

    models.Book.objects.filter(id=id).delete()

    return redirect("/index/")

def editbook(request,id) :

    # 点击保存POST提交

    if request.method == "POST" :

        # 提取数据

        id = request.POST.get("id")

        title = request.POST.get("title")

        author_name = request.POST.getlist("author")

        publishDate = request.POST.get("publishDate")

        prince = request.POST.get("prince")

        publish_name = request.POST.get("publish")

        # 出版社object

        publish_obj = models.Publish.objects.get(name=publish_name)

        # 移除旧关联

        book_obj = models.Book.objects.filter(id=id)[0]

        book_obj.authorlish.clear()

        # 更新图书表

        models.Book.objects.filter(id=id).update(title=title, publishDate=publishDate, prince=prince,publish_id=publish_obj)

        book_obj = models.Book.objects.filter(id=id)[0]

        # 添加新关联

        for i in author_name :

            print(i)

            obj = models.Author.objects.filter(name=i)[0]

            book_obj.authorlish.add(obj)

        return redirect("/index/")

    # 图书、作者、出版社querySet

    bookList = models.Book.objects.all()

    authorList = models.Author.objects.all()

    publishList = models.Publish.objects.all()

    # 查看原作者

    author_name = models.Book.objects.filter(id=id).first().authorlish.all().values_list("name")

    edit_author = []

    for i in author_name :

        edit_author.append(i[0])

    return render(request,"editbook.html",{"bookList":bookList,"authorList":authorList,"publishList":publishList,"edit_author":edit_author,"id":int(id)})

def addbook(request) :

    # 添加图书页面点击提交

    if request.method == "POST" :

        # 提取添加数据

        title = request.POST.get("title")

        author = request.POST.getlist("author")

        publishDate = request.POST.get("publishDate")

        prince = request.POST.get("prince")

        publish = request.POST.get("publish")

        # 出版社object

        publish_obj = models.Publish.objects.filter(name=publish)[0]

        # 添加数据到数据库

        book_obj = models.Book.objects.create(title=title, publishDate=publishDate, prince=prince ,publish=publish_obj)

        # 多对多添加

        for i in author :

            obj = models.Author.objects.filter(name=i)[0]

            book_obj.authorlish.add(obj)

        return redirect("/index/")

    # 作者与出版社querySet

    authorList = models.Author.objects.all()

    publishList = models.Publish.objects.all()

    return render(request,"addbook.html",{"authorList":authorList,"publishList":publishList})

def searchbook(request) :

    if request.method == "POST" :

        book = request.POST.get("book")

        print(book)

        booklist = models.Book.objects.filter(title__icontains = book)

        return render(request,"searchbook.html",{"booklist":booklist})
5、部分效果图
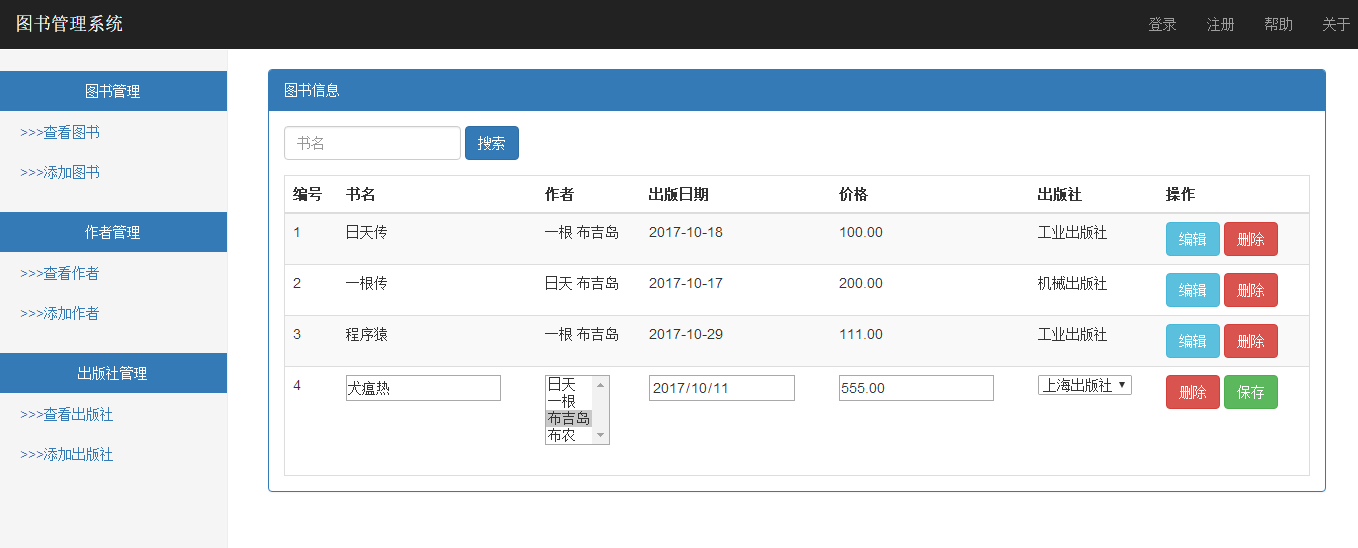
1)首页

2)添加图书
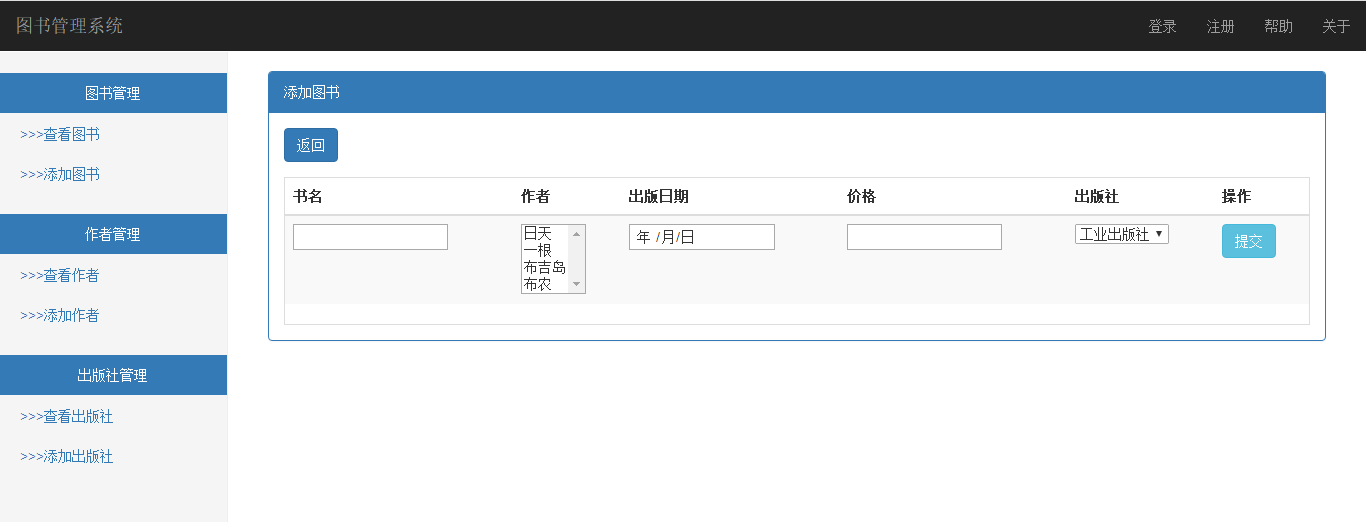
3)修改图书信息
4)搜索框搜索图书

66、django之模型层(model)--多表相关操作(图书管理小练习)的更多相关文章
- 64、django之模型层(model)--建表、查询、删除基础
要说一个项目最重要的部分是什么那铁定数据了,也就是数据库,这篇就开始带大家走进django关于模型层model的使用,model主要就是操纵数据库不使用sql语句的情况下完成数据库的增删改查.本篇仅带 ...
- django之模型层(model)--建表、查询、删除基础
要说一个项目最重要的部分是什么那铁定数据了,也就是数据库,这篇就开始带大家走进django关于模型层model的使用,model主要就是操纵数据库不使用sql语句的情况下完成数据库的增删改查.本篇仅带 ...
- django之模型层(model)--多表相关操作(图书管理小练习)
前面几篇随笔的数据库增删改查操作都是在单表的操作上的,然而现实中不可能都是单表操作,更多的是多表操作,一对一,一对多,多对多的表结构才是我们经常需要处理的,本篇将带我们了解多表操作的一些相关操作.也会 ...
- 67、django之模型层(model)--查询补充及mookie
本篇导航: F查询与Q查询 cookie 一.F查询与Q查询 1.以Book表为例 class Book(models.Model) : title = models.CharField(max_le ...
- django之模型层(model)--查询补充及cookie
已经连续写了好几篇django的模型层(model)增删改查的随笔了,没篇大篇幅都是查询相关的操作,可以看出查询在数据的操作中是多么的重要,而本篇最后再补充一点关于关于查询的一些方法,模型层基本的操作 ...
- Django框架-模型层
Django框架-模型层 一.单表查询之必知必会13条 1.时间字段中的两个关键性参数 create_time = models.DateField() # 年月日 create_time = mod ...
- 【Django】模型层说明
[Django模型层] 之前大概介绍Django的文章居然写了两篇..这篇是重点关注了Django的模型层来进行学习. ■ 模型定义 众所周知,Django中的模型定义就是定义一个类,其基本结构是这样 ...
- Django基础模型层(77-78)
jango框架之模型层(d77-78)一 单表操作: 1 mysql数据库:settings里配置 'default': { # key值必须都是大写 'ENGINE': 'django.d ...
- python 全栈开发,Day70(模板自定义标签和过滤器,模板继承 (extend),Django的模型层-ORM简介)
昨日内容回顾 视图函数: request对象 request.path 请求路径 request.GET GET请求数据 QueryDict {} request.POST POST请求数据 Quer ...
随机推荐
- 如何定制 Calico 网络 Policy - 每天5分钟玩转 Docker 容器技术(70)
Calico 默认的 policy 规则是:容器只能与同一个 calico 网络中的容器通信.本节讨论如何定制 policy. calico 能够让用户定义灵活的 policy 规则,精细化控制进出容 ...
- Tomcat【介绍Tomcat、结构目录、虚拟目录、临时域名、虚拟主机、体系结构】
什么是Tomcat Tomcat简单的说就是一个运行JAVA的网络服务器,底层是Socket的一个程序,它也是JSP和Serlvet的一个容器. 为什么我们需要用到Tomcat 如果你学过html,c ...
- Identifying Duplicate Indexes
本文是在阅读<Troubleshooting SQL Server>->Chapter 5: Missing Indexes->Identifying Duplicate In ...
- 升级与修改Nginx
自从上次安装了Nginx后,学到了很多新的东西,比如http2.0... 而且还发现nginx还出了新版本,遂决定升级下,还是那个URL,下载最新版. ./configure --user=www - ...
- MongoDB 复制篇
mongoDB 复制篇 复制集简介 Mongodb复制集由一组Mongod实例(进程)组成,包含一个Primary节点和多个Secondary节点,Mongodb Driver(客户端)的所有数据都写 ...
- DialogFragment的应用
一.DialogFragment简单介绍: 1.基本概念 DialogFrament 指一个与fragment建立了关联的Dialog, 随fragment生, 随fragment死, 即Dialog ...
- How many Knight Placing? UVA - 11091
How many Knight Placing? Time Limit: 3000MS Memory Limit: Unknown 64bit IO Format: %lld & %l ...
- 不要62 hdu2089
不要62 Time Limit: 1000/1000 MS (Java/Others) Memory Limit: 32768/32768 K (Java/Others)Total Submis ...
- hdu4578 线段树 三次方,二次方,一次方的值
Yuanfang is puzzled with the question below: There are n integers, a 1, a 2, -, a n. The initial val ...
- PHP字符串函数-trim()实例用法
string trim ( string $str [, string $charlist = " \t\n\r\0\x0B" ] )此函数返回字符串 str 去除首尾空白字符后的 ...