numpy的函数使用
@
- 注
- help ,帮助
- numpy.genfromtxt,导入文件
- array,创建数组(1,2维数组)
- array,创建行列向量
- numpy.shape,看numpy数据的行列信息
- numpy.dtype,查看numpy数据的类型
- 切片读取
- == , 矩阵元素等号判断
- &,与操作
- |,或操作
- 字符串 ==> 数据类型
- min,最小值
- sum
- shape,arange,reshape
- ndim
- size,查看矩阵的元素多少
- zeros,生成0矩阵
- ones,生成单位矩阵
- random
- linspace, 在指定范围内等间距生成指定的数据个数
- sin, 对矩阵中的数据求三角函数sin值
- 矩阵的减-,平方**,范围判断
- A * B,矩阵之间对应元素相乘
- A.dot(B),np.dot(A, B)),矩阵相乘
- exp,自然指数e
- sqrt,开方运算
- floor,向下取整
- ravel,水平铺开矩阵
- T,矩阵的转置
- vstack,按照列的方向拼接两个矩阵
- hstack,按照行的方向拼接两个矩阵
- hsplit,垂直方向上等数量分割矩阵数据
- vsplit,水平方向上等数量分割矩阵数据
- a=b,复制
- view,浅复制
- copy,深拷贝
- argmax,垂直方向上找出最大值的索引
- tile,重复数据
- sort,按顺序排列数据
- argsort,向量中元素从小到大排列
注
- 下面的代码是使pyhton3.6写的,有些可能是使用python2.7写的
- 1维数组叫矢量,2维数组叫矩阵,3维及大于3维的数组就叫多维数组了
help ,帮助
# 打印 numpy.genfromtxt 帮助文档

print (help(numpy.genfromtxt))

# 打印range 帮助文档

print(help(range))
numpy.genfromtxt,导入文件
示例
import numpy

# 读入文本文件

# "world_alcohol.txt"      == >  读入的文件

# delimiter=","            == >  文件内容之间的分割符

# dtype=str                == >  读入的文件的数据类型

# skip_header=1            == >  跳过第一行,即第一行数据不读取

world_alcohol = numpy.genfromtxt("world_alcohol.txt", delimiter=",",dtype=str, skip_header=1)

# 打印类型

print(type(world_alcohol))

# 打印读入的内容

print (world_alcohol)
array,创建数组(1,2维数组)
import numpy
#The numpy.array() function can take a list or list of lists as input. When we input a list, we get a one-dimensional array as a result:
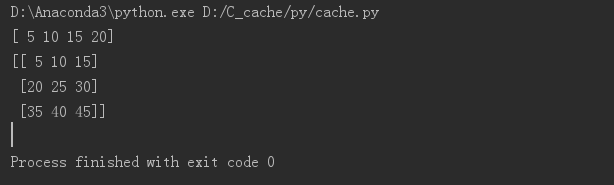
vector = numpy.array([5, 10, 15, 20])
#When we input a list of lists, we get a matrix as a result:
matrix = numpy.array([[5, 10, 15], [20, 25, 30], [35, 40, 45]])
# 一维数组
print(vector)
# 二维数组
print(matrix)
结果
array,创建行列向量
Numpy中的行向量和列向量 - Suprecat的博客 - CSDN博客
https://blog.csdn.net/wintersshi/article/details/80489258
numpy.shape,看numpy数据的行列信息
	#We can use the ndarray.shape property to figure out how many elements are in the array

	vector = numpy.array([1, 2, 3, 4])

	print(vector.shape)

	#For matrices, the shape property contains a tuple with 2 elements.

	matrix = numpy.array([[5, 10, 15], [20, 25, 30]])

	print(matrix.shape)
结果
	(4,)

	(2, 3)
numpy.dtype,查看numpy数据的类型
import numpy

#Each value in a NumPy array has to have the same data type

#NumPy will automatically figure out an appropriate data type when reading in data or converting lists to arrays.

#You can check the data type of a NumPy array using the dtype property.

numbers = numpy.array([1, 2, 3, 4])

print (numbers)

numbers.dtype
结果
[1 2 3 4]

dtype('int32')
切片读取
示例一
- 说明
[0:3], 范围包括0,但是不包括3 ,共3
import numpy

vector = numpy.array([5, 10, 15, 20])

print(vector[0:3])
结果
[ 5 10 15]
示例二
import numpy

matrix = numpy.array([

                    [5, 10, 15],

                    [20, 25, 30],

                    [35, 40, 45]

                 ])

# 读取所有的行,第1列(共0,1,2列)的数

print(matrix[:,1])
结果
[10 25 40]
示例三
import numpy

matrix = numpy.array([

                    [5, 10, 15],

                    [20, 25, 30],

                    [35, 40, 45]

                 ])

# 读取所有的行,第0,1(共0,1,2列)列的数据

print(matrix[:,0:2])
结果
[[ 5 10]

 [20 25]

 [35 40]]
- 示例四
matrix = numpy.array([

                    [5, 10, 15],

                    [20, 25, 30],

                    [35, 40, 45]

                 ])

# 矩阵的行1,2,列 0 ,1(共0,1,2列)

print(matrix[1:3,0:2])
结果
[[20 25]

 [35 40]]
== , 矩阵元素等号判断
- 示例一
import numpy

#it will compare the second value to each element in the vector

# If the values are equal, the Python interpreter returns True; otherwise, it returns False

vector = numpy.array([5, 10, 15, 20])

vector == 10
结果
array([False, True, False, False], dtype=bool)
- 示例二
import numpy

matrix = numpy.array([

                    [5, 10, 15],

                    [20, 25, 30],

                    [35, 40, 45]

                 ])

matrix == 25
结果
array([[False, False, False],

       [False,  True, False],

       [False, False, False]], dtype=bool)
- 示例三
import numpy

# Compares vector to the value 10, which generates a new Boolean vector [False, True, False, False]. It assigns this result to equal_to_ten

# 生成矩阵向量

vector = numpy.array([5, 10, 15, 20])

# 与 10 相等 进行布尔运算

equal_to_ten = (vector == 10)

print equal_to_ten

# 得到原来的数据

print(vector[equal_to_ten])
结果
[False  True False False]

[10]
- 示例四
import numpy

matrix = numpy.array([

                [5, 10, 15],

                [20, 25, 30],

                [35, 40, 45]

             ])

# 对所有行的第1列与  25 进行相等布尔运算

second_column_25 = (matrix[:,1] == 25)

# 布尔运算的结果

print(second_column_25)

# 还原   原来     的列

print(matrix[:, second_column_25])

# 将布尔结果对  行   进行求数

print(matrix[second_column_25, :])
结果
[False  True False]

[[10]

 [25]

 [40]]

[[20 25 30]]
- 示例五,对二维矩阵中的数一个指定的数据进行修改
import numpy

matrix = numpy.array([

    [5, 10, 15],

    [20, 25, 30],

    [35, 40, 45]

])

# 所有行的第1列(共0,1,2列)的数据与25进行布尔运算

second_column_25 = matrix[:, 1] == 25

print(second_column_25)

# 数据第1行第一列(共0,1,2列),25 ===> 10

matrix[second_column_25, 1] = 10

print(matrix)
结果
[False  True False]

[[ 5 10 15]

 [20 10 30]

 [35 40 45]]
&,与操作
import numpy

#We can also perform comparisons with multiple conditions

vector = numpy.array([5, 10, 15, 20])

# 与10进行布尔运算

print(vector == 10)

# 与 5进行布尔运算

print(vector == 5)

# 与操作

equal_to_ten_and_five = (vector == 10) & (vector == 5)

print(equal_to_ten_and_five)
结果
[False  True False False]

[ True False False False]

[False False False False]
|,或操作
- 示列一
import numpy

vector = numpy.array([5, 10, 15, 20])

# 与10进行布尔运算

print(vector == 10)

# 与 5进行布尔运算

print(vector == 5)

# 或操作

equal_to_ten_and_five = (vector == 10) | (vector == 5)

print(equal_to_ten_and_five)
结果
[False  True False False]

[ True False False False]

[ True  True False False]
- 示例二
import numpy

vector = numpy.array([5, 10, 15, 20])

# 与10进行布尔运算

print(vector == 10)

# 与 5进行布尔运算

print(vector == 5)

# 或操作

equal_to_ten_or_five = (vector == 10) | (vector == 5)

# 或操作后的数据进行修改

# 5, 10 ==> 50

vector[equal_to_ten_or_five] = 50

print(vector)
结果
[False  True False False]

[ True False False False]

[50 50 15 20]
字符串 ==> 数据类型
import numpy

# We can convert the data type of an array with the ndarray.astype() method.

vector = numpy.array(["1", "2", "3"])

# 原来的类型

print(vector.dtype)

print(vector)

# 字符串 ==> 数据类型

vector = vector.astype(float)

# 现在的类型

print(vector.dtype)

print(vector)
结果
<U1

['1' '2' '3']

float64

[1. 2. 3.]
min,最小值
import numpy

vector = numpy.array([5, 10, 15, 20])

vector.min()

print (vector.min())
结果
5
sum
说明
axis=1,每一行求和
axis=0,每一列求和示例一
import numpy

# The axis dictates which dimension we perform the operation on

#1 means that we want to perform the operation on each row, and 0 means on each column

matrix = numpy.array([

                [5, 10, 15],

                [20, 25, 30],

                [35, 40, 45]

             ])

print(matrix.sum(axis=1))
结果
[ 30 75 120]
- 示例二
import numpy

matrix = numpy.array([

                [5, 10, 15],

                [20, 25, 30],

                [35, 40, 45]

             ])

print(matrix.sum(axis=0))
结果
[60 75 90]
shape,arange,reshape
shape, 查看维度信息
arange,生成一组向量
reshape,对一组向量修改成新一矩阵分布
示例一,shape
import numpy as np

a =  np.array([

 [6., 9., 1., 5.],

 [3., 6., 4., 0.],

 [3., 9., 5., 7.]

    ])

print("a\n", a)

print("a.shape\n", a.shape)

a.shape = (2,6)

print("a.shape = (2,6)\n", a)

a.shape = (1,12)

print("a.shape = (1,12)\n", a)
结果
a

 [[6. 9. 1. 5.]

 [3. 6. 4. 0.]

 [3. 9. 5. 7.]]

a.shape

 (3, 4)

a.shape = (2,6)

 [[6. 9. 1. 5. 3. 6.]

 [4. 0. 3. 9. 5. 7.]]

a.shape = (1,12)

 [[6. 9. 1. 5. 3. 6. 4. 0. 3. 9. 5. 7.]]
- 示例二,arange
import numpy as np

# 生成 10 到 30 之间的数据,不包括30,间距为5的数据

print(np.arange( 10, 30, 5 ))

# 生成 10 到 11 之间的数据,不包括11,间距为0.2的数据

print(np.arange( 10, 11, 0.2))
结果
[10 15 20 25]

[10.  10.2 10.4 10.6 10.8]
- 示例三,shape,reshape
import numpy as np

# 生成一组向量

# To create sequences of numbers

print(np.arange(15))

# 查看矩阵的信息

print(np.arange(15).shape)

# 修改成新3行5列的矩阵数据

a = np.arange(15).reshape(3, 5)

print(a)

# 查看矩阵的信息

print(a.shape)
结果
[ 0  1  2  3  4  5  6  7  8  9 10 11 12 13 14]

(15,)

[[ 0  1  2  3  4]

 [ 5  6  7  8  9]

 [10 11 12 13 14]]

(3, 5)
ndim
- 说明: 用来查看矩阵的维度信息,1维,2维等
import numpy as np

# 生成一组向量

print(np.arange(15))

# 查看矩阵的维度信息

print(np.arange(15).ndim)

# 修改成新3行5列的矩阵数据

a = np.arange(15).reshape(3, 5)

print(a)

# 查看矩阵的维度信息

print(a.ndim)
结果
[ 0  1  2  3  4  5  6  7  8  9 10 11 12 13 14]

1

[[ 0  1  2  3  4]

 [ 5  6  7  8  9]

 [10 11 12 13 14]]

2
size,查看矩阵的元素多少
import numpy as np

# 生成一组向量

print(np.arange(15))

# 查看矩阵的信息

print(np.arange(15).dtype)

print(np.arange(15).dtype.name)
结果
[ 0  1  2  3  4  5  6  7  8  9 10 11 12 13 14]

int32

int32
import numpy as np

# 生成一组向量

print(np.arange(15))

# 查看矩阵总共有多少元素

print(np.arange(15).size)

# 修改成新3行5列的矩阵数据

a = np.arange(15).reshape(3, 5)

print(a)

# 查看矩阵总共有多少元素

print(a.size)
结果
[ 0  1  2  3  4  5  6  7  8  9 10 11 12 13 14]

15

[[ 0  1  2  3  4]

 [ 5  6  7  8  9]

 [10 11 12 13 14]]

15
zeros,生成0矩阵
- 说明:生成的0矩阵是一个float64类型的,注意到0后面有一个小数点
import numpy as np

# 3行4列

print(np.zeros ((3,4)) )

print(np.zeros ((3,4)).dtype )
结果
[[0. 0. 0. 0.]

 [0. 0. 0. 0.]

 [0. 0. 0. 0.]]

float64
ones,生成单位矩阵
- 说明
numpy.ones(shape, dtype=None, order='C')

Parameters:

# 形状

shape : int or sequence of ints

Shape of the new array, e.g., (2, 3) or 2.

# 数据类型

dtype : data-type, optional

The desired data-type for the array, e.g., numpy.int8. Default is numpy.float64.

# 存储順序

order : {‘C’, ‘F’}, optional, default: C

Whether to store multi-dimensional data in row-major (C-style) or column-major (Fortran-style) order in memory.

Returns:

out : ndarray

Array of ones with the given shape, dtype, and order.
示例一
import numpy as np

# 生成float64类型

print(np.ones(5))
结果
[1. 1. 1. 1. 1.]
示例二
import numpy as np

# 生成 int 类型

print(np.ones((5,), dtype=int))
结果
[1, 1, 1, 1, 1]
示例三
import numpy as np

# 生成2行3列的float64类型数据

s = (2,3)

print( np.ones(s))
结果
[[1. 1. 1.]

 [1. 1. 1.]]
示例四
- 说明
np.ones(2,3,4)含义:2个3X4矩阵,所有元素为1
又如,np.ones(4,5,3)含义:4个5X3矩阵,所有元素为1
==> np.ones(a,b,c):a个b*c矩阵
import numpy as np

print(np.ones( (2,3,4), dtype=np.int32 ))
结果
[[[1 1 1 1]

  [1 1 1 1]

  [1 1 1 1]]

 [[1 1 1 1]

  [1 1 1 1]

  [1 1 1 1]]]
- 扩展阅读
numpy 中ones,zeros函数 - mmr598146920的专栏 - CSDN博客
https://blog.csdn.net/mmr598146920/article/details/80539733
random
import numpy as np

# 2行3列随机数

print(np.random.random((2, 3)))
结果
[[0.69509627 0.04046586 0.26786661]

 [0.44120144 0.05091389 0.44784084]]
linspace, 在指定范围内等间距生成指定的数据个数
import numpy as np

from numpy import pi

# 在 0 到时 2*pi 区间(不包括右端点 2*pi)内,等间距生成 5 个数据

print(np.linspace( 0, 2*pi, 5 ))
结果
[0. 1.57079633 3.14159265 4.71238898 6.28318531]
sin, 对矩阵中的数据求三角函数sin值
import numpy as np

from numpy import pi

# 求三角函数sin值

print(np.sin(np.linspace( 0, 2*pi, 5 )))
结果
[ 0.0000000e+00  1.0000000e+00  1.2246468e-16 -1.0000000e+00

 -2.4492936e-16]
矩阵的减-,平方**,范围判断<
import numpy as np

# the product operator * operates elementwise in NumPy arrays

a = np.array([20, 30, 40, 50])

b = np.arange(4)

print("a:", a)

print("b", b)

# 矩阵相减

c = a - b

print("c = a - b", c)

# 矩阵减1

c = c - 1

print("c = c - 1", c)

# 矩阵中的每一个元素的平方

print("b ** 2", b ** 2)

# 范围判断

print("a < 35", a < 35)
结果
a: [20 30 40 50]

b [0 1 2 3]

c = a - b [20 29 38 47]

c = c - 1 [19 28 37 46]

b ** 2 [0 1 4 9]

a < 35 [ True  True False False]
A * B,矩阵之间对应元素相乘
import numpy as np

A = np.array([[1, 1],

              [0, 1]])

B = np.array([[2, 0],

              [3, 4]])

print('---A----')

print(A)

print('---B----')

print(B)

# 矩阵之间对应元素相乘

print('---A * B----')

print(A * B)
结果
---A----

[[1 1]

 [0 1]]

---B----

[[2 0]

 [3 4]]

---A * B----

[[2 0]

 [0 4]]
A.dot(B),np.dot(A, B)),矩阵相乘
import numpy as np

# The matrix product can be performed using the dot function or method

A = np.array([[1, 1],

              [0, 1]])

B = np.array([[2, 0],

              [3, 4]])

print('---A----')

print(A)

print('---B----')

print(B)

print('---A * B----')

print(A * B)

# 矩阵相乘

print('---A.dot(B)----')

print(A.dot(B))

# 矩阵相乘

print('---np.dot(A, B)----')

print(np.dot(A, B))
结果
---A----

[[1 1]

 [0 1]]

---B----

[[2 0]

 [3 4]]

---A.dot(B)----

[[5 4]

 [3 4]]

---np.dot(A, B)----

[[5 4]

 [3 4]]
exp,自然指数e
import numpy as np

B = np.arange(3)

print(B)

# 求自然指数e的次幂,B中的元素为e每一幂次方

print(np.exp(B))
结果
[0 1 2]

[1.         2.71828183 7.3890561 ]
sqrt,开方运算
import numpy as np

B = np.arange(3)

print(B)

# 对B中的每一个元素求根号,即1/2次幂

print(np.sqrt(B))
结果
[0 1 2]

[0.         1.         1.41421356]
floor,向下取整
示例一
import numpy as np

a = np.array([-1.7, -1.5, -0.2, 0.2, 1.5, 1.7, 2.0])

np.floor(a)
结果
[-2., -2., -1., 0., 1., 1., 2.]
示例二
import numpy as np

# Return the floor of the input

a = 10 * np.random.random((3, 4))

print(a)

a = np.floor(a)

print(a)
结果
[[6.6143481  9.9613796  1.30947854 5.6078685 ]

 [3.10948678 6.83076618 4.92651686 0.15127964]

 [3.3036663  9.44427669 5.25021126 7.66229507]]

[[6. 9. 1. 5.]

 [3. 6. 4. 0.]

 [3. 9. 5. 7.]]
ravel,水平铺开矩阵
- 说明
2维矩阵 ==> 1维向量,水平方向进行转化
import numpy as np

# Return the floor of the input

a = 10 * np.random.random((3, 4))

print(a)

a = np.floor(a)

print(a)

print('--------')

# 2维矩阵 ==>   1维向量,水平方向进行转化

# flatten the array

print(a.ravel() )
结果
[[6.6143481  9.9613796  1.30947854 5.6078685 ]

 [3.10948678 6.83076618 4.92651686 0.15127964]

 [3.3036663  9.44427669 5.25021126 7.66229507]]

[[6. 9. 1. 5.]

 [3. 6. 4. 0.]

 [3. 9. 5. 7.]]

--------

[6. 9. 1. 5. 3. 6. 4. 0. 3. 9. 5. 7.]
T,矩阵的转置
- 说明
在这种方式下,行向量无法直接转化为列向量
具体的转化方式见:
[numpy] np.newaxis 如何将行向量转换成列向量 - doufuxixi的博客 - CSDN博客
https://blog.csdn.net/doufuxixi/article/details/80356946
import numpy as np

# Return the floor of the input

a = 10 * np.random.random((3, 4))

print(a)

# 向下取整

a = np.floor(a)

print("a = np.floor(a)")

print(a)

# a 的转置

print("--------a.T")

print(a.T)

print('--------b = a.ravel()')

# a 水平方向铺平

b = a.ravel()

print(b)

# b 的转置

print('--------b.T')

print(b.T)
结果
[[6.8977933  6.5823566  2.70240107 4.48524208]

 [0.96507135 4.58781425 6.2868975  7.39792458]

 [6.18095442 4.62072618 5.73384294 8.45966937]]

a = np.floor(a)

[[6. 6. 2. 4.]

 [0. 4. 6. 7.]

 [6. 4. 5. 8.]]

--------a.T

[[6. 0. 6.]

 [6. 4. 4.]

 [2. 6. 5.]

 [4. 7. 8.]]

--------b = a.ravel()

[6. 6. 2. 4. 0. 4. 6. 7. 6. 4. 5. 8.]

--------b.T

[6. 6. 2. 4. 0. 4. 6. 7. 6. 4. 5. 8.]
vstack,按照列的方向拼接两个矩阵
import numpy as np

a = np.floor(10 * np.random.random((2, 2)))

b = np.floor(10 * np.random.random((2, 2)))

print('---a')

print(a)

print('---b')

print(b)

print('---np.vstack((a, b)')

print(np.vstack((a, b)))
结果
---a

[[4. 3.]

 [8. 6.]]

---b

[[8. 2.]

 [6. 0.]]

---np.vstack((a, b)

[[4. 3.]

 [8. 6.]

 [8. 2.]

 [6. 0.]]
hstack,按照行的方向拼接两个矩阵
import numpy as np

a = np.floor(10 * np.random.random((2, 2)))

b = np.floor(10 * np.random.random((2, 2)))

print('---a')

print(a)

print('---b')

print(b)

print('---np.hstack((a, b)')

print(np.hstack((a, b)))
结果
---a

[[1. 9.]

 [3. 6.]]

---b

[[9. 6.]

 [5. 0.]]

---np.hstack((a, b)

[[1. 9. 9. 6.]

 [3. 6. 5. 0.]]
hsplit,垂直方向上等数量分割矩阵数据
import numpy as np

x = np.arange(16.0).reshape(2, 8)

print(x)

# 等个数分割为2份

print(np.hsplit(x, 2))

# 等个数分割为4份

print(np.hsplit(x, 4))
结果
[[ 0.  1.  2.  3.  4.  5.  6.  7.]

 [ 8.  9. 10. 11. 12. 13. 14. 15.]]

[array([[ 0.,  1.,  2.,  3.],

       [ 8.,  9., 10., 11.]]), array([[ 4.,  5.,  6.,  7.],

       [12., 13., 14., 15.]])]

[array([[0., 1.],

       [8., 9.]]), array([[ 2.,  3.],

       [10., 11.]]), array([[ 4.,  5.],

       [12., 13.]]), array([[ 6.,  7.],

       [14., 15.]])]
结果( 重新排版后)
[[ 0.  1.  2.  3.  4.  5.  6.  7.]

 [ 8.  9. 10. 11. 12. 13. 14. 15.]]

[array([[ 0.,  1.,  2.,  3.],

        [ 8.,  9., 10., 11.]]),

 array([[ 4.,  5.,  6.,  7.],

	    [12., 13., 14., 15.]])]

[array([[0., 1.],

  	    [8., 9.]]),

 array([[ 2.,  3.],

 	    [10., 11.]]),

 array([[ 4.,  5.],

	    [12., 13.]]),

array([[ 6.,  7.],

	    [14., 15.]])]
vsplit,水平方向上等数量分割矩阵数据
import numpy as np

x = np.arange(16.0).reshape(8, 2)

print(x)

# 等数量分割为2份

print(np.vsplit(x, 2))

# 等数量分割为4份

print(np.vsplit(x, 4))
结果
[[ 0.  1.]

 [ 2.  3.]

 [ 4.  5.]

 [ 6.  7.]

 [ 8.  9.]

 [10. 11.]

 [12. 13.]

 [14. 15.]]

[array([[0., 1.],

       [2., 3.],

       [4., 5.],

       [6., 7.]]), array([[ 8.,  9.],

       [10., 11.],

       [12., 13.],

       [14., 15.]])]

[array([[0., 1.],

       [2., 3.]]), array([[4., 5.],

       [6., 7.]]), array([[ 8.,  9.],

       [10., 11.]]), array([[12., 13.],

       [14., 15.]])]
结果( 重新排版后)
[[ 0.  1.]

 [ 2.  3.]

 [ 4.  5.]

 [ 6.  7.]

 [ 8.  9.]

 [10. 11.]

 [12. 13.]

 [14. 15.]]

[array([

	   [0., 1.],

       [2., 3.],

       [4., 5.],

       [6., 7.]]),

array([

       [ 8.,  9.],

       [10., 11.],

       [12., 13.],

       [14., 15.]])]

[array([[0., 1.],

   	    [2., 3.]]),

  array([[4., 5.],

 	     [6., 7.]]),

  array([[ 8.,  9.],

         [10., 11.]]),

  array([[12., 13.],

         [14., 15.]])]
a=b,复制
- 说明
复制就是使用“=”。使用“=”的时候,实际上是传递的是对象的引用,当对象发生修改的时候,复制体也会发生同等的改变,无论何种改变。
import numpy as np

#Simple assignments make no copy of array objects or of their data.

a = np.arange(12)

b = a

# a and b are two names for the same ndarray object

print (b is a)

# b的形状改变,a也跟着改变

b.shape = 3,4

print (a.shape)

print (id(a))

print (id(b))
结果
True

(3, 4)

1974659569504

1974659569504
view,浅复制
- 说明
view相当于传引用,view和原始数据共享一份数据,修改一个会影响另一个。
import numpy as np

a = np.arange(12)

# The view method creates a new array object that looks at the same data.

c = a.view()

# 判断c a 是否共用一个内存id

print("c is a")

print(c is a)

#  查看a,c 的id

print("id(a)")

print(id(a))

print("id(c)")

print(id(c))

# 对c 的形状进行修改

c.shape = 2, 6

# a的形状不发生改变

print("a.shape")

print(a.shape)

print("c.shape")

print(c.shape)

# 对c 的元素进行修改,a中的对应位置的元素也跟着修改

c[0, 4] = 1234

print(a)

print("a")

print(c)

print("c")
结果
c is a

False

id(a)

34629952

id(c)

36175504

a.shape

(12,)

c.shape

(2, 6)

[   0    1    2    3 1234    5    6    7    8    9   10   11]

a

[[   0    1    2    3 1234    5]

 [   6    7    8    9   10   11]]

c
- 拓展阅读
numpy中的copy和view - 大泽之国 - CSDN博客
https://blog.csdn.net/z0n1l2/article/details/83116775
copy,深拷贝
- 说明
将对象中的所有的元素全都拷贝,拷贝后,两者这件的独立的,互不影响
import numpy as np

a = np.arange(12)

#The copy method makes a complete copy of the array and its data.

# 完全拷贝

d = a.copy()

print (d is a)

# 修改d 中的元素

d[0] = 9999

print (d)

print (a)
结果
[9999    1    2    3    4    5    6    7    8    9   10   11]

[ 0  1  2  3  4  5  6  7  8  9 10 11]
- 拓展阅读
numpy中的copy和view - 大泽之国 - CSDN博客
https://blog.csdn.net/z0n1l2/article/details/83116775
python复制,浅拷贝,深拷贝理解 - Young的博客 - CSDN博客
https://blog.csdn.net/dearyangjie/article/details/71533615
Python中复制,浅拷贝,深拷贝的区别详解 - H845165367的博客 - CSDN博客
https://blog.csdn.net/H845165367/article/details/79687387
argmax,垂直方向上找出最大值的索引
- 说明
垂直方向上,找出最大值的位置
如果某一列中,有两个元素是相同的大小,那么就取靠前的数值的索引
import numpy as np

# data = 100*np.sin(np.arange(20)).reshape(5, 4)

# data = np.floor(data)

# 5行4列

data = np.array(

[[   0.,   84.,   90.,   14.,],

 [ -76.,  -96.,  -28.,   65.,],

 [  98.,   41.,  -55., -100.,],

 [ -54.,   42.,   99.,   65.,],

 [ -29.,  -97.,  -76.,   14.,]]

)

print("data")

print(data)

# 垂直方向上,找出最大值的位置

# 结果:[2 0 3 1],分别对应第0列的第2个,第1列的第0个,第2列的3个,第3列的第1个(这里是与第3个等值,故取靠前的数值)

ind = data.argmax(axis=0)

print("ind")

print(ind)

# 在1行中,还原最大值的数据

data_max = data[ind, range(data.shape[1])]

print("data_max")

print(data_max)
结果
data

[[   0.   84.   90.   14.]

 [ -76.  -96.  -28.   65.]

 [  98.   41.  -55. -100.]

 [ -54.   42.   99.   65.]

 [ -29.  -97.  -76.   14.]]

ind

[2 0 3 1]

data_max

[98. 84. 99. 65.]
tile,重复数据
import numpy as np

a = np.arange(0, 40, 10)

print(a)

# 对a中的数据进行重复,以a为单位生成新的4行3列的矩阵

# 由于a是1行4列的数据,因此最终生成 4*3 =12列数据

b = np.tile(a, (4, 3))

print(b)

print(b.shape)
结果
[ 0 10 20 30]

[[ 0 10 20 30  0 10 20 30  0 10 20 30]

 [ 0 10 20 30  0 10 20 30  0 10 20 30]

 [ 0 10 20 30  0 10 20 30  0 10 20 30]

 [ 0 10 20 30  0 10 20 30  0 10 20 30]]

(4, 12)
sort,按顺序排列数据
- 说明
axis=0,垂直排列数据,从小到大
axis=1,水平排列数据,从小到大
示例一,axis=1
import numpy as np

a = np.array([[4, 3, 5], [1, 2, 1]])

print(a)

# 方式一

print('方式一--------b = np.sort(a, axis=1)')

b = np.sort(a, axis=1)

print(b)

print('--------a')

print(a)

# 方式二

print('方式二--------a.sort(axis=1)')

a.sort(axis=1)

print(a)
结果
[[4 3 5]

 [1 2 1]]

方式一--------b = np.sort(a, axis=1)

[[3 4 5]

 [1 1 2]]

--------a

[[4 3 5]

 [1 2 1]]

方式二--------a.sort(axis=1)

[[3 4 5]

 [1 1 2]]
示例二,axis=0
import numpy as np

a = np.array([[4, 3, 5], [1, 2, 1]])

print(a)

# 方式一

print('方式一--------b = np.sort(a, axis=0)')

b = np.sort(a, axis=0)

print(b)

print('--------a')

print(a)

# 方式二

print('方式二--------a.sort(axis=0)')

a.sort(axis=0)

print(a)
结果
[[4 3 5]

 [1 2 1]]

方式一--------b = np.sort(a, axis=0)

[[1 2 1]

 [4 3 5]]

--------a

[[4 3 5]

 [1 2 1]]

方式二--------a.sort(axis=0)

[[1 2 1]

 [4 3 5]]
argsort()函数是将x中的元素从小到大排列,提取其对应的index(索引),然后输出到y
argsort,向量中元素从小到大排列
- 说明
argsort()函数是将x中的元素从小到大排列,提取其对应的index(索引),然后输出到y
import numpy as np

a = np.array([4, 3, 1, 2])

j = np.argsort(a)

print('--------')

print(j)

print('--------')

print(a[j])
结果
--------

[2 3 1 0]

--------

[1 2 3 4]
numpy的函数使用的更多相关文章
- 006 numpy常用函数
属于Numpy的函数. 一:通用函数 1.说明 是一种对ndarray中的数据执行元素级运算的函数. 2.一元函数 3.二元函数 二:矢量计算 1.numpy.where 主要有两种用法 np.whe ...
- NumPy 数学函数
NumPy 数学函数 NumPy 包含大量的各种数学运算的函数,包括三角函数,算术运算的函数,复数处理函数等. 三角函数 NumPy 提供了标准的三角函数:sin().cos().tan(). 实例 ...
- NumPy 字符串函数
NumPy 字符串函数 以下函数用于对 dtype 为 numpy.string_ 或 numpy.unicode_ 的数组执行向量化字符串操作. 它们基于 Python 内置库中的标准字符串函数. ...
- Python中numpy.apply_along_axis()函数的用法
numpy.apply_along_axis(func, axis, arr, *args, **kwargs): 必选参数:func,axis,arr.其中func是我们自定义的一个函数,函数fun ...
- numpy常用函数学习
目录numpy常用函数学习点乘法线型预测线性拟合裁剪.压缩和累乘相关性多项式拟合提取符号数组杂项点乘法该方法为数学方法,但是在numpy使用的时候略坑.numpy的点乘为a.dot(b)或numpy. ...
- numpy.rollaxis函数
numpy.rollaxis numpy.rollaxis 函数向后滚动特定的轴到一个特定位置,格式如下: numpy.rollaxis(arr, axis, start) 参数说明: arr:数组 ...
- Numpy常用函数用法大全
.ndim :维度.shape :各维度的尺度 (2,5).size :元素的个数 10.dtype :元素的类型 dtype(‘int32’).itemsize :每个元素的大小,以字节为单位 ,每 ...
- 12、numpy——数学函数
NumPy 数学函数 NumPy 包含大量的各种数学运算的函数,包括三角函数,算术运算的函数,复数处理函数等. 1.三角函数 NumPy 提供了标准的三角函数:sin().cos().tan(). i ...
- 11、numpy——字符串函数
NumPy 字符串函数 以下函数用于对 dtype 为 numpy.string_ 或 numpy.unicode_ 的数组执行向量化字符串操作. 它们基于 Python 内置库中的标准字符串函数. ...
- 吴裕雄--天生自然Numpy库学习笔记:NumPy 数学函数
NumPy 包含大量的各种数学运算的函数,包括三角函数,算术运算的函数,复数处理函数等. NumPy 提供了标准的三角函数:sin().cos().tan(). import numpy as np ...
随机推荐
- 106、TensorFlow变量 (二) reshape
import tensorflow as tf rank_three_tensor = tf.ones([3, 4, 5]) # 创建一个[3,4,5]大小的张量,3行4列,每个位置上有五个元素 ma ...
- 聊聊 API 签名方式
前言 现在越来越多的公司以 API 的形式对外提供服务,这些 API 接口大多暴露在公网上,所以安全性就变的很重要了.最直接的风险如下: 非法使用 API 服务.(收费接口非法调用) 恶意攻击和破坏. ...
- CentOS7 图形化方式安装Oracle 18c 安装配置
下载 Oracle 数据库,zip 包 https://www.oracle.com/technetwork/database/enterprise-edition/downloads/index.h ...
- php优化及高效提速问题小结
一. 在函数中,传递数组时使用 return 比使用 global 要高效,比如: function userloginfo($usertemp){ $detail=explode("&qu ...
- Python3学习(18)--偏函数(Partial) --转载存地址
由于最近出差,没有时间更, 倒不是忙,而是费心,项目其实并不难,主要是涉及钱的地方谈技术略显苍白:没有技术解决不了的问题,但是钱没到位,没人愿意无偿给你提供技术,算是停更一周后的,吐槽吧. 赶上今天 ...
- vue - blog开发学7
将基本的项目部署到linux上(前后台只是实现了基本的功能,本次只是记录一些基本的开发流程,完善,等后续) 1.linux环境准备(我用的是阿里云服务器) ①jre.mysql,Nginx基本上这些就 ...
- Springboot1.5.9整合WebSocket
一.WebSocket介绍 1.WebSocket是什么? WebSocket是协议,是HTML5开始提供的基于TCP(传输层)的一种新的网络协议, 它实现了浏览器与服务器全双工(full-duple ...
- ajax基本原理实现
function ajax(method,url,data,success){ try{ var xhr=new XMLHttpRequest(); }catch(e){ xhr=new Active ...
- 【异常】Caused by: java.lang.IllegalStateException: Method has too many Body parameters
出现此异常原因是引文使用feign客户端的时候,参数没有用注解修饰 1.1GET方式错误写法 @RequestMapping(value="/test", method=Reque ...
- 【记录】linux 文件权限的查看和修改
从上图可以看出每个文件权限与类型都是不一样的,如果对各个字母表达的含义不了解,那么看的真是一脸懵逼. 别急,具体解释如下: d rwx rwx rwx - rwx r-- rw- 第一列含义 ...