CentOS7部署ES(单机)
一、创建路径,解压
## 创建路径

[root@localhost /]# cd /data

[root@localhost data]# mkdir ES

## 解压

[root@localhost data]# cd ES

[root@localhost ES]# ls

elasticsearch-8.11.3-linux-x86_64.tar.gz

[root@localhost ES]# tar -zxvf elasticsearch-8.11.3-linux-x86_64.tar.gz

## 创建数据和日志文件夹

[root@localhost ES]# mkdir /data/ES/elasticsearch-8.11.3/data

[root@localhost ES]# mkdir /data/ES/elasticsearch-8.11.3/log
二、添加用户elsearch
## 新增es用户

[root@localhost ES]# useradd elsearch

## 为es用户设置密码

[root@localhost ES]# passwd elsearch

Changing password for user elsearch.

New password:

BAD PASSWORD: The password contains the user name in some form

Retype new password:

passwd: all authentication tokens updated successfully.

## 如果错了,可以删除再加

## userdel -r elsearch

## 将ES目录更改为elsearch用户权限

[root@localhost ES]# chown elsearch:elsearch /data/ES/ -R
三、修改\config\elasticsearch.yml文件
[root@localhost data]# cd /data/ES/elasticsearch-8.11.3/config/

[root@localhost config]# ls

elasticsearch-plugins.example.yml  elasticsearch.yml  jvm.options  jvm.options.d  log4j2.properties  role_mapping.yml  roles.yml  users  users_roles

[root@localhost config]# vim elasticsearch.yml
修改内容
# ======================== Elasticsearch Configuration =========================

#放开node.name,集群模式下,放开cluster.name

node.name: node-1

# 数据存储和日志存储路径放开注释

path.data: /data/ES/elasticsearch-8.11.3/data

path.logs: /data/ES/elasticsearch-8.11.3/log

# 设置ip地址,任务网络均可访问

network.host: 0.0.0.0

# 放开http.port:9200

http.port: 9200

# Enable security features

# 启用或禁用X-Pack安全功能

xpack.security.enabled: false

xpack.security.enrollment.enabled: true

# Enable encryption for HTTP API client connections, such as Kibana, Logstash, and Agents

xpack.security.http.ssl.enabled: true

xpack.security.http.ssl.keystore.path: certs/http.p12

# Enable encryption and mutual authentication between cluster nodes

xpack.security.transport.ssl.enabled: true

xpack.security.transport.ssl.verification_mode: certificate

xpack.security.transport.ssl.keystore.path: certs/transport.p12

xpack.security.transport.ssl.truststore.path: certs/transport.p12

cluster.initial_master_nodes: ["node-1"]

## 跨域资源共享设置

http.cors.enabled: true

http.cors.allow-origin: "*"

http.cors.allow-methods: OPTIONS, HEAD, GET, POST, PUT, DELETE

http.cors.allow-headers: "X-Requested-With, Content-Type, Content-Length, X-User"

#----------------------- END SECURITY AUTO CONFIGURATION -------------------------
说明:在Elasticsearch中如果,network.host不是localhost或者127.0.0.1的话,就会认为是生产环境,会对环境的要求比较高,我们的测试环境不一定能够满足,一般情况下需要修改两处配置,如下:
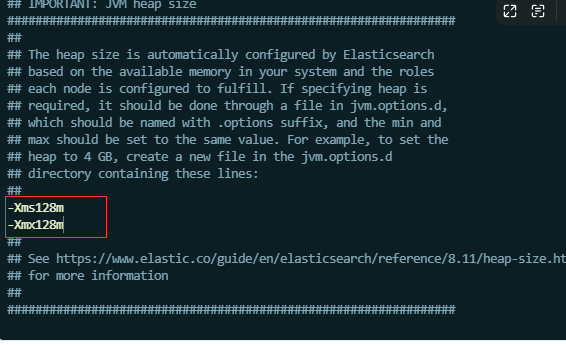
1、修改jvm启动参数jvm.options
[root@kaduoxi config]# vim jvm.options

-Xms128m    #根据自己机器情况修改

-Xmx128m
一个进程在VMAs(虚拟内存区域)创建内存映射量最大数量(/etc/sysctl.conf)
[root@kaduoxi config]# vim /etc/sysctl.conf

vm.max_map_count=655360

#配置生效

[root@kaduoxi config]# sysctl -p
四、启动ES服务
## 切换用户,启动es

[root@localhost config]# su - elsearch

[elsearch@localhost ~]$ cd /data/ES/elasticsearch-8.11.3/bin

[elsearch@localhost bin]$ ./elasticsearch
五、防火墙
#在root用户下关闭防火墙:

#centos6,关闭方式

chkconfig iptables off

#centos7,关闭方式

systemctl stop firewalld.service

## 查看防火墙所有端口

[root@localhost ES]#  firewall-cmd --zone=public --list-ports

## 放开端口6379

[root@localhost ES]#  sudo firewall-cmd --zone=public --add-port=9100/tcp --permanent

success

[root@localhost ES]#  sudo firewall-cmd --zone=public --add-port=9200/tcp --permanent

success

## 刷新防火墙

[root@localhost ES]#  firewall-cmd --reload

success
六、安装elasticsearch-head
[elsearch@kaduoxi bin]$ su - root

Password:

Last login: Mon Jan  8 15:45:04 CST 2024 on pts/0

[root@kaduoxi ~]# docker pull mobz/elasticsearch-head:5

5: Pulling from mobz/elasticsearch-head

75a822cd7888: Pull complete

57de64c72267: Pull complete

4306be1e8943: Pull complete

871436ab7225: Pull complete

0110c26a367a: Pull complete

1f04fe713f1b: Pull complete

723bac39028e: Pull complete

7d8cb47f1c60: Pull complete

7328dcf65c42: Pull complete

b451f2ccfb9a: Pull complete

304d5c28a4cf: Pull complete

4cf804850db1: Pull complete

Digest: sha256:55a3c82dd4ba776e304b09308411edd85de0dc9719f9d97a2f33baa320223f34

Status: Downloaded newer image for mobz/elasticsearch-head:5

docker.io/mobz/elasticsearch-head:5

[root@kaduoxi ~]# docker create --name elasticsearch-head -p 9100:9100 mobz/elasticsearch-head:5

66e6629b1c465d1d14a04d9ff0a19931b9c220dcbff41439b23b244f686cdcf7

[root@kaduoxi ~]# docker start elasticsearch-head

elasticsearch-head

[root@kaduoxi ~]#
问题
问题1:缺少证书
[2024-03-08T03:38:35,255][ERROR][o.e.b.Elasticsearch      ] [node-1] fatal exception while booting Elasticsearch

org.elasticsearch.ElasticsearchSecurityException: failed to load SSL configuration [xpack.security.transport.ssl] - cannot read configured [PKCS12] keystore (as a truststore) [/itcast/es/elasticsearch-8.11.3/config/certs/transport.p12] because the file does not exist
解决:
 cd /data/ES/elasticsearch-8.11.3/bin

 ## 两次回车

[elsearch@localhost bin]$ ./elasticsearch-certutil ca

## 连续回车

[elsearch@localhost bin]$ /data/ES/elasticsearch-8.11.3/bin/elasticsearch-certutil cert --ca /data/ES/elasticsearch-8.11.3/elastic-stack-ca.p12

## 切换root,config下创建certs文件夹

[root@localhost bin]# mv /data/ES/elasticsearch-8.11.3/elastic-certificates.p12 /data/ES/elasticsearch-8.11.3/config/certs/transport.p12

[root@localhost bin]# cp /data/ES/elasticsearch-8.11.3/config/certs/transport.p12 /data/ES/elasticsearch-8.11.3/config/certs/http.p12

[root@localhost bin]# cd ..

[root@localhost elasticsearch-8.11.3]# chmod -R +755 config/certs/
问题2:配置文件设置
[3] bootstrap checks failed. You must address the points described in the following [3] lines before starting Elasticsearch. For more information see [https://www.elastic.co/guide/en/elasticsearch/reference/8.11/bootstrap-checks.html]bootstrap check failure [1] of [3]: max file descriptors [4096] for elasticsearch process is too low, increase to at least [65535]; for more information see [https://www.elastic.co/guide/en/elasticsearch/reference/8.11/_file_descriptor_check.html]

bootstrap check failure [2] of [3]: max number of threads [3766] for user [elsearch] is too low, increase to at least [4096]; for more information see [https://www.elastic.co/guide/en/elasticsearch/reference/8.11/max-number-threads-check.html]

bootstrap check failure [3] of [3]: max virtual memory areas vm.max_map_count [65530] is too low, increase to at least [262144]; for more information see [https://www.elastic.co/guide/en/elasticsearch/reference/8.11/_maximum_map_count_check.html]

[2024-05-12T20:44:23,381][WARN ][o.e.n.Node               ] [node-1] unexpected exception while waiting for http server to closejava.util.concurrent.ExecutionException: java.lang.IllegalStateException: Can't move to stopped state when not started

        at java.base/java.util.concurrent.FutureTask.report(FutureTask.java:122)

        at java.base/java.util.concurrent.FutureTask.get(FutureTask.java:191)

        at org.elasticsearch.server@8.11.3/org.elasticsearch.node.Node.prepareForClose(Node.java:1776)

        at org.elasticsearch.server@8.11.3/org.elasticsearch.bootstrap.Elasticsearch.shutdown(Elasticsearch.java:468)

        at java.base/java.lang.Thread.run(Thread.java:1583)

See logs for more details.
解决:
## max number of threads [3766] for user [elsearch] is too low

参考官网:

https://www.elastic.co/guide/en/elasticsearch/reference/8.11/bootstrap-checks.html

[root@localhost config]# vim /etc/security/limits.conf

# 最大线程数

elsearch       -       nproc       4096

root       -       nproc       4096

[root@localhost config]# sudo systemctl daemon-reload

## 修改max_file_descriptors

[root@localhost config]# vim /etc/security/limits.conf

# 最大文件描述符  配置内容   *表示所有用户生效

* soft nofile 65536

* hard nofile 65536

## 重新登录即可生效

## 可使用命令查看是否生效

[root@localhost ~]# ulimit  -H -n

## 修改max_map_count

[root@kaduoxi config]# vim /etc/sysctl.conf

vm.max_map_count=655360

#配置生效

[root@kaduoxi config]# sysctl -p
CentOS7部署ES(单机)的更多相关文章
- 阿里云ECS部署ES
背景 最近越来越多的公司把业务搬迁到云上,公司也有这个计划,自己抽时间在阿里云和Azure上做了一些小的尝试,现在把阿里云上部署ES和kibana记录下来.为以后做一个参考,也希望对其他人有帮助. 这 ...
- docker 快速部署ES集群 spark集群
1) 拉下来 ES集群 spark集群 两套快速部署环境, 并只用docker跑起来,并保存到私库. 2)弄清楚怎么样打包 linux镜像(或者说制作). 3)试着改一下,让它们跑在集群里面. 4) ...
- 在 CentOS7 部署 ELK8.0.1
在 CentOS7 部署 ELK8.0.1 目录 在 CentOS7 部署 ELK8.0.1 1 下载软件: 2 环境准备: 2.1 关闭防火墙和SELinux 2.2 修改Linux最大打开文件数 ...
- [原]CentOS7部署osm2pgsql
转载请注明原作者(think8848)和出处(http://think8848.cnblogs.com) 部署Postgresql和部署PostGis请参考前两篇文章 本文主要参考GitHub上osm ...
- centos7 部署ssserver
centos7 部署shadowsocks服务端 为什么要选centos7? 以后centos7 肯定是主流,在不重要的环境还是尽量使用新系统吧 centos7 的坑 默认可能会有firewall 或 ...
- centos7 部署 docker compose
=============================================== 2019/4/10_第1次修改 ccb_warlock == ...
- centos7 部署 docker ce
=============================================== 2019/4/9_第1次修改 ccb_warlock === ...
- centos7 部署 open-falcon 0.2.0
=============================================== 2019/4/29_第3次修改 ccb_warlock 更新 ...
- centos7 部署 docker、shipyard
=============================================== 2019/4/9_第3次修改 ccb_warlock 更新说 ...
- centos7 部署 docker swarm
=============================================== 2019/4/9_第3次修改 ccb_warlock 更新说 ...
随机推荐
- Jetty使用入门
社区当前推荐开发者使用Jetty 12.X版本. 依据End of Community Support for Jetty 9.x - June 2022,社区对Jetty 9.x的支持,已在2022 ...
- 【中秋国庆不断更】OpenHarmony多态样式stateStyles使用场景
@Styles和@Extend仅仅应用于静态页面的样式复用,stateStyles可以依据组件的内部状态的不同,快速设置不同样式.这就是我们本章要介绍的内容stateStyles(又称为:多态样式). ...
- Nacos无法连接wsl2上部署的MySQL
情况描述 在部署Nacos时,需要连接MySQL数据库管理数据,但是如果连接的是wsl2上部署的MySQL,使用127.0.0.1或者localhost,通常会出现如下错误: org.springfr ...
- MogDB/openGauss 坏块测试-对启动的影响-测试笔记1
MogDB/openGauss 坏块测试-对启动的影响-测试笔记 1 在 UPDATE 操作提交后,脏块落盘前 kill 掉 mogdb 数据库,然后对 UPDATE 修改的坏进行以下破坏操作,仍然能 ...
- 7月27日19:30直播预告:HarmonyOS3及华为全场景新品发布会
7月27日 19:30 HarmonyOS 3 及华为全场景新品发布会 高能来袭! 在HarmonyOS开发者社区企微直播间 一起见证HarmonyOS的又一次智慧进化 扫码预约直播,与您不见不散!
- 如何增强Java Excel API 的导入和导出性能
前言 GrapeCity Documents for Excel (以下简称GcExcel)是葡萄城公司的一款服务端表格组件,它提供了一组全面的 API 以编程方式生成 Excel (XLSX) 电子 ...
- mysql 必知必会整理—子查询与连接表[八]
前言 简单介绍一下子查询与连接表. 正文 什么是子查询呢? 列出订购物品TNT2的所有客户. select cust_id from orders where order_num IN (SELECT ...
- redis 简单整理——redis 的列表基本结构和命令[四]
前言 简单整理一下redis的列表. 正文 列表(list)类型是用来存储多个有序的字符串,如图2-18所示,a. b.c.d.e五个元素从左到右组成了一个有序的列表,列表中的每个字符串 称为元素(e ...
- This version of Android Studio cannot open this project, please retry with Android Studio 4.0 or newer.
前言 遇到的问题,This version of Android Studio cannot open this project, please retry with Android Studio 4 ...
- 实训篇-Html-表格练习2
<!DOCTYPE html> <html> <head> <meta charset="utf-8"> <title> ...