run a Freight robot (3)
5.Logging In
Once the robot is turned on and the robot is on the network, ssh into the computer of the robot using the default fetch user account:
$ ssh fetch@<robot_name_or_ip>
robot_name_or_ip will be either an IPv4 network address, or a network name, depending on the configuration of your local network. If your computer and network is setup for multicast DNS (mDNS) then you may be able to use fetchXYZ.local as the network name where XYZ will be the serial number of your robot (remove any leading zeros from the serial number).
Default User Account
Each robot ships with a default user account, with username fetch and password robotics. It is recommended to change the password when setting up the robot.
Creating User Accounts
It is recommended that each user create their own account on the robot, especially when developing from source. To create an account on the robot, ssh into the robot as the fetch user, and run the following commands
$ sudo adduser USERNAME

$ sudo usermod -G adm,cdrom,sudo,dip,plugdev,lpadmin,sambashare USERNAME
6. Moving the Base with your Keyboard
Note
You will need a computer with ROS installed to properly communicate with the robot. Please consult the ROS Wiki for more information. We strongly suggest an Ubuntu machine with ROS Indigo installed.
To teleoperate the robot base in simulation, we recommend using the teleop_twist_keyboard.py script from teleop_twist_keyboard package.
$ export ROS_MASTER_URI=http://<robot_name_or_ip>:11311

$ rosrun teleop_twist_keyboard teleop_twist_keyboard.py
Using Software Runstop
To activate the software runstop, publish True to the /enable_software_runstop topic.
Alternately, with the teleop runstop enabled, pressing both of the right trigger buttons (buttons 9 and 11) will activate the software runstop. The software_runstop.py script in fetch_bringup can be modified to change the button(s) for the software runstop.
Once activated, the software runstop can be deactivated by (1) toggling the hardware runstop, or (2) disabling the software runstop by passing False to the /enable_software_runstop topic.
Enable Teleop Software Runstop
Note
In order to edit the robot.launch file, you will need to use a terminal editor (such as nano or vim), or use the -X flag with SSH to use a graphical editor (such as gedit). Additionally, the editor must be launched with sudo. Instructions below use nano.
To enable the software runstop, first SSH into the robot, and then modify the robot drivers launch file to use it.
We need to modify the robot.launch file to pass the correct arg to the software runstop script:
$ sudo nano /etc/ros/indigo/robot.launch
In this file there should be a Software Runstop entry near the end. By default this entry contains an args line, with a value of “-a -b -g”. To add teleop control, add the “-t” flag as well. This section will then look like the below. If your robot is an older one and does not have a Software Runstop entry, you will want to simply copy the block the below.
<!-- Software Runstop -->

<include file="$(find fetch_bringup)/launch/include/runstop.launch.xml">

  <arg name="flags" value="-a -b -g -t" />

</include>
Note that the -a, -b, -g flags correspond to letting the software runstop control the arm, base and gripper breakers, respectively.
Additionally, if completely disabling the software runstop functionality is desired, the above section in robot.launch can be commented out or removed.
Finally, restart the drivers so that our changes take effect:
$ sudo service robot stop && sudo service robot start
7. Visualizing Data
$ export ROS_MASTER_URI=http://<robot_name_or_ip>:11311

$ rosrun rviz rviz
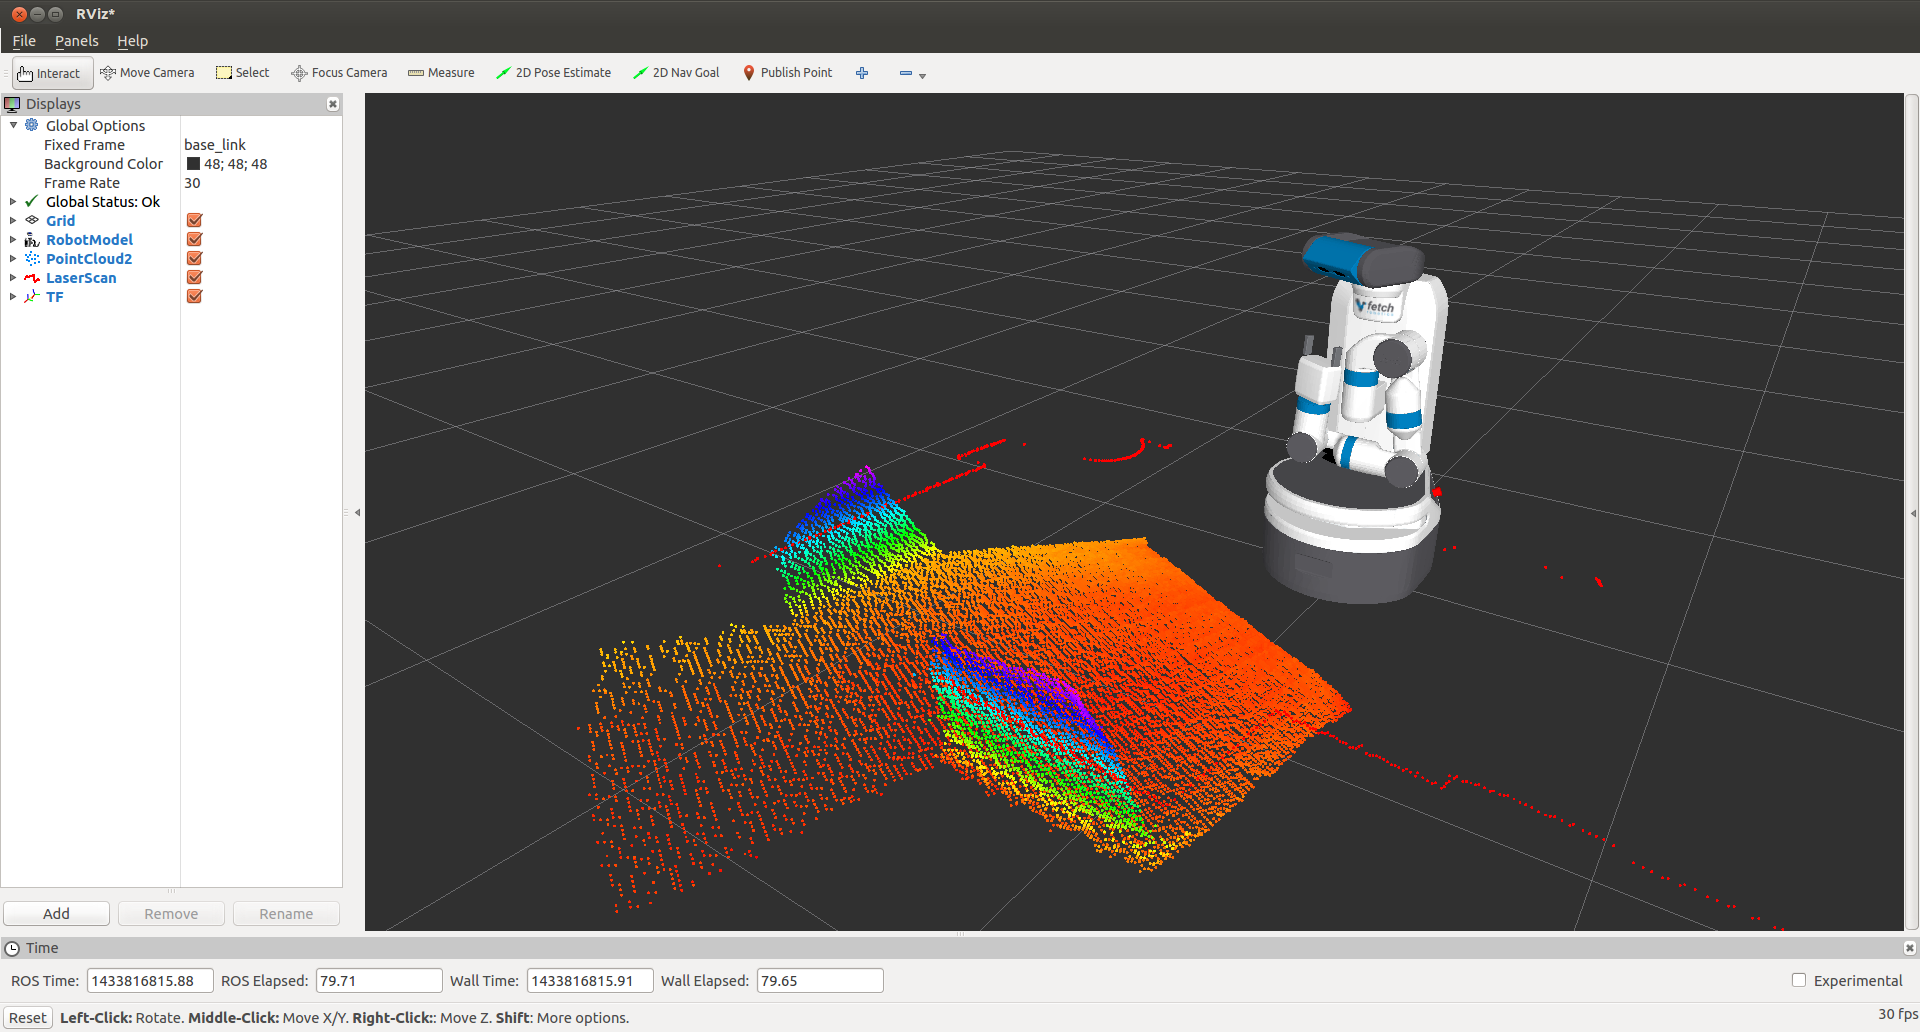
Note
You will need a computer with ROS installed to properly communicate with the robot. Please consult the ROS Wiki for more information. We strongly suggest an Ubuntu machine with ROS Indigo installed.
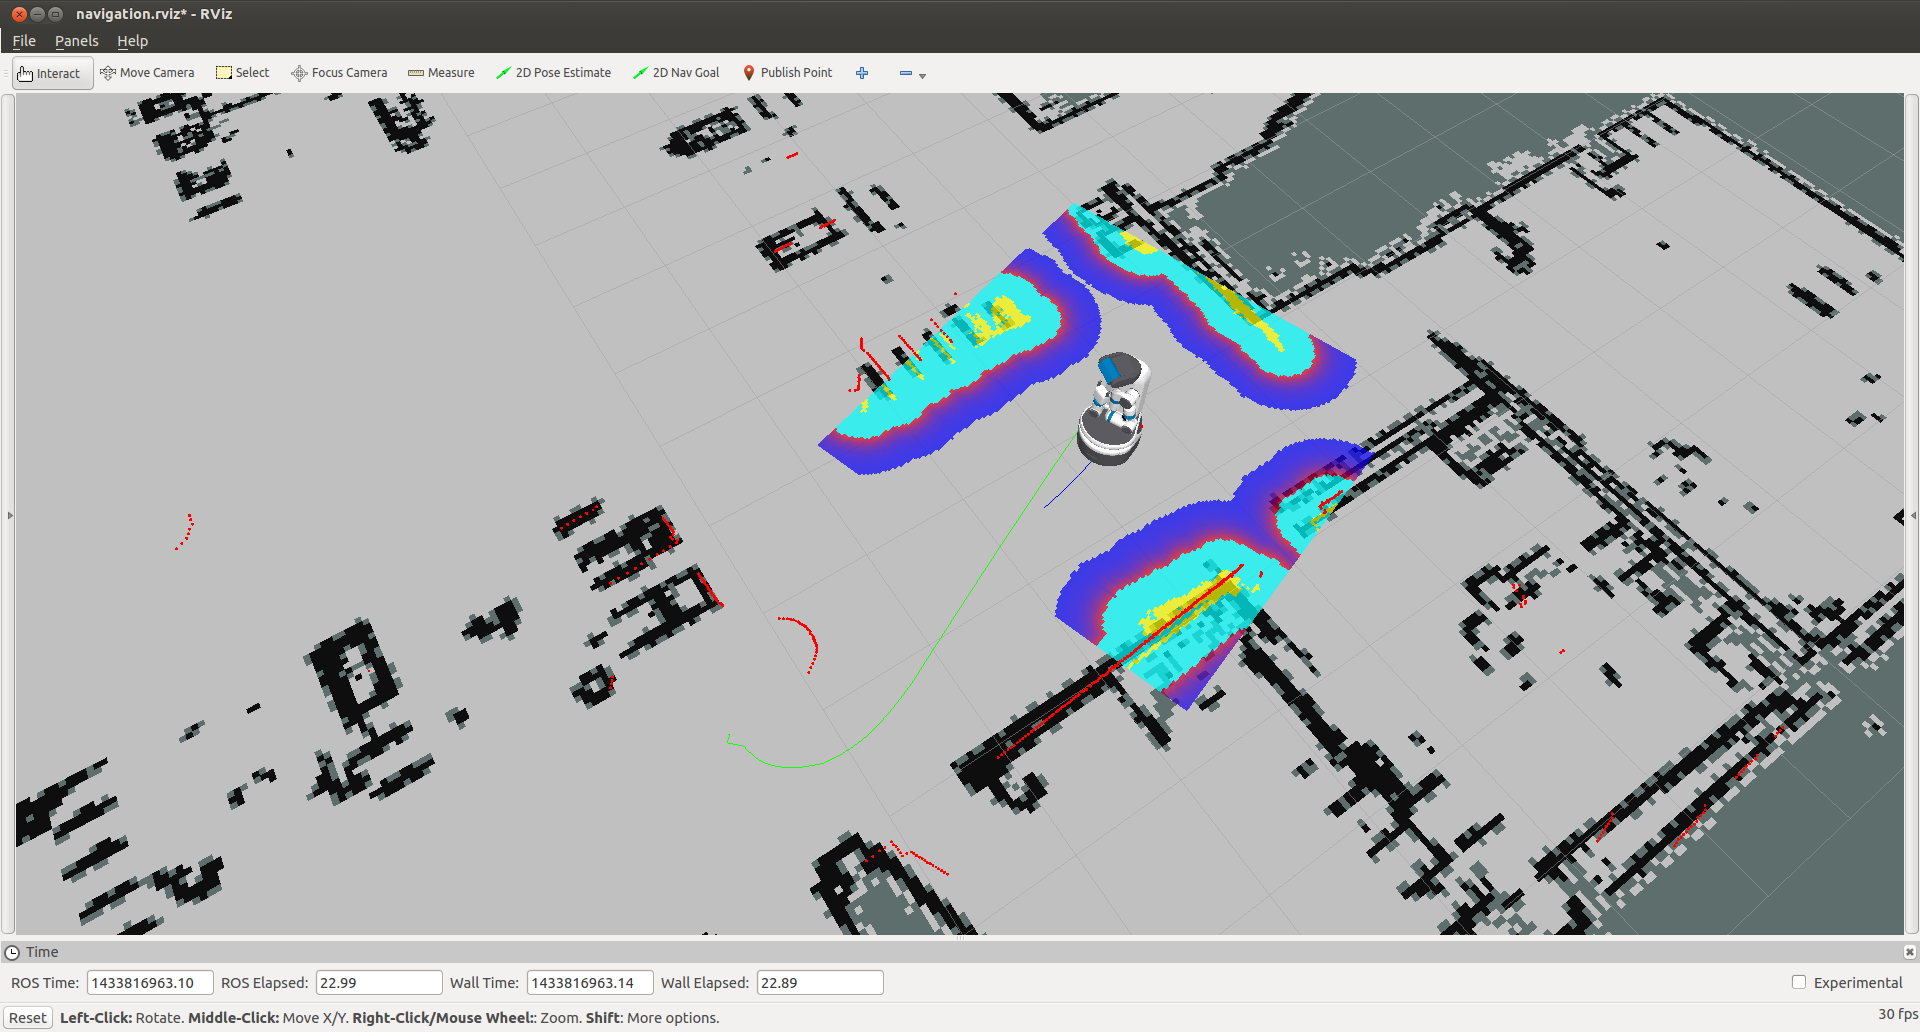
You can now manually set up your RVIZ visualization or re-run RVIZ with a configuration file using the command line. The default .rviz configuration file for Fetch can be loaded using:
$ roscd fetch_navigation/config

$ export ROS_MASTER_URI=http://<robot_name_or_ip>:11311

$ rviz -d navigation.rviz
run a Freight robot (3)的更多相关文章
- run a Freight robot (1)
1. Freight robot The Fetch and Freight Research Edition Robots are indoor laboratory robots. Coordin ...
- run a Freight robot (2)
3. Network Setup Connecting Freight to a Monitor The easiest way to configure the wireless networki ...
- Simulating a Freight robot in Gazebo
Installation Before installing the simulation environment, make sure your desktop is setup with a st ...
- implement "slam_karto" package on a Freight robot
1. login ssh fetch@<robot ip or robot name> 2. set robot master modify .bashrc in robot's com ...
- 几个bat文件(关于robot freamwork安装)
如果安装后 没有这几文件,或者在运行后 提示 文件缺少这个文件 , 就需要手动创建. 一般文件在 :C:\Python27\Scripts 这个目录下 1.pybot.bat文件: @echo o ...
- robot framework + win7 64 上的安装
1.安装 python 2.7 2.cmd 管理模式 python -m pip install --upgrade pip pip install robotframework==3. ...
- Robot Framework(一)入门
1.1简介 Robot Framework是一个基于Python的,可扩展的关键字驱动的测试自动化框架,用于端到端验收测试和验收测试驱动开发(ATDD).它可用于测试分布式异构应用程序,其中验证需要涉 ...
- robotframework笔记19
后处理输出 使用时自动测试 在测试执行报告和日志生成,并使用它 分别允许创建自定义报告和日志以及结合 和合并的结果. 使用Rebot 简介 rebot [options] robot_outputs ...
- robotframework笔记1
机器人框架是一个基于Python的,可扩展的关键字驱动的自动化测试最终到终端的验收测试和验收测试驱动开发(ATDD)框架.它可用于检测分布式异类应用程序,其中,验证要求感人几种技术和接口. 下面列出了 ...
随机推荐
- 在HTML页面获取当前系统时间
<script language="javascript"> function getCurDate() { var d = new Date(); var week; ...
- 理解Linux中断 (3)【转】
转自:http://blog.csdn.net/tommy_wxie/article/details/7425712 版权声明:本文为博主原创文章,未经博主允许不得转载. .下半部 在中断处理过程中, ...
- centos环境源码安装postgresql9.4
源码安装简要步骤 下载PostgreSQL 源码包 下载根目录地址:http://ftp.postgresql.org/ 本人选择的是当前最新版本v9.4.1:http://ftp.postgre ...
- ffmpeg无法接收组播流问题处理
问题:ffmpeg无法对IP组播进行处理,表现如下 [root@os01 /]# ffprobe udp://225.0.0.2:9000 ffprobe version Copyright (c) ...
- svn down代码的时候提示“由于目标计算机积极拒绝,无法连接”
如上图所示: 原因1:svn没有启动成功 原因2:防火墙没有svn的端口号3690 解决方法: 1.启动svn服务 svnserve -d -r svn路径 例如:svnserve -d -r / ...
- python 运行python manege.py runserver时报错:“no module named djangorestframework” 的解决方案
python 运行python manege.py runserver时报错:“no module named djangorestframework” 的解决方案 importerror:no mo ...
- ThinkPhp之分页
function page($count,$pagesize=3){ $Page=new \Think\Page($count,$pagesize); //每页显示记录数 $Page->setC ...
- C++陷阱之慎用string类
我们知道,string类为我们提供了很多的便利,我们用string类能方便的做字符串的各种操作,避免了我们直接操作char指针而产生的一些繁琐的操作,和内存泄露的可能性,可是string类也是有陷阱的 ...
- 准确率(Precision)、召回率(Recall)以及F值(F-Measure)
转载自:http://blog.csdn.net/yechaodechuntian/article/details/37394967 https://www.zhihu.com/question/19 ...
- Radar之字节流加载图片
获取GUITexture GameObject _obj = GameObject.Find("Tex1"); GUITexture _tex = _obj.GetComponen ...