OsgEearh 中的 FeatureEditor的实现原理
先来看看FeatureEditor的用法:
    const osgEarth::SpatialReference* mapSRS = mapNode->getMapSRS();

    osgEarth::Symbology::Style geomStyle;

    geomStyle.getOrCreate<osgEarth::LineSymbol>()->stroke()->color() = osgEarth::Symbology::Color::Cyan;

    geomStyle.getOrCreate<osgEarth::LineSymbol>()->stroke()->width() = 5.0f;

    geomStyle.getOrCreate<osgEarth::LineSymbol>()->tessellationSize() = 75000;

    geomStyle.getOrCreate<osgEarth::AltitudeSymbol>()->clamping() = osgEarth::AltitudeSymbol::CLAMP_TO_TERRAIN;

    geomStyle.getOrCreate<osgEarth::AltitudeSymbol>()->technique() = osgEarth::AltitudeSymbol::TECHNIQUE_DRAPE;

    osg::ref_ptr<osgEarth::Symbology::Polygon> polygon = new osgEarth::Symbology::Polygon();

    polygon->push_back(osg::Vec3d(0, 40, 0));

    polygon->push_back(osg::Vec3d(-60, 40, 0));

    polygon->push_back(osg::Vec3d(-60, 60, 0));

    polygon->push_back(osg::Vec3d(0, 60, 0));

    osg::ref_ptr<osgEarth::Features::Feature> feature = new osgEarth::Features::Feature(polygon, mapSRS);

    osg::ref_ptr<osgEarth::Annotation::FeatureNode> featureNode = new osgEarth::Annotation::FeatureNode(feature, geomStyle);

    geometryGroup->addChild(featureNode);

    osg::ref_ptr<osgEarth::Annotation::FeatureEditor> editor = new osgEarth::Annotation::FeatureEditor(featureNode);

    mapNode->addChild(editor);
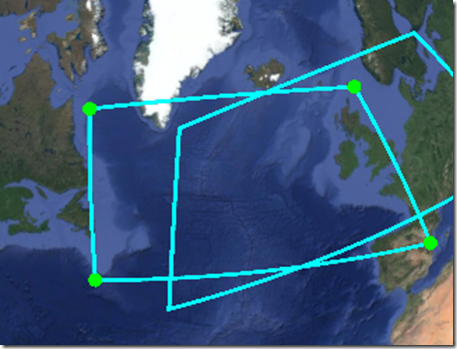
用FeatureNode作为参数来构造出一个FeatureEditor,然后将该FeatureEditor添加到MapNode中,即可实现通过鼠标拖动对FeatureNode的编辑功能。那么FeatureEditor是如何做到的呢?

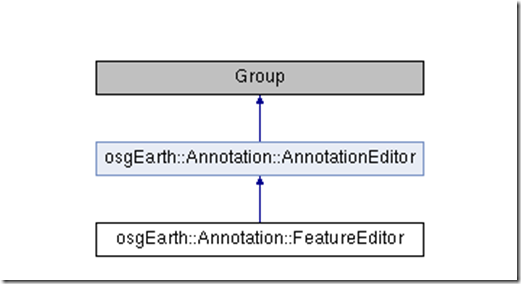
先看看FeatureEditor的继承图

FeatureEditor继承自AnnotationEditor,AnnotationEditor继承自Group,看看AnnotationEditor的代码
class OSGEARTHANNO_EXPORT AnnotationEditor : public osg::Group

    {

    protected:

        AnnotationEditor();

        virtual ~AnnotationEditor() { }

    };
AnnotationEditor::AnnotationEditor() :

osg::Group()

{

    // editor geometry should always be visible.

    osg::StateSet* stateSet = this->getOrCreateStateSet();

    stateSet->setMode(GL_DEPTH_TEST, 0);

    stateSet->setRenderBinDetails(99, "RenderBin");

}
AnnotationEditor这个类并没有做太多的事情,仅仅是在构造函数中设置了一下渲染状态而已。
接着看看FeatureEditor这个类
class OSGEARTHANNO_EXPORT FeatureEditor : public AnnotationEditor

    {

    public:

         /**

         * Constructs a new FeatureEditor

         * @param featureNode

         *      The FeatureNode to edit

         */

        FeatureEditor( FeatureNode* featureNode );

        /**

         *Gets the color of the draggers when they are selected

         */

        const osg::Vec4f& getPickColor() const;

        /**

         *Sets the color of the draggers when they are selected

         */

        void setPickColor( const osg::Vec4f& pickColor );

        /**

         *Gets the color of the draggers

         */

        const osg::Vec4f& getColor() const;

        /**

         *Sets the color of the draggers

         */

        void setColor( const osg::Vec4f& color );

        /**

         *Gets the dragger size

         */

        float getSize() const;

        /**

         *Sets the dragger size

         */

        void setSize( float size );

    protected:

        void init();

        osg::Vec4f _pickColor;

        osg::Vec4f _color;

        float _size;

        osg::ref_ptr< FeatureNode > _featureNode;

    };
这个类的代码也比较简单,只包含四个成员变量,两个color,一个size,以及该Editor所要编辑的FeatureNode。
FeatureEditor::FeatureEditor( FeatureNode* featureNode):

_featureNode( featureNode ),

_color(osg::Vec4(0.0f, 1.0f, 0.0f, 1.0f)),

_pickColor(osg::Vec4(1.0f, 1.0f, 0.0f, 1.0f)),

_size( 5.0f )

{

    init();

}
构造函数初始化了四个成员变量,然后调用init()函数。
void

FeatureEditor::init()

{

    removeChildren( 0, getNumChildren() );

    Feature* feature = _featureNode->getFeatures().front().get();

    //Create a dragger for each point

    for (unsigned int i = 0; i < feature->getGeometry()->size(); i++)

    {

        SphereDragger* dragger = new SphereDragger( _featureNode->getMapNode() );

        dragger->setColor( _color );

        dragger->setPickColor( _pickColor );

        dragger->setSize( _size );

        dragger->setPosition(GeoPoint(feature->getSRS(),  (*feature->getGeometry())[i].x(),  (*feature->getGeometry())[i].y()));

        dragger->addPositionChangedCallback(new MoveFeatureDraggerCallback( _featureNode.get(), i) );

        addChild(dragger);

    }

}
正如官方所给的注释:这个函数为geometry中的每个point都创建了一个dragger,dragger又是个什么东东?这个我们现在还不知道,接下来我们的内容就是研究dragger,在此处,我们主要需要注意这四句代码,此时不懂不要紧,看完后面,就会串起来了。
void

FeatureEditor::init()

{

    for (unsigned int i = 0; i < feature->getGeometry()->size(); i++)

    {

        //构造函数

        SphereDragger* dragger = new SphereDragger( _featureNode->getMapNode() );

        //根据point的位置来设置dragger的位置

        dragger->setPosition(GeoPoint(feature->getSRS(),  (*feature->getGeometry())[i].x(),  (*feature->getGeometry())[i].y()));

        //为dragger添加回调

        dragger->addPositionChangedCallback(new MoveFeatureDraggerCallback( _featureNode.get(), i) );

        //将dragger添加到场景中

        addChild(dragger);

    }

}
下面来看看dragger

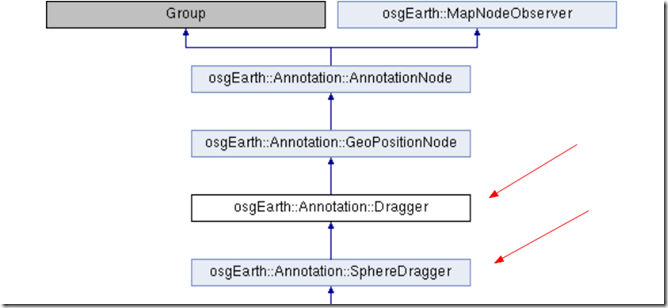
dragger继承自GeoPositionNode,对于GeoPositionNode,我们不需要知道太多,GeoPositionNode继承自Group,它的特殊之处在于它具有地理信息(毕竟人家叫 Geo Positon嘛),它提供了一个setPosition接口,我们可以通过这个接口来设置GeoPositionNode的位置。
/**

     * Dragger is a handle you can use to control things in the scene.

     * You drag it around with the mouse and it fires PositionChangedCallback's

     * that you can listen to to repond to.

     */

    class OSGEARTHANNO_EXPORT Dragger : public GeoPositionNode

    {

    public:

        /**

        * Callback that is fired when the position changes

        */

        struct PositionChangedCallback : public osg::Referenced

        {

        public:

            virtual void onPositionChanged(const Dragger* sender, const osgEarth::GeoPoint& position) {};

            virtual ~PositionChangedCallback() { }

        };

        typedef std::list< osg::ref_ptr<PositionChangedCallback> > PositionChangedCallbackList;

        enum DragMode

        {

          DRAGMODE_HORIZONTAL,

          DRAGMODE_VERTICAL

        };

        Dragger( MapNode* mapNode, int modKeyMask=0, const DragMode& defaultMode=DRAGMODE_HORIZONTAL );

        /** dtor */

        virtual ~Dragger();

        /** Sets the map position of the dragger, optionally firing a PositionChanged event. */

        void setPosition(const osgEarth::GeoPoint& position, bool fireEvents);

        /** Drag mode */

        void setDefaultDragMode(const DragMode& mode) { _defaultMode = mode; }

        DragMode& getDefaultDragMode() { return _defaultMode; }

        /** Add a callback that runs whenever the user moves the dragger */

        void addPositionChangedCallback( PositionChangedCallback* callback );

        /** Remove a callback. */

        void removePositionChangedCallback( PositionChangedCallback* callback );

    public: // GeoPositionNode

        virtual void setPosition(const GeoPoint& point);

    public: // osg::Node

        virtual void traverse(osg::NodeVisitor& nv);

    protected:

        virtual bool handle(const osgGA::GUIEventAdapter& ea, osgGA::GUIActionAdapter& aa);

        void firePositionChanged();

        bool _dragging;

        bool _hovered;

        PositionChangedCallbackList _callbacks;

        osg::ref_ptr<  osgManipulator::LineProjector >  _projector;

        osgManipulator::PointerInfo  _pointer;

        osg::Vec3d _startProjectedPoint;

        bool _elevationDragging;

        int _modKeyMask;

        DragMode _defaultMode;

        double _verticalMinimum;

    };
dragger的代码有一丢丢长,为求直观,上面的代码中我删除了其中一部分代码。
/**

     * Dragger is a handle you can use to control things in the scene.

     * You drag it around with the mouse and it fires PositionChangedCallback's

     * that you can listen to to repond to.

     */
官方给的注释是:可以利用dragger来control scene中的对象,当你用鼠标拖动dragger时,会触发PositionChangedCallback回调。
还记得之前FeatureEditor中init函数中的这句代码么?
//为dragger添加回调

dragger->addPositionChangedCallback(new MoveFeatureDraggerCallback( _featureNode.get(), i) );
我们先不管MoveFeatureDraggerCallback具体是什么,只需要知道它继承自PositionChangedCallback(PostionChangedCallback的代码在上面的代码里),PositionChangedCallback这个函数包含一个虚函数:
virtual void onPositionChanged(const Dragger* sender, const osgEarth::GeoPoint& position) {};
显然MoveFeatureChangedCallback对这个函数进行了重写,重写的内容具体是什么,我们先不管,先将注意力放在addPositionChangedCallback这个函数上。
void Dragger::addPositionChangedCallback( PositionChangedCallback* callback )

{

    _callbacks.push_back( callback );

}
这个函数的功能也很直观,将PositionChangedCallback添加进一个列表中,这个列表何时被用到?
void Dragger::firePositionChanged()

{

    for( PositionChangedCallbackList::iterator i = _callbacks.begin(); i != _callbacks.end(); i++ )

    {

        i->get()->onPositionChanged(this, getPosition());

    }

}
firePositonChanged函数遍历列表中的PositionChangedCallback对象,调用其onPositionChanged函数。firePositionChanged函数何时被调用?
void Dragger::setPosition(const GeoPoint& position, bool fireEvents)

{

    GeoPositionNode::setPosition( position );

    if ( fireEvents )

        firePositionChanged();

}
再看看handle函数。handle函数是用来处理gui事件的,在handle函数中,firePositionChanged()和setPosition()多次出现过。
bool Dragger::handle(const osgGA::GUIEventAdapter& ea, osgGA::GUIActionAdapter& aa)

{

    if (ea.getHandled()) return false;

    osgViewer::View* view = dynamic_cast<osgViewer::View*>(&aa);

    if (!view) return false;

    if (!getMapNode()) return false;

    if (ea.getEventType() == osgGA::GUIEventAdapter::PUSH)

    {

        IntersectionPicker picker( view, this );

        IntersectionPicker::Hits hits;

        if ( picker.pick( ea.getX(), ea.getY(), hits ) )

        {

            const GeoPoint& position = getPosition();

            _dragging = true;

            //Check for and handle vertical dragging if necessary

            bool pressedAlt = _modKeyMask && (ea.getModKeyMask() & _modKeyMask) > 0;

            _elevationDragging = (_defaultMode == Dragger::DRAGMODE_VERTICAL && !pressedAlt) || (_defaultMode == Dragger::DRAGMODE_HORIZONTAL && pressedAlt);

            if (_elevationDragging)

            {

              _pointer.reset();

              // set movement range

              // TODO: values 0.0 and 300000.0 are rather experimental

              GeoPoint posStart(position.getSRS(), position.x(), position.y(), 0.0, ALTMODE_ABSOLUTE);

              osg::Vec3d posStartXYZ;

              posStart.toWorld(posStartXYZ);

              GeoPoint posEnd(position.getSRS(), position.x(), position.y(), 300000.0, ALTMODE_ABSOLUTE);

              osg::Vec3d posEndXYZ;

              posEnd.toWorld(posEndXYZ);

              _projector->setLine(posStartXYZ, posEndXYZ);

              // set camera

              osgUtil::LineSegmentIntersector::Intersections intersections;

              osg::Node::NodeMask intersectionMask = 0xffffffff;

              osgViewer::View* view = dynamic_cast<osgViewer::View*>(&aa);

              if ( !view )

                  return true;

              if (view->computeIntersections(ea.getX(),ea.getY(),intersections, intersectionMask))

              {

                  for (osgUtil::LineSegmentIntersector::Intersections::iterator hitr = intersections.begin(); hitr != intersections.end(); ++hitr)

                  {

                      _pointer.addIntersection(hitr->nodePath, hitr->getLocalIntersectPoint());

                  }

                  bool draggerFound = false;

                  for (osgManipulator::PointerInfo::IntersectionList::iterator piit = _pointer._hitList.begin(); piit != _pointer._hitList.end(); ++piit)

                  {

                      for (osg::NodePath::iterator itr = piit->first.begin(); itr != piit->first.end(); ++itr)

                      {

                          Dragger* dragger = dynamic_cast<Dragger*>(*itr);

                          if (dragger==this)

                          {

                              draggerFound = true;

                              osg::Camera *rootCamera = view->getCamera();

                              osg::NodePath nodePath = _pointer._hitList.front().first;

                              osg::NodePath::reverse_iterator ritr;

                              for (ritr = nodePath.rbegin(); ritr != nodePath.rend(); ++ritr)

                              {

                                  osg::Camera* camera = dynamic_cast<osg::Camera*>(*ritr);

                                  if (camera && (camera->getReferenceFrame()!=osg::Transform::RELATIVE_RF || camera->getParents().empty()))

                                  {

                                       rootCamera = camera;

                                       break;

                                  }

                              }

                              _pointer.setCamera(rootCamera);

                              _pointer.setMousePosition(ea.getX(), ea.getY());

                              break;

                          }

                      }

                      if (draggerFound)

                        break;

                  }

              }

            }

            aa.requestRedraw();

            return true;

        }

    }

    else if (ea.getEventType() == osgGA::GUIEventAdapter::RELEASE)

    {

        _elevationDragging = false;

        if ( _dragging )

        {

            _dragging = false;

            firePositionChanged();

        }

        aa.requestRedraw();

    }

    else if (ea.getEventType() == osgGA::GUIEventAdapter::DRAG)

    {

        if (_elevationDragging)

        {

            _pointer._hitIter = _pointer._hitList.begin();

            _pointer.setMousePosition(ea.getX(), ea.getY());

            if (_projector->project(_pointer, _startProjectedPoint))

            {

                const GeoPoint& position = getPosition();

                //Get the absolute mapPoint that they've drug it to.

                GeoPoint projectedPos;

                projectedPos.fromWorld(position.getSRS(), _startProjectedPoint);

                // make sure point is not dragged down below

                // TODO: think of a better solution / HeightAboveTerrain performance issues?

                if (projectedPos.z() >= _verticalMinimum)

                {

                    //If the current position is relative, we need to convert the absolute world point to relative.

                    //If the point is absolute then just emit the absolute point.

                    if (position.altitudeMode() == ALTMODE_RELATIVE)

                    {

                        projectedPos.transformZ(ALTMODE_RELATIVE, getMapNode()->getTerrain());

                    }

                    setPosition( projectedPos );

                    aa.requestRedraw();

                }

            }

            return true;

        }

        if (_dragging)

        {

            osg::Vec3d world;

            if ( getMapNode() && getMapNode()->getTerrain()->getWorldCoordsUnderMouse(view, ea.getX(), ea.getY(), world) )

            {

                const GeoPoint& position = getPosition();

                //Get the absolute mapPoint that they've drug it to.

                GeoPoint mapPoint;

                mapPoint.fromWorld( getMapNode()->getMapSRS(), world );

                //If the current position is relative, we need to convert the absolute world point to relative.

                //If the point is absolute then just emit the absolute point.

                if (position.altitudeMode() == ALTMODE_RELATIVE)

                {

                    mapPoint.alt() = position.alt();

                    mapPoint.altitudeMode() = ALTMODE_RELATIVE;

                }

                setPosition( mapPoint );

                aa.requestRedraw();

                return true;

            }

        }

    }

    else if (ea.getEventType() == osgGA::GUIEventAdapter::MOVE)

    {

        IntersectionPicker picker( view, this );

        IntersectionPicker::Hits hits;

        if ( picker.pick( ea.getX(), ea.getY(), hits ) )

        {

            setHover( true );

        }

        else

        {

            setHover( false );

        }

        aa.requestRedraw();

    }

    return false;

}
dragger有两种模式,水平模式和垂直模式,这两种模式的差异在handle()中得到了体现。
enum DragMode

        {

          DRAGMODE_HORIZONTAL,

          DRAGMODE_VERTICAL

        };
handle函数的内容我大体说明一下:当鼠标push时,判断是否点击到了dragger上,如果击中的话,判断当前拖动模式是水平模式还是垂直模式,如果是垂直模式的话,就创建一个projector对象,根据dragger当前的位置得到一条直线,将projector的投影对象设为该直线。之后drag时,将鼠标所处位置的世界坐标投影到该直线上。(顺带一提,这部分代码可以参考一下osg中的dragger类的handle函数,两者还是挺相似的,都用到了投影的方法)

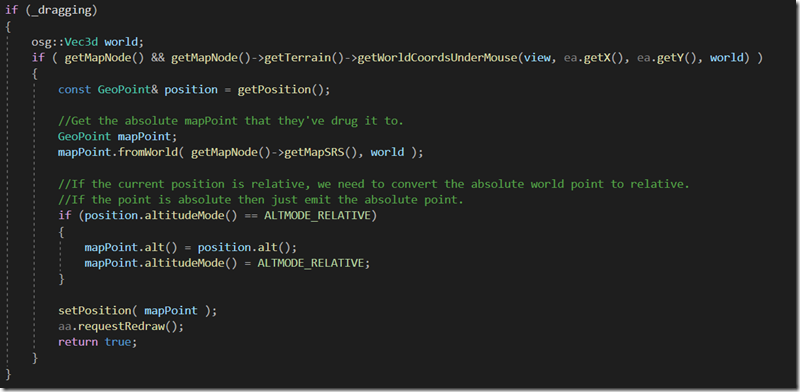
若为水平模式,那就不需要投影了,在drag时,直接根据鼠标的位置,得到地面坐标就ok了。

故handle函数的主要作用就是当drag dragger时,利用setPosition函数实时地更新dragger的位置,并触发回调。
最后再回头看看MoveFeatureChangedCallback()这个类。
class MoveFeatureDraggerCallback : public Dragger::PositionChangedCallback

{

public:

    MoveFeatureDraggerCallback(FeatureNode* featureNode, int point):

      _featureNode( featureNode ),

      _point(point)

      {}

      virtual void onPositionChanged(const Dragger* sender, const osgEarth::GeoPoint& position)

      {

          Feature* feature = _featureNode->getFeatures().front().get();

          (*feature->getGeometry())[_point] =  osg::Vec3d(position.x(), position.y(), 0);

          _featureNode->init();

      }

      osg::ref_ptr< FeatureNode > _featureNode;

      int _point;

};
重点关注onPositionChanged这个重写的虚函数,它有两个参数,sender代表调用这个函数的dragger,position表示dragger的位置,函数内容很简单,就是根据dragger的位置来更改geometry中point的位置,最后再重绘geometry。
剖析到此结束,我们总结一下:假设一个geometry有十个point,当我们根据这个geometry创建一个FeatureEditor是,FeatureEditor会创建十个Dragger,每个Dragger的初始位置都是Point所处的位置,当Draggr被移动时,会触发回调,从而改变这个Dragger所绑定的point的位置,以上!
建议再重头看一下上面的剖析过程。
OsgEearh 中的 FeatureEditor的实现原理的更多相关文章
- 学习重点:1、金典的设计模式在实际中应用2、JVM原理3、jui源代码
学习重点:1.金典的设计模式在实际中应用 2.JVM原理 3.jui源代码
- Spring中EmptyResultDataAccessException异常产生的原理及处理方法
Spring中EmptyResultDataAccessException异常产生的原理及处理方法 Spring中使用JdbcTemplate的queryForObject方法,当查不到数据时会抛出如 ...
- 基于接口回调详解JUC中Callable和FutureTask实现原理
Callable接口和FutureTask实现类,是JUC(Java Util Concurrent)包中很重要的两个技术实现,它们使获取多线程运行结果成为可能.它们底层的实现,就是基于接口回调技术. ...
- Spring框架中IoC(控制反转)的原理(转)
原文链接:Spring框架中IoC(控制反转)的原理 一.IoC的基础知识以及原理: 1.IoC理论的背景:在采用面向对象方法设计的软件系统中,底层实现都是由N个对象组成的,所有的对象通过彼此的合作, ...
- [置顶] Hadoop2.2.0中HDFS的高可用性实现原理
在Hadoop2.0.0之前,NameNode(NN)在HDFS集群中存在单点故障(single point of failure),每一个集群中存在一个NameNode,如果NN所在的机器出现了故障 ...
- Oracle中的SQL分页查询原理和方法详解
Oracle中的SQL分页查询原理和方法详解 分析得不错! http://blog.csdn.net/anxpp/article/details/51534006
- Java网络编程和NIO详解7:浅谈 Linux 中NIO Selector 的实现原理
Java网络编程和NIO详解7:浅谈 Linux 中NIO Selector 的实现原理 转自:https://www.jianshu.com/p/2b71ea919d49 本系列文章首发于我的个人博 ...
- Java中的HashMap的工作原理是什么?
问答题23 /120 Java中的HashMap的工作原理是什么? 参考答案 Java中的HashMap是以键值对(key-value)的形式存储元素的.HashMap需要一个hash函数,它使用ha ...
- Spring.Net是怎么在MVC中实现注入的(原理)
本文将介绍Spring.Net(不仅仅是Spring.Net,其实所有的IoC容器要向控制器中进行注入,原理都是差不多的)在MVC控制器中依赖注入的实现原理,本文并没有关于在MVC使用Spring怎么 ...
随机推荐
- ATOM插件及快捷键
xml-formatter :https://atom.io/packages/xml-formatter xml格式化工具 SHIFT-CTRL-X:快速格式化 SHIFT-CTRL-M:移除换行符 ...
- JUnit 5和Selenium基础(二)
使用Selenium内置的PageFactory实现页面对象模式 在这一部分中,将通过Selenium的内置PageFactory支持类来介绍Page Object模式的实现.PageFactory提 ...
- 从操作系统层面理解Linux下的网络IO模型
I/O( INPUT OUTPUT),包括文件I/O.网络I/O. 计算机世界里的速度鄙视: 内存读数据:纳秒级别. 千兆网卡读数据:微妙级别.1微秒=1000纳秒,网卡比内存慢了千倍. 磁盘读数据: ...
- AWS、阿里云、Azure、Google Cloud、华为云、腾讯云 各种云服务器价格收费对比(上)
他来了,他来了~ 他带着六家公有云厂商的资源价格走来了~ 不久前,我们上线了一款小工具——[多云成本计算器]1.0版,公众号菜单栏可以直接体验.详细介绍可以戳这里<3秒即得最低价,速石上线「多云 ...
- python列表(数组)
列表(list) 就是 数组 - 列表是Python中的一个对象 - 对象(object)就是内存中专门用来存储数据的一块区域 - 之前我们学习的对象,像数值,它只能保存一个单一的数据 - 列表中可 ...
- APICloud联合腾讯云推出“云主机解决方案“,各种福利等你拿
为了帮助开发者一站式打通云.开发.运维全流程服务,更全面提供基于自身业务情况的云服务器.数据库.存储等基础设施服务,APICloud联合腾讯云重磅推出“云主机解决方案“.开发者可通过控制台简单清晰的购 ...
- hdu4417 主席树求区间小于等于K
题目链接:http://acm.hdu.edu.cn/showproblem.php?pid=4417 Problem Description Mario is world-famous plum ...
- Git基础知识 —— 获取Git仓库
前言 官方提供了两种获取Git仓库的方法,第一种是在本地现有项目目录下导入所有文件到Git中,第二种就是从Git仓库中clone项目到本地 这里就不说Git的安装了哈,有需要的小伙伴可以查看该博文:h ...
- java项目Jenkins部署
假设背景: Nginx跳板机服务器:192.168.10.1 Tomcat应用服务器:192.168.10.3 端口:10083 应用名称:appXXX 1.配置跳板机的转发路径 如:192.168. ...
- C语言进阶——编译预处理指令
编译预处理指令 • #开头的是编译预处理指令 • 它们不是C语⾔的成分,但是C语⾔程序离不开它们 • #define⽤来定义⼀个宏 #define • #define <名字> <值 ...
