SpringBoot系统列 5 - 接口版本控制、SpringBoot FreeMarker模板引擎
接着上篇博客的代码继续写
1.接口版本控制
一个系统上线后会不断迭代更新,需求也会不断变化,有可能接口的参数也会发生变化,如果在原有的参数上直接修改,可能会影响线上系统的正常运行,这时我们就需要设置不同的版本,这样即使参数发生变化,由于老版本没有变化,因此不会影响上线系统的运行。
一般我们可以在地址上带上版本号,也可以在参数上带上版本号,还可以再 header 里带上版本号,这里我们在地址上带上版本号,大致的地址如:http://api.example.com/v1/test,其中,v1 即代表的是版本号。具体做法请看代码:
import org.springframework.web.bind.annotation.Mapping;

import java.lang.annotation.*;

/**

 * 版本控制

 * @author XIHONGLEI

 * @date 2018-11-15

 */

@Target({ElementType.METHOD, ElementType.TYPE})

@Retention(RetentionPolicy.RUNTIME)

@Documented

@Mapping

public @interface ApiVersion {

    int value();

}
import org.springframework.web.servlet.mvc.condition.RequestCondition;

import javax.servlet.http.HttpServletRequest;

import java.util.regex.Matcher;

import java.util.regex.Pattern;

/**

 * @author XIHONGLEI

 * @date 2018-11-15

 */

public class ApiVersionCondition implements RequestCondition<ApiVersionCondition> {

    // 路径中版本的前缀, 这里用 /v[1-9]/的形式

    private final static Pattern VERSION_PREFIX_PATTERN = Pattern.compile("v(\\d+)/");

    private int apiVersion;

    public ApiVersionCondition(int apiVersion) {

        this.apiVersion = apiVersion;

    }

    @Override

    public ApiVersionCondition combine(ApiVersionCondition other) {

        // 采用最后定义优先原则,则方法上的定义覆盖类上面的定义

        return new ApiVersionCondition(other.getApiVersion());

    }

    @Override

    public ApiVersionCondition getMatchingCondition(HttpServletRequest request) {

        Matcher m = VERSION_PREFIX_PATTERN.matcher(request.getRequestURI());

        if (m.find()) {

            Integer version = Integer.valueOf(m.group(1));

            if (version >= this.apiVersion) {

                return this;

            }

        }

        return null;

    }

    @Override

    public int compareTo(ApiVersionCondition other, HttpServletRequest request) {

        // 优先匹配最新的版本号

        return other.getApiVersion() - this.apiVersion;

    }

    public int getApiVersion() {

        return apiVersion;

    }

}
import org.springframework.core.annotation.AnnotationUtils;

import org.springframework.web.servlet.mvc.condition.RequestCondition;

import org.springframework.web.servlet.mvc.method.annotation.RequestMappingHandlerMapping;

import java.lang.reflect.Method;

/**

 * @author XIHONGLEI

 * @date 2018-11-15

 */

public class CustomRequestMappingHandlerMapping extends RequestMappingHandlerMapping {

    @Override

    protected RequestCondition<ApiVersionCondition> getCustomTypeCondition(Class<?> handlerType) {

        ApiVersion apiVersion = AnnotationUtils.findAnnotation(handlerType, ApiVersion.class);

        return createCondition(apiVersion);

    }

    @Override

    protected RequestCondition<ApiVersionCondition> getCustomMethodCondition(Method method) {

        ApiVersion apiVersion = AnnotationUtils.findAnnotation(method, ApiVersion.class);

        return createCondition(apiVersion);

    }

    private RequestCondition<ApiVersionCondition> createCondition(ApiVersion apiVersion) {

        return apiVersion == null ? null : new ApiVersionCondition(apiVersion.value());

    }

}
#然后在WebConfig配置类中注入Bean

import com.hello.config.CustomRequestMappingHandlerMapping;

import com.hello.filter.ApiInterceptor;

import org.springframework.beans.factory.annotation.Value;

import org.springframework.boot.SpringBootConfiguration;

import org.springframework.context.annotation.Bean;

import org.springframework.scheduling.concurrent.ThreadPoolTaskExecutor;

import org.springframework.web.servlet.config.annotation.InterceptorRegistry;

import org.springframework.web.servlet.config.annotation.WebMvcConfigurationSupport;

import org.springframework.web.servlet.mvc.method.annotation.RequestMappingHandlerMapping;

/**

 * 配置类

 * @author XIHONGLEI

 * @date 2018-10-31

 */

@SpringBootConfiguration

public class WebConfig extends WebMvcConfigurationSupport {

    @Override

    protected void addInterceptors(InterceptorRegistry registry) {

        super.addInterceptors(registry);

        // 将 ApiInterceptor 拦截器类添加进去

        registry.addInterceptor(new ApiInterceptor());

    }

    @Override

    @Bean

    public RequestMappingHandlerMapping requestMappingHandlerMapping() {

        RequestMappingHandlerMapping handlerMapping = new CustomRequestMappingHandlerMapping();

        handlerMapping.setOrder(0);

        handlerMapping.setInterceptors(getInterceptors());

        return handlerMapping;

    }

}
#最后定义一个带版本控制的接口
import com.hello.WebConfig;
import com.hello.config.ApiVersion;
import com.hello.entity.ContractDetailDto;
import com.hello.service.CheckPositionService;
import org.springframework.beans.factory.annotation.Autowired;
import org.springframework.web.bind.annotation.RequestMapping;
import org.springframework.web.bind.annotation.ResponseBody;
import org.springframework.web.bind.annotation.RestController; import java.util.List; @RestController public class HelloController { @Autowired
private WebConfig webConfig; @ApiVersion(1)
@RequestMapping("{version}/getName")
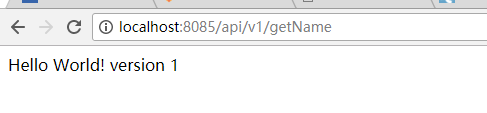
public String vGetName() {
return "Hello World! version 1";
}
@ApiVersion(2)
@RequestMapping("{version}/getName")
public String getName() {
return "Hello World! version 2";
}
}
查看效果:

2.模板引擎
在传统的 SpringMVC 架构中,我们一般将 JSP、HTML 页面放到 webapps 目录下面,但是 Spring Boot 没有 webapps,更没有 web.xml,如果我们要写界面的话,该如何做呢?
Spring Boot 官方提供了几种模板引擎:FreeMarker、Velocity、Thymeleaf、Groovy、mustache、JSP。
这里以 FreeMarker 为例讲解 Spring Boot 的使用。
首先引入 FreeMarker 依赖:
        <dependency>

            <groupId>org.springframework.boot</groupId>

            <artifactId>spring-boot-starter-freemarker</artifactId>

        </dependency>
在 resources 下面建立两个目录:static 和 templates,如图所示:

其中 static 目录用于存放静态资源,譬如:CSS、JS、HTML 等,templates 目录存放模板引擎文件,我们可以在 templates 下面创建一个文件:index.ftl(freemarker 默认后缀为 .ftl),并添加内容:
<!DOCTYPE html>

<html lang="en">

<head>

    <meta charset="UTF-8">

    <title>Hello ${name}!</title>

</head>

<body>

        Hello ${name}!

</body>

</html>
然后在POM中配置Resource的时候一定要把所有的资源文件都包括:
<resources>

            <resource>

                <directory>src/main/java</directory>

                <includes>

                    <include>**/*.yml</include>

                    <include>**/*.properties</include>

                    <include>**/*.xml</include>

                </includes>

                <filtering>false</filtering>

            </resource>

            <resource>

                <directory>src/main/resources</directory>

                <includes>

                    <include>**/*</include>

                </includes>

                <filtering>false</filtering>

            </resource>

        </resources>
新建Contrlller:
import org.springframework.stereotype.Controller;
import org.springframework.ui.Model;
import org.springframework.web.bind.annotation.RequestMapping;
import org.springframework.web.servlet.ModelAndView; @Controller
public class HomeController {
@RequestMapping(value = "/index")
public ModelAndView index() {
ModelAndView view = new ModelAndView("/index");
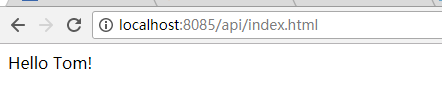
view.addObject("name","Tom");
return view;
}
}
看结果:
SpringBoot系统列 5 - 接口版本控制、SpringBoot FreeMarker模板引擎的更多相关文章
- SpringBoot系统列 2 - 配置文件,多环境配置(dev,qa,online)
实现项目的多环境配置的方法有很多,比如通过在Pom.xml中配置profiles(最常见) 然后在Install项目打War包的时候,根据需求打不同环境的包,如图: 这种配置多环境的方法在SSM框架中 ...
- SpringBoot系统列 1 - HelloWorld!
学习SpringBoot系统列之HelloWorld! 1.新建一个Maven项目 2.添加POM配置 <parent> <groupId>org.springframewor ...
- SpringBoot获取Freemarker模板引擎,生成HTML代码
今天用Ajax异步添加评论,加载Freemarker模板引擎,生成模板模块 1.新建Freemarker模板 <li id="${comment.oId}"> < ...
- Spring Boot 系列(五)web开发-Thymeleaf、FreeMarker模板引擎
前面几篇介绍了返回json数据提供良好的RESTful api,下面我们介绍如何把处理完的数据渲染到页面上. Spring Boot 使用模板引擎 Spring Boot 推荐使用Thymeleaf. ...
- Spring Boot 揭秘与实战(七) 实用技术篇 - FreeMarker 模板引擎
文章目录 1. FreeMaker 代替 JSP 作为页面渲染 2. 生成静态文件 3. 扩展阅读 4. 源代码 Spring Boot 提供了很多模板引擎的支持,例如 FreeMarker.Thym ...
- Java之利用Freemarker模板引擎实现代码生成器,提高效率
https://blog.csdn.net/huangwenyi1010/article/details/71249258 java模板引擎freemarker代码生成器 更多 个人分类: 一步一步 ...
- FreeMarker模板引擎
现在开发的项目,也是基于SOA架构,每个功能接口都是用WebService实现,Web服务的通信协议就是用XML来传输. 以前写WebService都是自动生成XML,没想到这项目竟然要自己定义XML ...
- Spring Boot 2.0 整合 FreeMarker 模板引擎
本篇博文将和大家一起使用Spring Boot 2.0 和FreeMarker 模板引擎整合实战. 1. 创建新的项目 2. 填写项目配置信息 3. 勾选web 模块 4. 勾选freemarker模 ...
- freemarker模板引擎的使用
freemarker是一套前端模板引擎,在使用时,要先在web项目中添加freemarker.jar的依赖. 我在这里主要演示spring-mvc整合freemarker模板引擎.项目案例的文件包结构 ...
随机推荐
- scrapy中间件
一.下载中间件 from scrapy import signals from scrapy.http import Response from scrapy.exceptions import Ig ...
- HDU5511 : Minimum Cut-Cut
设$d[x]$表示端点位于$x$子树内部的非树边条数,那么有两种情况: $1.$割去的两条树边$(x,fa[x]),(y,fa[y])$中,$x$是$y$的祖先,那么此时需要割去的非树边数量为$d[x ...
- HTML(三)
html图像.绝对路径和相对路径 html图像 <img>标签可以在网页上插入一张图片,它是独立使用的标签,通过“src”属性定义图片的地址,通过“alt”属性定义图片加载失败时显示的文字 ...
- python对象转化为json串、json串转化为python串
1.1. JSON简介: JavaScript Object Notation(JavaScript对象表示法) JSON是存储和交换文本信息的语法.类似XML JSON比XML更小.更快.更易解析 ...
- 线段树模板hdu 1166:敌兵布阵
敌兵布阵 Time Limit: 2000/1000 MS (Java/Others) Memory Limit: 65536/32768 K (Java/Others)Total Submis ...
- js动态时间(转)
html代码 <span id="timeShow" show_cur_times()></span> js代码 $(function(){ //设置1秒调 ...
- Taints 与 Tolerations
节点亲和性是描述Pods如何分配到一个或一组节点的策略,亲和性的相关资料可以参考Kubernetes中的亲和性与反亲和性.与亲和性规则不同, Taints 描述节点拒绝一个或一组Pods的策略.其实现 ...
- Go 语言学习笔记
1. go没有static关键字 面向对象编程中,尽量对函数进行封装,对于没有函数变量的对象,使用static关键字尤其方便. go中没有static关键字,必须每次new一个出来. type Han ...
- Ubuntu apt-get彻底卸载软件包【转】
原文地址:https://blog.csdn.net/get_set/article/details/51276609 最近对ubuntu卸载参数的详细程度了解不够:转载已了解查用. 如果你关注搜索到 ...
- Elasticsearch集成HanLP分词器-个人学习
1.通过git下载分词器代码. 连接如下:https://gitee.com/hualongdata/hanlp-ext hanlp官网如下:http://hanlp.linrunsoft.com/ ...