nginx配置基于域名、端口、IP的虚拟主机
1、基于域名的虚拟主机:
绝大多数企业对外提供服务的网站使用的都是基于域名的主机,通过不同的域名区分不同的虚拟主机。
首先我们进入安装nginxd的目录下:/application/nginx-1.6.3/conf
我们去除掉默认配置文件里的注释和空行并重定向到nginx.conf文件里,同时我们需要配置如下:
egrep -v "#|^$" nginx.conf.default >nginx.conf //去掉包含#号和空行的内容
[root@lamp01 conf]# vim nginx.conf

worker_processes  1;

events {

    worker_connections  1024;

}

http {

    include       mime.types;

    default_type  application/octet-stream;

    sendfile        on;

    keepalive_timeout  65;

    server {

        listen       80;

        server_name  www.jyw1.com;

        location / {

            root   html/www;

            index  index.html index.htm;

        }

    }

     server {

        listen       80;

        server_name  bbs.jyw2.com;

        location / {

            root   html/bbs;

            index  index.html index.htm;

         }

     }

}
创建站点目录文件:
mkdir ../html/{www,bbs} -p
[root@lamp01 conf]# tree ../html/

../html/

├── 50x.html

├── bbs

│   └── index.html

├── index.html

└── www

     └── index.html
为站点目录生成首页并追加内容:
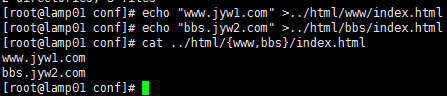
通过hosts来做dns解析

[root@lamp01 conf]# echo "www.jyw1.com" >../html/www/index.html

[root@lamp01 conf]# echo "bbs.jyw2.com" >../html/bbs/index.html

[root@lamp01 conf]# cat ../html/{www,bbs}/index.html

www.jyw1.com

bbs.jyw2.com

[root@lamp01 conf]# /application/nginx/sbin/nginx -t  #检查语法

nginx: the configuration file /application/nginx-1.6.3/conf/nginx.conf syntax is ok

nginx: configuration file /application/nginx-1.6.3/conf/nginx.conf test is successful

[root@lamp01 conf]# /application/nginx/sbin/nginx -s reload  #刷新配置

[root@lamp01 conf]# vi /etc/hosts

[root@lamp01 conf]# ping www.jyw1.com

PING www.jyw1.com (192.168.43.118) 56(84) bytes of data.

64 bytes from www.jyw1.com (192.168.43.118): icmp_seq=1 ttl=64 time=0.022 ms

64 bytes from www.jyw1.com (192.168.43.118): icmp_seq=2 ttl=64 time=0.020 ms

^C

--- www.jyw1.com ping statistics ---

2 packets transmitted, 2 received, 0% packet loss, time 1280ms

rtt min/avg/max/mdev = 0.020/0.021/0.022/0.001 ms

[root@lamp01 conf]# ping bbs.jyw2.com

PING bbs.jyw2.com (192.168.43.118) 56(84) bytes of data.

64 bytes from www.jyw1.com (192.168.43.118): icmp_seq=1 ttl=64 time=0.015 ms

64 bytes from www.jyw1.com (192.168.43.118): icmp_seq=2 ttl=64 time=0.020 ms

^C

--- bbs.jyw2.com ping statistics ---

2 packets transmitted, 2 received, 0% packet loss, time 1311ms

rtt min/avg/max/mdev = 0.015/0.017/0.020/0.004 ms

[root@lamp01 conf]# curl www.jyw1.com

www.jyw1.com

[root@lamp01 conf]# curl bbs.jyw2.com

bbs.jyw2.com

[root@lamp01 conf]#
我是用的windows系统,配置一下host在“C:\Windows\System32\drivers\etc”下的hosts中配置一下域名重定向
192.168.43.118 www.jyw1.com bbs.jyw2.com
然后cmd再ping一下这个域名是否正确指向了这个IP上
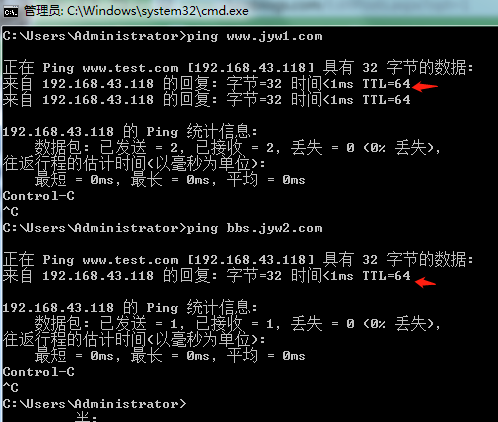
打开浏览器,输入www.test.com会得到以下结果,就说明外网访问成功

ok,通过多域名来访问站点,同样也可以一个站点多个域名。
2.基于端口的虚拟主机配置:
此类型的虚拟主机主要应用于企业内部的网站,需要加端口号才能访问,通过不同的端口来区分不同的虚拟主机,为企业网站安全优化,例如:企业的网站后台,资料共享等。
在前面配置的基于域名的虚拟主机的基础上只需要修改nginx.conf文件,刷新配置即可完成:
修改nginx.conf配置文件
[root@lamp01 conf]# vim nginx.conf

worker_processes  1;

events {

    worker_connections  1024;

}

http {

    include       mime.types;

    default_type  application/octet-stream;

    sendfile        on;

    keepalive_timeout  65;

    server {

        listen       ;

        server_name  www.jyw1.com;

        location / {

            root   html/www;

            index  index.html index.htm;

        }

    }

     server {

        listen       ;

        server_name  bbs.jyw2.com;

        location / {

            root   html/bbs;

            index  index.html index.htm;

         }

     }

}
刷新配置,测试结果如下
[root@lamp01 conf]# /application/nginx/sbin/nginx -t

nginx: the configuration file /application/nginx-1.6.3/conf/nginx.conf syntax is ok

nginx: configuration file /application/nginx-1.6.3/conf/nginx.conf test is successful

[root@lamp01 conf]# /application/nginx/sbin/nginx -s reload

[root@lamp01 conf]# curl www.jyw1.com

curl: (7) couldn't connect to host

[root@lamp01 conf]# curl www.jyw1.com:8001

www.jyw1.com

[root@lamp01 conf]# curl bbs.jyw2.com:8002

bbs.jyw2.com

[root@lamp01 conf]#
在windows下测试如下:

ok,既可以对应多个站点,多个端口访问,也可以对应一个站点多个端口访问。
3.基于IP地址虚拟主机:
通过不同的IP区分不同的虚拟主机,此类型企业应用于比较少,通常用到不通业务流中或者负载均衡上面。
在前面配置的基于域名的虚拟主机的基础上只需要修改nginx.conf文件,刷新配置即可完成:
修改nginx.conf配置文件
[root@lamp01 conf]# vim nginx.conf

worker_processes  1;

events {

    worker_connections  1024;

}

http {

    include       mime.types;

    default_type  application/octet-stream;

    sendfile        on;

    keepalive_timeout  65;

    server {

        listen      192.168.43.118:80;

        server_name  www.jyw1.com;

        location / {

            root   html/www;

            index  index.html index.htm;

        }

    }

     server {

        listen 192.168.43.88:80;

        server_name  bbs.jyw2.com;

        location / {

            root   html/bbs;

            index  index.html index.htm;

         }

     }

}
修改完配置文件后,我们需要虚拟一块网卡:
ip addr add //添加
ip addr del 192.168.43.88/24 dev eth0 //删除
临时性网卡: ip addr add 192.168.43.88/24 label eth0:1 dev eth0 或者 ifconfig eth0:1 192.168.43.88/24 up
[root@lamp01 conf]# ip addr add 192.168.43.88/24 label eth0:1 dev eth0  添加网卡(推荐使用ip addr)

[root@lamp01 conf]# ifconfig

eth0      Link encap:Ethernet  HWaddr 00:0C:29:01:4D:22

          inet addr:192.168.43.118  Bcast:192.168.43.255  Mask:255.255.255.0

          inet6 addr: fe80::20c:29ff:fe01:4d22/64 Scope:Link

          UP BROADCAST RUNNING MULTICAST  MTU:1500  Metric:1

          RX packets:1100 errors:0 dropped:0 overruns:0 frame:0

          TX packets:664 errors:0 dropped:0 overruns:0 carrier:0

          collisions:0 txqueuelen:1000

          RX bytes:94218 (92.0 KiB)  TX bytes:76354 (74.5 KiB)

eth0:1    Link encap:Ethernet  HWaddr 00:0C:29:01:4D:22

          inet addr:192.168.43.88  Bcast:192.168.43.255  Mask:255.255.255.0

          UP BROADCAST RUNNING MULTICAST  MTU:1500  Metric:1

[root@lamp01 conf]# ip addr del 192.168.43.99/24 dev eth0   删除网卡

[root@lamp01 conf]# ifconfig

eth0      Link encap:Ethernet  HWaddr 00:0C:29:01:4D:22

          inet addr:192.168.43.118  Bcast:192.168.43.255  Mask:255.255.255.0

          inet6 addr: fe80::20c:29ff:fe01:4d22/64 Scope:Link

          UP BROADCAST RUNNING MULTICAST  MTU:1500  Metric:1

          RX packets:1218 errors:0 dropped:0 overruns:0 frame:0

          TX packets:724 errors:0 dropped:0 overruns:0 carrier:0

          collisions:0 txqueuelen:1000

          RX bytes:103486 (101.0 KiB)  TX bytes:83366 (81.4 KiB)

[root@lamp01 conf]#
永久性网卡:
cd /etc/sysconfig/network-scripts/ //进入到网卡配置文件的目录
cp ifcfg-eth0 ifcfg-eth0:1 //拷贝配置文件并重命名
vim ifcfg-eth0:1 //编辑配置文件
/etc/init.d/network restart //重启网络服务
图略....
下面我们刷新配置,查看效果:
[root@lamp01 ~]# /application/nginx/sbin/nginx -t

nginx: the configuration file /application/nginx-1.6.3/conf/nginx.conf syntax is ok

nginx: configuration file /application/nginx-1.6.3/conf/nginx.conf test is successful

[root@lamp01 ~]# /application/nginx/sbin/nginx -s reload

[root@lamp01 ~]# curl 192.168.43.88

bbs.jyw2.com

[root@lamp01 ~]# curl 192.168.43.118

www.jyw1.com

[root@lamp01 ~]#
在windows下测试如下:

ok,既可以多个IP对应一个站点,也可以对应多个站点访问。
nginx配置基于域名、端口、IP的虚拟主机的更多相关文章
- 源码编译安装LNMP环境及配置基于域名访问的多虚拟主机
实验环境及软件版本: CentOS版本: 6.6(2.6.32.-504.el6.x86_64) nginx版本: nginx-1.6.2 mysql版本: Mysql-5.6.23 php版本: ...
- 源码编译安装LAMP环境及配置基于域名访问的多虚拟主机
实验环境及软件版本: CentOS版本: 6.6(2.6.32.-504.el6.x86_64) apache版本: apache2.2.27 mysql版本: Mysql-5.6.23 php版本 ...
- nginx配置基于域名的虚拟主机
其实基于域名和基于ip的虚拟主机配置是差不多的,在配置基于ip的虚拟主机上我们只需要修改几个地方就能变成基于域名的虚拟主机,一个是要修改域名,一个是host文件直接看代码 [root@localhos ...
- Nginx 配置基于域名的虚拟
编辑配置文件 vi /etc/nginx/nginx.conf user www www; worker_processes 2; error_log logs/error.log not ...
- nginx 配置 同一域名端口下,根据URL 导向不同的项目目录
我们现在拥有2个项目.但是只有一个域名,通过nginx配置来实现以下url导向不同的项目. 后台管理台:{域名}/admin 用户客户端:{域名}/client server { listen 888 ...
- Nginx配置基于多域名、端口、IP的虚拟主机
原文:https://www.cnblogs.com/ssgeek/p/9220922.html ------------------------------- Nginx配置基于多域名.端口.IP的 ...
- Apache基于域名、端口、IP的虚拟主机配置(Centos 6.5)
虚拟主机:部署多个站点,每个站点,希望用不同的域名和站点目录,或者是不同的端口,不同的ip,需要虚拟主机功能.一句话,一个http服务要配置多个站点,就需要虚拟主机. 虚拟主机分类:基于域名.基于端口 ...
- Nginx总结(二)基于ip的虚拟主机配置
前面讲了如何安装配置Nginx,大家可以去这里看看nginx系列文章:https://www.cnblogs.com/zhangweizhong/category/1529997.html 今天要说的 ...
- Nginx的配置文件简介及在Nginx中配置基于不同ip的虚拟主机
Nginx的配置文件简介及在Nginx中配置基于不同ip的虚拟主机: #user nobody; worker_processes 1; #error_log logs/error.log; #err ...
随机推荐
- 课程四(Convolutional Neural Networks),第一周(Foundations of Convolutional Neural Networks) —— 0.Learning Goals
Learning Goals Understand the convolution operation Understand the pooling operation Remember the vo ...
- 《深入分析Linux内核源代码》读书、私藏笔记大放送
秉承着"不懂操作系统原理的程序员不是合格的程序员"的至理名言,鄙人又是买陈莉君老师的“Linux教学视频”,又是研读其力作<深入分析Linux内核源代码>,先将总结笔记 ...
- Android应用内实现视频播放--腾讯浏览服务(TBS)
TBS视频播放 TBS视频播放器可以支持市面上几乎所有的视频格式,包括mp4, flv, avi, 3gp, webm, ts, ogv, m3u8, asf, wmv, rm, rmvb, mov, ...
- 2017年最新20个轻量的 JavaScript 库和插件
下面这个列表中的免费 JavaScript 插件都是今年发布的,没有臃肿的一体化的框架,它们提供轻量级的解决方案,帮助 Web 开发过程更容易和更快.提供的插件可以创建滑块.响应式菜单.模态窗口.相册 ...
- 深度学习论文翻译解析(二):An End-to-End Trainable Neural Network for Image-based Sequence Recognition and Its Application to Scene Text Recognition
论文标题:An End-to-End Trainable Neural Network for Image-based Sequence Recognition and Its Application ...
- netty源码解解析(4.0)-13 Channel NIO实现: 关闭和清理
Channel提供了3个方法用来实现关闭清理功能:disconnect,close,deregister.本章重点分析这个3个方法的功能的NIO实现. disconnect实现: 断开连接 disco ...
- Windows版本redis高可用方案探究
目录 Windows版本redis高可用方案探究 前言 搭建redis主从 配置主redis-28380 配置从redis-23381 配置从redis-23382 将redis部署为服务 启动red ...
- 三对角线性方程组(tridiagonal systems of equations)的求解
三对角线性方程组(tridiagonal systems of equations) 三对角线性方程组,对于熟悉数值分析的同学来说,并不陌生,它经常出现在微分方程的数值求解和三次样条函数的插值问题 ...
- Sherman-Morrison公式及其应用
Sherman-Morrison公式 Sherman-Morrison公式以 Jack Sherman 和 Winifred J. Morrison命名,在线性代数中,是求解逆矩阵的一种方法.本篇 ...
- ajax+ashx:实现文件的批量导出
背景: 最近公司有一个需求,就是实现excle的批量导出(一次性导出多个excle). 实现方式: 想到的实现方式: 1.发起一个导出请求,然后批量生产需要导出的excle文件,最后将文件生成一个压缩 ...