iOS开发 首次启动显示用户引导,第二次启动直接进入App,UIScrollView,UIPageControl,NSUserDefaults
首先创建一个引导图的控制器类
UserGuideViewController.h和UserGuideViewController.m

#import <UIKit/UIKit.h>

#import "firstViewController.h"

#define WIDTH self.view.frame.size.width

#define HEIGHT self.view.frame.size.height

@interface UserGuideViewController : UIViewController<UIScrollViewDelegate>

@end
#import "UserGuideViewController.h"

@interface UserGuideViewController ()

@property(strong,nonatomic)UIScrollView *scrollView;

@property(strong,nonatomic)UIPageControl *page;

@property(strong,nonatomic)UIImageView *image1;

@property(strong,nonatomic)UIImageView *image2;

@property(strong,nonatomic)UIImageView *image3;

@property(strong,nonatomic)UIButton *btn;

@end

@implementation UserGuideViewController

- (void)viewDidLoad {

    [super viewDidLoad];

    //加载用户引导图

    [self initScroll];

}

-(void)initScroll{

    self.image1=[[UIImageView alloc]initWithFrame:CGRectMake(0, 0, WIDTH, HEIGHT)];

    self.image1.image=[UIImage imageNamed:@"1"];

    self.image2=[[UIImageView alloc]initWithFrame:CGRectMake(WIDTH, 0, WIDTH, HEIGHT)];

    self.image2.image=[UIImage imageNamed:@"2"];

    self.image3=[[UIImageView alloc]initWithFrame:CGRectMake(WIDTH*2, 0, WIDTH, HEIGHT)];

    self.image3.image=[UIImage imageNamed:@"3"];

    self.scrollView=[[UIScrollView alloc]initWithFrame:self.view.frame];

    self.scrollView.backgroundColor=[UIColor redColor];

    self.scrollView.contentSize=CGSizeMake(WIDTH*3, HEIGHT);

    //锁定滚动方向

    self.scrollView.directionalLockEnabled=YES;

    //设置分页

    self.scrollView.pagingEnabled=YES;

    //隐藏滚动条

    self.scrollView.showsHorizontalScrollIndicator=NO;

    //设置是否回弹

    self.scrollView.bounces=NO;

    //添加按钮

    self.btn=[[UIButton alloc]initWithFrame:CGRectMake(80, 600, 230, 37)];

        [self.btn setTitle:@"立即体验" forState:0];

    self.btn.titleLabel.font=[UIFont boldSystemFontOfSize:20];

    [self.btn setTitleColor:[UIColor colorWithRed:1.000 green:0.886 blue:0.107 alpha:1.000] forState:0];

    self.btn.backgroundColor=[UIColor redColor];

    [self.btn addTarget:self action:@selector(firstpressed) forControlEvents:UIControlEventTouchUpInside];

    [self.image3 addSubview:self.btn];

    //设置分页各个属性

    self.page=[[UIPageControl alloc]init];

    CGSize pageSize=CGSizeMake(120, 44);

    self.page.frame=CGRectMake((WIDTH-pageSize.width)*0.5, HEIGHT-pageSize.height-40, pageSize.width, pageSize.height);

    self.page.backgroundColor=[UIColor clearColor];

    //设置分页页数

    self.page.numberOfPages=3;

    self.page.currentPage=0;

    self.scrollView.delegate=self;

    [self.scrollView addSubview:self.image1];

    [self.scrollView addSubview:self.image2];

    [self.scrollView addSubview:self.image3];

    [self.view addSubview:self.scrollView];

    [self.view addSubview:self.page];

    //打开用户交互,否则下面的button无法响应

    self.image3.userInteractionEnabled=YES;

}

//按钮的处罚时间

-(void)firstpressed{

    //跳转至正文

    [self presentViewController:[firstViewController new] animated:YES completion:^{

    }];

}

-(void)scrollViewDidScroll:(UIScrollView *)scrollView{

    //设置分页

    self.page.currentPage=(int)(scrollView.contentOffset.x/WIDTH);

}

- (void)didReceiveMemoryWarning {

    [super didReceiveMemoryWarning];

    // Dispose of any resources that can be recreated.

}

/*

#pragma mark - Navigation

// In a storyboard-based application, you will often want to do a little preparation before navigation

- (void)prepareForSegue:(UIStoryboardSegue *)segue sender:(id)sender {

    // Get the new view controller using [segue destinationViewController].

    // Pass the selected object to the new view controller.

}

*/

@end
正文页firstViewController.h和firstViewController.m
#import <UIKit/UIKit.h>

@interface firstViewController : UIViewController

@end
#import "firstViewController.h"

@interface firstViewController ()

@end

@implementation firstViewController

- (void)viewDidLoad {

    [super viewDidLoad];

    self.view.backgroundColor=[UIColor redColor];

}

- (void)didReceiveMemoryWarning {

    [super didReceiveMemoryWarning];

    // Dispose of any resources that can be recreated.

}

/*

#pragma mark - Navigation

// In a storyboard-based application, you will often want to do a little preparation before navigation

- (void)prepareForSegue:(UIStoryboardSegue *)segue sender:(id)sender {

    // Get the new view controller using [segue destinationViewController].

    // Pass the selected object to the new view controller.

}

*/

@end
AppDelegate.mAppDelegate.h文件
#import <UIKit/UIKit.h>

#import "firstViewController.h"

#import "UserGuideViewController.h"

@interface AppDelegate : UIResponder <UIApplicationDelegate>

@property(strong,nonatomic)firstViewController *firstVc;

@property (strong, nonatomic) UIWindow *window;

@end
#import "AppDelegate.h"

@interface AppDelegate ()

@end

@implementation AppDelegate

- (BOOL)application:(UIApplication *)application didFinishLaunchingWithOptions:(NSDictionary *)launchOptions {

    self.firstVc=[[firstViewController alloc]init];

    //判断应用是否是第一次启动

    if (![[NSUserDefaults standardUserDefaults] boolForKey:@"firstLaunch"]) {

        [[NSUserDefaults standardUserDefaults]setBool:YES forKey:@"firstLaunch"];

        NSLog(@"第一次启动");

        //如果是第一次启动的话,使用UserGuideViewController(用户引导页面) 作为根视图

        UserGuideViewController *userViewController=[[UserGuideViewController alloc]init];

        self.window.rootViewController=userViewController;

    }else{

        NSLog(@"不是第一次启动");

        //如果不是第一次启动的话,使用first作为根视图

        firstViewController *first=[[firstViewController alloc]init];

        self.window.rootViewController=first;

    }

    self.window.backgroundColor=[UIColor whiteColor];

    [self.window makeKeyAndVisible];

    return YES;

}

- (void)applicationWillResignActive:(UIApplication *)application {

    // Sent when the application is about to move from active to inactive state. This can occur for certain types of temporary interruptions (such as an incoming phone call or SMS message) or when the user quits the application and it begins the transition to the background state.

    // Use this method to pause ongoing tasks, disable timers, and throttle down OpenGL ES frame rates. Games should use this method to pause the game.

}

- (void)applicationDidEnterBackground:(UIApplication *)application {

    // Use this method to release shared resources, save user data, invalidate timers, and store enough application state information to restore your application to its current state in case it is terminated later.

    // If your application supports background execution, this method is called instead of applicationWillTerminate: when the user quits.

}

- (void)applicationWillEnterForeground:(UIApplication *)application {

    // Called as part of the transition from the background to the inactive state; here you can undo many of the changes made on entering the background.

}

- (void)applicationDidBecomeActive:(UIApplication *)application {

    // Restart any tasks that were paused (or not yet started) while the application was inactive. If the application was previously in the background, optionally refresh the user interface.

}

- (void)applicationWillTerminate:(UIApplication *)application {

    // Called when the application is about to terminate. Save data if appropriate. See also applicationDidEnterBackground:.

}

@end
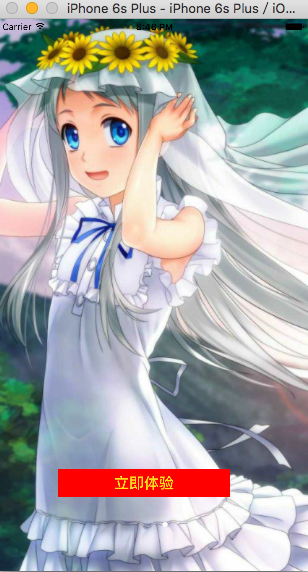
运行效果
第一次运行
第二次运行
iOS开发 首次启动显示用户引导,第二次启动直接进入App,UIScrollView,UIPageControl,NSUserDefaults的更多相关文章
- iOS开发之应用首次启动显示用户引导
这个功能的重点就是在如何判断应用是第一次启动的. 其实很简单 我们只需要在一个类里面写好用户引导页面 基本上都是使用UIScrollView 来实现, 新建一个继承于UIViewController ...
- iOS开发--应用设置及用户默认设置——转载
[链接]iOS开发--应用设置及用户默认设置[1.bundlehttp://www.jianshu.com/p/6f2913f6b218 在iphone里面,应用都会在“设置”里面有个专属的应用设置, ...
- iOS-王云鹤 APP首次启动显示用户指导
这个功能的重点就是在如何判断应用是第一次启动的. 其实很简单 我们只需要在一个类里面写好用户引导页面 基本上都是使用UIScrollView 来实现, 新建一个继承于UIViewController ...
- iOS开发--应用设置及用户默认设置【2、读取应用中的设置】
在上一节中,我们通过探讨应用的系统设置的基本功能,了解运用bundle捆绑包以及plist文件的基本开发.用户能够使用设置应用来声明他们的偏好设置,那么我们怎样去调用用户所设置的参数呢 ...
- IOS开发之自动布局显示网络请求内容
在上一篇博客中详细的介绍了IOS开发中的相对布局和绝对布局,随着手机屏幕尺寸的改变,在App开发中为了适应不同尺寸的手机屏幕,用自动布局来完成我们想要实现的功能和效果显得尤为重要.本人更喜欢使用相对布 ...
- iOS开发——UI进阶篇(七)程序启动原理、打电话、发短信
一.Info.plist常见的设置 1.建立一个工程后,会在Supporting files文件夹下看到一个“工程名-Info.plist”的文件,该文件对工程做一些运行期的配置,非常重要,不能删除 ...
- iOS开发证书都显示“此证书的签发者无效”,更新WWDR Certificate证书后还是显示无效
1.首先iOS开发证书显示"此证书的签发者无效".是因为WWDR Certificate证书过期导致的,须要更新WWDR Certificate证书! 1)下载最新WWDR Cer ...
- iOS开发之工具篇-20个可以帮你简化移动app开发流程的工具
如果想进入移动app开发这个领域,你总能从别的开发者或者网上或者书上找到各种各样的方法和工具,对于新手来说,还没有摸清门路就已经陷入迷茫了.这里推荐20个可以帮你简化app开发流程的工具.很多开发者都 ...
- iOS开发--应用设置及用户默认设置【1、bundle的运用】
在iphone里面,应用都会在“设置”里面有个专属的应用设置,选择该菜单界面,用户便可以在其中输入和更改各种选项,协助用户更便捷设置个人喜好与习惯. 在这一节中,希望能通过对捆绑包(bu ...
随机推荐
- Python高级特性学习笔记
切片(slice) 可简化循环取元素的操作. L[0:3] or L[:3] 表示从索引0的位置开始,到索引3为止,但不包括索引3的前3个元素(L[0],L[1],L[2]); L[-2:]表示取包括 ...
- C++ 读取txt文本内容,并将结果保存到新文本
循序渐进学习读文件 // readFile.cpp : 定义控制台应用程序的入口点. #include "stdafx.h" #include <iostream> # ...
- tfs中如何创建团队项目及如何操作团队项目
创建团队项目集合 tfs server管理控制台\团队项目集合页面.选择'创建集合'链接,按向导即可创建项目集合. 创建团队项目 创建好团队项目集合后,就要开始创建团队项目了. 进入vs,连接上tfs ...
- Check if a configuration profile is installed on iOS
Configuration profiles can be downloaded to an iOS device through Safari to configure the device in ...
- Android系统的架构
android的系统架构和其操作系统一样,采用了分层的架构.从架构图看,android分为四个层,从高层到低层分别是应用程序层.应用程序框架层.系统运行库层和linux核心层. 1.应用程序 Andr ...
- Maven 排除第三方jar包所依赖的其他依赖
单依赖过滤:可以过滤一个或者多个,如果过滤多个要写多个<exclusion>. <dependency> <groupId>org.apache.hbase< ...
- GridView获取列子段的几种途径
GridView是ASP.NET中功能强大的数据显示控件,它的RowDataBound事件为我们提供了方便的控制行.列数据的途径. 要获取当前行的某个数据列,我在实践中总结有如下几种方法: 1. Ce ...
- android base64 和 aes 加密 解密
package pioneerbarcode.ccw.com.encryptanddecode;import android.os.Bundle;import android.support.v7.a ...
- C++用法的学习心得(要求包含示例,并反映出利用网络获取帮助的过程)
大一一年C++的学习生涯,让我感慨颇多!回想起,当初上课时的情形,一切是那么的清晰,仿佛就像是发生在昨天一样. 任何一门学科的学习都是有技巧的.对于c++,我学的并不好,刚开 ...
- AspNetPager控件分页使用方法
AspNetPager控件官方下载地址:http://www.webdiyer.com/aspnetpager/ 把控件加到项目中(添加自定义控件的方法),并把它拖放到页面上 <asp:Scri ...