Spring整合hibernate -SessionFactory
本文目录
1 本文采用 hibernate4 整合 Spring3.1
2 把Spring获取datasource通过class="org.springframework.orm.hibernate3.annotation.AnnotationSessionFactoryBean"把datasource注入给hibernate的sessionfactory
3 注入后,配置sessionfactory的相关属性,例如实体类,properties
4 实体类上添加注解
5 编写测试类,测试通过
一 构建sessionFactory
1 datasource注入sessionfactory
a 把datasource注入到class="org.springframework.orm.hibernate3.LocalSessionFactoryBean"
注意: LocalSessionFactoryBean是hibernate3使用XML时使用的sessionfactory,所以不支持annotation----------------hibernate3的时候不推荐使用,hibernate4的时候自带annotation实现
b 把datasource注入到class="org.springframework.orm.hibernate3.annotation.AnnotationSessionFactoryBean" ----------------hibernate3的时候推荐使用
我使用的是hibernate4,编译的时候出了一个错误如下:
注意: java.lang.NoClassDefFoundError: Lorg/hibernate/cache/CacheProvider; (hibernate4整合spring3.1)
查了一下相关资料,原来发现hibernate4已经将hibernate3的一些功能改掉了,在hibernate4已经不使用CacheProvider了,所以做了以下修改,
原先:<bean id="sessionFactory"
class="org.springframework.orm.hibernate3.annotation.AnnotationSessionFactoryBean">
改成:<bean id="sessionFactory"
class="org.springframework.orm.hibernate4.LocalSessionFactoryBean">
问题解决,可以正常使用(本文是采用hibernate4整合spring3.1)
LocalSessionFactoryBean配置
<beans>

    <bean id="myDataSource" class="org.apache.commons.dbcp.BasicDataSource" destroy-method="close">

        <property name="driverClassName" value="org.hsqldb.jdbcDriver"/>

        <property name="url" value="jdbc:hsqldb:hsql://localhost:9001"/>

        <property name="username" value="sa"/>

        <property name="password" value=""/>

    </bean>

    <bean id="mySessionFactory" class="org.springframework.orm.hibernate3.LocalSessionFactoryBean">

        <property name="dataSource" ref="myDataSource"/>

        <property name="mappingResources">

            <list>

                <value>product.hbm.xml</value>

            </list>

        </property>

        <property name="hibernateProperties">

            <value>

                hibernate.dialect=org.hibernate.dialect.HSQLDialect

            </value>

        </property>

    </bean>

</beans>
AnnotationSessionFactoryBean(推荐)
    <bean id="mySessionFactory"

        class="org.springframework.orm.hibernate3.annotation.AnnotationSessionFactoryBean">    <!--这个支持annotation-->

        <property name="dataSource" ref="dataSource" />

        <property name="mappingResources">

            <list>

                <value>product.hbm.xml</value>

            </list>

        </property>

        <property name="hibernateProperties">

            <value>

                hibernate.dialect=org.hibernate.dialect.HSQLDialect

            </value>

        </property>

    </bean>
2 注入hibernate需要的proptity的参数
<property name="hibernateProperties">

            <value>

                hibernate.dialect=org.hibernate.dialect.MySQLDialect

                hibernate.show_sql=true

            </value>

</property>
3 注入实体类
annotatedClasses是注入类
mappingResource是注入XML
<property name="annotatedClasses">

            <list>

                <value>com.entity.User</value>

            </list>

 </property>
也可以使用自动扫描的方式注入实体类
 <property name="packagesToScan">

            <list>

                    <value>com.entity</value>

            </list>

        </property>
同时在实体类上添上注解
package com.entity;

import javax.persistence.Entity;

import javax.persistence.Id;

@Entity

public class User {

    @Id

    private int id;

    private String name;

    private String remark;

    public String getName() {

        return name;

    }

    public void setName(String name) {

        this.name = name;

    }

    public String getRemark() {

        return remark;

    }

    public void setRemark(String remark) {

        this.remark = remark;

    }

    public int getId() {

        return id;

    }

    public void setId(int id) {

        this.id = id;

    }

}
4 引入hibernate包
5 最后附上所有代码
beans.xml
<?xml version="1.0" encoding="UTF-8"?>

<beans xmlns="http://www.springframework.org/schema/beans"

    xmlns:xsi="http://www.w3.org/2001/XMLSchema-instance"

    xmlns:aop="http://www.springframework.org/schema/aop"

    xmlns:context="http://www.springframework.org/schema/context"

    xsi:schemaLocation="http://www.springframework.org/schema/beans

        http://www.springframework.org/schema/beans/spring-beans.xsd

        http://www.springframework.org/schema/context

        http://www.springframework.org/schema/context/spring-context.xsd

        ">

        <context:component-scan base-package="com.*"></context:component-scan>

    <bean id="mappings"

        class="org.springframework.beans.factory.config.PropertyPlaceholderConfigurer">

        <property name="locations">

            <value>classpath:jdbc.properties</value>

        </property>

    </bean>

<!--    <bean id="dataSource" class="org.apache.commons.dbcp.BasicDataSource" destroy-method="close">-->

<!--        <property name="driverClassName" value="com.mysql.jdbc.Driver"/>-->

<!--        <property name="url" value="jdbc:mysql://localhost:3306/spring"/>-->

<!--        <property name="username" value="root"/>-->

<!--        <property name="password" value="root"/>-->

<!--    </bean>-->

    <bean id="dataSource" class="org.apache.commons.dbcp.BasicDataSource" destroy-method="close">

        <property name="driverClassName" value="${jdbc.driverClassName}"/>

        <property name="url" value="${jdbc.url}"/>

        <property name="username" value="${jdbc.username}"/>

        <property name="password" value="${jdbc.password}"/>

    </bean>

    <bean id="mySessionFactory"

        class="org.springframework.orm.hibernate4.LocalSessionFactoryBean">

        <property name="dataSource" ref="dataSource" />

        <property name="annotatedClasses">

            <list>

                <value>com.entity.User</value>

            </list>

        </property>

        <property name="hibernateProperties">

            <value>

                hibernate.dialect=org.hibernate.dialect.MySQLDialect

                hibernate.show_sql=true

            </value>

        </property>

    </bean>

</beans>
service
package com.serviceImpl;

import javax.annotation.PostConstruct;

import javax.annotation.PreDestroy;

import javax.annotation.Resource;

import org.springframework.context.annotation.Scope;

import org.springframework.stereotype.Component;

import com.dao.UserDao;

import com.entity.User;

@Component

public class UserServiceImpl {

    private UserDao userDao;

    public void add(User user) {

        userDao.save(user);

    }

    public void update(User user) {

        userDao.update(user);

    }

    public void init() {// 初始方法

        System.out.println("init");

    }

    public void destroy() {// 销毁方法

        System.out.println("destory");

    }

    public UserDao getUserDao() {

        return userDao;

    }

    @Resource(name="userDaoImpl2")

    public void setUserDao(UserDao userDao) {

        this.userDao = userDao;

    }

}
userDaoImpl2
package com.daoImpl;

import javax.annotation.Resource;

import org.hibernate.Session;

import org.hibernate.SessionFactory;

import org.springframework.stereotype.Component;

import com.dao.UserDao;

import com.entity.User;

@Component

public class UserDaoImpl2 implements UserDao{

    SessionFactory mySessionFactory;

    public void save(User user) {

        System.out.println(user.getName()+"-->"+user.getRemark()+"  save --调用UserDaoImpl2!");

//        Session s = mySessionFactory.getCurrentSession();
//    这里没有用getCurrentSession是因为配置文件没有配置,在property中配置hibernate.current_session_context_class=thread即可,比较推荐

        Session s = mySessionFactory.openSession();

        s.beginTransaction();

        s.save(user);

        s.getTransaction().commit();

    }

    public void update(User user) {

        System.out.println(user.getName()+"-->"+user.getRemark()+"  update  --调用UserDaoImpl2!");

    }

    public SessionFactory getMySessionFactory() {

        return mySessionFactory;

    }

     @Resource

    public void setMySessionFactory(SessionFactory mySessionFactory) {

        this.mySessionFactory = mySessionFactory;

    }

}
测试类
package com.serviceImpl.test;

import org.junit.Before;

import org.junit.Test;

import org.springframework.context.support.ClassPathXmlApplicationContext;

import com.entity.User;

import com.serviceImpl.UserServiceImpl;

public class UserServiceImplTest {

    User user;

    @Before

    public void setUp() throws Exception {

        user = new User();

        user.setName("testName");

        user.setRemark("testRemark");

    }

    @Test

    public void testAdd() {

        ClassPathXmlApplicationContext app = new ClassPathXmlApplicationContext("beans.xml");

         UserServiceImpl UserServiceImpl = (UserServiceImpl)app.getBean("userServiceImpl");

         UserServiceImpl.add(user);//调用方法

         UserServiceImpl.update(user);//调用方法

    }

}
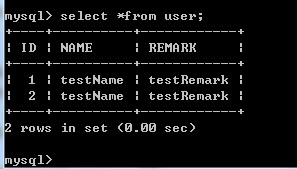
执行结果
testName-->testRemark save --调用UserDaoImpl2!
Hibernate: insert into User (name, remark, id) values (?, ?, ?)
testName-->testRemark update --调用UserDaoImpl2!
hibernate4 整合 Spring3.1 SessionFactory完成
回顾一下步骤
1 本文采用 hibernate4 整合 Spring3.1
2 把Spring获取datasource通过class="org.springframework.orm.hibernate3.annotation.AnnotationSessionFactoryBean"把datasource注入给hibernate的sessionfactory
3 注入后,配置sessionfactory的相关属性,例如实体类,properties
4 实体类上添加注解
5 编写测试类,测试通过
Spring整合hibernate -SessionFactory的更多相关文章
- 【Java EE 学习 53】【Spring学习第五天】【Spring整合Hibernate】【Spring整合Hibernate、Struts2】【问题:整合hibernate之后事务不能回滚】
一.Spring整合Hibernate 1.如果一个DAO 类继承了HibernateDaoSupport,只需要在spring配置文件中注入SessionFactory就可以了:如果一个DAO类没有 ...
- spring整合hibernate的详细步骤
Spring整合hibernate需要整合些什么? 由IOC容器来生成hibernate的sessionFactory. 让hibernate使用spring的声明式事务 整合步骤: 加入hibern ...
- spring整合hibernate
spring整合hibernate包括三部分:hibernate的配置.hibernate核心对象交给spring管理.事务由AOP控制 好处: 由java代码进行配置,摆脱硬编码,连接数据库等信息更 ...
- spring 整合hibernate
1. Spring 整合 Hibernate 整合什么 ? 1). 有 IOC 容器来管理 Hibernate 的 SessionFactory2). 让 Hibernate 使用上 Spring 的 ...
- Spring 整合 Hibernate
Spring 整合 Hibernate •Spring 支持大多数流行的 ORM 框架, 包括 Hibernate JDO, TopLink, Ibatis 和 JPA. •Spring 对这些 OR ...
- 使用Spring整合Hibernate,并实现对数据表的增、删、改、查的功能
1.1 问题 使用Spring整合Hibernate,并实现资费表的增.删.改.查. 1.2 方案 Spring整合Hibernate的步骤: 1.3 步骤 实现此案例需要按照如下步骤进行. 采用的环 ...
- Spring整合Hibernate详细步骤
阅读目录 一.概述 二.整合步骤 回到顶部 一.概述 Spring整合Hibernate有什么好处? 1.由IOC容器来管理Hibernate的SessionFactory 2.让Hibernate使 ...
- SSH整合之spring整合hibernate
SSH整合要导入的jar包: MySQL中创建数据库 create database ssh_db; ssh_db 一.spring整合hibernate带有配置文件hibernate.cfg.xml ...
- 3、Spring整合Hibernate
经过前面的两节分析:1.Hibernate之生成SessionFactory源码追踪 和 2.Spring的LocalSessionFactoryBean创建过程源码分析 .我们可以得到这样一个结论, ...
随机推荐
- 【Python音乐生成】可能有用的一些Python库
1,Python-MIDI,很多操作库的前置库.作者提供了一个python3的branch.git clone下来之后注意切换到这个branch之后再运行setup.py. 实际使用的时候,使用 im ...
- 在 Windows下用 Visual Studio 编译 OpenSSL 1.1.0
到OpenSSL官方网站下载OpenSSL源代码包 1.下载 openssl-1.1.0.tar.gz 2.安装 ActivePerl, 可以到http://www.activestate.com/a ...
- pat乙级1050螺旋矩阵
1.用vector建立二维数组: vector<vector<int>> arr(rows); ; i < rows; i++) arr[i].resize(cols); ...
- java Vamei快速教程15 IO基础
作者:Vamei 出处:http://www.cnblogs.com/vamei 欢迎转载,也请保留这段声明.谢谢! 计算机最重要的功能是处理数据.一个有用的计算机语言需要拥有良好的IO功能,以便让未 ...
- IOS CALayer基本使用 (图层)
● 其实UIView之所以能显示在屏幕上,完全是因为它内部的一个图层(CALayer) ● 在创建UIView对象时,UIView内部会自动创建一个图层(即CALayer对象),通过UIView 的l ...
- POJ 3181 Dollar Dayz(递推,两个long long)
题意:John有N美元,有价格为1~K的工具,可以买的个数不限,问1~K组合出N的方案数. f[i = 第i中工具][j = 花费为j] = 方案数. f[i][j] = sigma{ f[i-1][ ...
- python Scraping
http://docs.python-guide.org/en/latest/scenarios/scrape/
- IE支持直接查看Json数据注册表代码
Windows Registry Editor Version 5.00 [HKEY_CLASSES_ROOT\MIME\Database\Content Type\application/json] ...
- 固定table的表头同时固定列
table表格是我们最常使用的数据显示一种形式,但有时候数据比较多的时候 就需要我们去固定表头,固定列.我这里用简单的css样式配合两句js脚本来实现,希望能够去帮到你. <div class= ...
- Python读取内容UnicodeDecodeError错误
1.错误现象 环境:Python3.7 描述: 用open方法获取文件句柄: 用read/readlines方法一次读取文件所有内容: 尝试了编码GB2312/GBK/GB18030/UTF-8,发现 ...