Django 之验证码实现
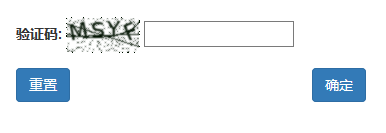
1. django-simple-captcha 模块
- 安装
django-simple-captcha
pip install django-simple-captcha

pip install Pillow
- 注册
和注册 app 一样,captcha 也需要注册到 settings 中。同时它也会创建自己的数据表,因此还需要数据同步。
# settings.py

INSTALLED_APPS = [

    ...

    'captcha',

]

# 执行命令进行数据迁徙,会发现数据库中多了一个 captcha_captchastore 的数据表

python manage.py migrate
- 添加路由
在项目根目录下的 urls.py中添加 captcha对应的路由:
from django.contrib import admin

from django.urls import path, include

urlpatterns = [

    path('admin/', admin.site.urls),

    path('captcha', include('captcha.urls')),        # 验证码

]
- 修改 Form 表单
Django 中通常都是由 Form 生成表单,而验证码一般也伴随注册登录表单,因此需要在 forms.py 中添加验证码的字段。
from django import forms

from captcha.fields import CaptchaField     # 一定要导入这行

class UserForm(forms.Form):

    username = forms.CharField(

        label='用户名',                # 在表单里表现为 label 标签

        max_length=128,

        widget=forms.TextInput(attrs={'class': 'form-control'})   # 添加 css 属性

    )

    captcha = CaptchaField(

        label='验证码',

        required=True,

        error_messages={

            'required': '验证码不能为空'

        }

    )
- 视图函数:
from django.shortcuts import render

from app.forms import UserForm

def home(request):

    register_form = UserForm(request.POST)

    if register_form.is_valid():

        pass

    register_form = UserForm()

    return render(request, 'index.html', {'register_form': register_form})
- 前端渲染
接下来就是在如何前端渲染出来:
<html>

    <head></head>

    <body>

        <form action='#' method='post'>

            {{ register_form.captcha.label_tag }}

            {{ register_form.captcha }} {{

        </form>

    </body>

</html>
2. 手动生成验证码
主要利用的是画图模块 PIL 以及随机模块 random 在后台生成一个图片和一串随机数,然后保存在内存中(也可以直接保存在 Django 项目中)。
在前端指定一个 img 标签,其 src 属性路径为:生成验证码的路径 <img src='/accounts/check_code/'。
- 画图程序
check_code.py
#!/usr/bin/env python

# -*- coding:utf-8 -*-

import random

from PIL import Image, ImageDraw, ImageFont, ImageFilter

_letter_cases = "abcdefghjkmnpqrstuvwxy"  # 小写字母,去除可能干扰的i,l,o,z

_upper_cases = _letter_cases.upper()  # 大写字母

_numbers = ''.join(map(str, range(3, 10)))  # 数字

init_chars = ''.join((_letter_cases, _upper_cases, _numbers))

# PIL

def create_validate_code(size=(120, 30),

                         chars=init_chars,

                         img_type="GIF",

                         mode="RGB",

                         bg_color=(255, 255, 255),

                         fg_color=(0, 0, 255),

                         font_size=18,

                         font_type="static/font/Monaco.ttf",

                         length=4,

                         draw_lines=True,

                         n_line=(1, 2),

                         draw_points=True,

                         point_chance=2):

    """

    @todo: 生成验证码图片

    @param size: 图片的大小,格式(宽,高),默认为(120, 30)

    @param chars: 允许的字符集合,格式字符串

    @param img_type: 图片保存的格式,默认为GIF,可选的为GIF,JPEG,TIFF,PNG

    @param mode: 图片模式,默认为RGB

    @param bg_color: 背景颜色,默认为白色

    @param fg_color: 前景色,验证码字符颜色,默认为蓝色#0000FF

    @param font_size: 验证码字体大小

    @param font_type: 验证码字体,默认为 ae_AlArabiya.ttf

    @param length: 验证码字符个数

    @param draw_lines: 是否划干扰线

    @param n_lines: 干扰线的条数范围,格式元组,默认为(1, 2),只有draw_lines为True时有效

    @param draw_points: 是否画干扰点

    @param point_chance: 干扰点出现的概率,大小范围[0, 100]

    @return: [0]: PIL Image实例

    @return: [1]: 验证码图片中的字符串

    """

    width, height = size  # 宽高

    # 创建图形

    img = Image.new(mode, size, bg_color)

    draw = ImageDraw.Draw(img)  # 创建画笔

    def get_chars():

        """生成给定长度的字符串,返回列表格式"""

        return random.sample(chars, length)

    def create_lines():

        """绘制干扰线"""

        line_num = random.randint(*n_line)  # 干扰线条数

        for i in range(line_num):

            # 起始点

            begin = (random.randint(0, size[0]), random.randint(0, size[1]))

            # 结束点

            end = (random.randint(0, size[0]), random.randint(0, size[1]))

            draw.line([begin, end], fill=(0, 0, 0))

    def create_points():

        """绘制干扰点"""

        chance = min(100, max(0, int(point_chance)))  # 大小限制在[0, 100]

        for w in range(width):

            for h in range(height):

                tmp = random.randint(0, 100)

                if tmp > 100 - chance:

                    draw.point((w, h), fill=(0, 0, 0))

    def create_strs():

        """绘制验证码字符"""

        c_chars = get_chars()

        strs = ' %s ' % ' '.join(c_chars)  # 每个字符前后以空格隔开

        font = ImageFont.truetype(font_type, font_size)

        font_width, font_height = font.getsize(strs)

        draw.text(((width - font_width) / 3, (height - font_height) / 3),

                  strs, font=font, fill=fg_color)

        return ''.join(c_chars)

    if draw_lines:

        create_lines()

    if draw_points:

        create_points()

    strs = create_strs()

    # 图形扭曲参数

    params = [1 - float(random.randint(1, 2)) / 100,

              0,

              0,

              0,

              1 - float(random.randint(1, 10)) / 100,

              float(random.randint(1, 2)) / 500,

              0.001,

              float(random.randint(1, 2)) / 500

              ]

    img = img.transform(size, Image.PERSPECTIVE, params)  # 创建扭曲

    img = img.filter(ImageFilter.EDGE_ENHANCE_MORE)  # 滤镜,边界加强(阈值更大)

    return img, strs
Tips
这里需要指定 Monaco.ttf 字体:
font_type="static/font/Monaco.ttf",

# https://pan.baidu.com/s/1XwyaFC_MROFA4fXujVwH3A 提取码:17f8
- 视图函数
views.py
from django.shortcuts import render, redirect, HttpResponse

from blog.check_code import create_validate_code

from io import BytesIO

from django.contrib import auth

from django.http import JsonResponse

def check_code(request):

    """

    获取验证码

    :param request:

    :return:

    """

    stream = BytesIO()

    # 生成图片 img、数字代码 code,保存在内存中,而不是 Django 项目中

    img, code = create_validate_code()

    img.save(stream, 'PNG')

    # 写入 session

    request.session['valid_code'] = code

    print(code)

    return HttpResponse(stream.getvalue())

def login(request):

    """

    登录视图

    :param request:

    :return:

    """

    if request.method == 'POST':

        ret = {'status': False, 'message': None}

        username = request.POST.get('username')

        password = request.POST.get('password')

        # 获取用户输入的验证码

        code = request.POST.get('check_code')

        p = request.POST.get('p')

        # 用户输入的验证码与 session 中取出的验证码比较

        if code.upper() == request.session.get('valid_code').upper():

            # 验证码正确,验证用户名密码是否正确

            user_obj = auth.authenticate(username=username, password=password)

            if user_obj:

                # 验证通过,则进行登录操作

                # 封装到 request.user 中

                auth.login(request, user_obj)

                return redirect('accounts:home')

            else:

                ret['status'] = True

                ret['message'] = '用户名或密码错误'

                return render(request, 'accounts/login.html', ret)

        else:

            ret['status'] = True

            ret['message'] = '验证码错误'

        return render(request, 'accounts/login.html', ret)

    return render(request, 'accounts/login.html')
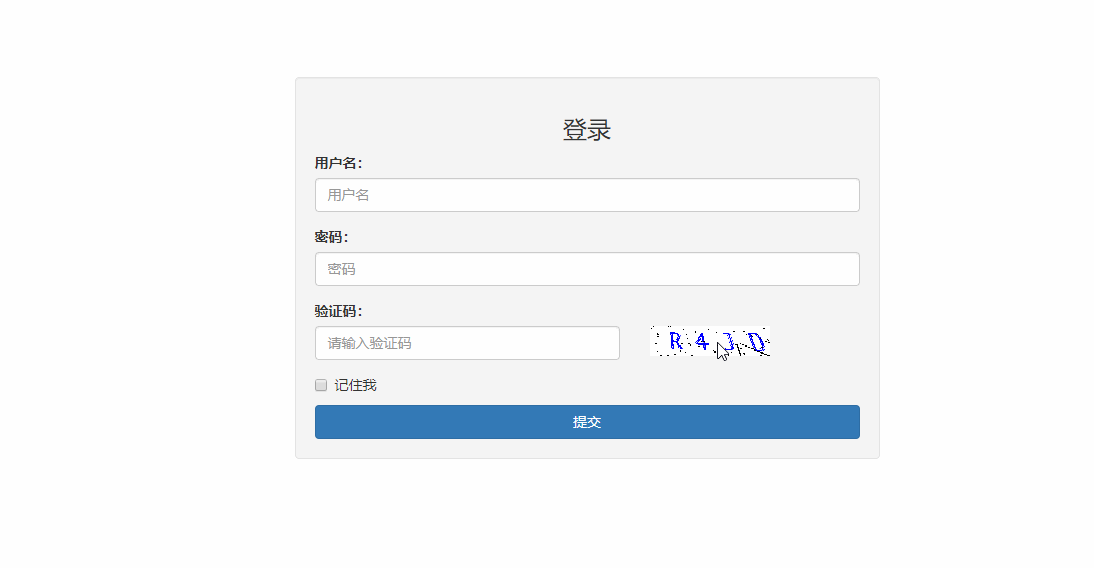
- 登录页面
login.html
{% load static %}

<!DOCTYPE html>

<html lang="en">

<head>

    <meta charset="UTF-8">

    <title>登录</title>

    <link rel="stylesheet" href="{% static 'bootstrap-3.3.7-dist/css/bootstrap.css' %}">

    <style>

        .login-col {

            margin-top: 100px;

        }

    </style>

</head>

<body>

<div class="container">

    <div class="row">

        <div class="well col-md-6 col-md-offset-3 login-col">

            <h3 class="text-center">登录</h3>

            <!--错误信息-->

            {% if status %}

                <div class="alert alert-danger" role="alert">

                    <p id="login-error">{{ message }}</p>

                    <p id="login-error"></p>

                </div>

            {% endif %}

            <form action="{% url 'accounts:login' %}" method="post" novalidate>

                {% csrf_token %}

                <div class="form-group">

                    <label for="exampleInputUsername">用户名:</label>

                    <input type="text" class="form-control" id="exampleInputUsername" placeholder="用户名" name="username">

                </div>

                <div class="form-group">

                    <label for="exampleInputPassword1">密码:</label>

                    <input type="password" class="form-control" id="exampleInputPassword" placeholder="密码"

                           name="password">

                </div>

                <!--验证码-->

                <div class="form-group">

                    <label for="id_code">验证码:</label>

                    <div class="row">

                        <div class="col-md-7 col-xs-7">

                            <input type="text" class="form-control" id="id_code" placeholder="请输入验证码" name="check_code">

                        </div>

                        <div class="col-md-5 col-xs-5">

                            <img src="/accounts/check_code" onclick="changeImg(this)" class="img">

                        </div>

                    </div>

                </div>

                <div class="checkbox">

                    <label>

                        <input type="checkbox"> 记住我

                    </label>

                </div>

                <button type="submit" class="btn btn-primary btn-block" id="login-button">提交</button>

            </form>

        </div>

    </div>

</div>

<script src="{% static 'js/jquery-3.1.1.js' %}"></script>

<script src="{% static 'bootstrap-3.3.7-dist/js/bootstrap.js' %}"></script>

<script>

    function changeImg(ths) {

        // 硬编码

        ths.src = '/accounts/check_code/?temp=' + Math.random();

        // 使用命名空间,发送请求

        // ths.src = '{% url 'accounts:check_code' %}' + '?temp=' + Math.random();

    }

</script>

</body>

</html>
给验证码图片 img 标签绑定 onclick 事件,当用户点击验证码时,相当于访问 http://127.0.0.1:8000/accounts/check_code/?temp=一个随机数,即向 http://127.0.0.1:8000/accounts/check_code/ 发送一个 get 请求,再次从后台生成一个验证码并返回。
- 路由
accounts/urls.py
from django.urls import path

from accounts import views

app_name = 'accounts'

urlpatterns = [

    # 登录

    path('login/', views.login, name='login'),

    # 获取验证码

    path('check_code/', views.check_code, name='check_code'),

    # 首页

    path('home/', views.home, name='home'),

    # 注销

    path('logout/', views.logout, name='logout'),

]
Tips
- 画图程序
check_code.py保存在项目任意位置即可,只需在视图函数中导入即可。 Monaco.ttf字体不可或缺,放置在静态文件中即可,但是需要修改check_code.py中的字体引入路径。- 验证用户输入的验证码是否正确,只需从 session 中取出生成的验证码与其比较即可。
- 验证码刷新,只需让其再发送一次 get 请求即可。
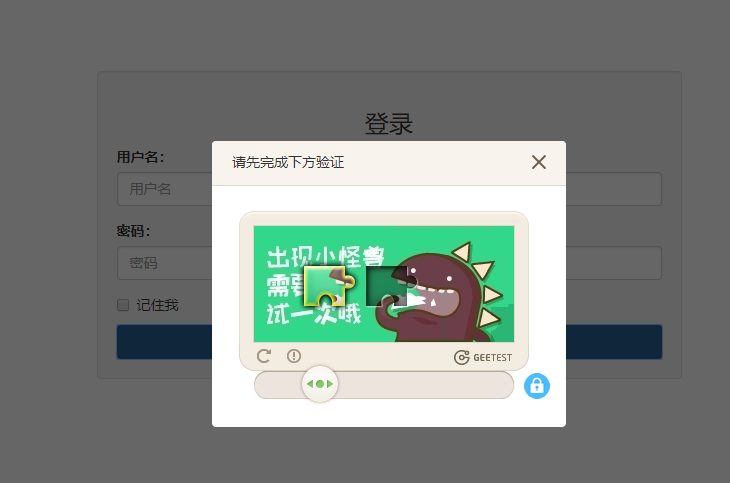
3. 极验科技之滑动验证码
除上述两种图片验证码以外,还有一种滑动验证码,用的比较多有 极验科技。
- 官方下载源码包,并安装
geetest模块
访问官网,选择:技术文档 —— 行为验证 —— 选择服务端部署为 Python —— 使用 git 或直接下载 gt3-python-sdk 文件。
pip install geetest

pip install requests    # 有可能还需要 requests 模块

<!-- 引入封装了failback的接口--initGeetest -->

<script src="http://static.geetest.com/static/tools/gt.js"></script>
- 登录页面
login2.html
html 部分
{% load static %}

<!DOCTYPE html>

<html lang="en">

<head>

    <meta charset="UTF-8">

    <title>登录</title>

    <link rel="stylesheet" href="{% static 'bootstrap-3.3.7-dist/css/bootstrap.css' %}">

    <style>

        .login-col {

            margin-top: 100px;

        }

    </style>

</head>

<body>

<div class="container">

    <div class="row">

        <div class="well col-md-6 col-md-offset-3 login-col">

            <h3 class="text-center">登录</h3>

            <form>

                {% csrf_token %}

                <div class="form-group">

                    <label for="username">用户名:</label>

                    <input type="text" class="form-control" id="username" placeholder="用户名" name="username">

                </div>

                <div class="form-group">

                    <label for="password">密码:</label>

                    <input type="password" class="form-control" id="password" placeholder="密码" name="password">

                </div>

                <!--极验科技滑动验证码-->

                <div class="form-group">

                    <!-- 放置极验的滑动验证码 -->

                    <div id="popup-captcha"></div>

                </div>

                <!--记住我-->

                <div class="checkbox">

                    <label>

                        <input type="checkbox"> 记住我

                    </label>

                </div>

                <!--登录按钮-->

                <button type="button" class="btn btn-primary btn-block" id="login-button">提交</button>

                <!--错误信息-->

                <span class="login-error"></span>

            </form>

        </div>

    </div>

</div>

</body>

</html>
JavaScript 部分
<script src="{% static 'js/jquery-3.3.1.js' %}"></script>

<script src="{% static 'bootstrap-3.3.7-dist/js/bootstrap.js' %}"></script>

<!-- 引入封装了failback的接口--initGeetest -->

<script src="http://static.geetest.com/static/tools/gt.js"></script>

<script>

    var handlerPopup = function (captchaObj) {

        // 成功的回调

        captchaObj.onSuccess(function () {

            var validate = captchaObj.getValidate();

            var username = $('#username').val();

            var password = $('#password').val();

            console.log(username, password);

            $.ajax({

                url: "/accounts/login2/", // 进行二次验证

                type: "post",

                dataType: 'json',

                data: {

                    username: username,

                    password: password,

                    csrfmiddlewaretoken: $("[name='csrfmiddlewaretoken']").val(),

                    geetest_challenge: validate.geetest_challenge,

                    geetest_validate: validate.geetest_validate,

                    geetest_seccode: validate.geetest_seccode

                },

                success: function (data) {

                    console.log(data);

                    if (data.status) {

                        // 有错误,在页面上显示

                        $('.login-error').text(data.msg);

                    } else {

                        // 登录成功

                        location.href = data.msg;

                    }

                }

            });

        });

        // 当点击登录按钮时,弹出滑动验证码窗口

        $("#login-button").click(function () {

            captchaObj.show();

        });

        // 将验证码加到id为captcha的元素里

        captchaObj.appendTo("#popup-captcha");

        // 更多接口参考:http://www.geetest.com/install/sections/idx-client-sdk.html

    };

    $('#username, #password').focus(function () {

        // 将之前的错误清空

        $('.login-error').text('');

    });

    // 验证开始需要向网站主后台获取id,challenge,success(是否启用failback)

    $.ajax({

        url: "/accounts/pc-geetest/register?t=" + (new Date()).getTime(), // 加随机数防止缓存

        type: "get",

        dataType: "json",

        success: function (data) {

            // 使用initGeetest接口

            // 参数1:配置参数

            // 参数2:回调,回调的第一个参数验证码对象,之后可以使用它做appendTo之类的事件

            initGeetest({

                gt: data.gt,

                challenge: data.challenge,

                product: "popup", // 产品形式,包括:float,embed,popup。注意只对PC版验证码有效

                offline: !data.success // 表示用户后台检测极验服务器是否宕机,一般不需要关注

                // 更多配置参数请参见:http://www.geetest.com/install/sections/idx-client-sdk.html#config

            }, handlerPopup);

        }

    });

</script>
JS 代码主要分为两部分,第一部分是获取表单的 value 值,向后台发送 Ajax 请求,以验证用户名及密码是否正确,若有错误将错误信息显示出来。第二部分向后台获取验证码所需相关参数。
- 视图函数
views.py
from django.shortcuts import render, redirect, HttpResponse

from django.http import JsonResponse

from geetest import GeetestLib

def login2(request):

    if request.method == 'POST':

        ret = {'status': False, 'msg': None}

        username = request.POST.get('username')

        password = request.POST.get('password')

        print(username, password)

        # 获取极验,滑动验证码相关参数

        gt = GeetestLib(pc_geetest_id, pc_geetest_key)

        challenge = request.POST.get(gt.FN_CHALLENGE, '')

        validate = request.POST.get(gt.FN_VALIDATE, '')

        seccode = request.POST.get(gt.FN_SECCODE, '')

        status = request.session[gt.GT_STATUS_SESSION_KEY]

        user_id = request.session["user_id"]

        print(gt, challenge, validate, seccode, status)

        if status:

            result = gt.success_validate(challenge, validate, seccode, user_id)

        else:

            result = gt.failback_validate(challenge, validate, seccode)

        if result:

            # 验证码正确

            # 利用auth模块做用户名和密码的校验

            user_obj = auth.authenticate(username=username, password=password)

            if user_obj:

                # 用户名密码正确

                # 给用户做登录

                auth.login(request, user_obj)

                ret["msg"] = "/accounts/home/"

                # return redirect('accounts:home')

            else:

                # 用户名密码错误

                ret["status"] = True

                ret["msg"] = "用户名或密码错误!"

        else:

            ret["status"] = True

            ret["msg"] = "验证码错误"

        return JsonResponse(ret)

    return render(request, "accounts/login2.html")

# 请在官网申请ID使用,示例ID不可使用

pc_geetest_id = "b46d1900d0a894591916ea94ea91bd2c"

pc_geetest_key = "36fc3fe98530eea08dfc6ce76e3d24c4"

# 处理极验 获取验证码的视图

def get_geetest(request):

    user_id = 'test'

    gt = GeetestLib(pc_geetest_id, pc_geetest_key)

    status = gt.pre_process(user_id)

    request.session[gt.GT_STATUS_SESSION_KEY] = status

    request.session["user_id"] = user_id

    response_str = gt.get_response_str()

    return HttpResponse(response_str)
- 路由
accounts/urls.py
from django.urls import path

from accounts import views

app_name = 'accounts'

urlpatterns = [

    path('home/', views.home, name='home'),

    # 极验滑动验证码 获取验证码的url

    path('pc-geetest/register/', views.get_geetest, name='get_geetest'),

    path('login2/', views.login2, name='login2'),

]
总结
- 极验滑动验证码除了支持 Django,还支持 flask、tornado 等
- 上述以 Ajax 形式发送的 post 请求,因此注意查看是否设置了 csrf_token,并且提交按钮
button的提交类型应该为button而非submit(踩坑) - 同时它还有嵌入式,移动端等,更多示例请参考下载的官方源码。
Django 之验证码实现的更多相关文章
- django生成验证码
django生成验证码 # 制作验证码 def verify_code(): # 1,定义变量,用于画面的背景色.宽.高 # random.randrange(20, 100)意思是在20到100之间 ...
- Django之验证码 + session 认证
验证码 + session认证 目录结构 . └── project ├── app01 │ ├── admin.py │ ├── apps.py │ ├── __init__.py │ ...
- python django 实现验证码的功能
我也是刚学Python Django不久很多都不懂,所以我现在想一边学习一边记录下来然后大家一起讨论! 验证码功能一开始我在网上找了很多的demo但是我在模仿他们写的时候,发现在我的版本上根本就不能 ...
- Django之验证码
一.自己生成验证码 二.极验科技互动验证码 使用前步骤:下载官网文件——pip install geetest——引入其封装的js模块 代码分为三段:生成验证码——显示验证码——验证验证码. from ...
- Django 生成验证码或二维码 pillow模块
一.安装PIL PIL:Python Imaging Library,已经是Python平台事实上的图像处理标准库了.PIL功能非常强大,API也非常简单易用. PIL模块只支持到Python 2 ...
- django(一)验证码
这里讲讲在django中使用第三方插件验证码的流程. 一. 先安装pillow, 通过 python -m pip install pillow 二.安装完后,在官方网站上看操作过程.地址:pillo ...
- Django Redis验证码 密码 session 实例
1.settings CACHES = { "default": { "BACKEND": "django_redis.cache.RedisCach ...
- django的验证码
pip install Pillow==3.4.1在views.py中创建一个视图函数 from PIL import Image, ImageDraw, ImageFont from django. ...
- Django中验证码的登录
需求概述 一般登录页面或者其他页面都需要验证码的功能,那在Django中如何实现呢? 这基本就需要用到第三方模块了:pillow 还需要两个文件,一个是字体文件:Monaco.ttf,另一个是一个模块 ...
随机推荐
- Django框架ORM单表添加表记录_模型层
此方法依赖的表时之前创建的过的一张表 参考链接:https://www.cnblogs.com/apollo1616/p/9840354.html 方法1: # 语法 [变量] = [表名].obje ...
- [容易]合并排序数组 II
题目来源:http://www.lintcode.com/zh-cn/problem/merge-sorted-array/
- 关于JavaScript中prototype机制的理解
最近几天一直在研究JavaScript中原型的机制,从开始的似懂非懂,到今天终于有所领悟.不敢说彻底理解,但是起码算知道怎么回事了. 为什么一开始似懂非懂 开始了解一遍原型机制后,感觉知其然但不知其所 ...
- 关于引用WebLogic.jar时遇到NoClassDefFoundError问题的解决方法
前段时间在做一个项目开发时,需要用到weblogic.jndi.WLInitialContextFactory,所以按照以前的经验,将WebLogic.jar添加到Build Path中.可是在执行时 ...
- Java中String的设计
String应用简介 前言 String字符串在Java应用中使用非常频繁,只有理解了它在虚拟机中的实现机制,才能写出健壮的应用,本文使用的JDK版本为1.8.0_111. 常量池 Java代码被编译 ...
- OC中RAC编程block的基本使用
在OC中block的基本使用 // // ViewController.h // RAC--test // // Created by Aaron on 17/1/17. // Copyright © ...
- Algorithm: Sieve of Eratosthenes
寻找比n小的所有质数的方法. 2是质数, 2*i都是质数,同样3是质数,3*i也都是质数 代码如下 int n; vector<, true); prime[] = prime[] = fals ...
- 统一ID服务
代码已经修改 调用方式 为restful请求 或者 feign请求 请参考 wiki: http://192.168.120.46:8090/display/peixun/akucun+Gui ...
- pkg-config设置
pkg-config在一些源码管理中会被使用到. 介绍 上网查资料,知道了pkg-config这个东西,下面简单介绍一下. pkg-config提供了下面几个功能: 检查库的版本号.如果所需要的库的版 ...
- 图形绘制处理逻辑VC
// 逻辑1:先从资源中读取背景资源,然后将绘图对象与DC绑定,通过绘图对象绘出背景 // 逻辑2:先从资源中读取背景资源,新建一个MEMDC,将绘图对象与MEMDC绑定,并且 // 通过绘图对象在内 ...