【electron-vite+live2d+vue3+element-plus】实现桌面模型宠物+桌面管理系统应用(踩坑)
脚手架
项目使用 electron-vite 脚手架搭建
ps:还有一个框架是 electron-vite ,这个框架我发现与pixi库有冲突,无法使用,如果不用pixi也可以用这个脚手架。
node 版本建议18+
----------------------------------------------------------------------------------------
运行live2D相关依赖
1.pixi.js
npm install pixi.js@6.5.10

// pixi 后面可能运行会报错,提示需要安装unsafe-eval

// 需要注意pixi/unsafe-eval 需要安装与pixi一致的版本

npm install @pixi/unsafe-eval@6.5.10
2. pixi-live2d-display
npm install pixi-live2d-display
3. live2D官方SDK

如果需要兼容老版本模型需要引入2.0版sdk
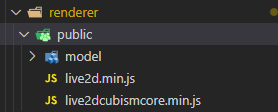
因为使用Vite,SDK引入不能使用import,需要在index.html 中使用script标签引入
需要注意的是文件存放路径,否则打包后会找不到文件,这里笔者是在renderer文件夹下创建了public文件夹,将渲染进程需要使用的静态资源存放在里面。
----------------------------------------------------------------------------------------
VUE 路由设置与Element-Plus安装
npm install vue-router

npm install element-plus
安装后新建相关文件夹与文件
需要注意的是路由模式要使用hash模式
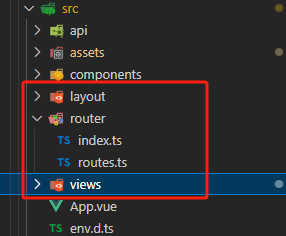
router/index.ts
import {

  createRouter,

  createWebHashHistory,

  type RouteLocationNormalized,

  createWebHistory

} from "vue-router";

import routes from "./routes";

const router = createRouter({

  // hash路由模式

  history: createWebHashHistory(),

  // History路由模式

  // history: createWebHistory(),

  routes

});

export interface toRouteType extends RouteLocationNormalized {

  meta: {

    title?: string;

    noCache?: boolean;

  };

}

router.beforeEach((to: toRouteType, from, next) => {

  next();

});

router.afterEach(() => {

});

export default router;
router/routes.ts
import Layout from "../layout/index.vue";

import type { RouteRecordRaw } from "vue-router";

const routes: Array<RouteRecordRaw> = [

  {

    path: "/",

    name: "root",

    component: Layout,

    redirect: "live2D",

    children: [

      {

        path: "live2D",

        name: "live2D",

        component: () => import("../views/live2D/index.vue"),

        meta: {

          title: "live2D"

        }

      }

    ]

  }

];

export default routes;
layout/index.vue
<script setup lang="ts">

import { computed } from "vue";

const cachedViews = computed(() => {

  return [];

});

</script>

<template>

  <div class="app-wrapper">

    <router-view v-slot="{ Component }">

      <keep-alive :include="cachedViews">

        <component :is="Component" />

      </keep-alive>

    </router-view>

  </div>

</template>

<style scoped>

.app-wrapper {

  position: relative;

  height: 100%;

  width: 100%;

}

</style>
App.vue 加入router-view标签
<template>

  <router-view />

</template>

<style></style>
renderer渲染进程 下的main.ts 引入相关包
import './assets/main.css'

import { createApp } from 'vue'

import App from './App.vue'

import router from "./router/index";

import ElementPlus from 'element-plus';

import './assets/element.css';

import zhCn from 'element-plus/es/locale/lang/zh-cn';

const app = createApp(App);

app.use(router);

app.use(ElementPlus,{locale:zhCn});

app.mount('#app')
main主进程 下的 main.ts 跳转修改如下
默认为跳转根目录,跟目录的redirect配置的页面,需要指定页面使用hash拼接路由与参数。
参数在路由后加?xxx=xxx&yyy=yyy
 if (is.dev && process.env['ELECTRON_RENDERER_URL']) {

   await mainWindow.loadURL(process.env['ELECTRON_RENDERER_URL'])

   // 跳转指定页面

   // await recordsListWindow.loadURL(process.env['ELECTRON_RENDERER_URL']+`/#/xxxx`);

 } else {

   await mainWindow.loadFile(join(__dirname, '../renderer/index.html'))

   // 跳转指定页面

   // await recordsListWindow.loadFile(join(__dirname, '../renderer/index.html'),{hash:'/xxxx'});

 }
测试使用
在renderer/views文件夹下创建 views/live2D/index.vue,设置模型容器
<script setup lang="ts" name="live2D">

import { reactive,ref,onMounted } from 'vue'

import * as PIXI from 'pixi.js'

import * as pixiFnPatch from "@pixi/unsafe-eval"

import { Live2DModel } from 'pixi-live2d-display'

import jsonFile from '/model/xxx/xxx.model3.json?url'

// 全局注册

let windowRef:any = window;

windowRef.PIXI = PIXI;

// 修复@pixi/unsafe-eval无法正常安装问题

pixiFnPatch.install(PIXI);

async function initLive2D(){

  let model:any = await Live2DModel.from(jsonFile);

  const app = new PIXI.Application({

    view: document.getElementById('live2d-canvas') as HTMLCanvasElement,

    width: 100,

    height: 300,

    autoStart:true,

    backgroundAlpha:0

  });

  app.stage.addChild(model);

  // app.renderer.backgroundColor = 0x0161639;

  // transforms 模型方位

  model.x = -10; // 方位(单位像素)

  model.y = -20

  // model.rotation = Math.PI

  // model.skew.x = Math.PI

  model.scale.set(0.6)  // 缩放

  model.anchor.set(0, 0) // 锚点,以画布中心下方为中心点,x,y(单位:倍)

  model.on('hit', (hitAreas) => {

    // if (hitAreas.includes('body')) {

    //   model.motion('tap_body')

    // }

  })

}

onMounted(() => {

  initLive2D();

})

</script>

<template>

  <div class='canvas-wrap'>

    <canvas id="live2d-canvas" class="live2d-canvas" width="100" height="300"></canvas>

  </div>

</template>

<style scoped>

  .canvas-wrap{

    width: 100%;

    height: 100%;

    cursor: move;

    -webkit-app-region: drag;

  }

  .live2d-canvas{

    width: 100%;

    height: 100%;

  }

</style>
主进程中的main.ts文件创建主窗口
// 创建主窗体参数做如下更改

const { width,height} = screen.getPrimaryDisplay().workAreaSize;

const mainWindow = new BrowserWindow({

  x: width - 150,

  y: height - 300,

  width: 100,

  height: 300,

  show: false,

  maximizable: false,

  minimizable: false,

  resizable: false,

  fullscreenable: false,

  frame: false,

  transparent: true,

  hasShadow: false,

  alwaysOnTop: true,

  titleBarStyle: 'customButtonsOnHover',

  autoHideMenuBar: true,

  ...(process.platform === 'linux' ? { icon } : {}),

  webPreferences: {

    preload: join(__dirname, '../preload/index.js'),

    sandbox: false,

    nodeIntegration: true,

    webSecurity:false // 禁用同源策略

  }

})
----------------------------------------------------------------------------------------
测试效果-运行/打包
// 运行

npm run dev

// 打包 需要管理员权限

// 打包后在根目录的 dist 下有安装包和安装后的文件夹

npm run build:win
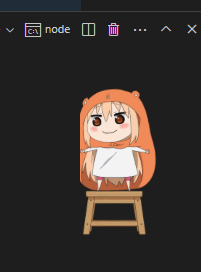
具体模型交互使用相关API参数进行设置即可
----------------------------------------------------------------------------------------
配置vue页面demo
1.views文件夹下新建demo/index.vue
2.router.ts新增相关路由
{

	path: "demo",

  	name: "demo",

  	component: () => import("../views/demo/index.vue"),

  	meta: {

    	title: "demo"

  	}

},
3. 在主进程下的main.ts新增托盘菜单配置做测试
// 系统托盘图标目录

  const appTray = new Tray(icon);

  const menuTemplate = [

    {

      id: '1',

      label: '查看demo',

      click: async function () {

        let recordsListWindow = new BrowserWindow({

          width: 1000,

          height: 600,

          title: 'demo',

          autoHideMenuBar: true,

          webPreferences: {

            nodeIntegration: true

          }

        });

        if (is.dev && process.env['ELECTRON_RENDERER_URL']) {

          await recordsListWindow.loadURL(process.env['ELECTRON_RENDERER_URL']+`/#/demo`);

        }

        else {

          await recordsListWindow.loadFile(join(__dirname, '../renderer/index.html'),{hash:'/demo'});

        }

        recordsListWindow.setTitle('demo');

        //打开开发者工具

        if(is.dev) recordsListWindow.webContents.openDevTools({mode:'detach'});

      }

    },

    {

      id: '2',

      label: '退出',

      click: function(){

        app.quit();

      }

    }

  ];

  // 图标的上下文菜单

  const contextMenu = Menu.buildFromTemplate(menuTemplate);

  // 设置此托盘图标的悬停提示内容

  appTray.setToolTip('demo');

  appTray.setTitle('demo');

  // 设置此图标的上下文菜单

  appTray.setContextMenu(contextMenu);
配置完成后托盘图标右键即可出现菜单,点击后会创建新窗口显示对应路由下的vue文件
----------------------------------------------------------------------------------------
开发中可能出现的报错
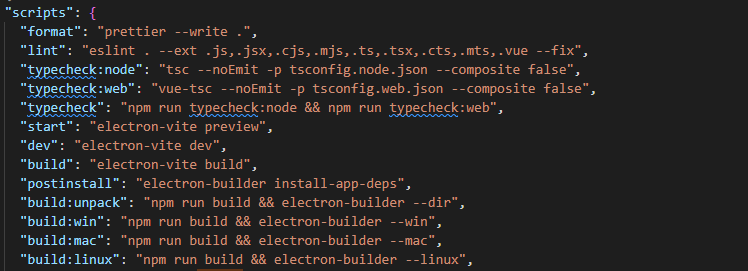
1. tsc 代码检测报错
在package.json 中把相关脚本的tsc检测关闭
----------------------------------------------------------------------------------------
2.打包后静态资源无法访问
检查是否使用绝对路径,最好的方法是将渲染进程的静态资源都放在public文件夹下
渲染进程资源处理
主进程资源处理
----------------------------------------------------------------------------------------
3.模型拖拽与鼠标事件冲突
有时候会遇到既要模型能拖动,也要能右键出现菜单的需求。
有两种解决方法:
(1):设置区域拖动,只有部分区域能触发拖动
能拖动的元素设置:-webkit-app-region: drag;
要触发鼠标事件的元素设置:-webkit-app-region: no-drag;
(2):不用-webkit-app-region: drag;属性来拖动
具体代码如下:
前端页面做事件监听
const moveIng = ref(false);

const startX = ref(0);

const startY = ref(0);

const lastWidth = ref(0);

const lastHeight = ref(0);

function move (event:any){

  if (!moveIng.value) return;

  const x:any = window.screenX + event.clientX - startX.value

  const y:any = window.screenY + event.clientY - startY.value

  // 调用主进程函数

  window.api.moveBounds(parseInt(x), parseInt(y), lastWidth.value, lastHeight.value);

}

window.addEventListener('mousedown',(event:any)=>{

 event.preventDefault();

  moveIng.value = true;

  startX.value = parseInt(event.clientX);

  startY.value = parseInt(event.clientY);

  lastWidth.value = window.outerWidth;

  lastHeight.value = window.outerHeight;

  document.addEventListener('mousemove', move);

});

window.addEventListener('mouseup',(event:any)=>{

  event.preventDefault();

  if (!moveIng.value) return

  document.removeEventListener('mousemove', move)

  moveIng.value = false

});

window.addEventListener('contextmenu',()=>{

  if (!moveIng.value) return

  document.removeEventListener('mousemove', move)

  moveIng.value = false

});
中间层 preload.ts
moveBounds: (x:any,y:any,width:any,height:any) => {

	ipcRenderer.send('moveBounds',x,y,width,height);

}
主进程 main.ts
// 监听渲染线程窗体移动同时改变主进程位置

  ipcMain.on('moveBounds', (event:any, x:any, y:any, width:any, height:any) => {

    if(event.frameId!=mainWindow.webContents.id) return;

    let newBounds = {

      x: parseInt(x),

      y: parseInt(y),

      width: parseInt(width),

      height: parseInt(height),

    }

    mainWindow.setBounds(newBounds)

  })
----------------------------------------------------------------------------------------
4.右键自定义菜单
// 给主窗口添加右键菜单

  const contextRightMenu = Menu.buildFromTemplate(menuTemplate);

  mainWindow.webContents.on("context-menu", (e:any) => {

    e.preventDefault();

    contextRightMenu.popup();

  });
----------------------------------------------------------------------------------------
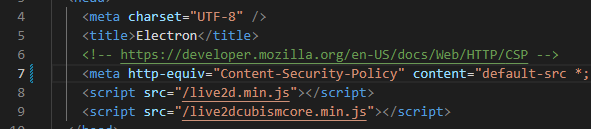
5.在使用本地静态图片资源时报错
Refused to load the script xxxxxx because it violates the following Content Security Policy directive:"script-src 'self' xxxxxxxxxxxxx"
需要在index.html 中修改meta标签
<meta http-equiv="Content-Security-Policy" content="default-src *; img-src * 'self' data: https:; script-src 'self' 'unsafe-inline' 'unsafe-eval' *; style-src 'self' 'unsafe-inline' *">
----------------------------------------------------------------------------------------
6.修改打包图标
安装 electron-icon-builder 包
配置package.json,新增脚本,修改input路径为自己项目的路径
"build-icon": "electron-icon-builder --input=./resources/icon.png --output=build --flatten"
运行脚本即可生成
npm run build-icon
----------------------------------------------------------------------------------------
【electron-vite+live2d+vue3+element-plus】实现桌面模型宠物+桌面管理系统应用(踩坑)的更多相关文章
- Vue + TypeScript + Element 搭建简洁时尚的博客网站及踩坑记
前言 本文讲解如何在 Vue 项目中使用 TypeScript 来搭建并开发项目,并在此过程中踩过的坑 . TypeScript 具有类型系统,且是 JavaScript 的超集,TypeScript ...
- 如何在 Vite 中使用 Element UI + Vue 3
在上篇文章<2021新年 Vue3.0 + Element UI 尝鲜小记>里,我们尝试使用了 Vue CLI 创建 Vue 3 + Element UI 的项目,而 Vue CLI 实际 ...
- vite创建vue3+ts项目流程
vite+vue3+typescript搭建项目过程 vite和vue3.0都出来一段时间了,尝试一下搭vite+vue3+ts的项目 相关资料网址 vue3.0官网:https://v3.vue ...
- 基于 vite 创建 vue3 全家桶项目(vite + vue3 + tsx + pinia)
vite 最近非常火,它是 vue 作者尤大神发布前端构建工具,底层基于 Rollup,无论是启动速度还是热加载速度都非常快.vite 随 vue3 正式版一起发布,刚开始的时候与 vue 绑定在一起 ...
- vue3 vite2 封装 SVG 图标组件 - 基于 vite 创建 vue3 全家桶项目续篇
在<基于 vite 创建 vue3 全家桶>一文整合了 Element Plus,并将 Element Plus 中提供的图标进行全局注册,这样可以很方便的延续 Element UI 的风 ...
- vue3的学习笔记:MVC、Vue3概要、模板、数据绑定、用Vue3 + element ui、react框架实现购物车案例
一.前端MVC概要 1.1.库与框架的区别 框架是一个软件的半成品,在全局范围内给了大的约束.库是工具,在单点上给我们提供功能.框架是依赖库的.Vue是框架而jQuery则是库. 1.2.MVC(Mo ...
- vite+ts+vue3+router4+Pinia+ElmPlus+axios+mock项目基本配置
1.vite+TS+Vue3 npm create vite Project name:... yourProjectName Select a framework:>>Vue Selec ...
- Vue3 + Element ui 后台管理系统
Vue3 + Element ui 后台管理系统 概述:这是一个用vue3.0和element搭建的后台管理系统界面. 项目git地址: https://github.com/whiskyma/vu ...
- 【vite】踩坑,首次点击路由跳转页面,发生回退,页面闪回,二次点击才能进入目标页面
[vite]踩坑,首次点击路由跳转页面,发生回退,页面闪回,二次点击才能进入目标页面 最近在做移动端前端项目,使用的vite3+vue3+vant,组件和api挂载,使用的自动导入,unplugin- ...
- Win10家庭版设置桌面右键更换桌面壁纸
Win10家庭版设置桌面右键更换桌面壁纸.. ------------------------- 这是设置之前的右键快捷菜单.. ------------------------- 开始设置:右键桌面 ...
随机推荐
- 01. go-admin的下载与启动
目录 一.介绍 二.新建空文件夹 三.获取后台源码并启动 1.下载编译go代码 2.配置命令到goland IDE ,debug启动 四.获取前端ui源码并启动 1.下载编译go代码 2.启动项目 * ...
- Linux中文件的隐藏属性
在Linux系统中,可以使用chattr与lsattr来操作文件的隐藏属性.
- TeamViewer 9 和 10 即将停用 尝试切换到 Splashtop
TeamViewer 9 和 TeamViewer 10 将于2021 年 6 月 1 日到期停用.当这两个版本的 TeamViewer 到期时,用户将无法再远程访问其计算机和设备. 这意味着要继续使 ...
- C语言:计算长方形面积问题
#include <stdio.h> #include <stdlib.h> /* run this program using the console pauser or a ...
- PageOffice 6 给SaveFilePage指向的保存地址传参
PageOffice给保存方法传递参数的方式有两种: 通过设置保存地址的url中的?传递参数.例如: poCtrl.setSaveFilePage("/save?p1=1") 通过 ...
- CICD详解之gitlab,Jenkins
持续集成概念 持续集成Continuous Integration 持续交付Continuous Delivery 持续部署Continuous Deployment 什么是持续集成: 持续集成是指开 ...
- ansible使用详解
ansible执行,用户主机配置 免密同一个同一个用户执行命令 1 能免密登录的[root@mcw1 ~]$ ansible 10.0.0.132 -m shell -a "hostname ...
- Android 13 - Media框架(31)- ACodec(七)
关注公众号免费阅读全文,进入音视频开发技术分享群! 之前的章节中我们解了 input buffer 是如何传递给 OMX 的,以及Output buffer 是如何分配并且注册给 OMX 的.这一节我 ...
- 容器化tomcat9.0
#启动tomcat容器: docker run -d --name tomcat9.0 -p 8080:8080 registry.cn-hangzhou.aliyuncs.com/chenleile ...
- mediaserverd
1.mediaserverd是什么 mediaserverd(/usr/sbin/mediaserverd)是被root进程launchd启动的一个后台(daemon)进程,其描述文件为com.app ...