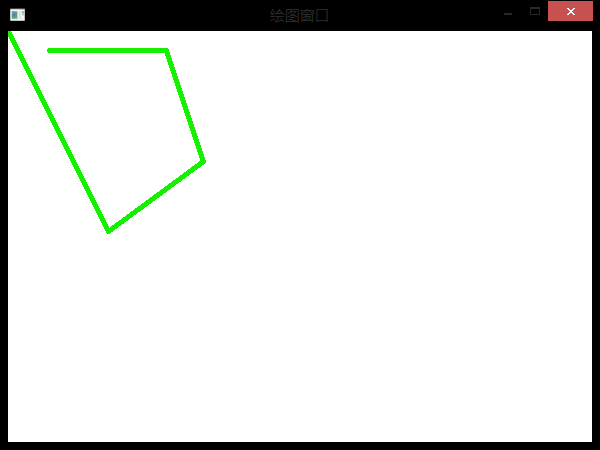
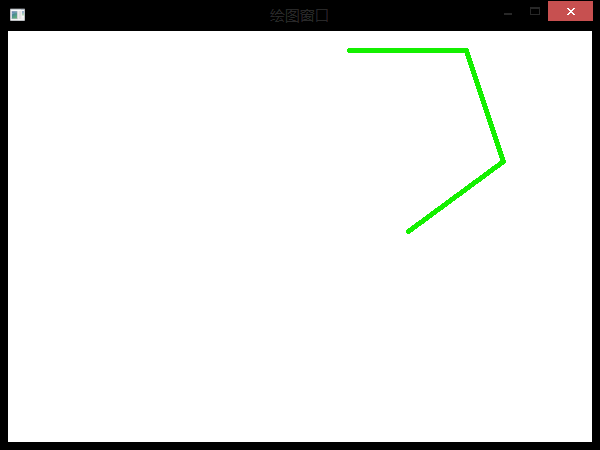
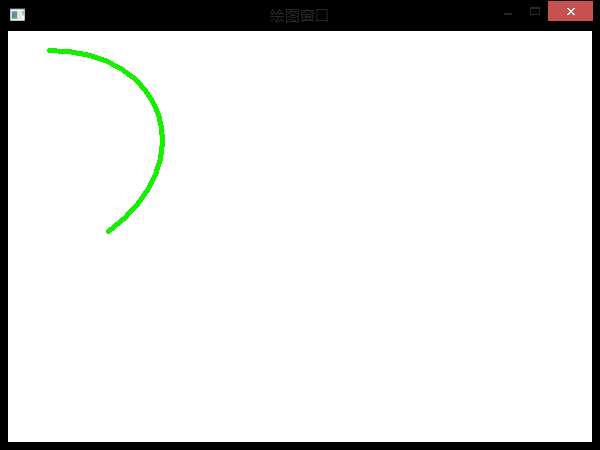
[游戏模版5] Win32 折线 弧线
>_<:first build some points put in poly1[],poly2[] and poly3[] in the function of InitInstance(...)
>_<:then in the function MyDraw() use PolylineTo(...)\Polyline(...)\Polygon(...) draw diferent line and use PolyBezierTo(...)\PolyBezier(...) draw two kind curve separately.
>_<:finally show the different among these functions.
>_<!there I don't use message to draw, instread I put the MyDraw() in the last of InitInstance(...) function.


 //{{NO_DEPENDENCIES}}

 // Microsoft Visual C++ generated include file.

 // Used by FE.RC

 //

 #define IDR_MAINFRAME                    128

 #define IDD_FE_DIALOG        102

 #define IDD_ABOUTBOX                    103

 #define IDS_APP_TITLE                    103

 #define IDM_ABOUT                        104

 #define IDM_EXIT                        105

 #define IDS_HELLO                        106

 #define IDI_FE                107

 #define IDI_SMALL                        108

 #define IDC_FE                109

 #define IDC_MYICON                        2

 #define IDC_STATIC                        -1

 // Next default values for new objects

 //

 #ifdef APSTUDIO_INVOKED

 #ifndef APSTUDIO_READONLY_SYMBOLS

 #define _APS_NEXT_RESOURCE_VALUE        129

 #define _APS_NEXT_COMMAND_VALUE         32771

 #define _APS_NEXT_CONTROL_VALUE         1000

 #define _APS_NEXT_SYMED_VALUE           110

 #endif

 #endif
reourse.h
 // stdafx.h : include file for standard system include files,

 //  or project specific include files that are used frequently, but

 //      are changed infrequently

 //

 #if !defined(AFX_STDAFX_H__A9DB83DB_A9FD_11D0_BFD1_444553540000__INCLUDED_)

 #define AFX_STDAFX_H__A9DB83DB_A9FD_11D0_BFD1_444553540000__INCLUDED_

 #if _MSC_VER > 1000

 #pragma once

 #endif // _MSC_VER > 1000

 #define WIN32_LEAN_AND_MEAN        // Exclude rarely-used stuff from Windows headers

 // Windows Header Files:

 #include <windows.h>

 // C RunTime Header Files

 #include <stdlib.h>

 #include <malloc.h>

 #include <memory.h>

 #include <tchar.h>

 // Local Header Files

 // TODO: reference additional headers your program requires here

 //{{AFX_INSERT_LOCATION}}

 // Microsoft Visual C++ will insert additional declarations immediately before the previous line.

 #endif // !defined(AFX_STDAFX_H__A9DB83DB_A9FD_11D0_BFD1_444553540000__INCLUDED_)
StdAfx.h
main.cpp
 #include "stdafx.h"

 #include "resourse.h"

 #include "math.h"

 #define MAX_LOADSTRING 100

 // Global Variables:

 HINSTANCE hInst;                                // current instance

 TCHAR szTitle[MAX_LOADSTRING];                                // The title bar text

 TCHAR szWindowClass[MAX_LOADSTRING];                                // The title bar text

 HPEN hPen;

 HBRUSH hBru;

 POINT poly1[];

 POINT poly2[];

 POINT poly3[];

 // Foward declarations of functions included in this code module:

 ATOM                MyRegisterClass(HINSTANCE hInstance);

 BOOL                InitInstance(HINSTANCE, int);

 LRESULT CALLBACK    WndProc(HWND, UINT, WPARAM, LPARAM);

 LRESULT CALLBACK    About(HWND, UINT, WPARAM, LPARAM);

 void                MyPaint(HDC hdc);

 //========================================================================================

 int APIENTRY WinMain(HINSTANCE hInstance,

                      HINSTANCE hPrevInstance,

                      LPSTR     lpCmdLine,

                      int       nCmdShow)

 {

      // TODO: Place code here.

     MSG msg;

     MyRegisterClass(hInstance);//调用函数向系统注册窗口类别,输入参数hInstance是目前运行程序的对象代码;

     // 调用InitInstance函数,进行初始化操作;

     if (!InitInstance (hInstance, nCmdShow))

     {

         return FALSE;

     }

     // 消息循环(通过消息循环来获取信息,

     //进行必要的键盘信息转换而后将控制权交给操作系统,

     //有操作系统决定哪个程序的消息处理函数处理消息

     while (GetMessage(&msg, NULL, , )) //获取程序消息

     {

             TranslateMessage(&msg);//转换伪码及字符

             DispatchMessage(&msg);//将控制权交给系统,再有系统决定负责处理消息的程序;

     }

     return msg.wParam;

 }

 //=====================================================================================

 //=============================================================================================

 //在建立程序窗口实体之前,必须先定义一个窗口类别,其中包含所要建立窗口的信息,

 //并向系统注册,这里的MyRegisterClass函数就是进行定义及注册窗口类别的函数。

 //==============================================================================================

 ATOM MyRegisterClass(HINSTANCE hInstance)

 {

     WNDCLASSEX wcex;            //申请一个窗口类别“WNDCLASSEX”和结构”wcex“

                                 //--------------------------------------------------------------

                                 //定义vcex结构的各项信息,其中设定信息处理函数(lpfnWndProc)

                                 //为WNDPROC,类别名称为(lpszClassName)为”fe";

                                 //--------------------------------------------------------------

     wcex.cbSize = sizeof(WNDCLASSEX);

     wcex.style            = CS_HREDRAW | CS_VREDRAW;

     wcex.lpfnWndProc    = (WNDPROC)WndProc;

     wcex.cbClsExtra        = ;

     wcex.cbWndExtra        = ;

     wcex.hInstance        = hInstance;

     wcex.hIcon            = NULL;

     wcex.hCursor        = NULL;

     wcex.hCursor        = LoadCursor(NULL,IDC_ARROW);

     wcex.hbrBackground    = (HBRUSH)(COLOR_WINDOW+);

     wcex.lpszMenuName    = NULL;

     wcex.lpszClassName    = "fe";

     wcex.hIconSm        = NULL;

     return RegisterClassEx(&wcex);//调用RegisterClassEx函数注册类别,返回一个“ATOM"形态的字符串

                                   //此字符串即为类别名称”fe";

 }

 //============================================================================================

 //============================================================================================

 //按照前面所定义的窗口类别来建立并显示实际的程序窗口

 //============================================================================================

 BOOL InitInstance(HINSTANCE hInstance, int nCmdShow)

 {

    HWND hWnd;

    HDC hdc;

    int i;

    const double pi=3.1415926535;

    hInst = hInstance; // 把instance handle 储存在全局变量中;

    hWnd = CreateWindow("fe","绘图窗口",WS_OVERLAPPEDWINDOW,

       CW_USEDEFAULT, , CW_USEDEFAULT, , NULL, NULL, hInstance, NULL);

                       //-----------------------------------------------

                       //调用CreateWindow函数来建立一个窗口对象

                       //第一个参数就是窗口建立依据的类别名称

                       //-----------------------------------------------

    if (!hWnd)

    {

       return FALSE;

    }

    //------------------------------------------------

    //设定窗口的位置及窗口的大小,然后绘制显示在设备上

    //-------------------------------------------------

    MoveWindow(hWnd,,,,,true);//位置及大小

    ShowWindow(hWnd, nCmdShow);//改定窗口显示时的状态

    UpdateWindow(hWnd);//将窗口绘制在显示设备上

    for(i=;i<=;i++)

    {

        poly1[i].x =  +  * sin(i *  * pi / );

        poly1[i].y =  +  * cos(i *  * pi / );

        poly2[i].x = poly1[i].x + ;

        poly2[i].y = poly1[i].y;

        poly3[i].x = poly1[i].x + ;

        poly3[i].y = poly1[i].y + ;

    }

    hPen = CreatePen(PS_SOLID,,RGB(,,));

    //hBru = GreateHatchBrush(HS_BDIAGONAL,RGB(0,255,0));

    hdc = GetDC(hWnd);

    MyPaint(hdc);

    ReleaseDC(hWnd,hdc);

    return TRUE;

 }

 //============================================================================================

 //============================================================================================

 //

 //============================================================================================

 void MyPaint(HDC hdc)

 {

     SelectObject(hdc,hPen);

     SelectObject(hdc,hBru);

     //PolylineTo(hdc,poly1,4);

     //Polyline(hdc,poly2,4);

     //Polygon(hdc,poly3,4);

     //PolyBezierTo(hdc,poly1,3);

     PolyBezier(hdc,poly1,);

 }

 //============================================================================================

 //============================================================================================

 //在前面定义类别的时候把WndProc定义为消息处理函数(当某些外部消息发生时,会按消息的类型

 //来决定该如何进行处理。此外该函数也是一个回叫函数(CALLBACK)(windows系统函数)每一个

 //程序都会接收信息,选择性接受、处理;

 //============================================================================================

 LRESULT CALLBACK WndProc(HWND hWnd, UINT message, WPARAM wParam, LPARAM lParam)

 {

     PAINTSTRUCT ps;

     HDC hdc;

     switch (message)                   //判断消息类型

     {

         case WM_PAINT:                //窗口重绘制

             hdc = BeginPaint(hWnd, &ps);

             EndPaint(hWnd, &ps);

             break;

         case WM_DESTROY:              //处理窗口结束消息

             PostQuitMessage();

             break;

         default:

             return DefWindowProc(hWnd, message, wParam, lParam);

    }

    return ;

 }

 //============================================================================================
[游戏模版5] Win32 折线 弧线的更多相关文章
- [游戏模版2] Win32最小框架
>_<:Just the minimum Win32 frame don't have any other special function. //{{NO_DEPENDENCIES}} ...
- [游戏模版18] Win32 五子棋
>_<:Learning its AI logic. >_<:resource >_<:code: #include <windows.h> // C ...
- [游戏模版3] Win32 画笔 画刷 图形
>_<:introduce the functions of define\create\use pen and brush to draw all kinds of line and s ...
- [游戏模版4] Win32 显示鼠标位置
>_<:use MOUSE_MOVE message refresh the position information. >_<:use LOWORD(lParam) get ...
- [游戏模版6] Win32 graph
>_<:there in the MyPaint(...) function respectively use Ellipse(...) draw ellipse, use RoundRe ...
- [游戏模版7] Win32 最简单贴图
>_<:this is the first using mapping. >_<:There will be introducing how to do: First load ...
- [游戏模版8] Win32 透明贴图
>_<:The same with previous introduction. In the InitInstance fanction make a little change: &g ...
- [游戏模版9] Win32 半透明 图像处理
>_<:Previous part we talk about how to map a transparent picture, and this time we will solve ...
- [游戏模版10] Win32 平面地图贴图 正
>_<:picture resource >_<:If you master the ways of mapping picture,then this problem is ...
随机推荐
- jqGrid学习笔记(二)
本节介绍jqGrid其他的使用方法,主要是一些基本操作,特殊的数据显示等. 1 刷新jqGrid数据. 常用到刷新jqGrid数据的情况是,在用到查询的时候,根据查询条件,请求数据,并刷新jqGrid ...
- Hibernate 一级二级缓存
1.一级缓存与session关联,session关闭时,缓存数据消失: 2.一级缓存无法自我控制缓存的数量,需考虑缓存溢出: 3.二级缓存与sessionFactory关联,当sessionFacto ...
- iOS button文字居中
新建一个UIButton的category .h @interface UIButton (QXTitleInCenter) -(instancetype)init; @end .m @impleme ...
- 常见算法是js实现汇总(转载)
常见算法是js实现汇总 /*去重*/ <script> function delRepeat(arr){ var newArray=new Array(); var len=arr.len ...
- modelsim10.0C编译ISE14.7的xilinx库(xilinx ip核)
1.打开D:\Xilinx\14.7\ISE_DS\ISE\bin\nt64\compxlibgui.exe,nt64表示系统是64位,如果是32位,换成nt,然后按照界面所示一步一步执行, 2.修改 ...
- JS星座判断(关于日期)
JS根据日期判断所属星座 效果如下: 完整代码如下: <!DOCTYPE html> <html > <head> <link rel="style ...
- 附12 grafana配置文件
一.配置文件位置 /usr/local/opt/grafana/share/grafana/default.ini /usr/local/etc/grafana/grafana.ini 二.init格 ...
- 音痴又音痴的LT (vector)
http://acm.nyist.net/JudgeOnline/problem.php?pid=1261 分析:若是每次都想用sort继而来查第k个数,那会T的特别惨~ C++内置函数upperbo ...
- AngularJS学习--- 动画操作 (Applying Animations) ngAnimate step 12
1.切换目录 git checkout step-12 npm start 2.效果图 这里在点击右边的缩略图时,会有一个很明显的从下向上的动画过程. 3.代码实现: step11和step12之间的 ...
- AngularJS学习---Routing(路由) & Multiple Views(多个视图) step 7
1.切换分支到step7,并启动项目 git checkout step- npm start 2.需求: 在步骤7之前,应用只给我们的用户提供了一个简单的界面(一张所有手机的列表),并且所有的模板代 ...